Tired of manually uploading leads from Facebook? Organize automatic data import from social networks into CRM, email providers, project management services and other systems. Our SaveMyLeads tool will allow you to quickly set up webhooks for uploading leads without the help of a programmer.
Content:
1. How to automate Facebook leads download via Webhooks
2. Getting started with SaveMyLeads
3. Connecting Facebook Leads Ads
4. Connecting the external system account
5. Testing data transfer
6. Finishing setup
If you're collecting leads through Facebook, you're probably faced with the need to import them into external systems. For example, in CRM, to systematize customer data and conduct transactions through the sales funnel. Or mailing list providers to save customer email addresses in your contact database.
The SaveMyLeads service allows you to automate the unloading of leads from Facebook - quickly and without the help of programmers. It is enough to connect the social network with the necessary system on the SaveMyLeads website and start the data transfer. Here's how the result works: as soon as a new lead appears in the Facebook form, SaveMyLeads instantly imports it into the selected system.
Our service offers ready-made connections for uploading leads to dozens of popular systems. The user only needs to select the connection to the desired system and activate it. After that, SaveMyLeads will start importing leads automatically.
In addition, SaveMyLeads supports Webhooks. This technology allows the service to upload data from Facebook to many different systems, even if we have not yet prepared connections for them. The main thing is that the end system also supports Webhooks.
To automate the import of leads using Webhook technology, it is enough to set up uploading data from Facebook, as well as receiving it on the side of an external system. Everything is very simple - SaveMyLeads accompanies the process with available tips.
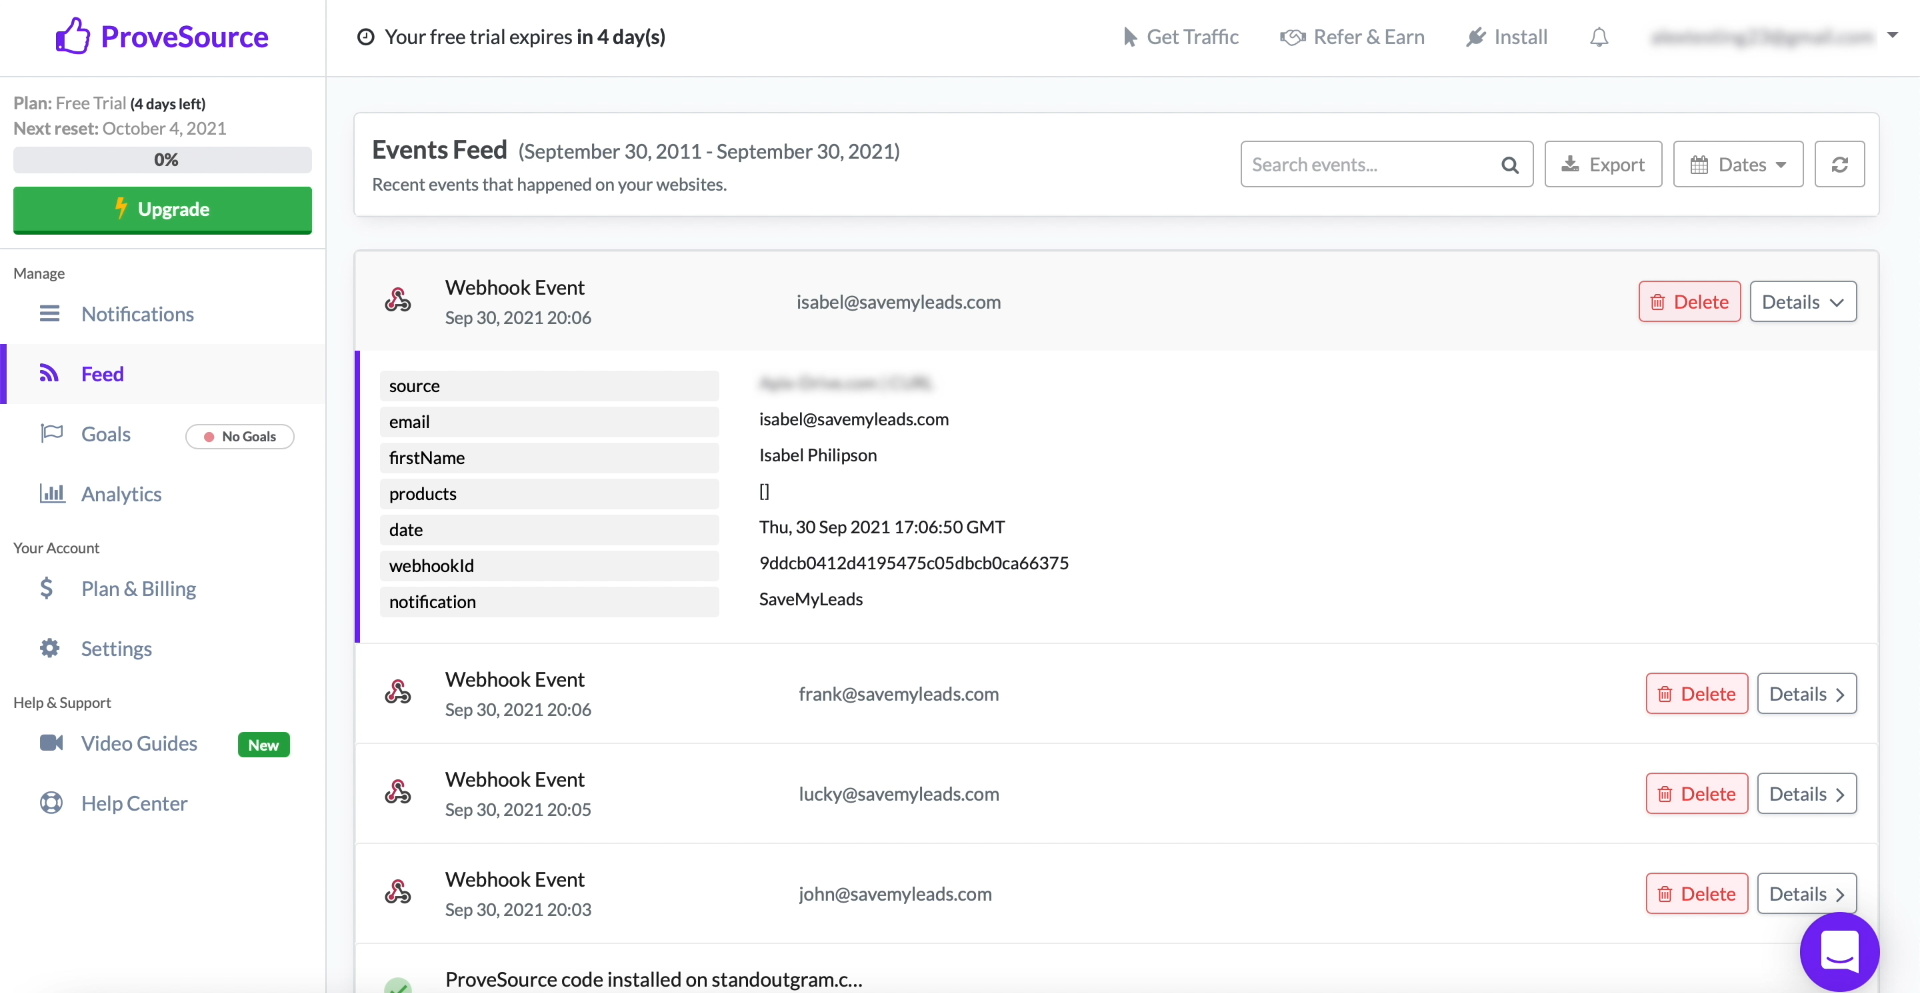
Let's take a look at the setup process with a specific example. We will automate the import of Facebook leads into the ProveSource system.
How to automate Facebook leads download via Webhooks
Before you start, be sure to create an advertising form on Facebook and add any data to it as a new lead - this will come in handy for the test.
Getting Started with SaveMyLeads
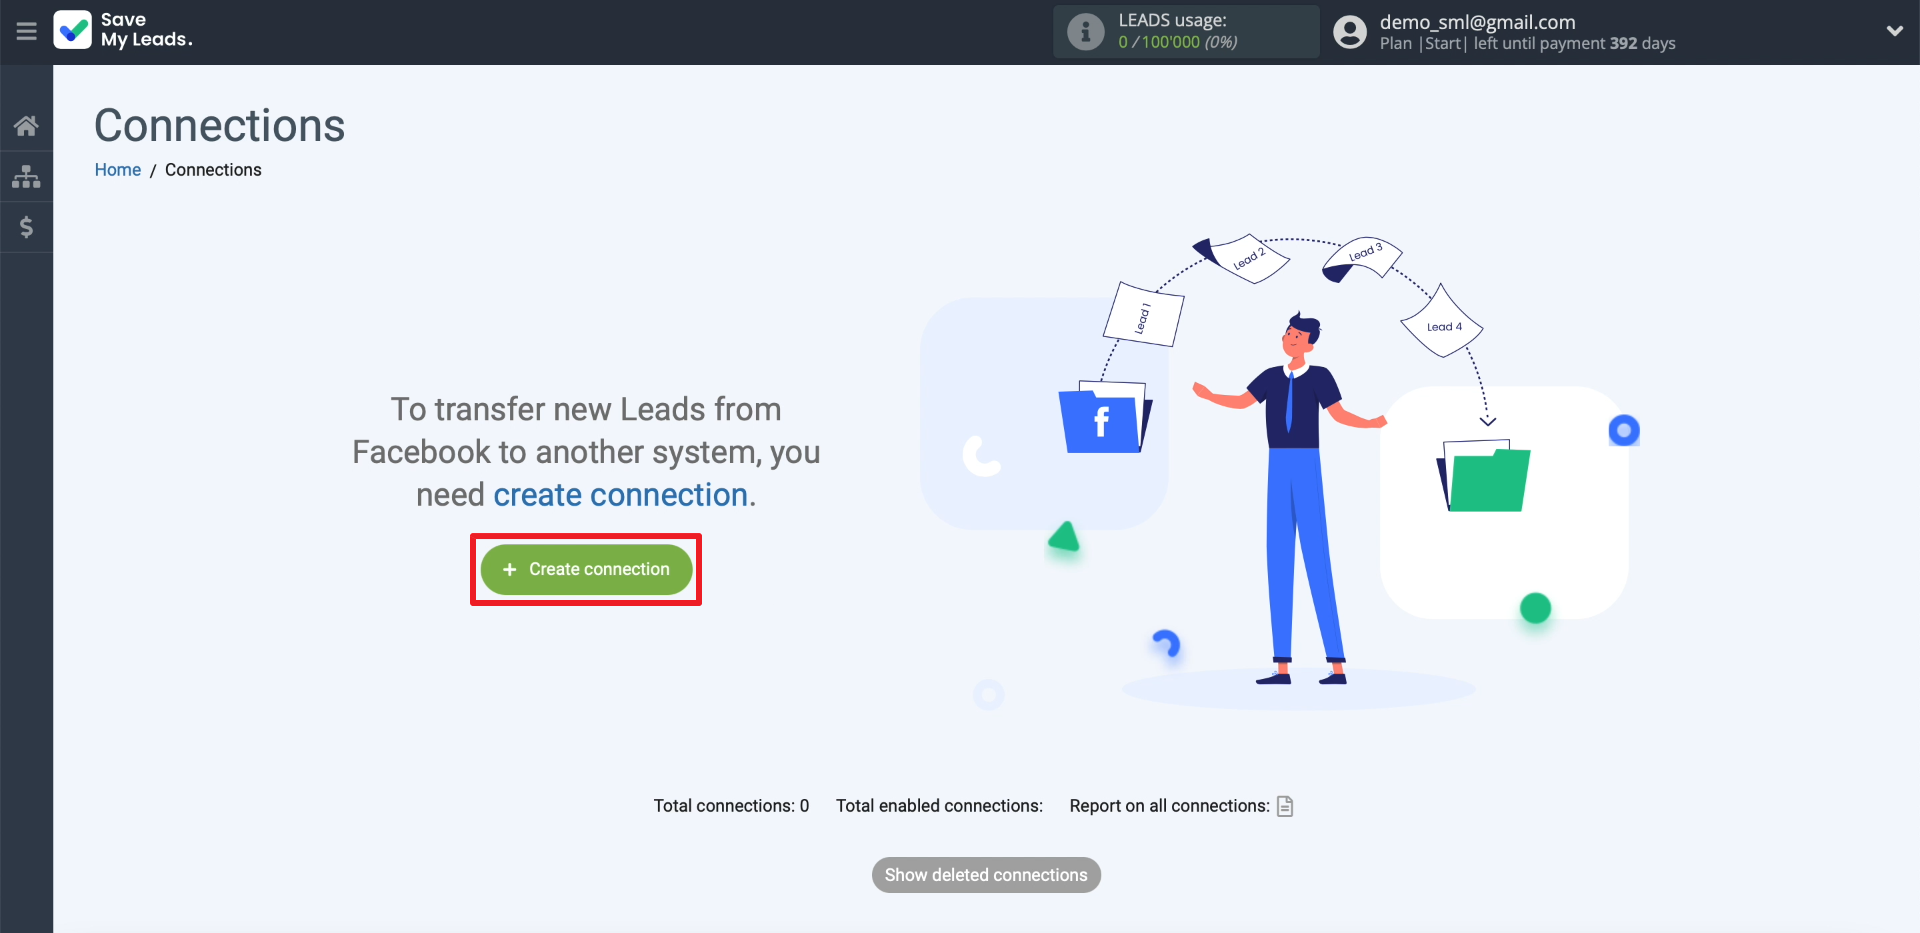
Registering on the SaveMyLeads website. We enter your personal account and click "Create connection".
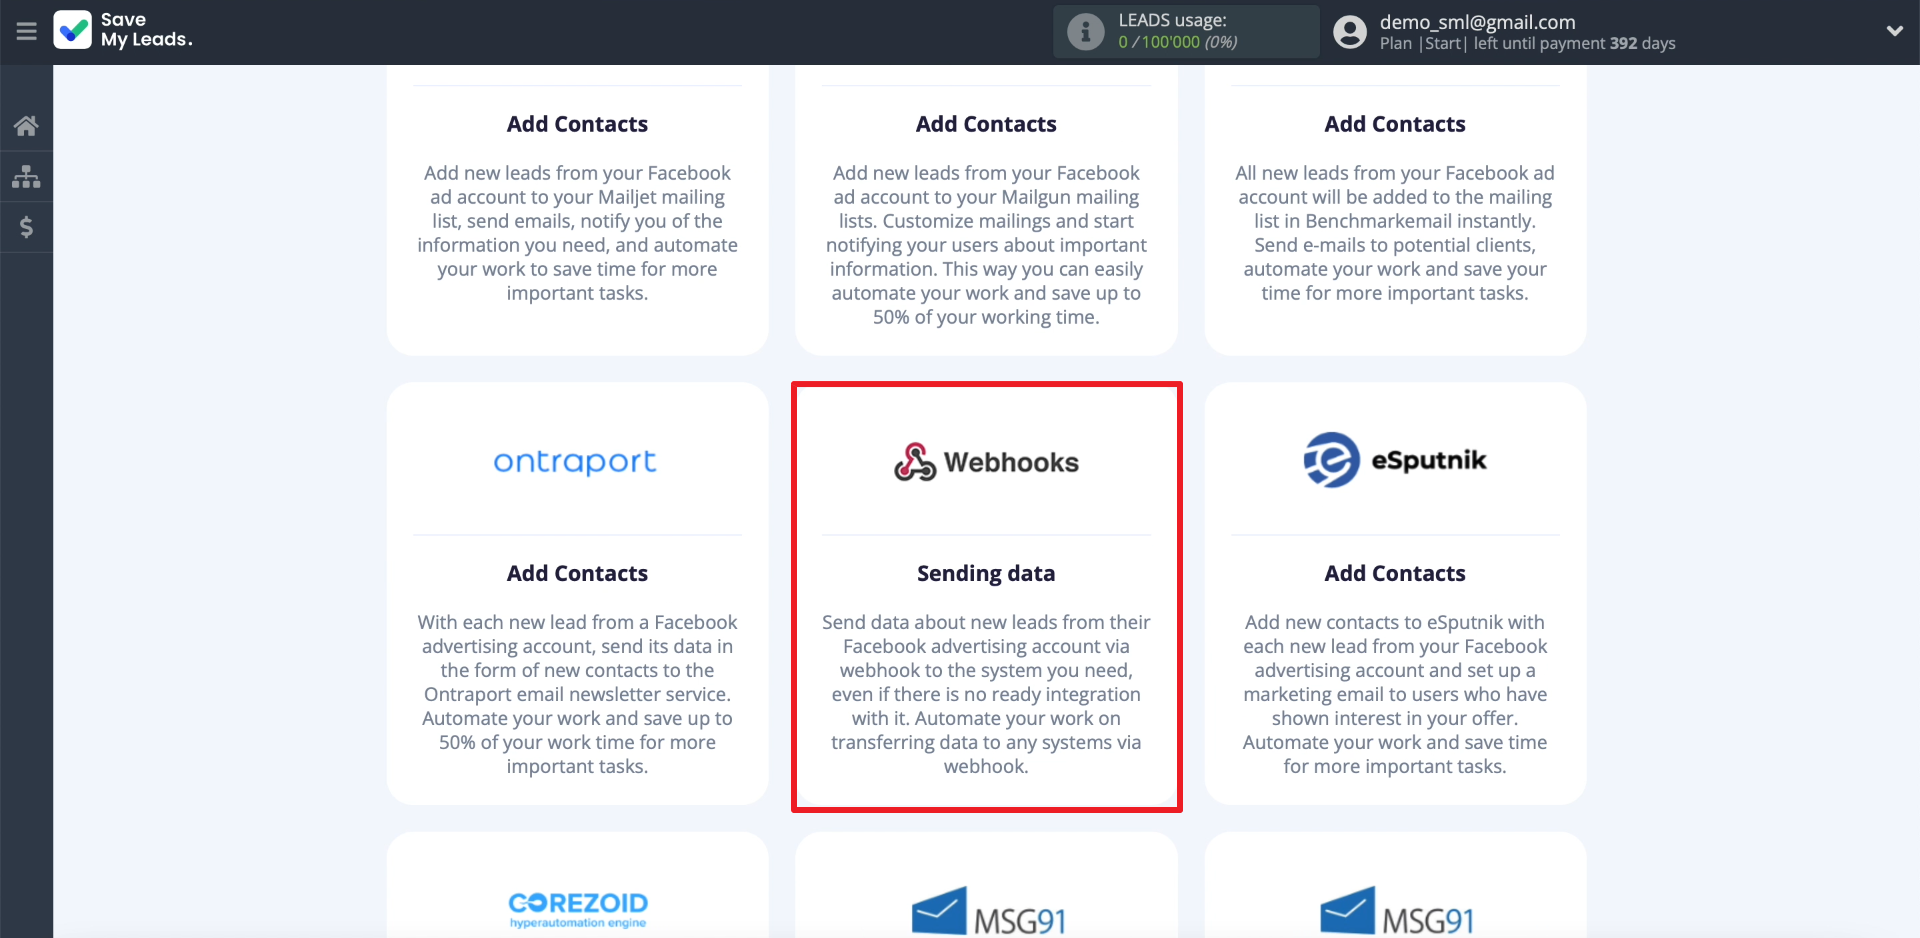
In the opened list of connections, select the connection using Webhooks technology.
Connecting Facebook Leads Ads
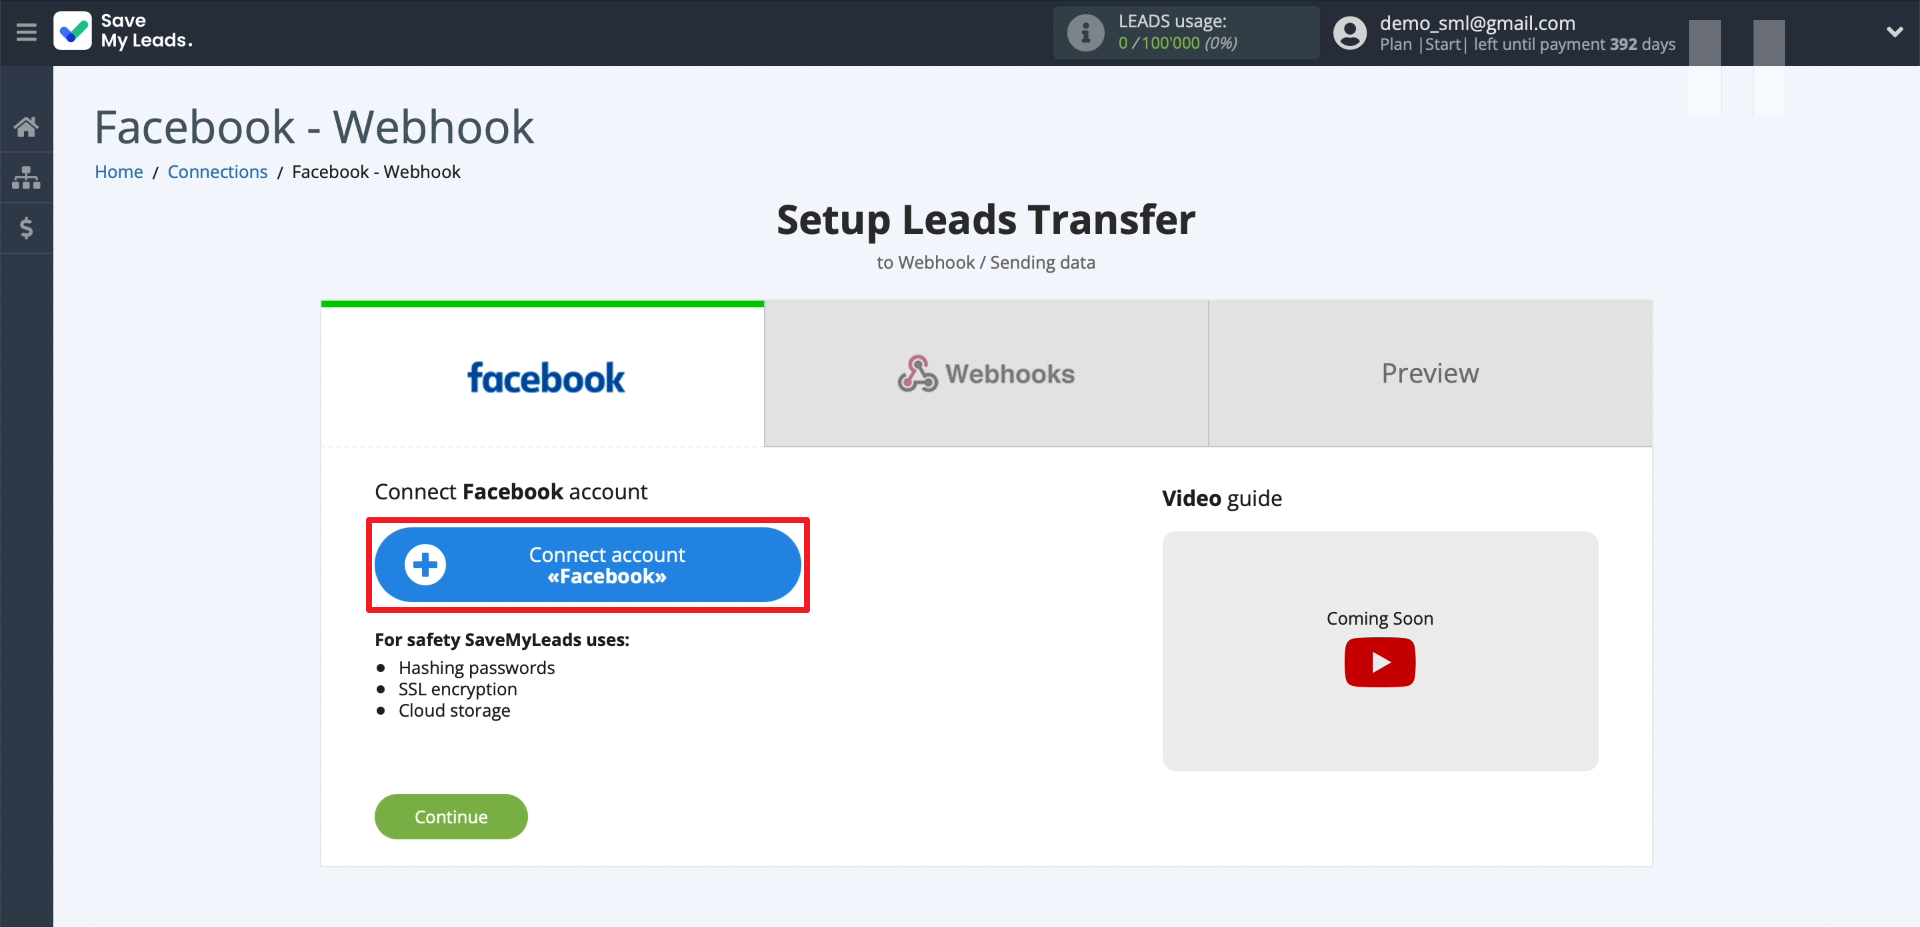
In order for SaveMyLeads to upload leads from the social network, we will connect our Facebook account to it. Click "Connect account "Facebook" and enter your username and password. Be sure to give the service all the requested permissions so that SaveMyLeads gets access to the leads.
Now let's show the service where it can upload leads from. First, select the newly connected Facebook account. Then the business page for which we set up ads. After that, we select our form for collecting leads.
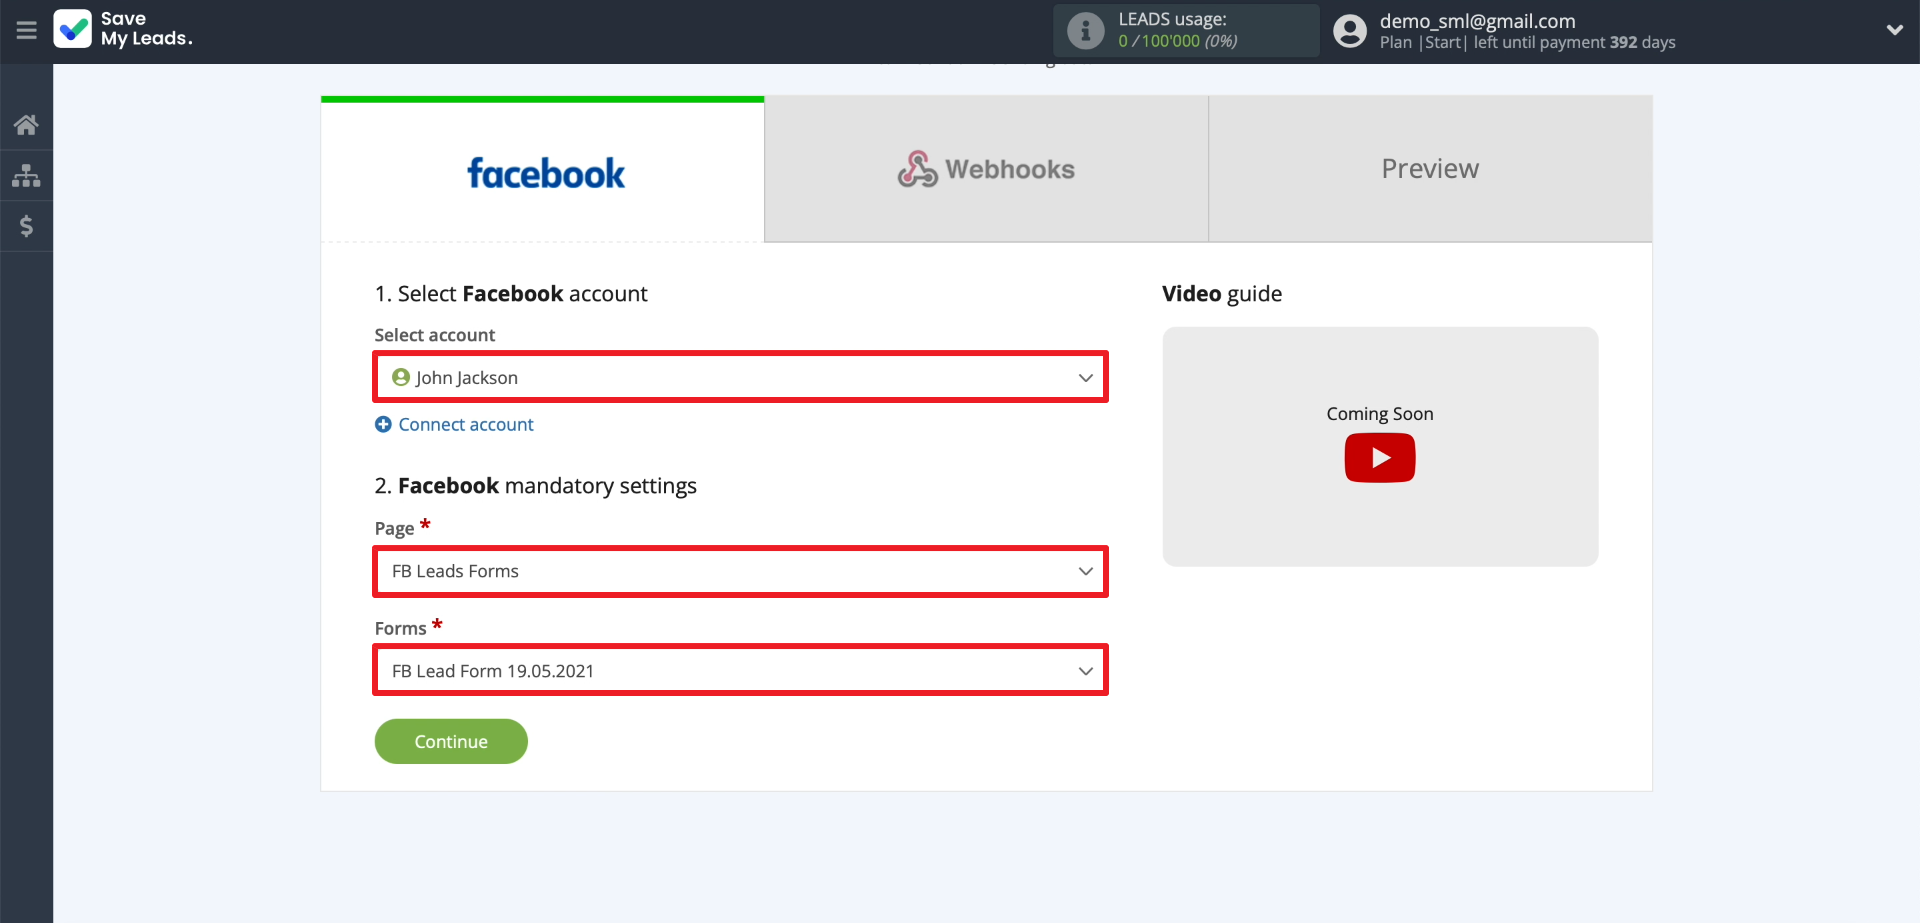
You can select one form within one connection. If you intend to import leads from multiple forms, create a separate connection for each of them.
Connecting the external system account
In order for SaveMyLeads to import uploaded leads, we will connect an external system to it via Webhooks. Click "Connect account "Webhook".
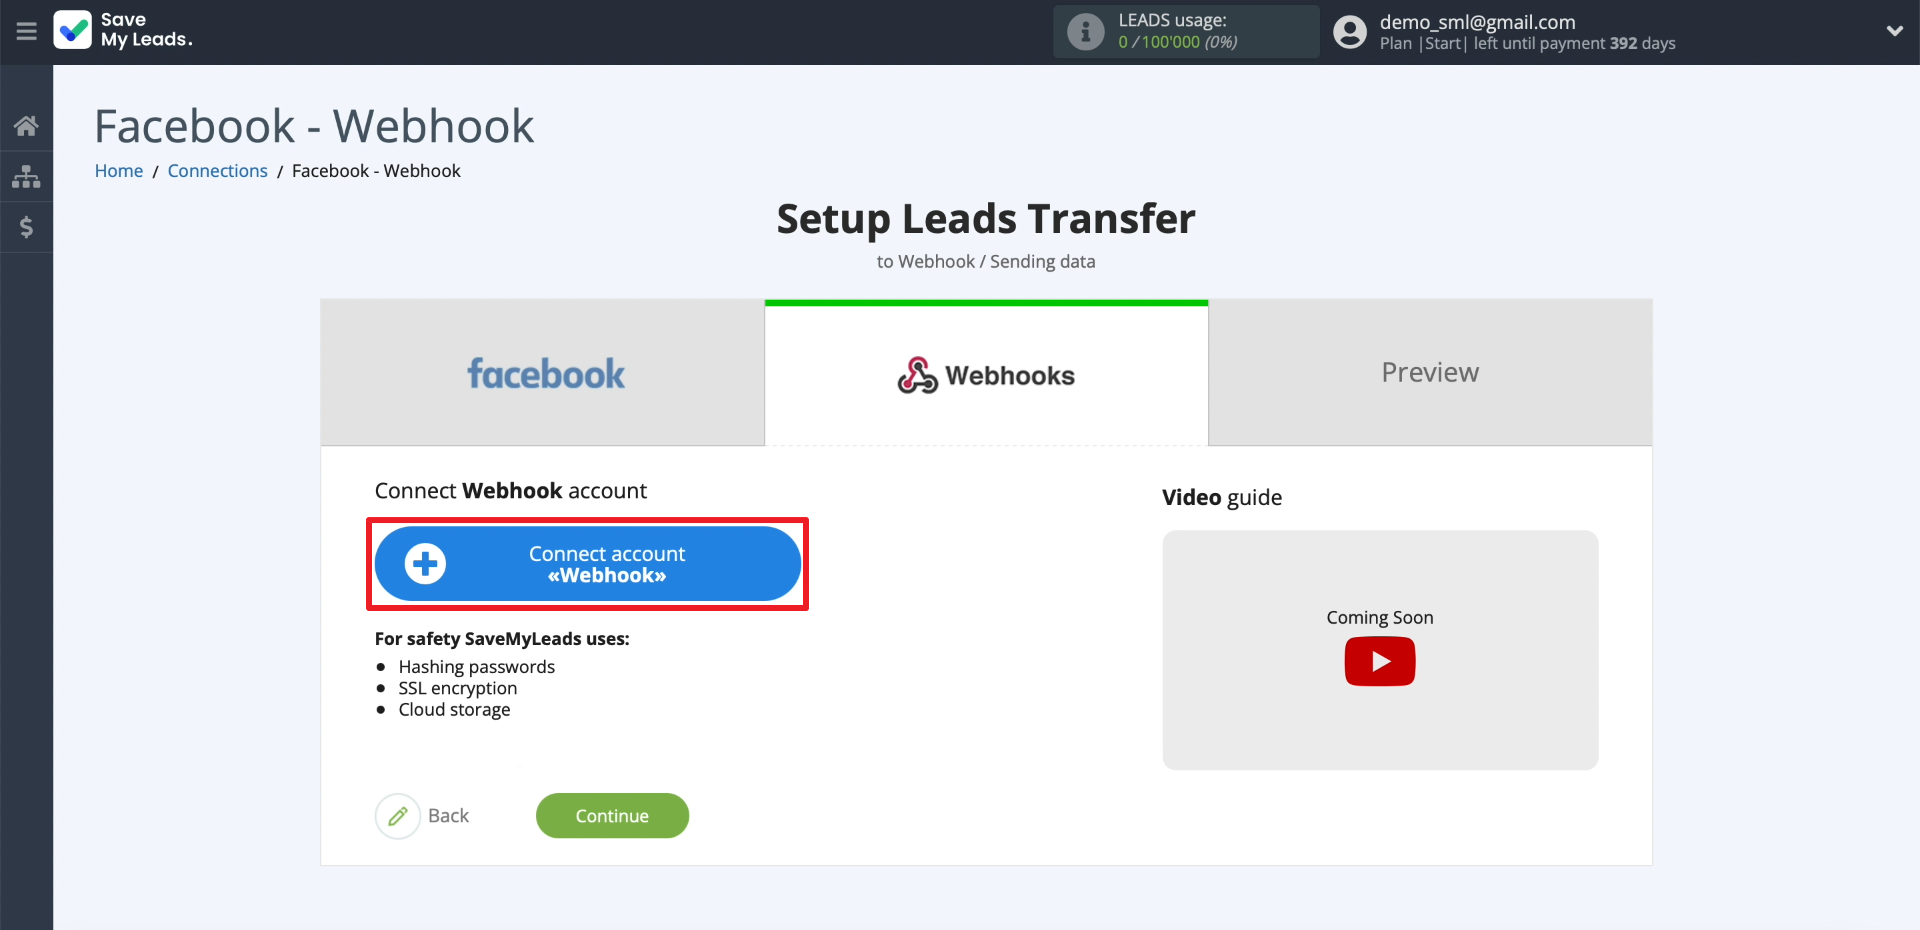
Now you need to set up lead reception on the side of the external system. To do this, you need to go to her website, find the Webhooks connection in the settings and prepare it to receive data. As a result, we will get a link that will be needed for integration. For instructions on working with Webhooks, look in the help on the site of the selected system.
- Automate the work with leads from the Facebook advertising account
- Empower with integrations and instant transfer of leads
- Don't spend money on developers or integrators
- Save time by automating routine tasks
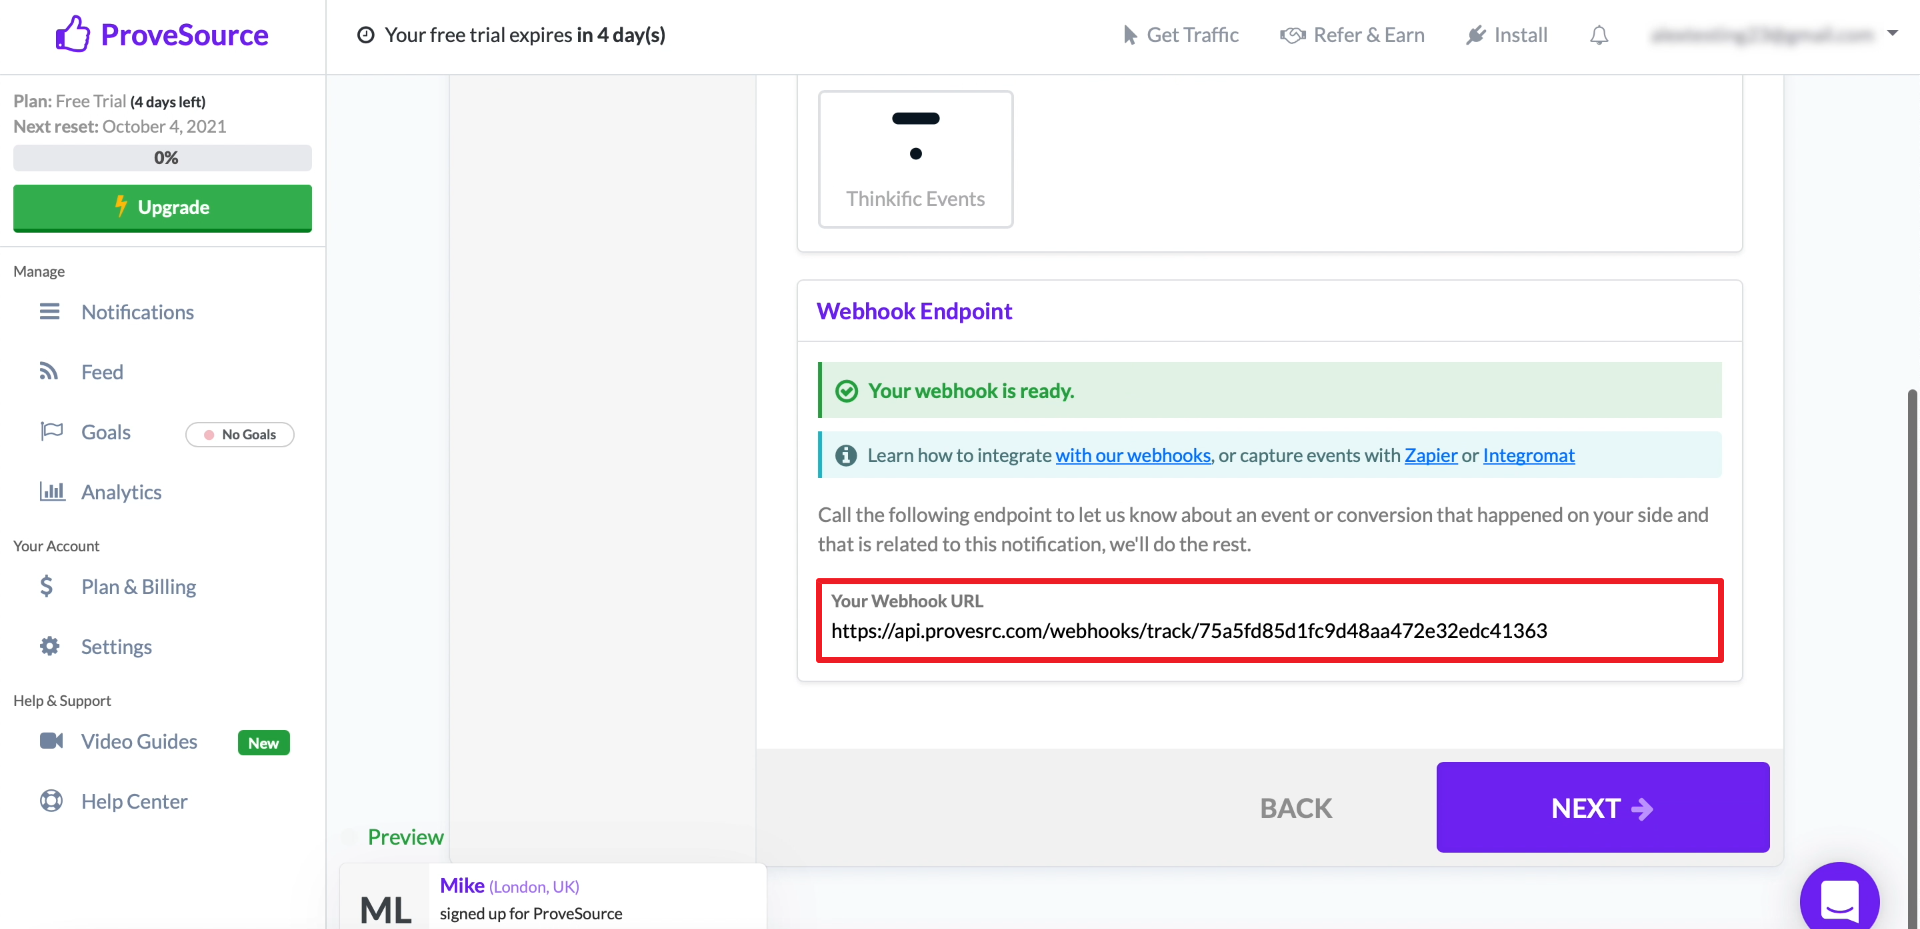
Since in the current example we are setting up a connection to the ProveSource system, we go to its website. In the "Notifications" section, click "New notification" and select Webhook in the settings.
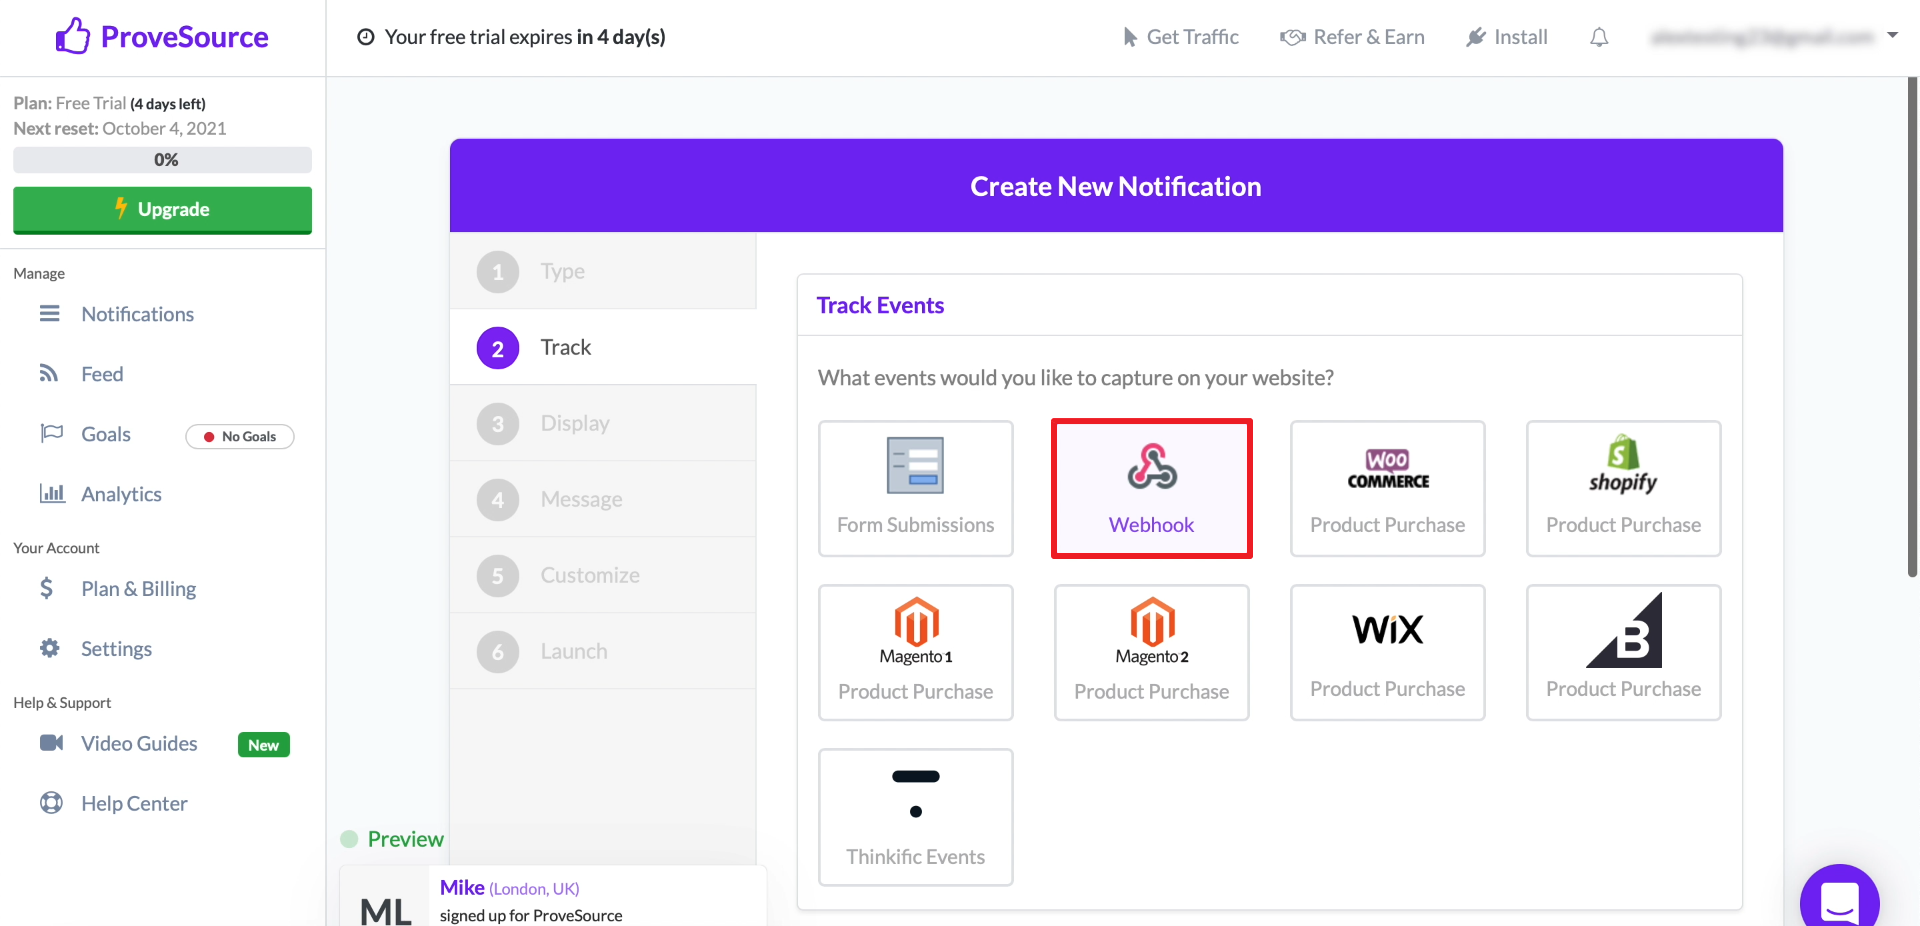
We copy the link for data transfer and complete the Webhooks setup using the interface hints.
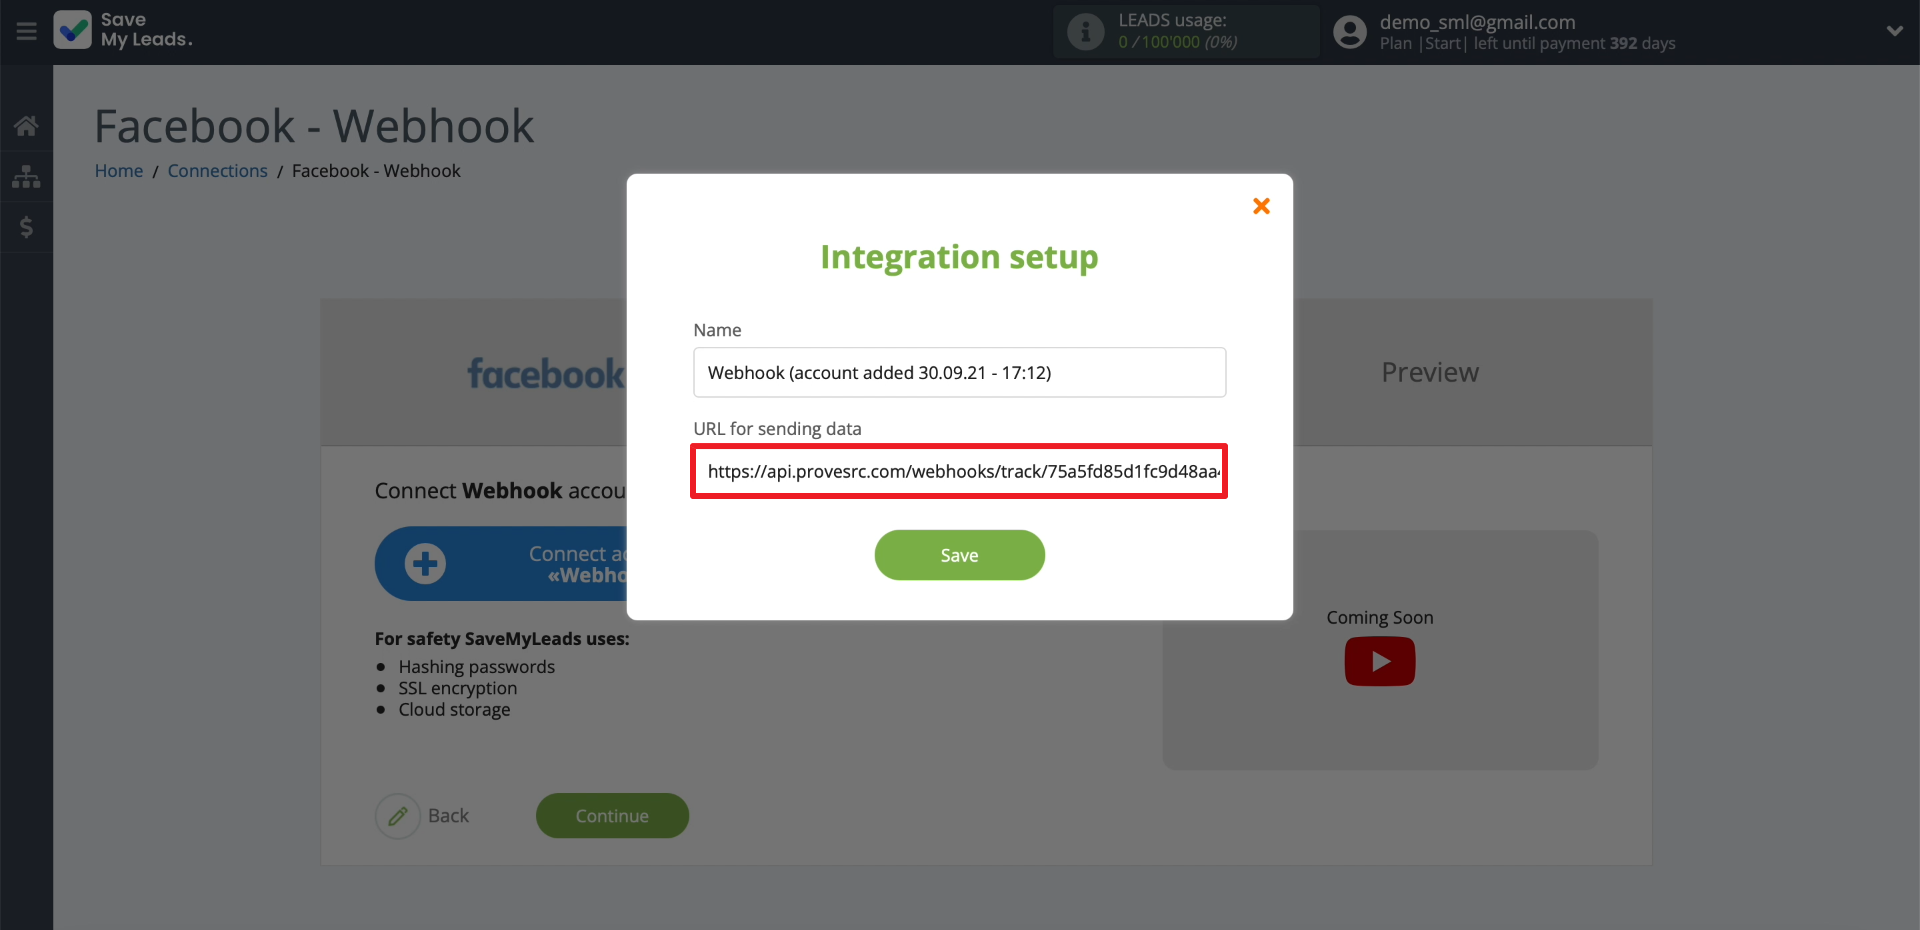
We return to the SaveMyLeads website and paste the link we just copied.
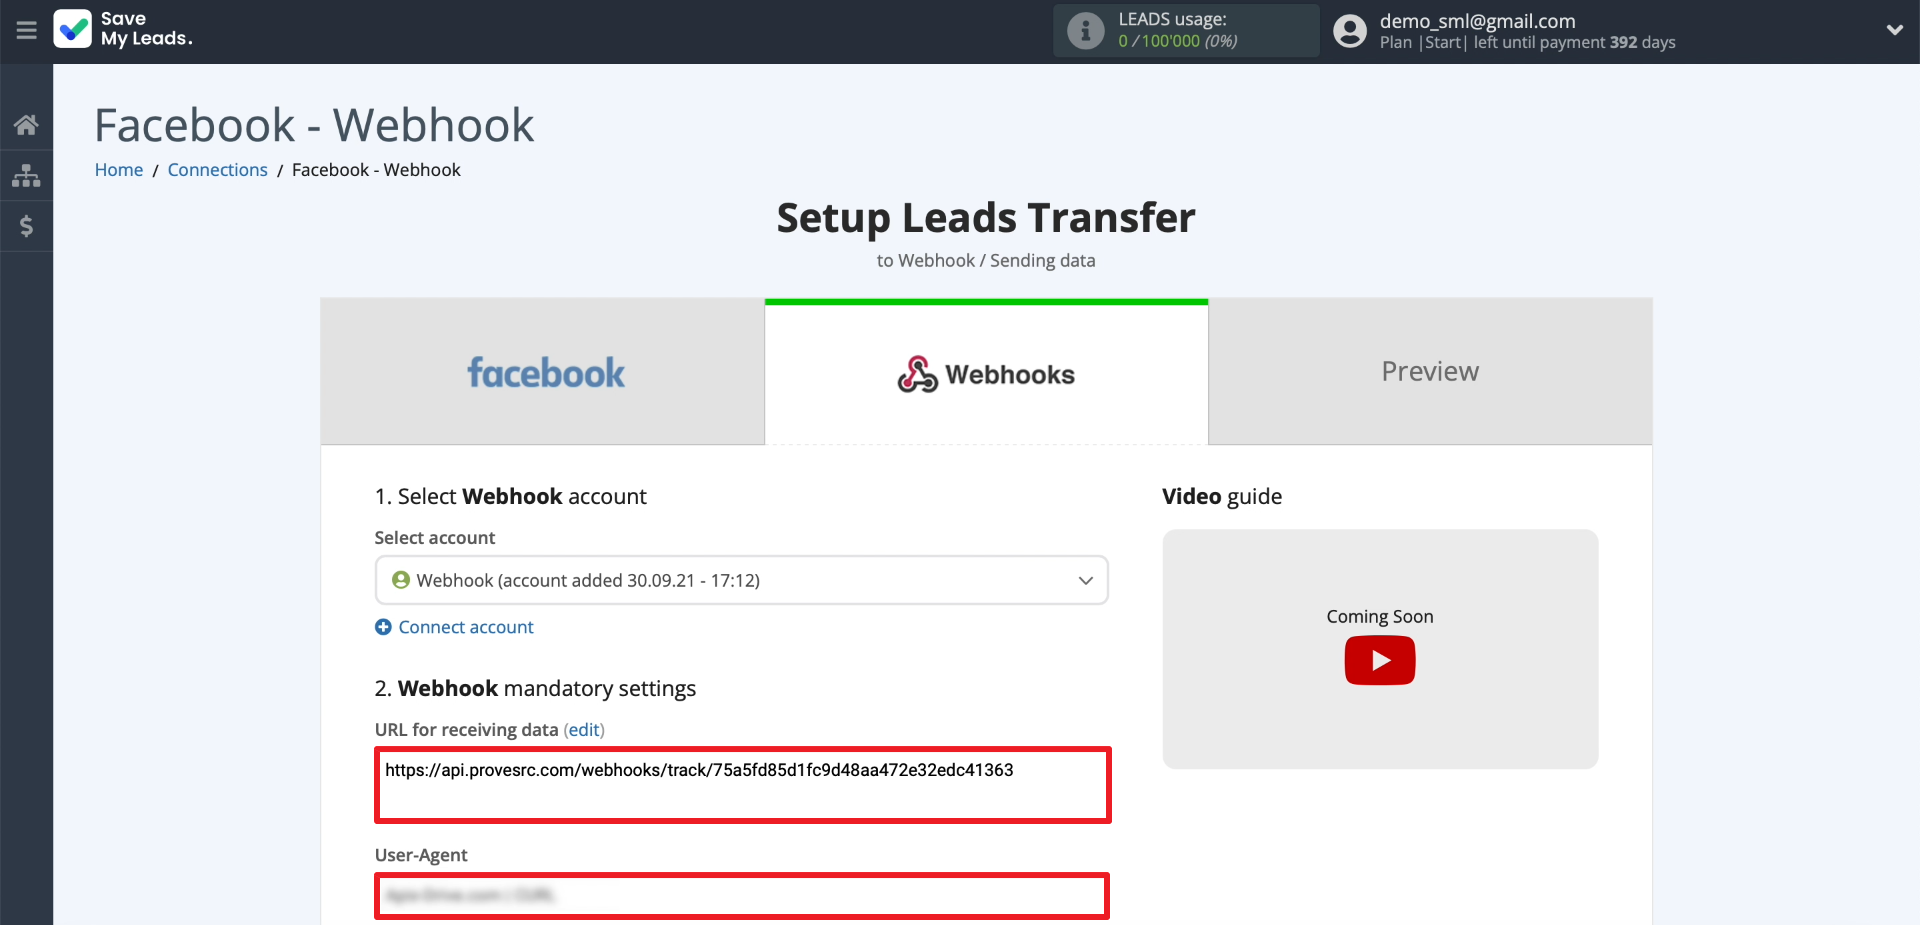
So, the ProveSource account is connected. Now let's set up data import into this system. The "URL for receiving data" "User-Agent" fields should be filled in automatically.
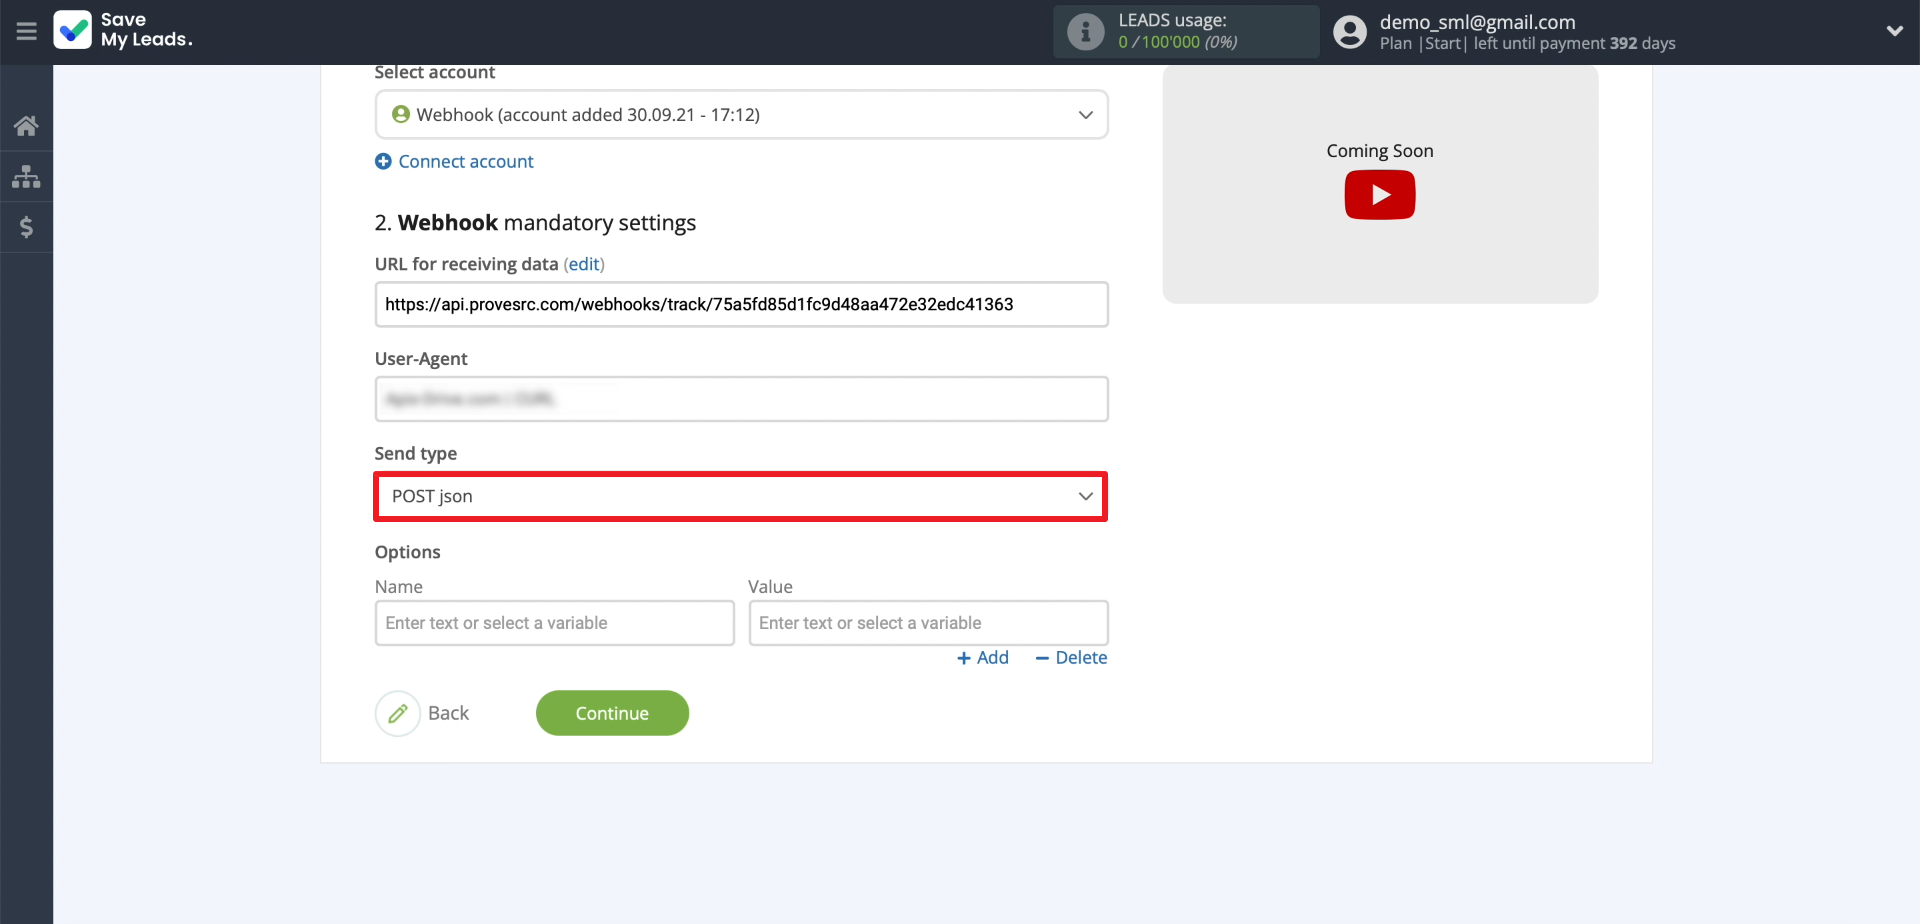
In the "Send type" field, select "POST json".
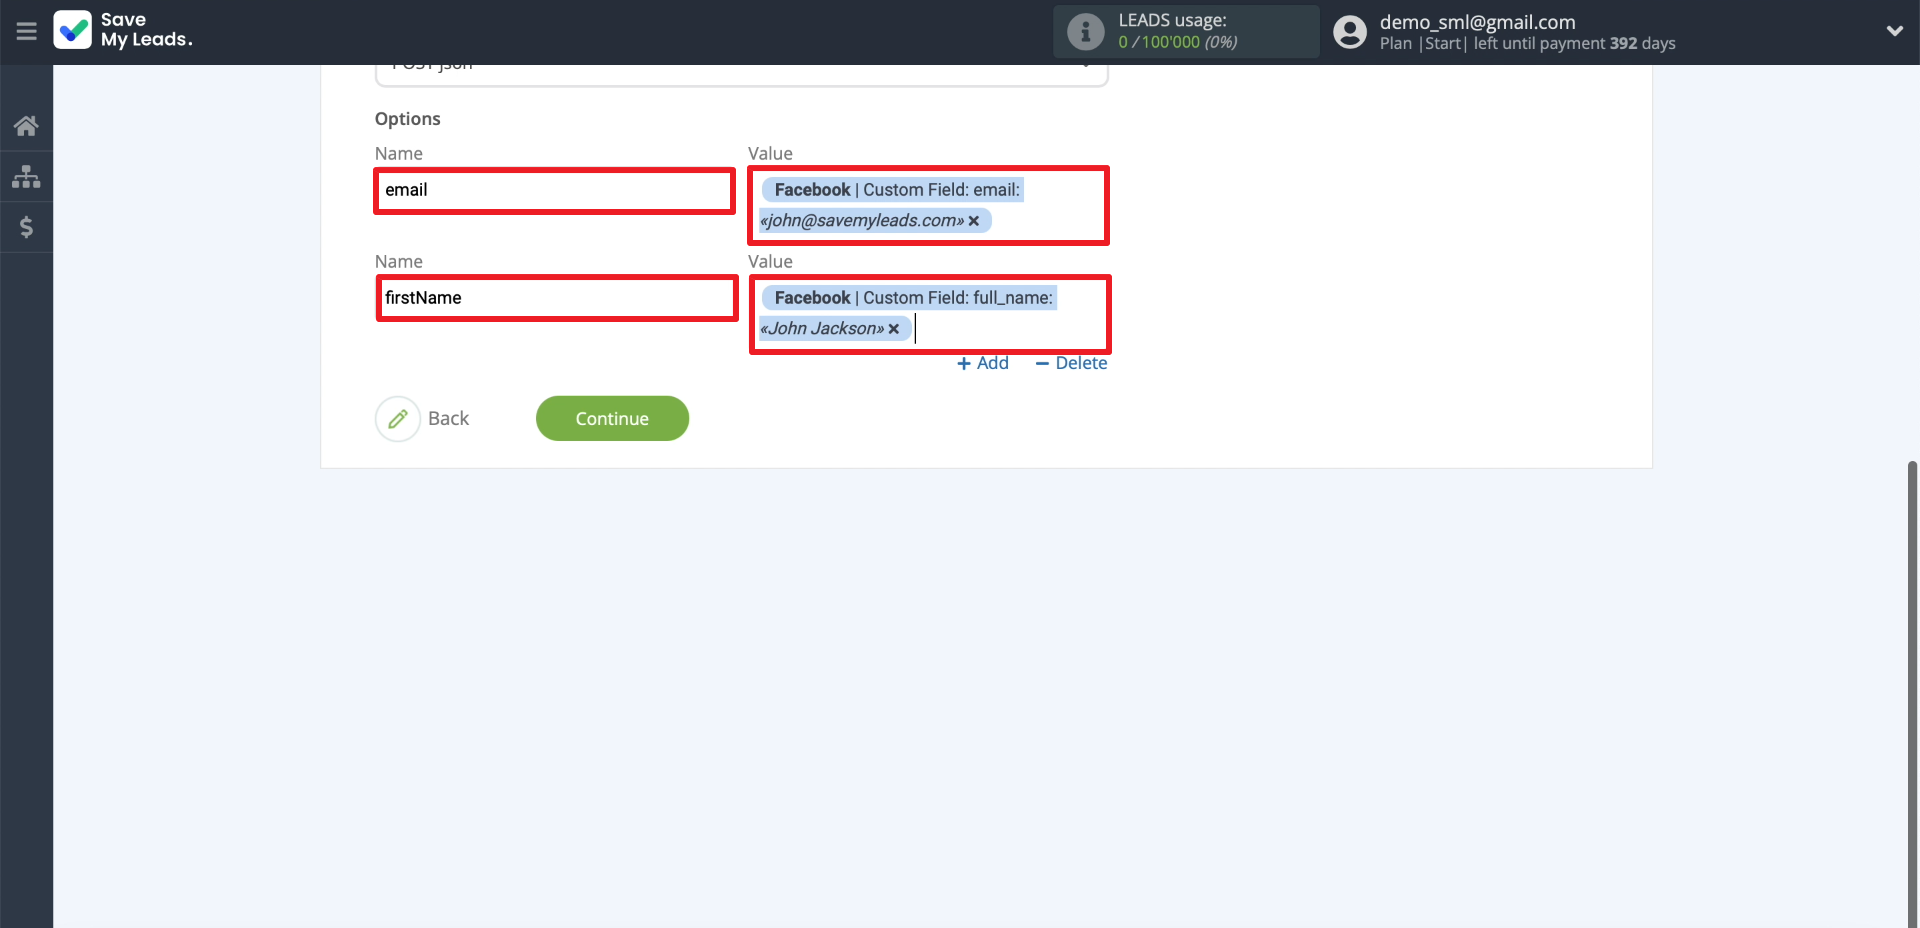
Next, we set up exactly what data will be sent to ProveSource for each lead. In the left column you need to enter the names of the variables to which the data will be transferred. How to work with the variables of your chosen system - read on its website. In the column on the right, you need to choose what kind of data will go into each variable from Facebook.
Testing data transfer
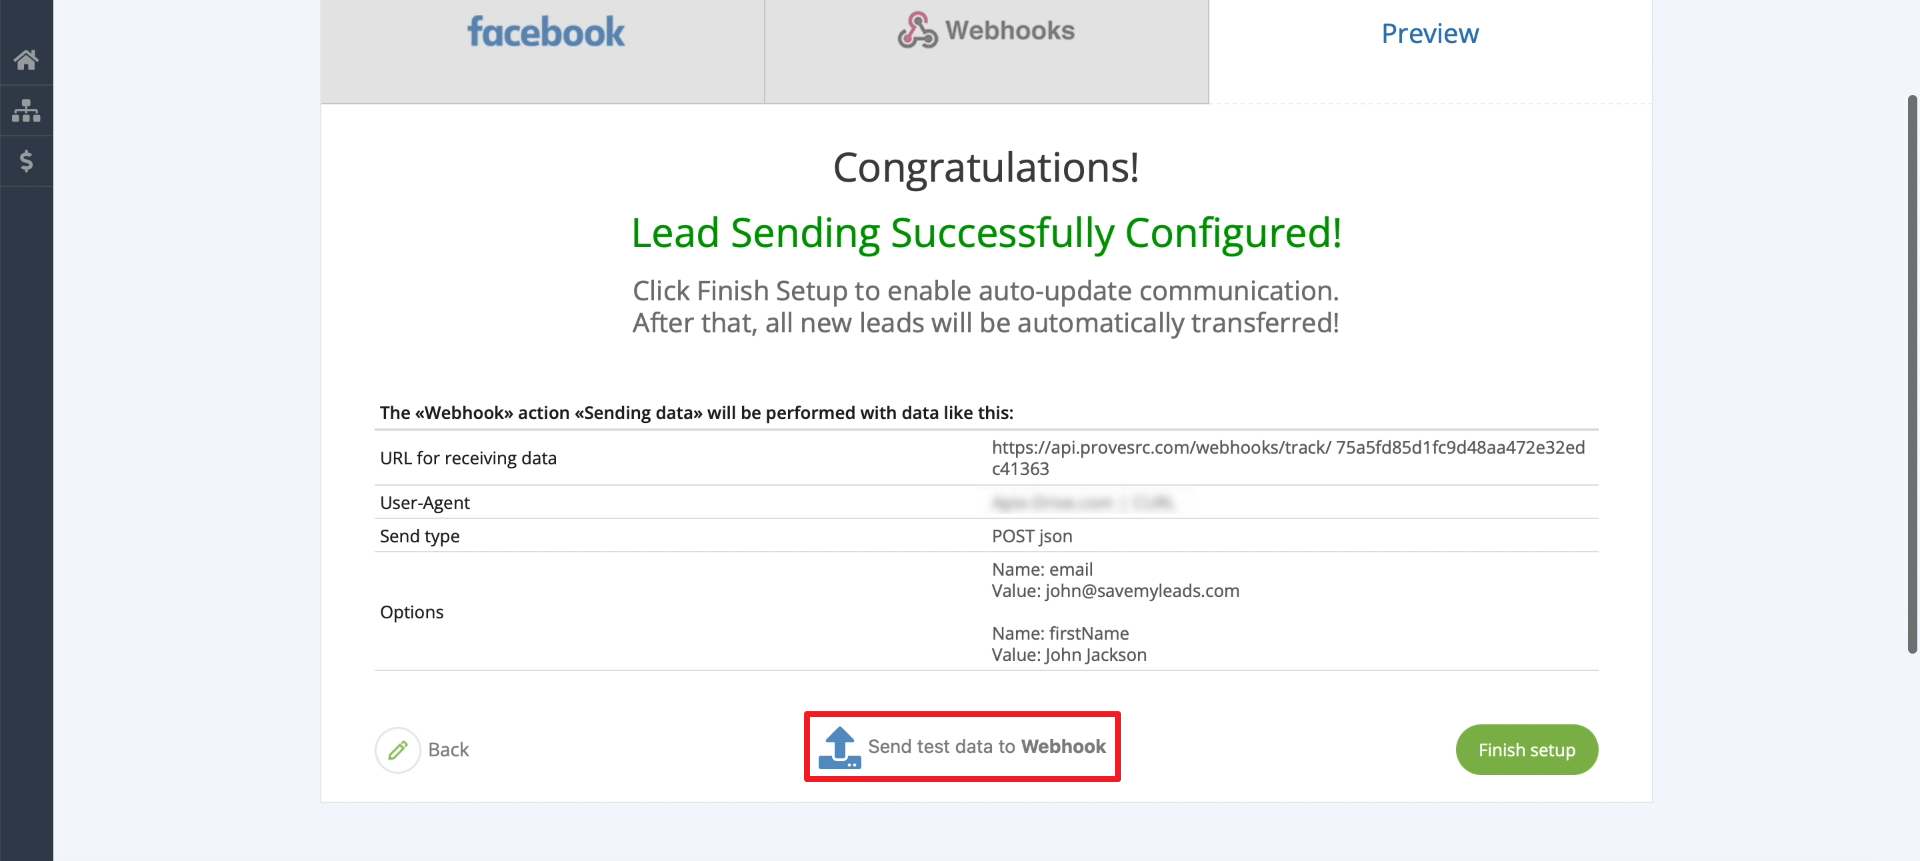
At this point, SaveMyLeads should upload from Facebook and display the data of the lead we asked you to add to the form. Now let's test their import into ProveSource. Click "Send test data to Webhook".
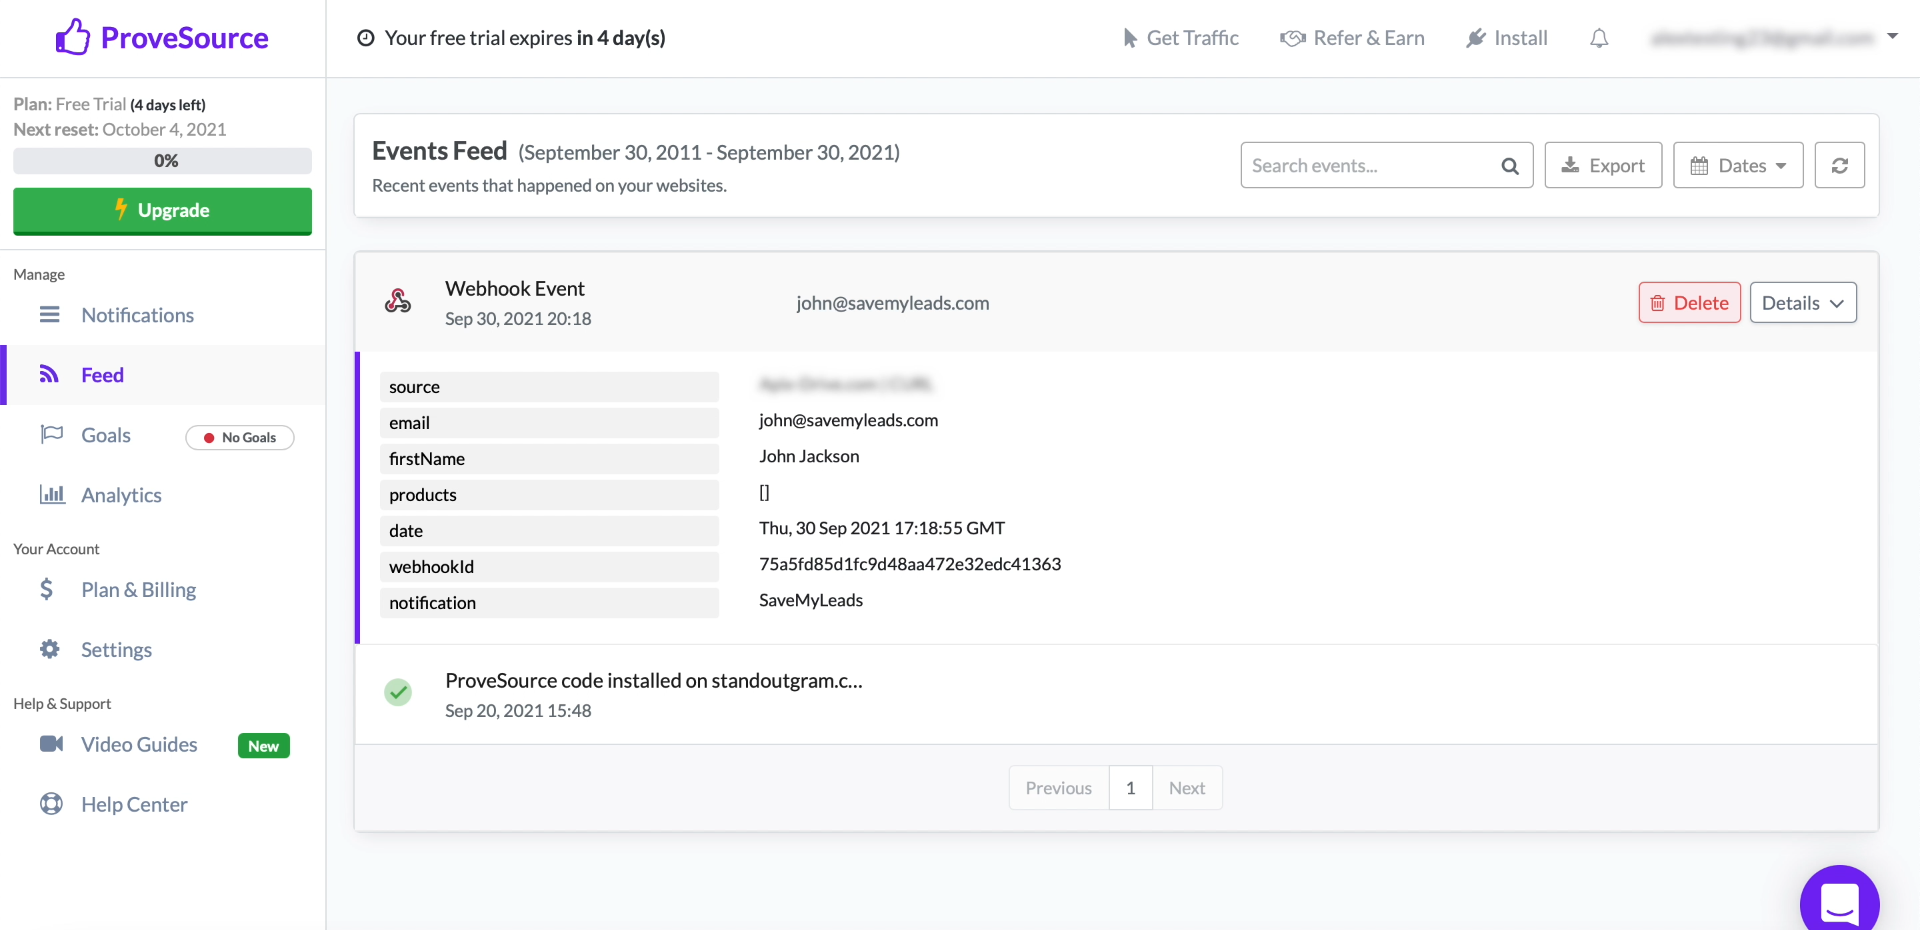
Open ProveSource and check if the submitted data is displayed. If not, check the previous configuration steps. If yes, then the import is working - go to the final stage.
Finishing setup
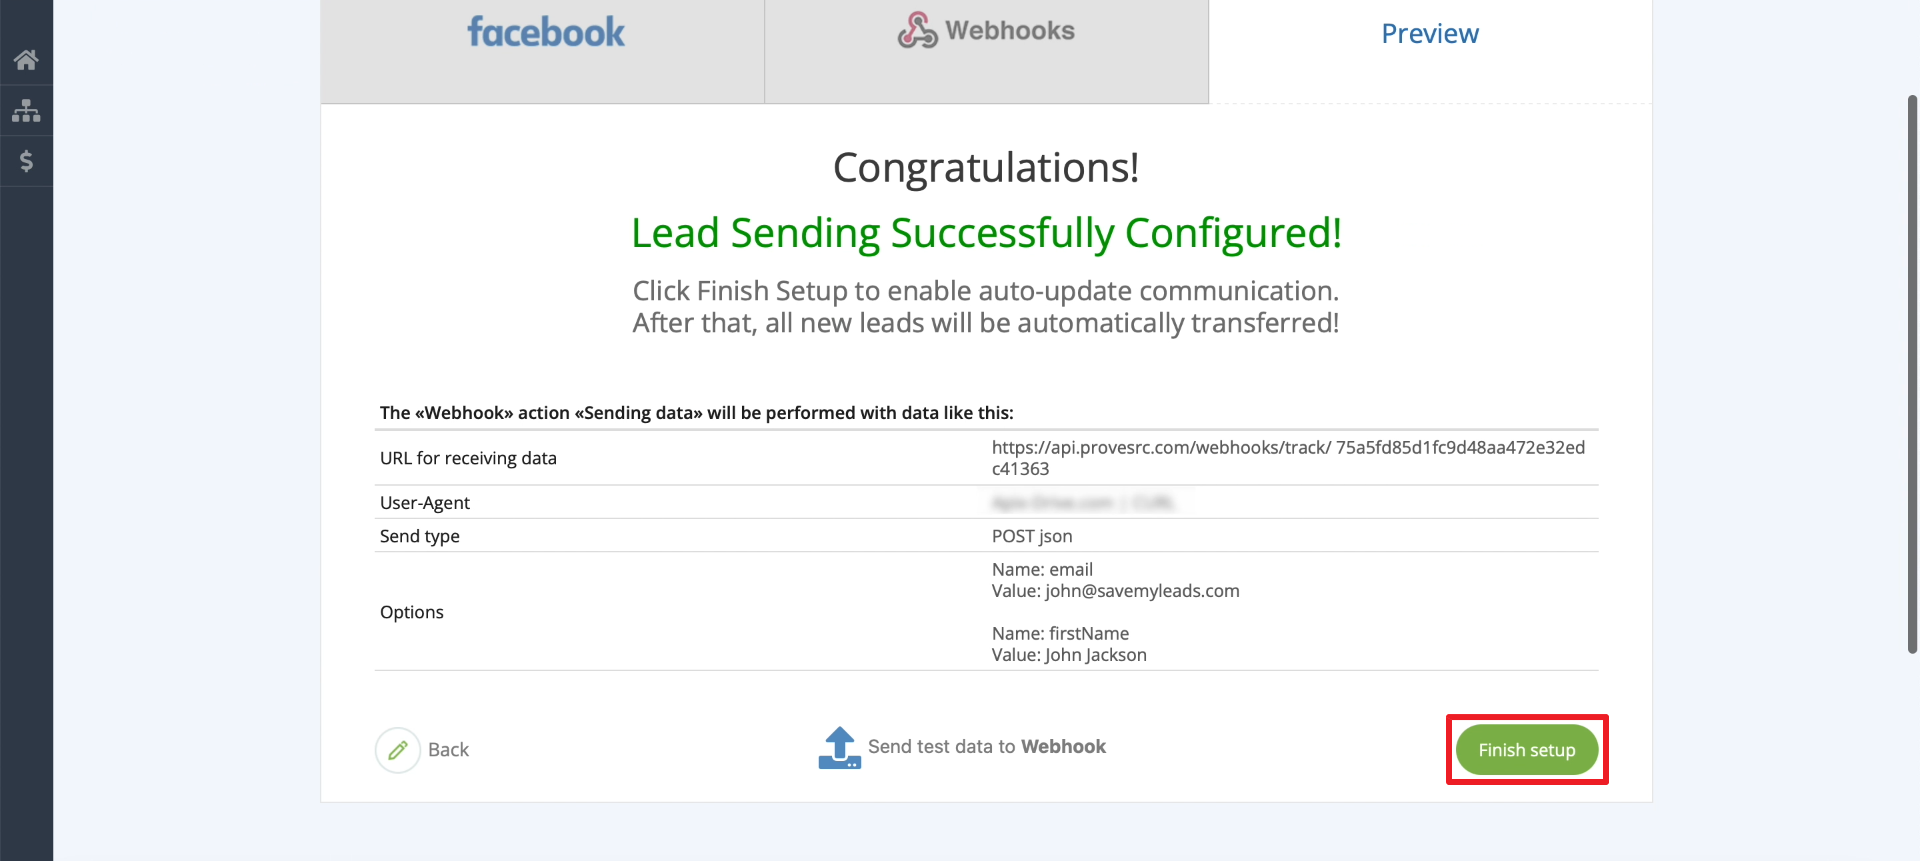
Click "Finish setup" to complete the setup and launch the created connection.
If necessary, edit the name of the connection. Click on the gear and enter the desired text.
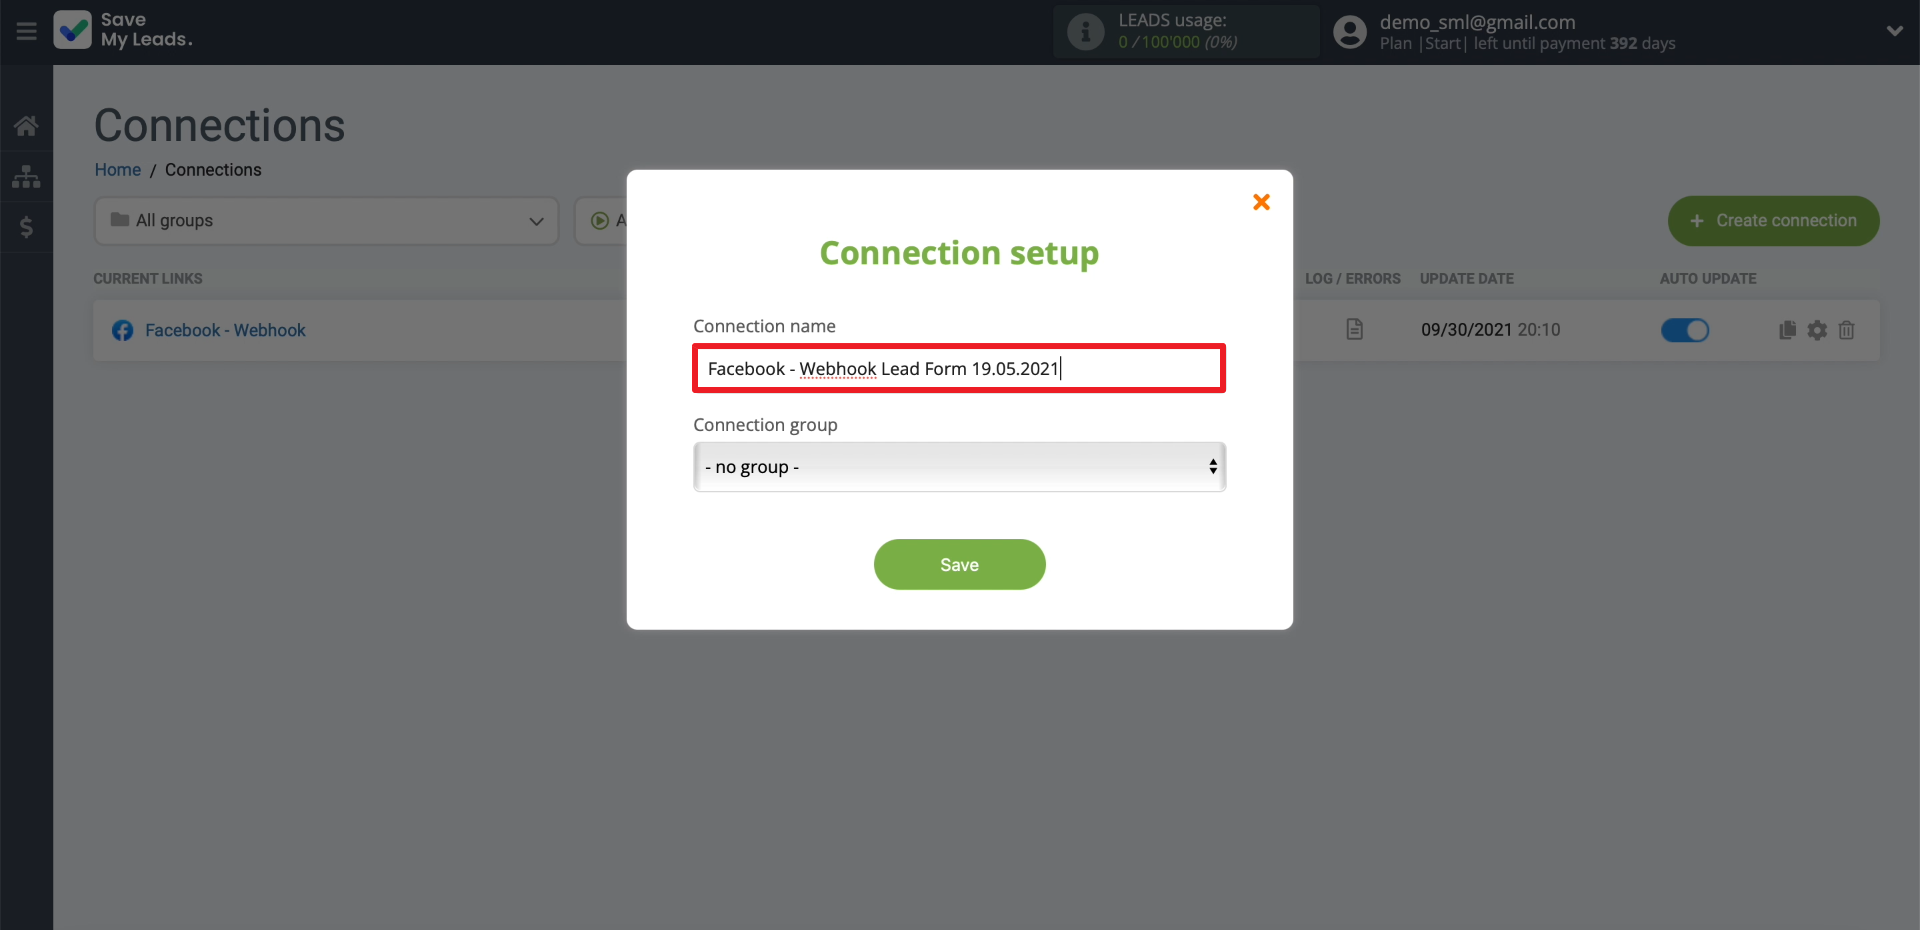
That's all. Now SaveMyLeads will upload new leads from Facebook in ProveSource automatically. You can pause, delete or edit the created connection at any time. Also, you can always create other connections with this or other systems that support Webhooks.
