Tired of adding subscribers manually? Automate the upload of contacts from a Facebook lead form to the Constant Contact mailing list. This will save you a lot of time and effort. The SaveMyLeads service will help you quickly set up automation without any technical skills.
Content:
1. How to setup Facebook and Constant Contact integration
2. Getting started with SaveMyLeads
3. Connecting Facebook Leads Ads
4. Connecting Constant Contact
5. Testing data transfer
6. Finishing setup
So you're generating leads through Facebook ads and want to convert them into subscribers to your email newsletter. In this case, you need a simple and efficient way to send the collected contacts from the lead form to the mailing list management service.
This problem can be easily solved with the SaveMyLeads online tool. It allows you to quickly connect Facebook to various services for sending newsletters and set up automatic uploading of leads. As a result of the connection, SaveMyLeads will independently add each new lead to your mailing service. The transferred contacts will go directly to the list of subscribers you have chosen.
What exactly is automation useful for? Let's see how it can help your business.
1. Less routine. You don't have to download contacts from Facebook as a spreadsheet and then manually add them to a mailing list. SaveMyLeads transfers data in a fully automatic mode. Thus, the service will free you from monotonous work and save a lot of working time.
2. Prompt delivery of contacts. As soon as a new lead appears in the form, SaveMyLeads immediately uploads it to the mailing list. The service operates non-stop 24/7. As a result, your list of subscribers is replenished in real time. This means that you do not have to worry that you will not have time to unload all contacts from Facebook before sending the next mailing letter.
3. No data errors. If you transfer contacts manually, it is easy to make mistakes in names or addresses, mix up data, or miss something. Automation eliminates such cases. SaveMyLeads submits the data as it appears in the lead form.
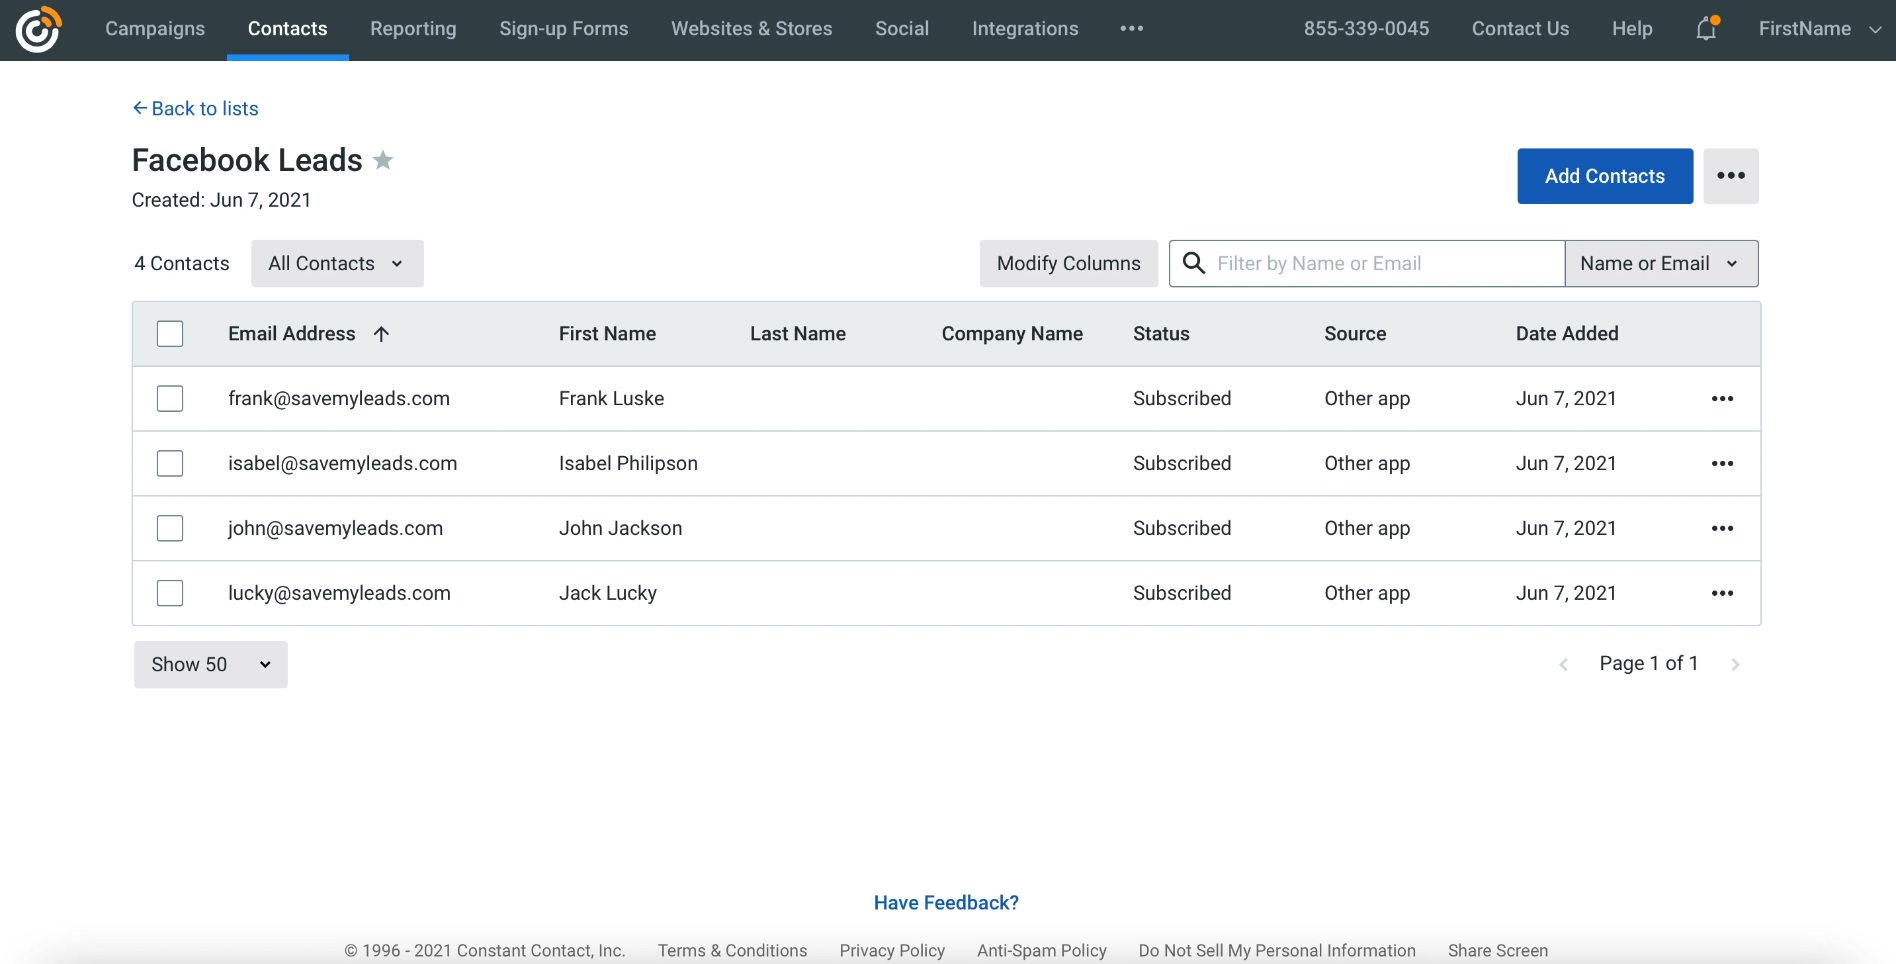
Here is an example of contacts uploaded from Facebook to Constant Contact using SaveMyLeads:
How to setup Facebook and Constant Contact integration
You don't need to write code to set up automation. It is enough to register on the SaveMyLeads website, select the desired mailing service from the menu and follow the instructions on the screen. In the process of creating a connection, the system will ask you to link your account of this service to Facebook and select the data transfer settings.
To make it easier for you to understand, let's consider setting up automatic uploading of leads from Facebook to the Constant Contact mailing service. Before you begin, make sure you've created a Facebook lead form and signed up for an account with Constant Contact. In addition, add any contact to the form - it will come in handy for the test.
Getting started with SaveMyLeads
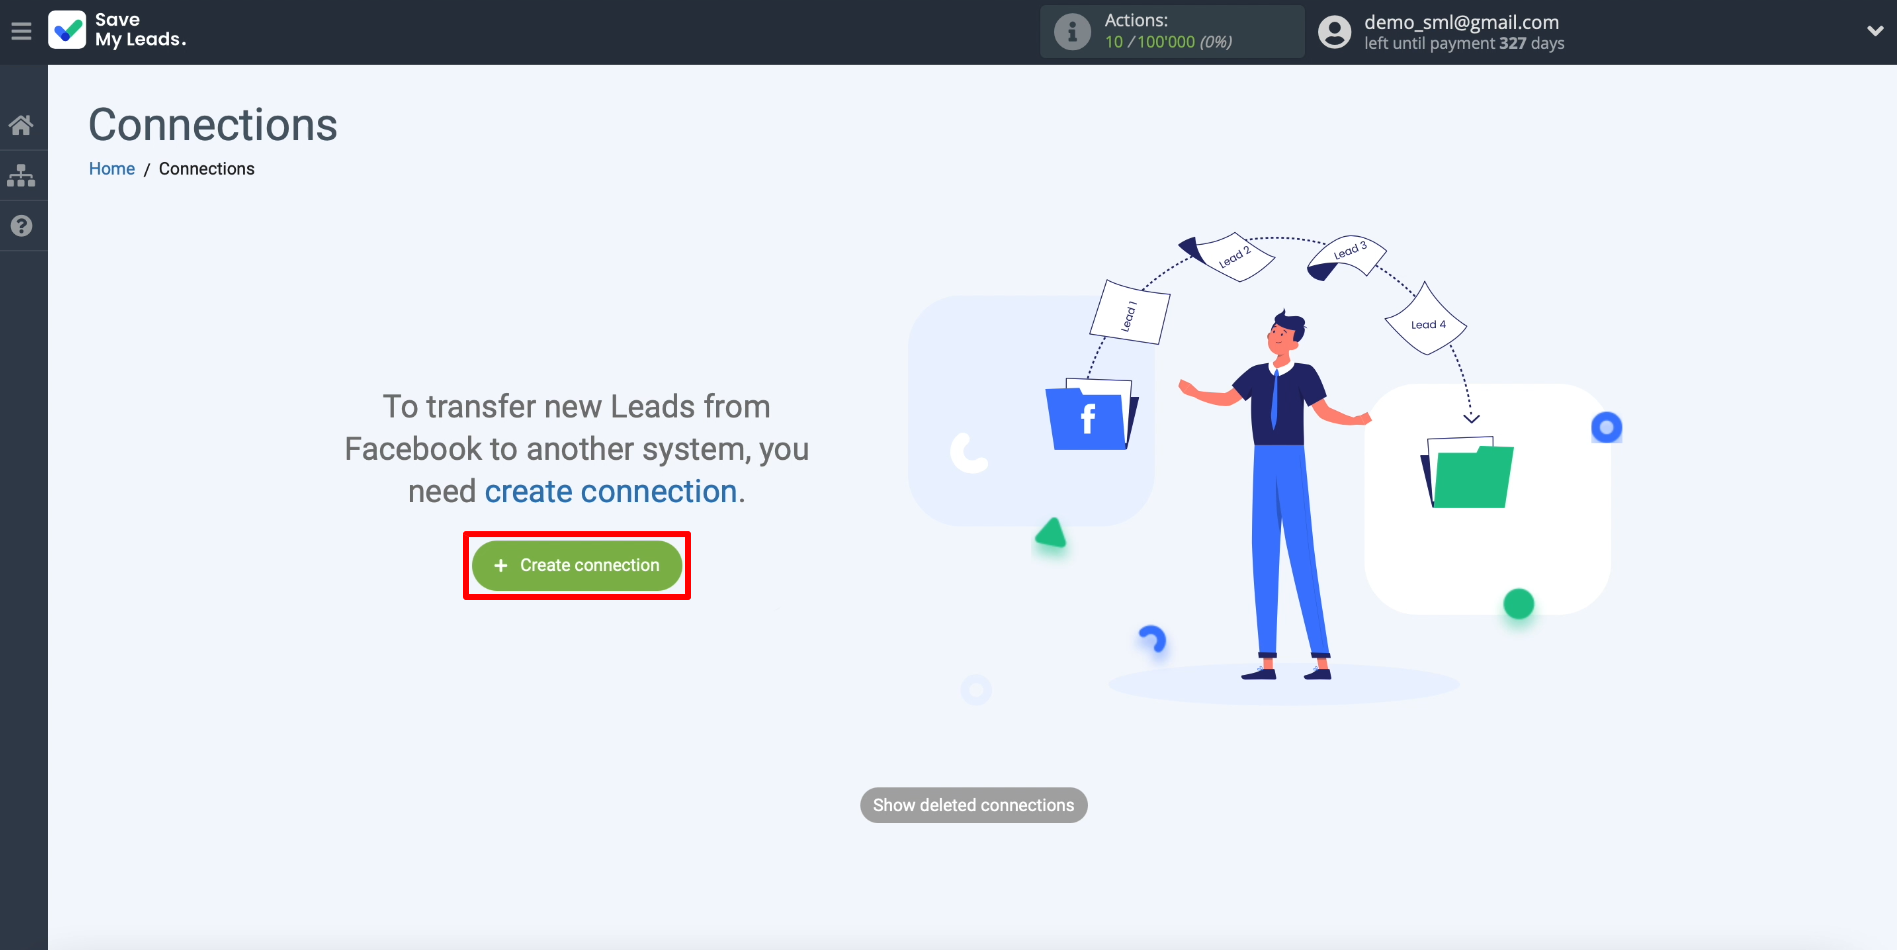
Registering on the SaveMyLeads website. After that, click "Create connection".
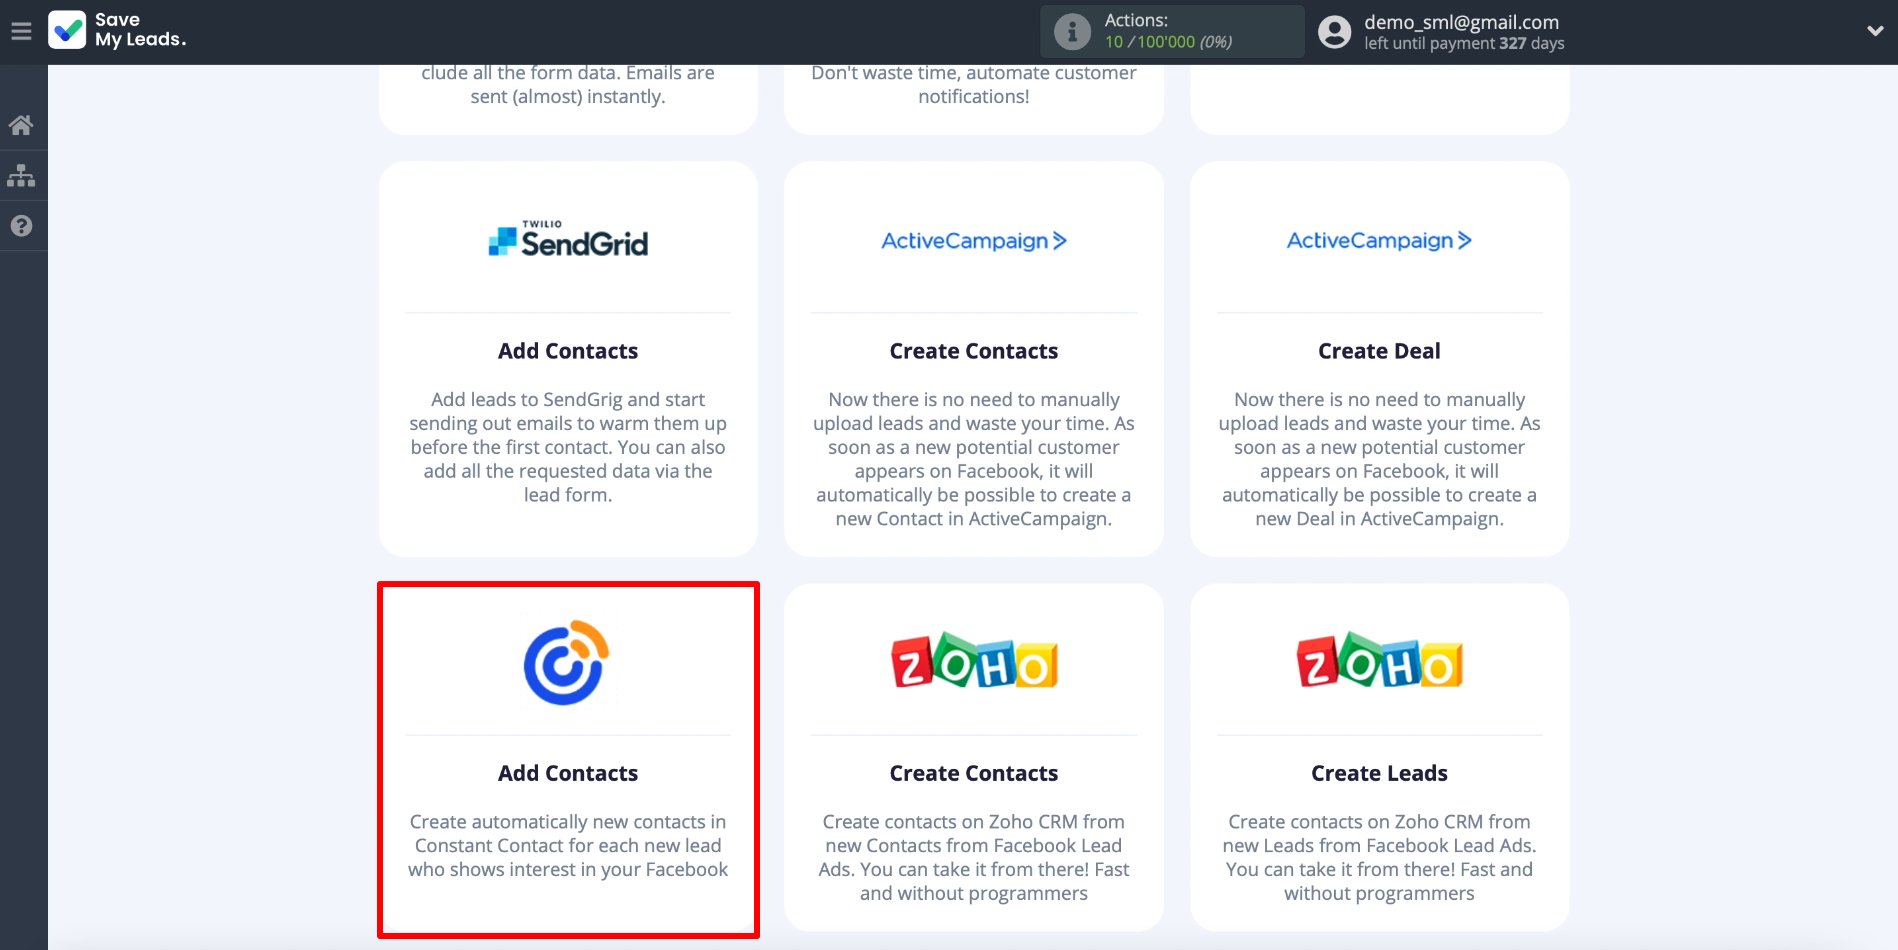
The screen should display a list of connections that can be created using SaveMyLeads. Each of them serves to integrate Facebook with a specific service. We select the connection intended for transferring contacts from Facebook to Constant Contact.
Connecting Facebook Leads Ads
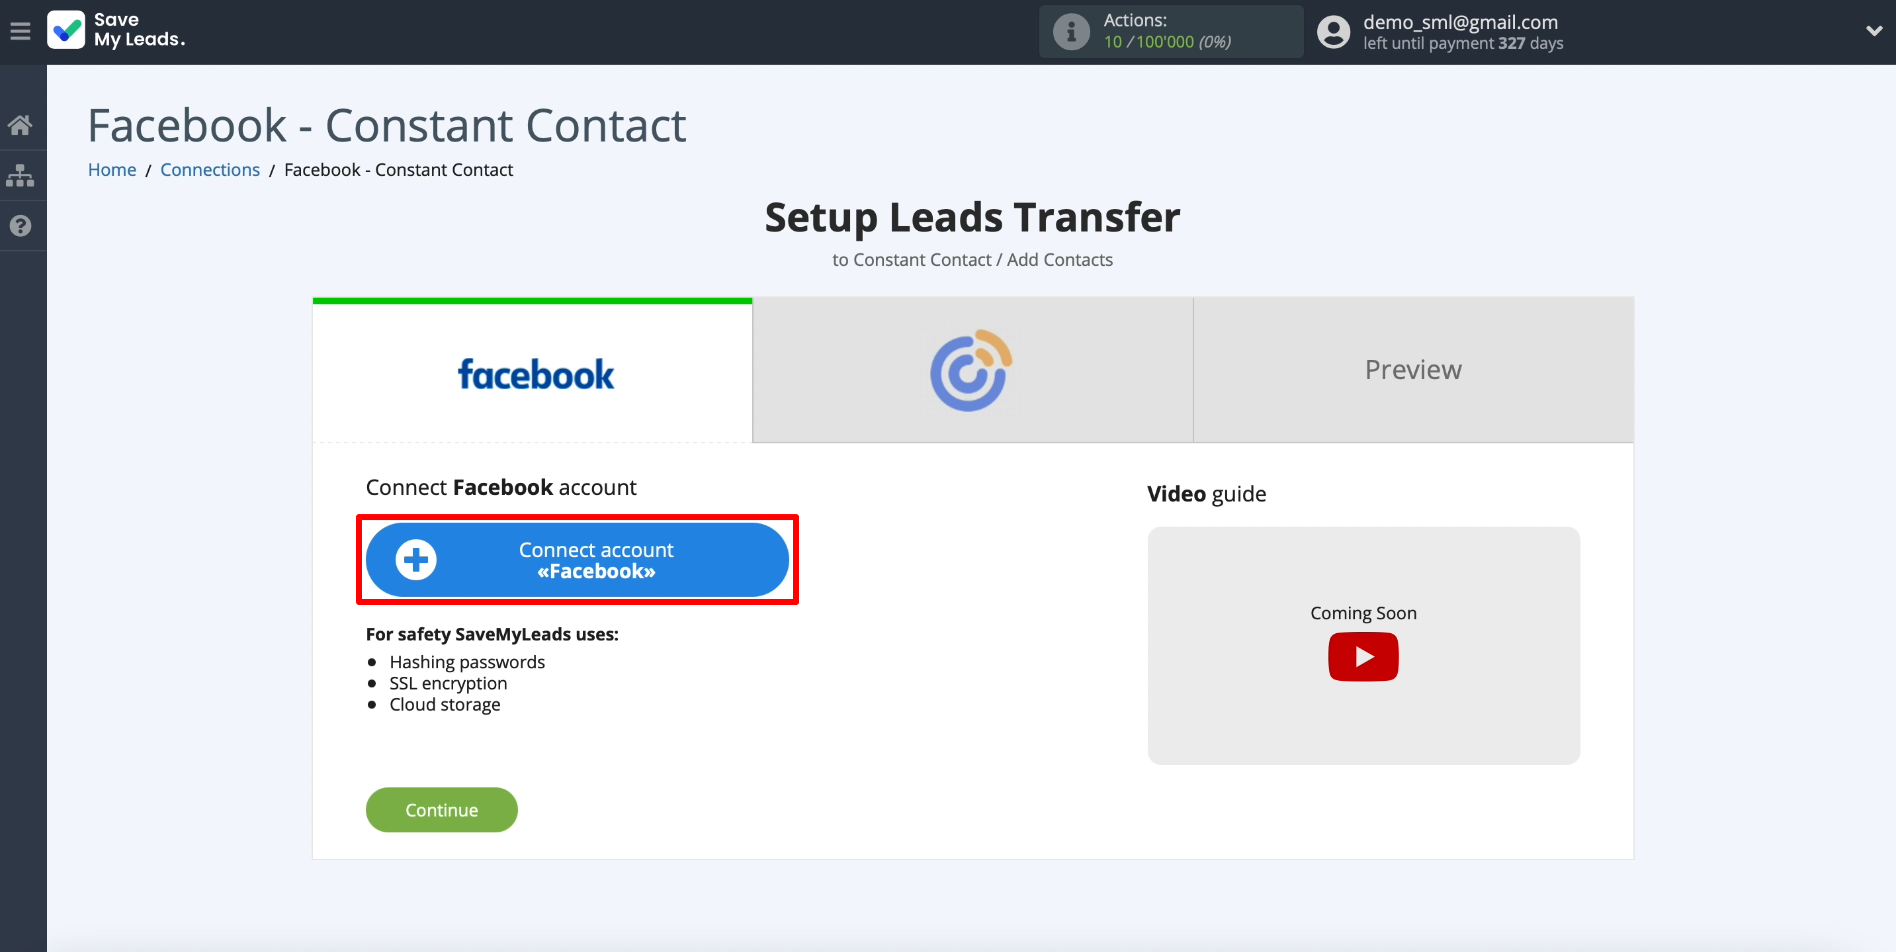
In order for SaveMyLeads to be able to upload leads from the forms, we need to connect a Facebook account. To do this, click "Connect account "Facebook". We enter the login and password, after which we give the system all the requested permissions.
Now we need to show SaveMyLeads where it can upload leads from. First, we select the newly connected account, then the business page for which the advertising campaign is set up, and, finally, the form for collecting leads.
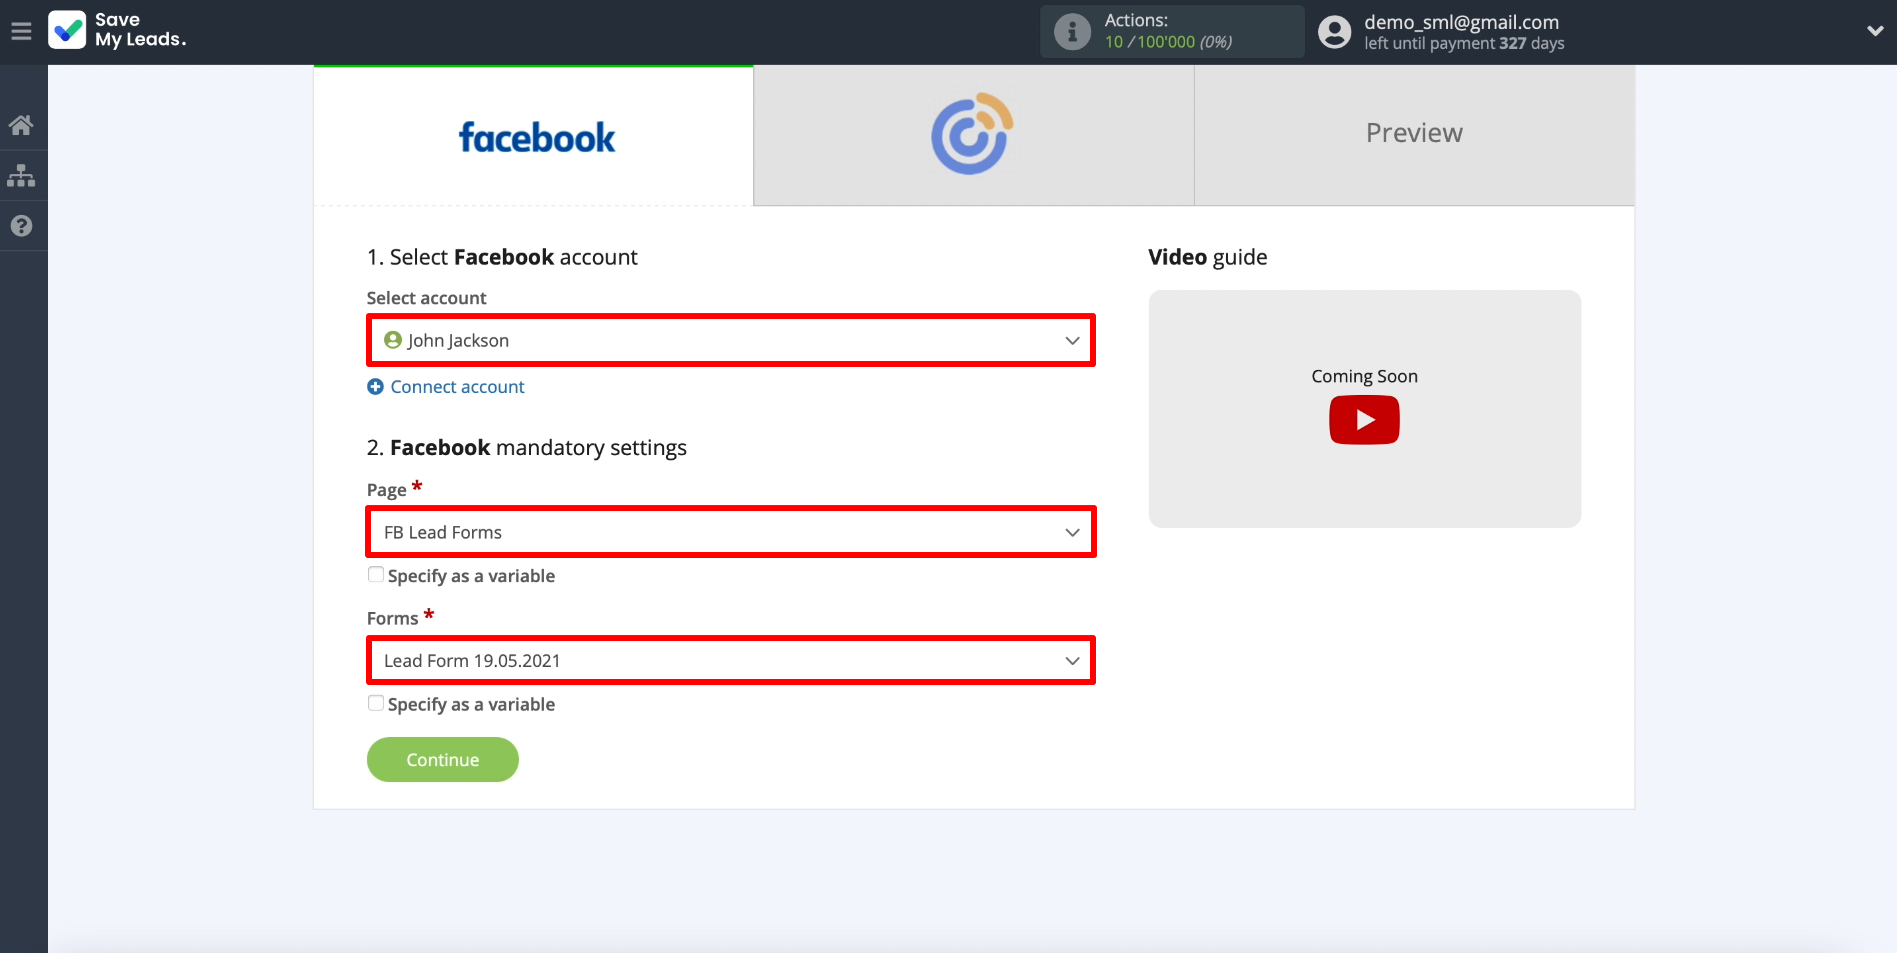
Only one form can be selected per connection. If you want to set up uploading leads from several forms, you need to create a separate connection for each of them.
Connecting Constant Contact
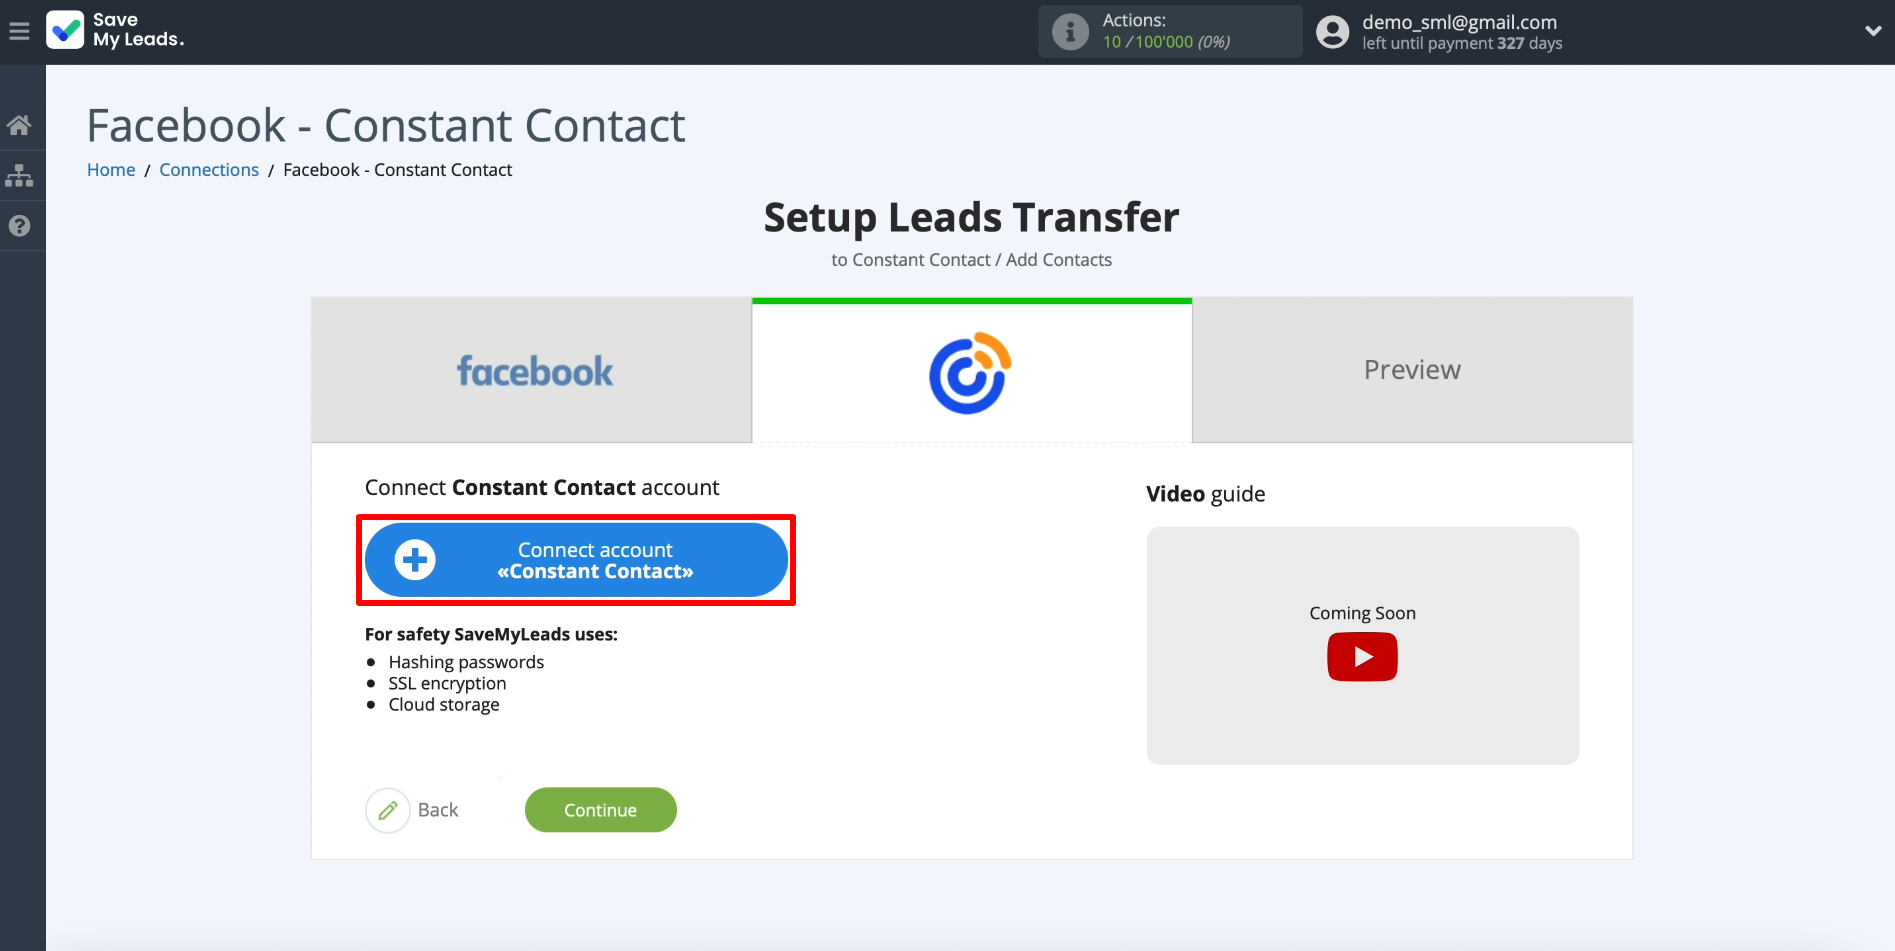
In order for SaveMyLeads to send the leads uploaded from Facebook to the mailing list, we will connect the Constant Contact account. Click "Connect account "Constant Contact" and follow the integration prompts.
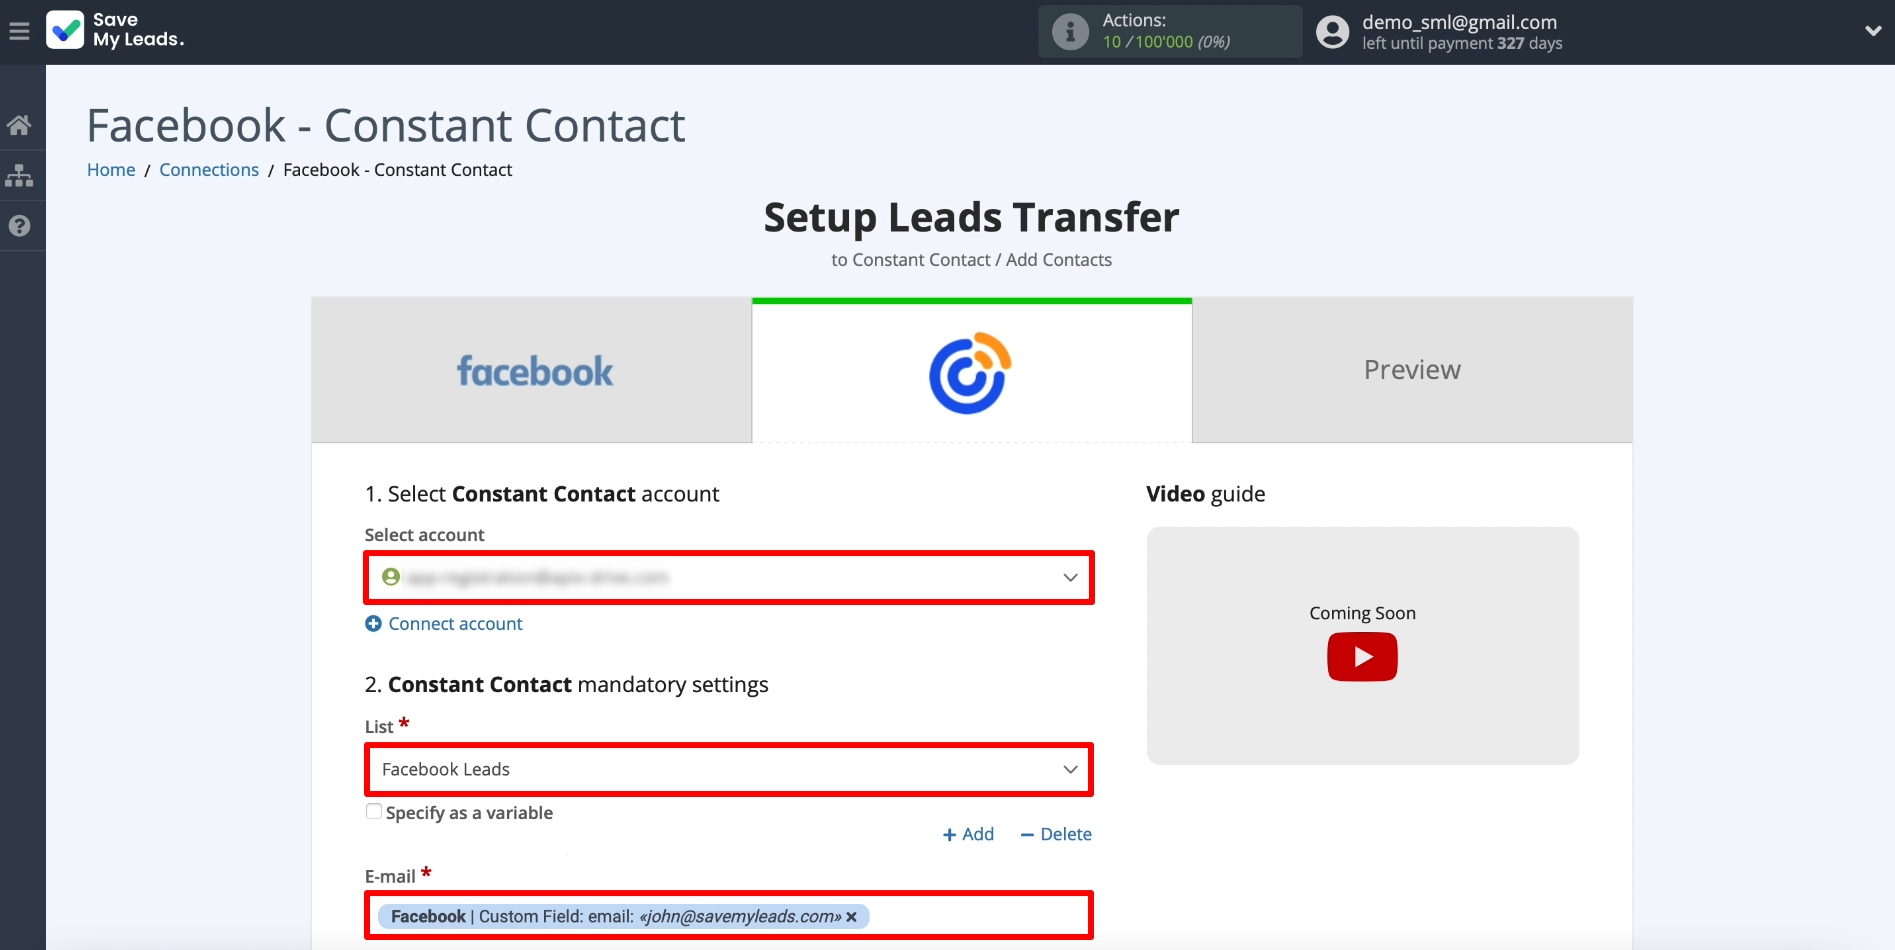
Now you need to specify where exactly the data should go. Select the newly connected Constant Contact account and the final list of contacts.
- Automate the work with leads from the Facebook advertising account
- Empower with integrations and instant transfer of leads
- Don't spend money on developers or integrators
- Save time by automating routine tasks
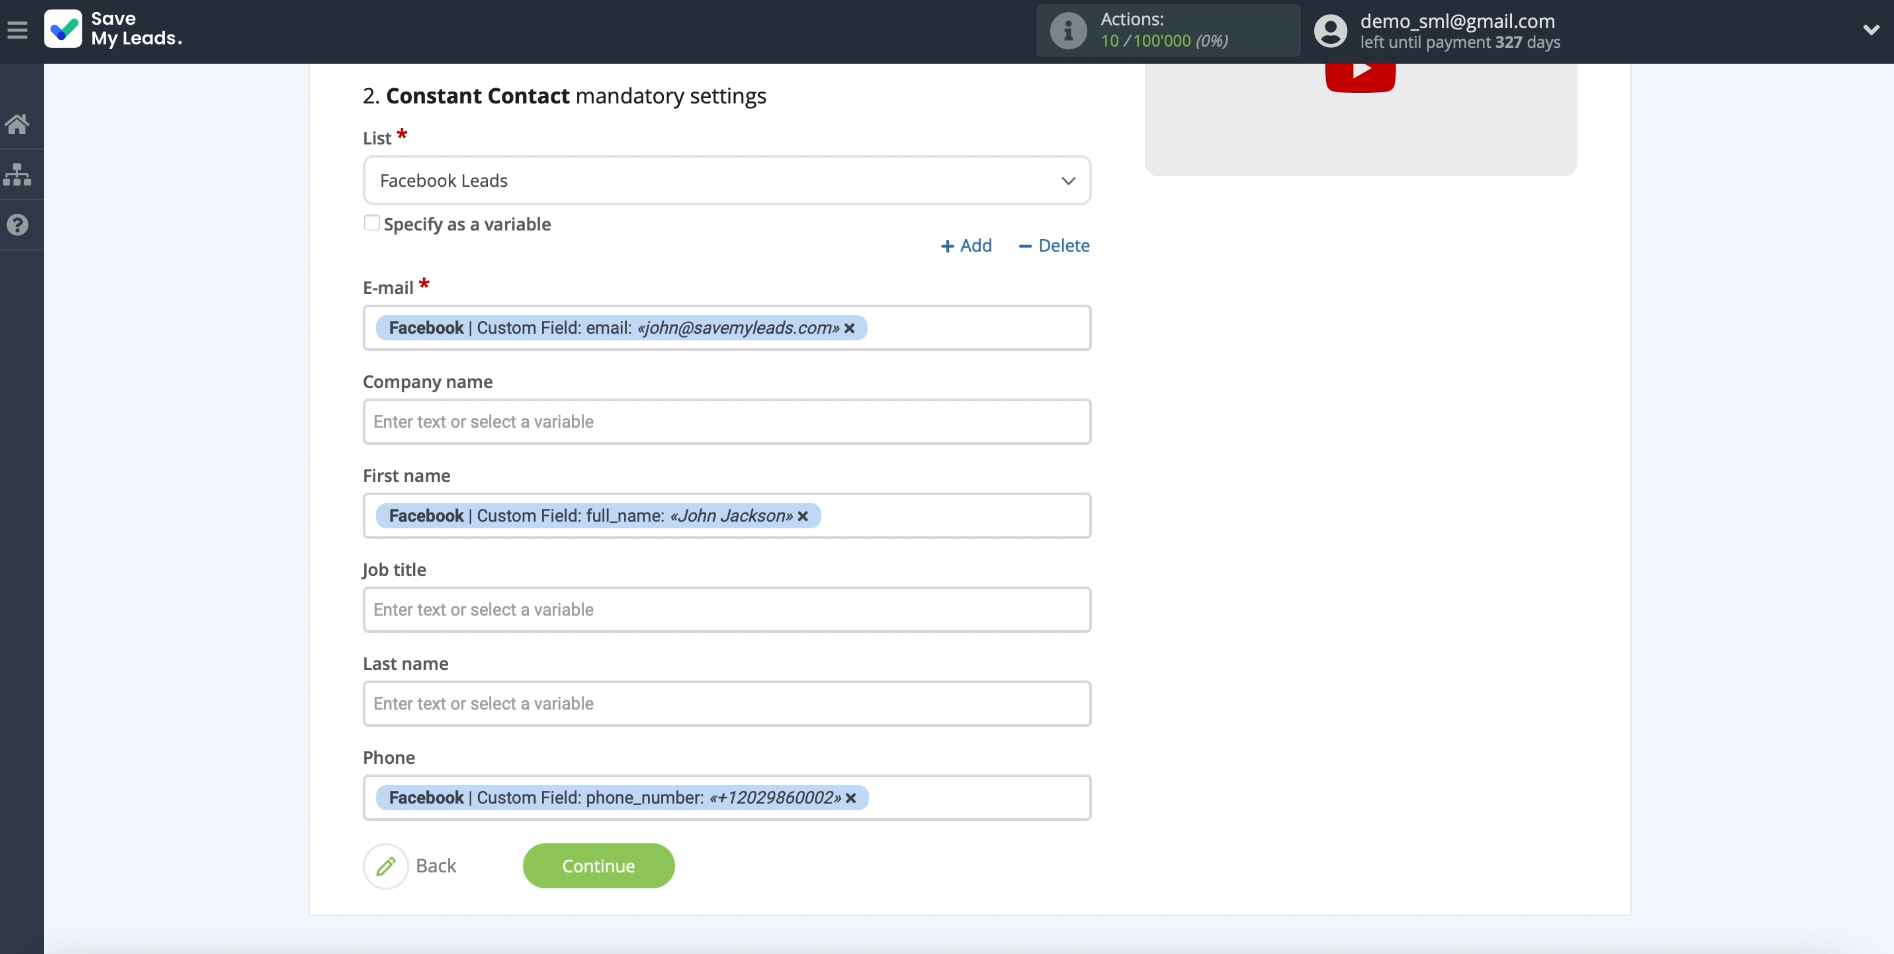
Below you need to specify what kind of data will be transmitted. To do this, click on the fields we need and use the drop-down list to select which lead data should be copied through each of them to Constant Contact. Be sure to fill in the "E-mail" field, the rest are optional.
Testing data transfer
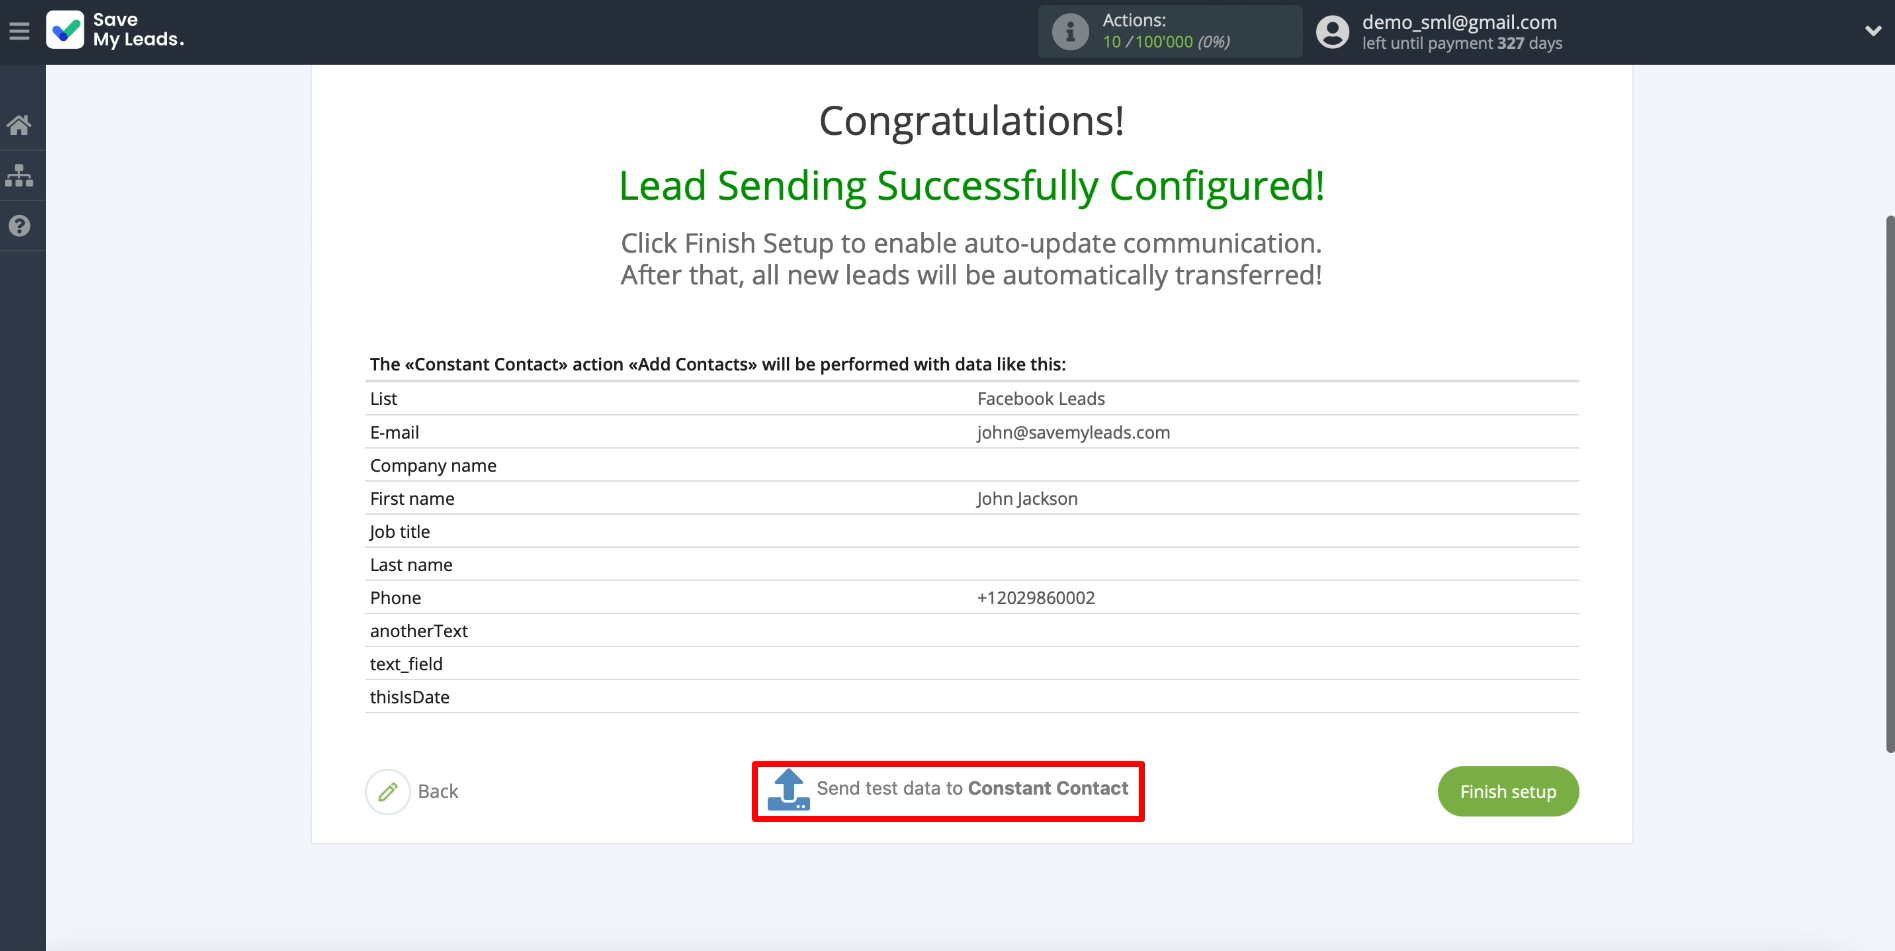
Previously, we asked you to add any contact to a Facebook form. It should now appear on the screen. We use it to test uploading data to a mailing list. To do this, click "Send test data to Constant Contact".
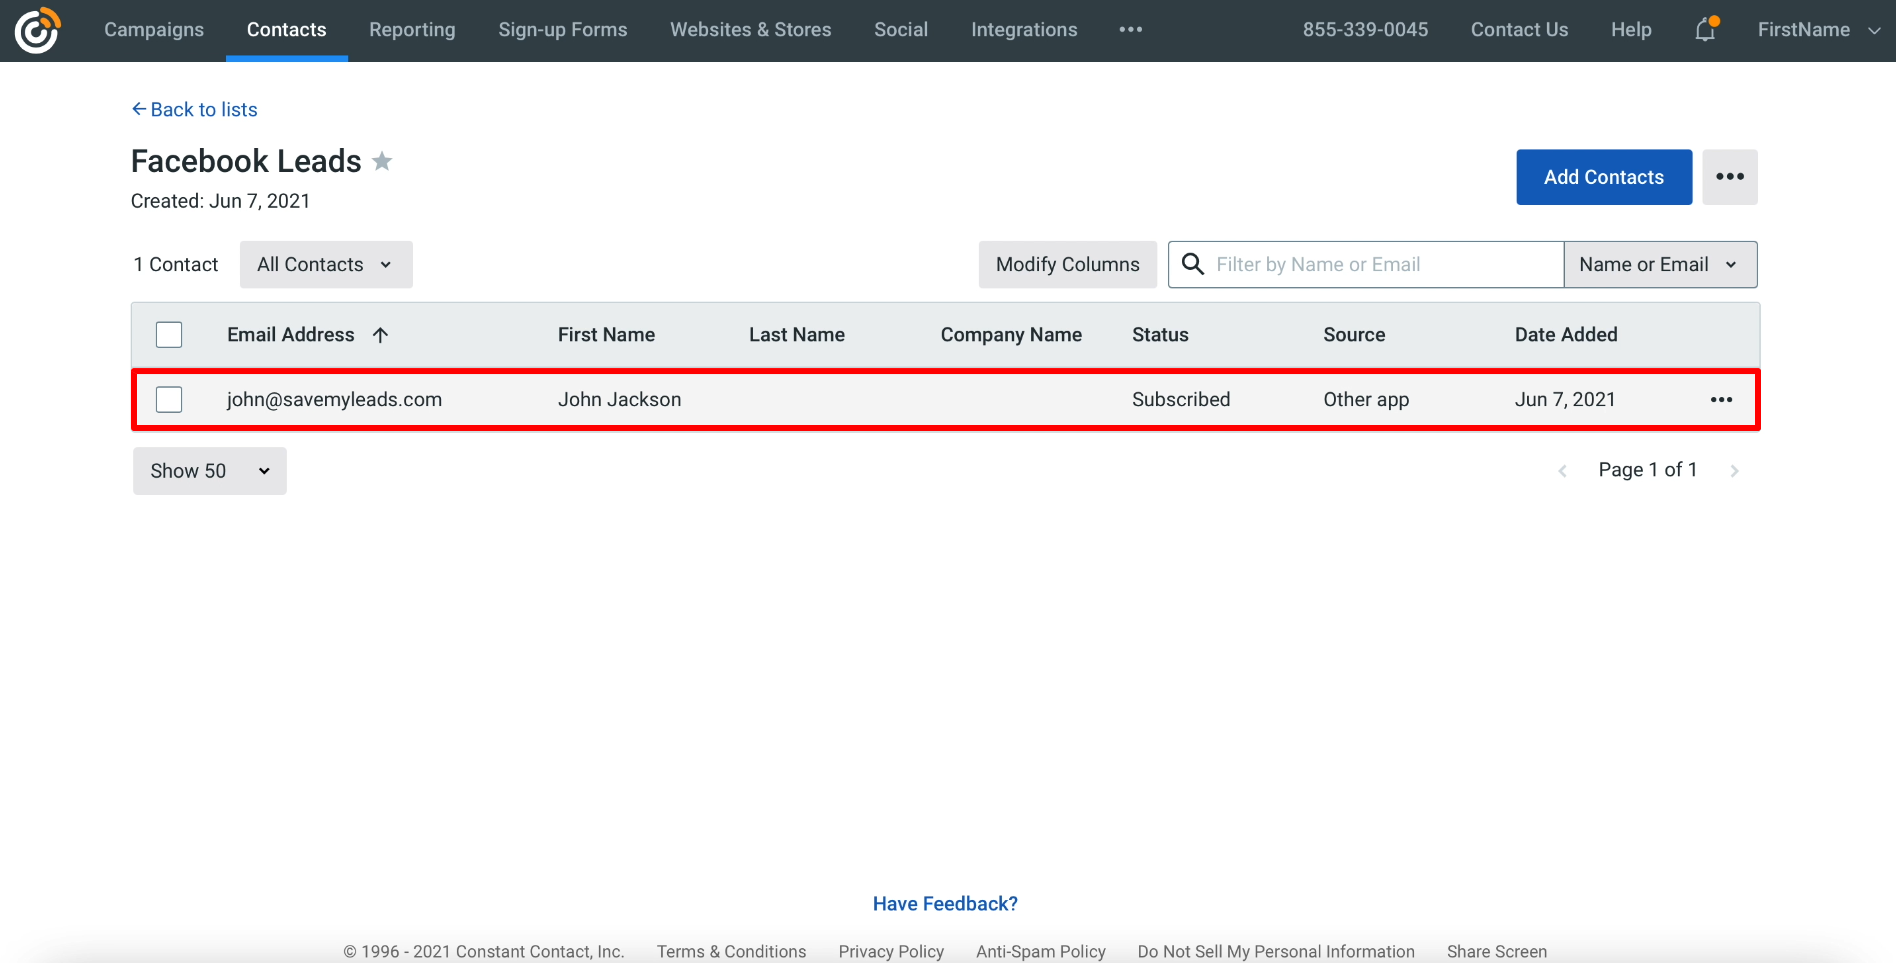
Now we go to the selected mailing list on the Constant Contact website and check the sent contact. If something went wrong, check the correctness of the previous steps. If the data is displayed - everything works! You can move on to the final step.
Finishing setup
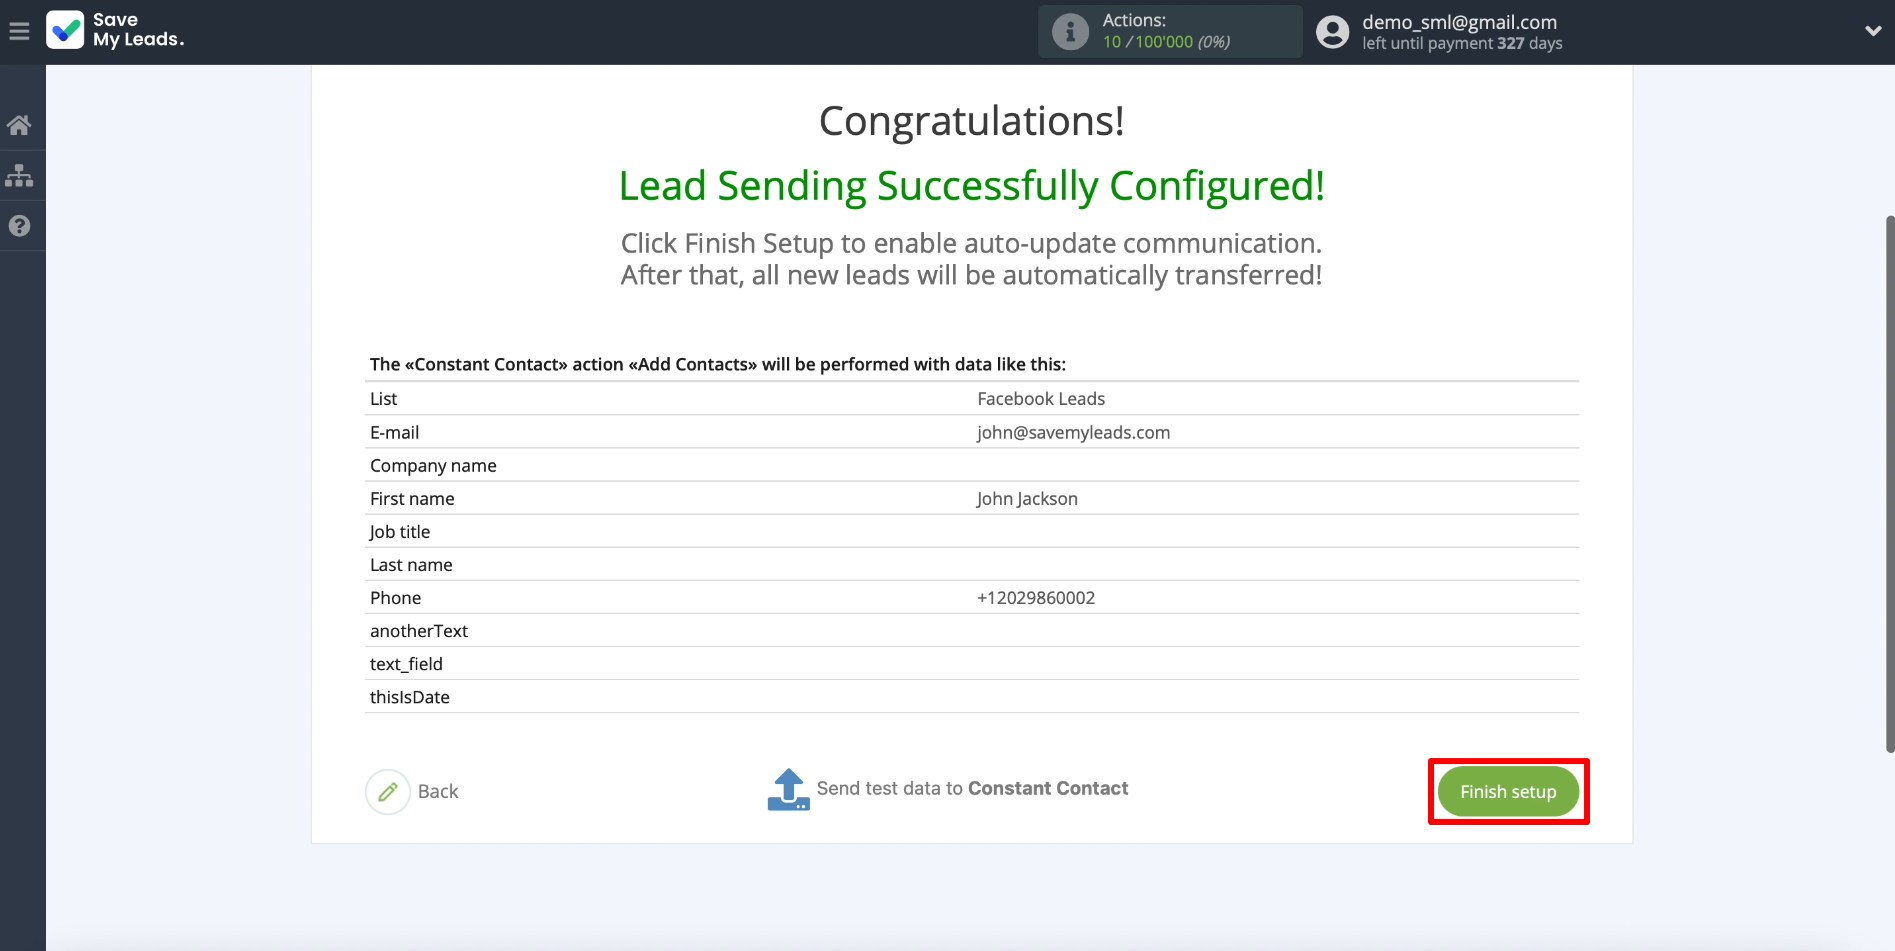
Click "Finish setup" to complete the connection setup and start automatic uploading of contacts.
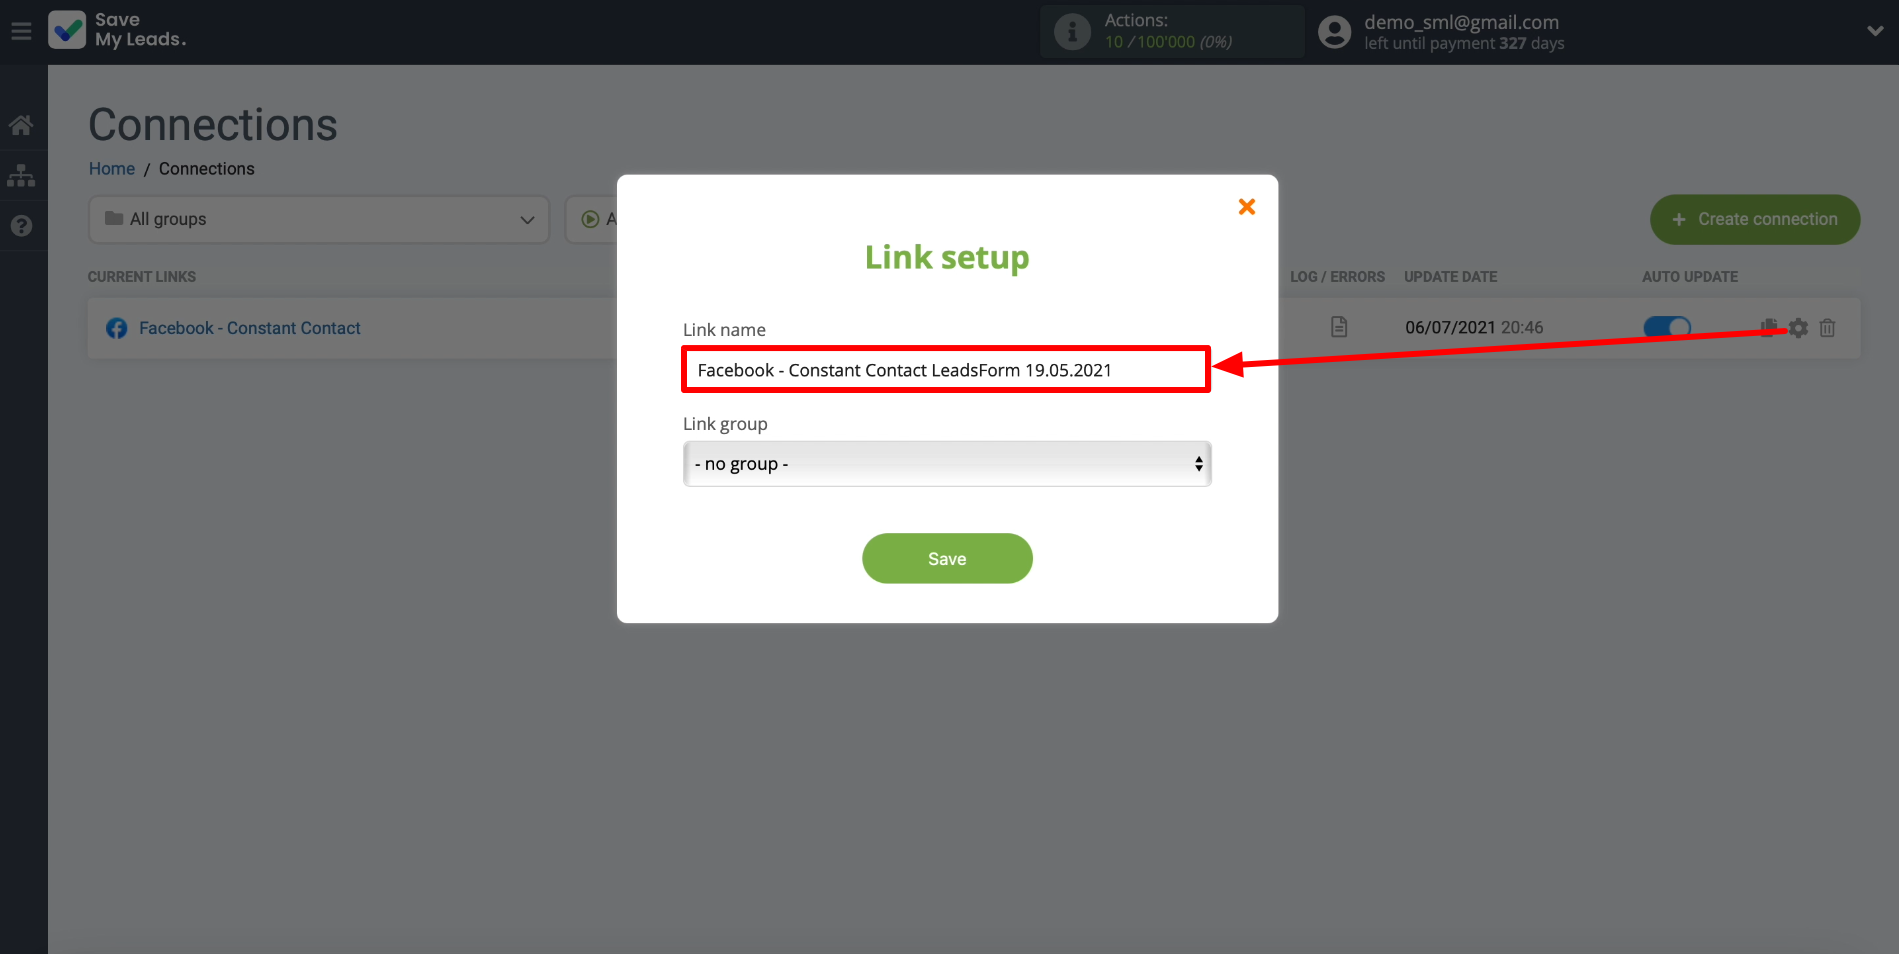
If necessary, you can edit the name of the connection. To do this, just click on the gear and enter the desired text in the field.
That's all! The connection is set up and ready to go. Now SaveMyLeads will upload contacts from the Facebook lead form to the Constant Contact mailing list according to the specified parameters.
