We will tell you how to upload leads from the Facebook advertising account automatically to the Aweber mailing service. You can entrust this task to any specialist without programming knowledge. With the SaveMyLeads online connector, they can do this in 5 minutes.
Content:
1. How to set up Facebook and Aweber integration
2. Connect Facebook Leads Ads
3. Connect Aweber
4. Automate data update
5. Conclusion
When a business begins to receive leads from the Facebook social network using the capabilities of the advertising account, a natural question arises: how to work with them in the future in order to process and interact conveniently.
A lead is a potential customer. If you carry out timely work with subscribers, then they can become a regular buyer of your products. To do this, the business uses various techniques: it guides leads through the sales funnel, sends them promotional mailings, and periodically reminds of itself by sending out information about new products or selections of promotional goods.
Before you start working with leads, you need to form a database of contacts from them. If you plan to send promotional mailings, then it is convenient to upload leads to a special service, for example, Aweber. But what about new incoming applications? If a comment or question is not processed in time, the lead may “burn out” and go to competitors. Automation will help with this problem. If you set up the integration so that each new lead comes from the Facebook advertising account to the Aweber service, then you don’t have to constantly monitor new requests, control this issue, and burden employees with this.
All new applications will automatically be sent to the service for mailing. This greatly simplifies the work of the staff, saves their time. Employees will be able to deal with more important tasks, the business will automate some of the routine processes and will work more efficiently. This increases the loyalty of leads because they do not have to wait for a long time to process their request, and the business does not lose or miss applications.
How to set up Facebook and Aweber integration
To set up automatic uploading of leads from Facebook to Aweber, you can use the services of developers. If there are no such specialists in the staff of your company, you can turn to freelancers for help or hire a programmer for a one-time project. But, firstly, you will have to allocate time and budget for this, and secondly, the business becomes constantly dependent on the developer’s services: if you have to finalize integrations or create a new connection, change settings, then you will have to constantly contact specialists, and it's every time a new budget and spending time.
The SaveMyLeads online connector will help you deal with these problems conveniently and effectively. With it, any of your employees will be able to set up the connection of different services and applications with the Facebook advertising account without programming knowledge.
Connect Facebook Leads Ads
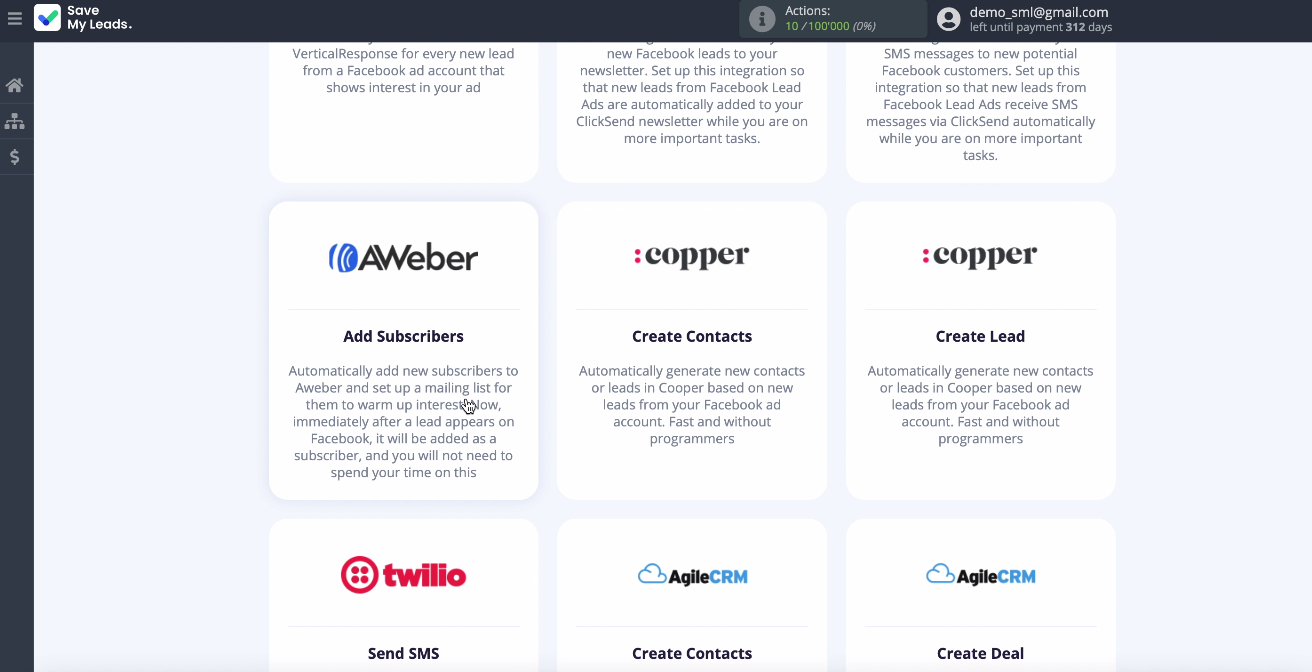
To start the integration, create a new connection. Choose one of the ready-made templates for systems to which you can transfer data - Aweber.
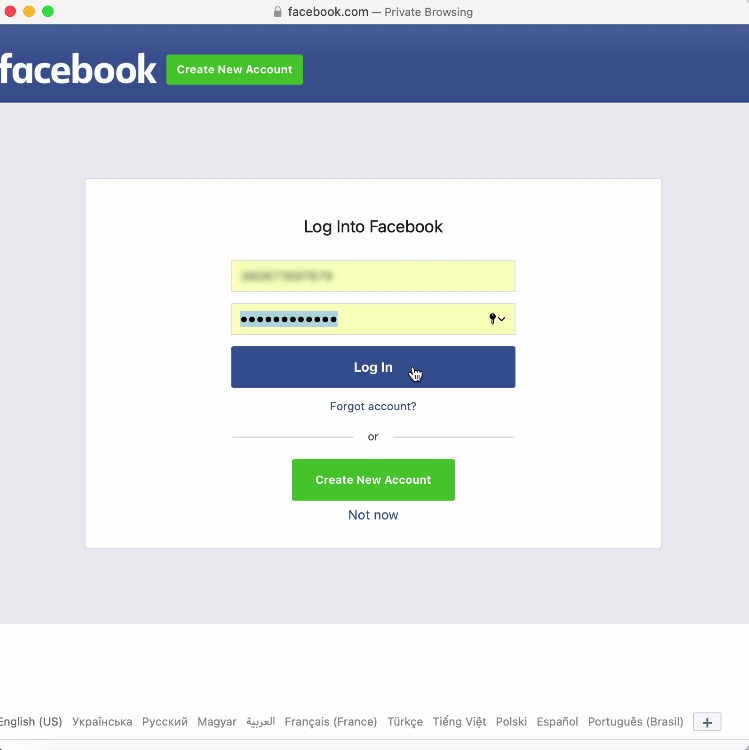
Connect your Facebook account to the SaveMyLeads system. Enter your username and password from your personal Facebook account.
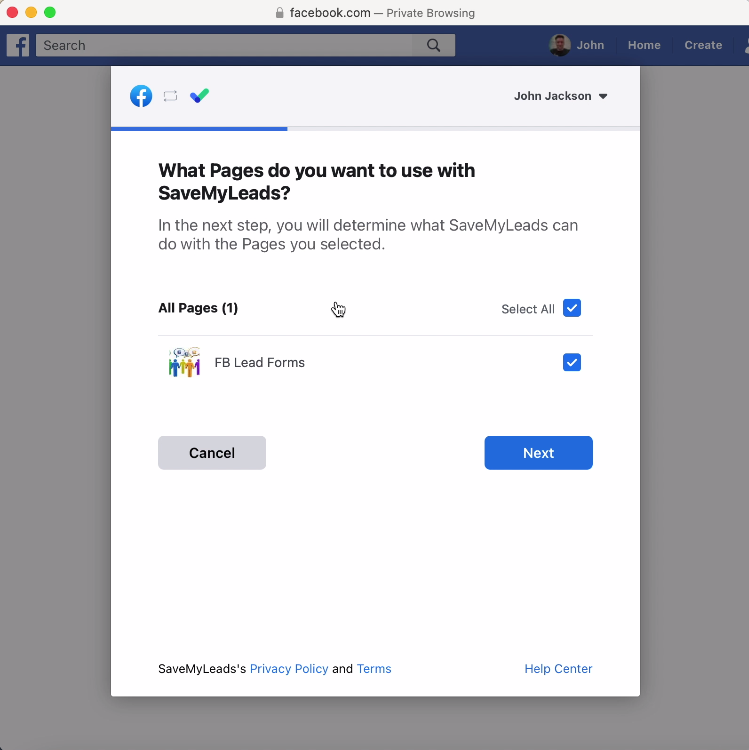
At this point, you can see all the promotional pages that you have access to. It is better to tick all of them at once in order to be able to work with them in the future.
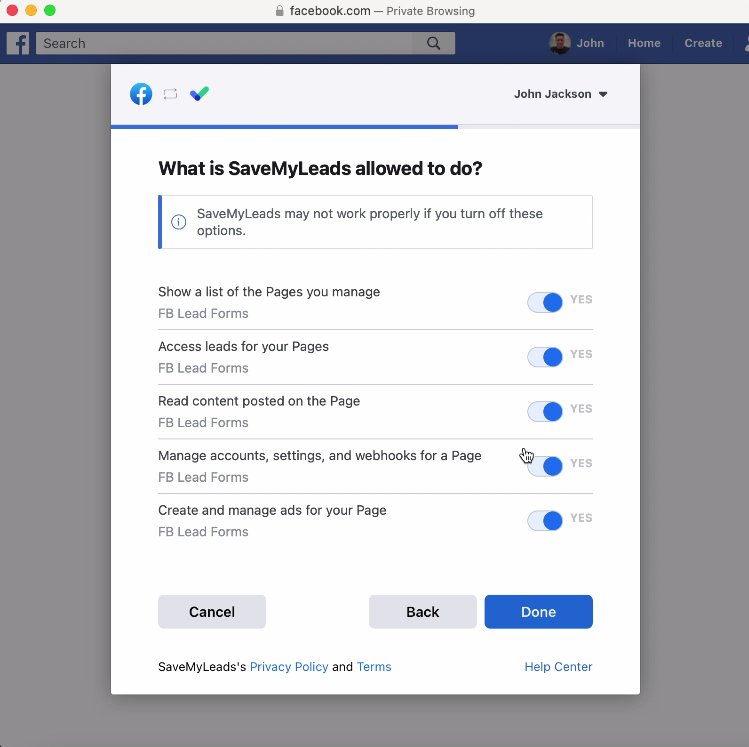
Select an account when it appears in the list. Select an advertising page for transferring leads, as well as forms for uploading data. If you have several forms, you need to create several connections for each of them:
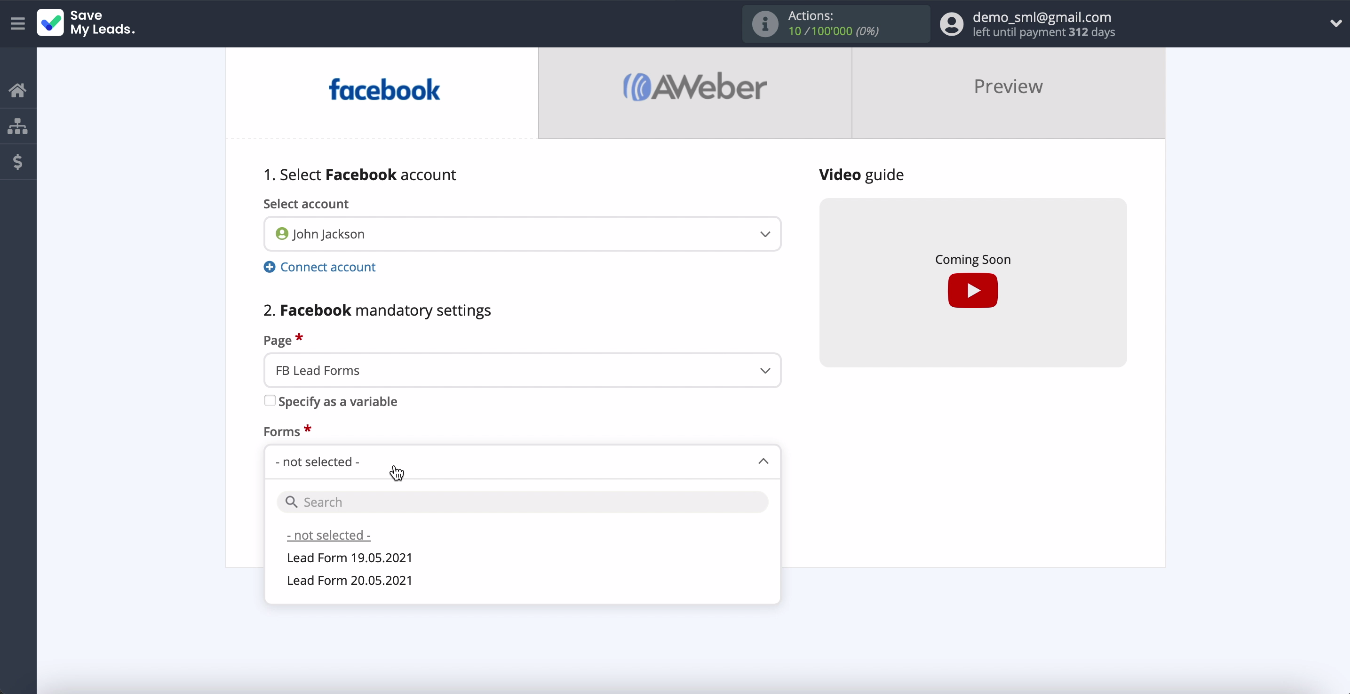
Connect Aweber
Now you need to connect your Aweber account to the SaveMyLeads service. Specify the login and password for the Aweber personal account, when the connected account is displayed in the list, select it. Specify the List to which new subscribers will be added
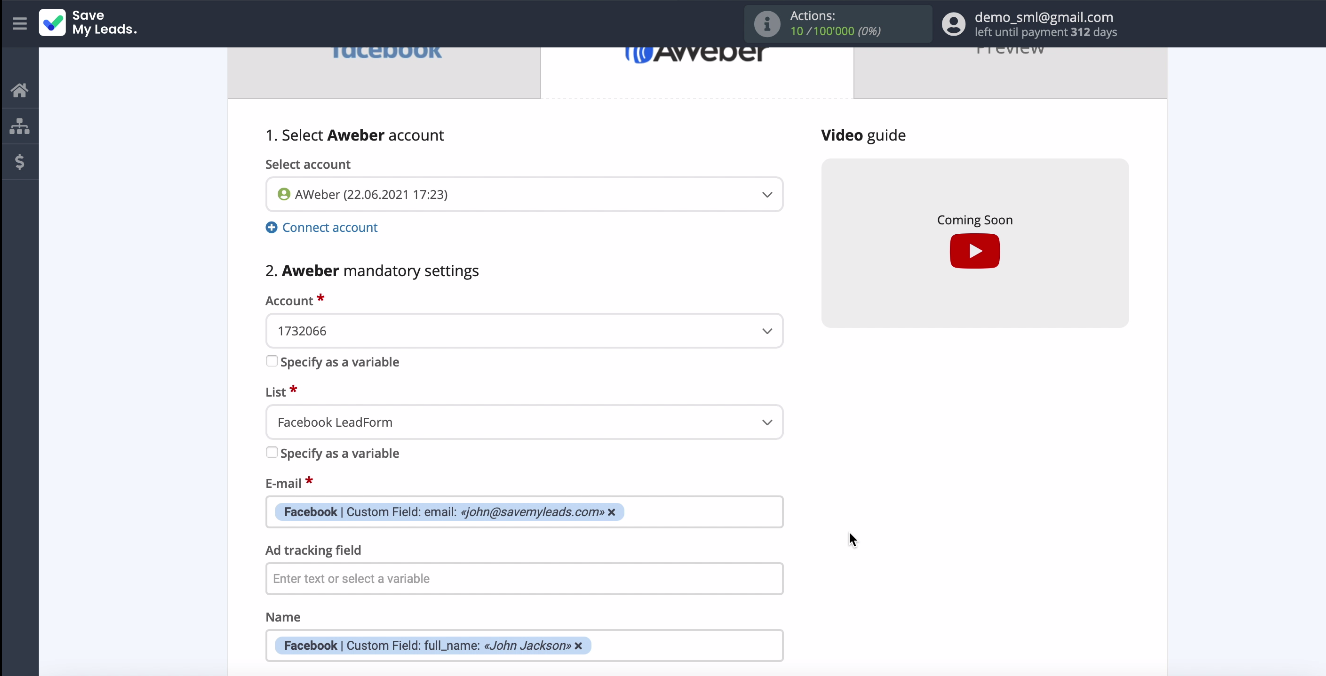
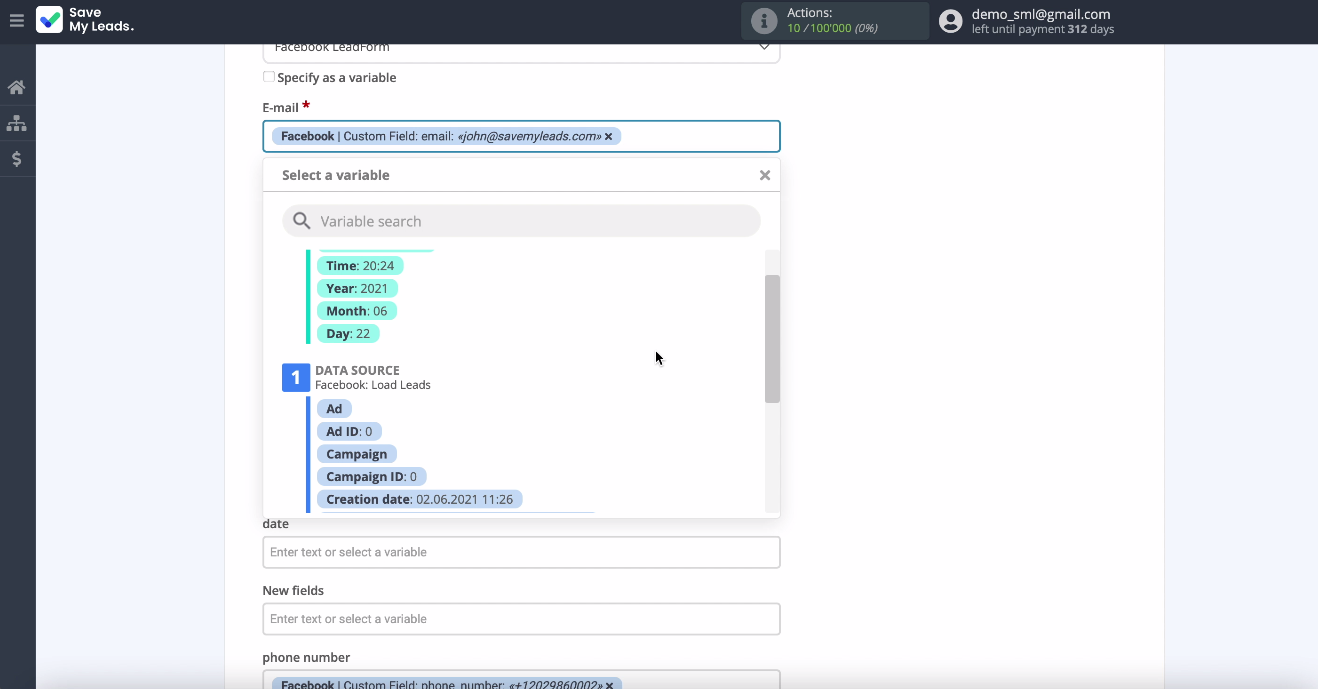
Now you can see the fields for creating a new subscriber, you need to assign variables from Facebook to them. To do this, click in an empty field and select a variable from the drop-down list. If you are satisfied with the pre-setting of the fields, you can leave it unchanged.
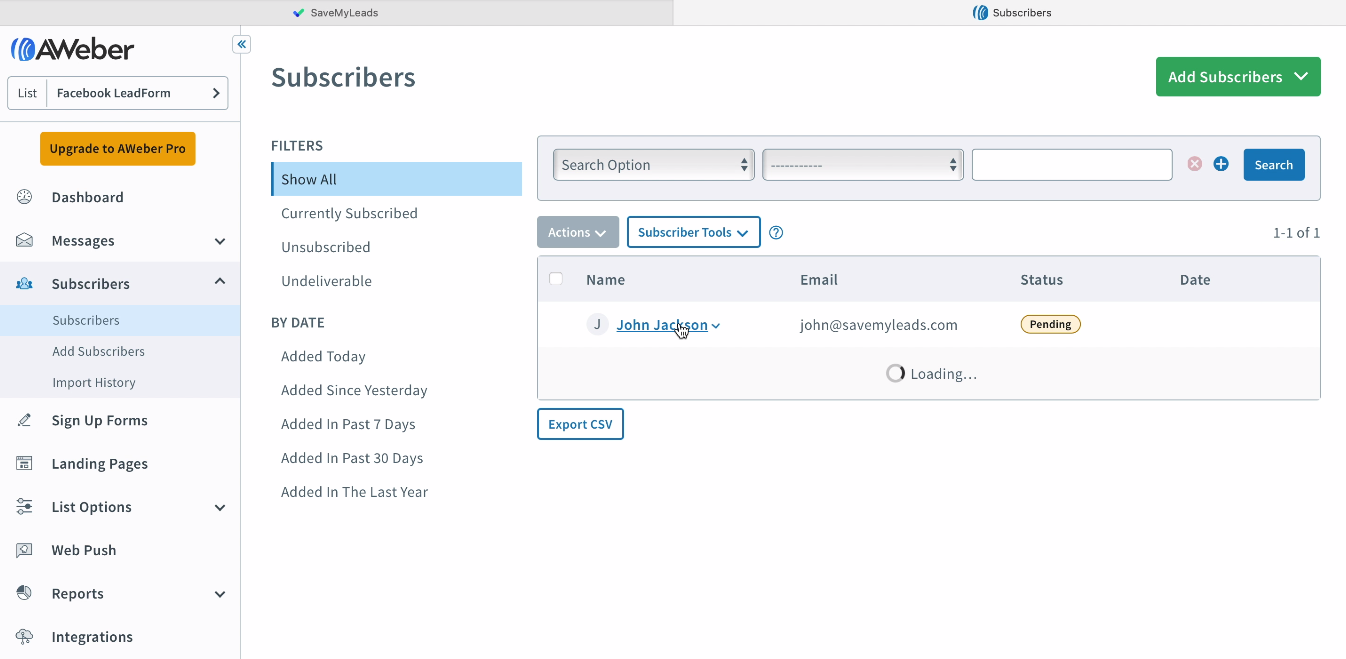
Now you can see an example of filling in the fields for creating a new subscriber in the Aweber service. To check if the settings are correct, click Send Test Data to Aweber. Go to Aweber service and check the result:
Automate data update
In order for new Facebook leads to be instantly transferred to the Aweber service in the form of new subscribers, you must enable automatic data updating:
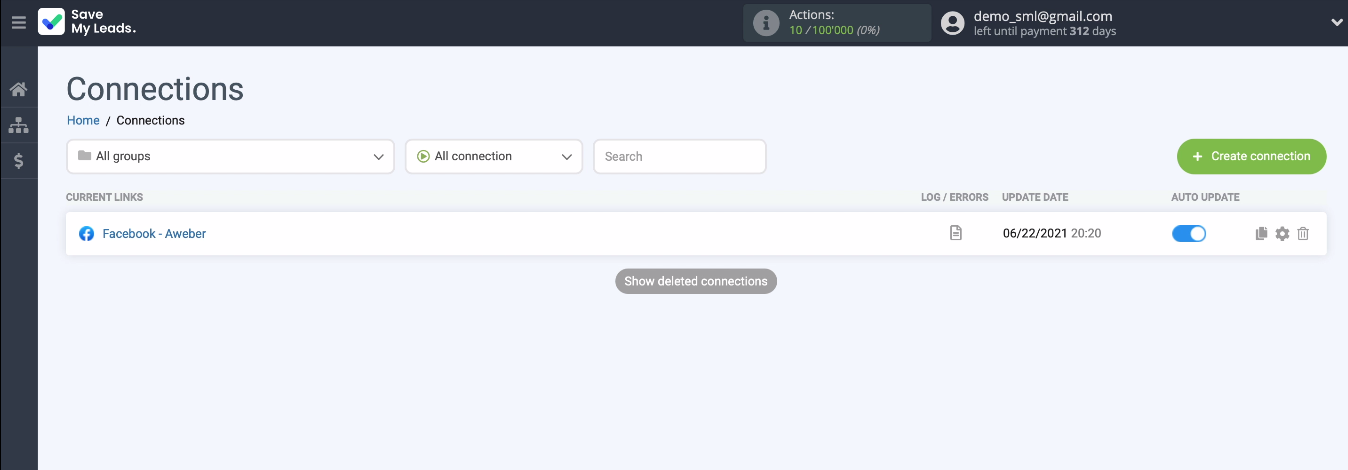
If necessary, you can change the name of the connection in the settings.
Conclusion
It will take you or your employee no more than 5 minutes to set up the Facebook and Aweber integration. Thanks to ready-made integrations in the SaveMyLeads online connector, leads will be sent to the service for distribution automatically every time a new case is added.
- Automate the work with leads from the Facebook advertising account
- Empower with integrations and instant transfer of leads
- Don't spend money on developers or integrators
- Save time by automating routine tasks
SaveMyLeads is a simple and easy-to-use service, and thanks to our step-by-step instructions, you will definitely not have any difficulties setting up the integration. No need to figure out how to send API requests, learn how to work with API documentation and protocols. Just add your accounts and the online connector will do the rest for you.
