Tired of transferring contacts from a social network to CRM manually? Automate your data transfer with SaveMyLeads. It's fast and easy.
Content:
1. How to set up Facebook and AgileCRM integration
2. Connect Facebook Leads Ads
3. Connect AgileCRM
4. Testing data transfer
5. Finishing setup
Setting up automatic uploading of contacts through SaveMyLeads, you will get several significant advantages.
First of all, you will reduce the amount of manual work. You no longer have to monitor the appearance of new contacts in the lead form, upload them and copy them to CRM. SaveMyLeads will perform these routine steps automatically.
In addition, you will be able to respond to customers faster. Our service monitors the Facebook lead form every second. As soon as a new contact appears in it, SaveMyLeads immediately copies it to CRM. This enables managers to process new leads instantly. Plus, the service is always active and ready to transfer contacts 24 hours a day, seven days a week.
Finally, you minimize the number of errors in the data. When manually transferring contacts, an employee may accidentally transfer customer data incorrectly or confuse something. Automation eliminates errors associated with the human factor: SaveMyLeads transfers data to CRM in the form in which the client himself indicated them in the lead form.
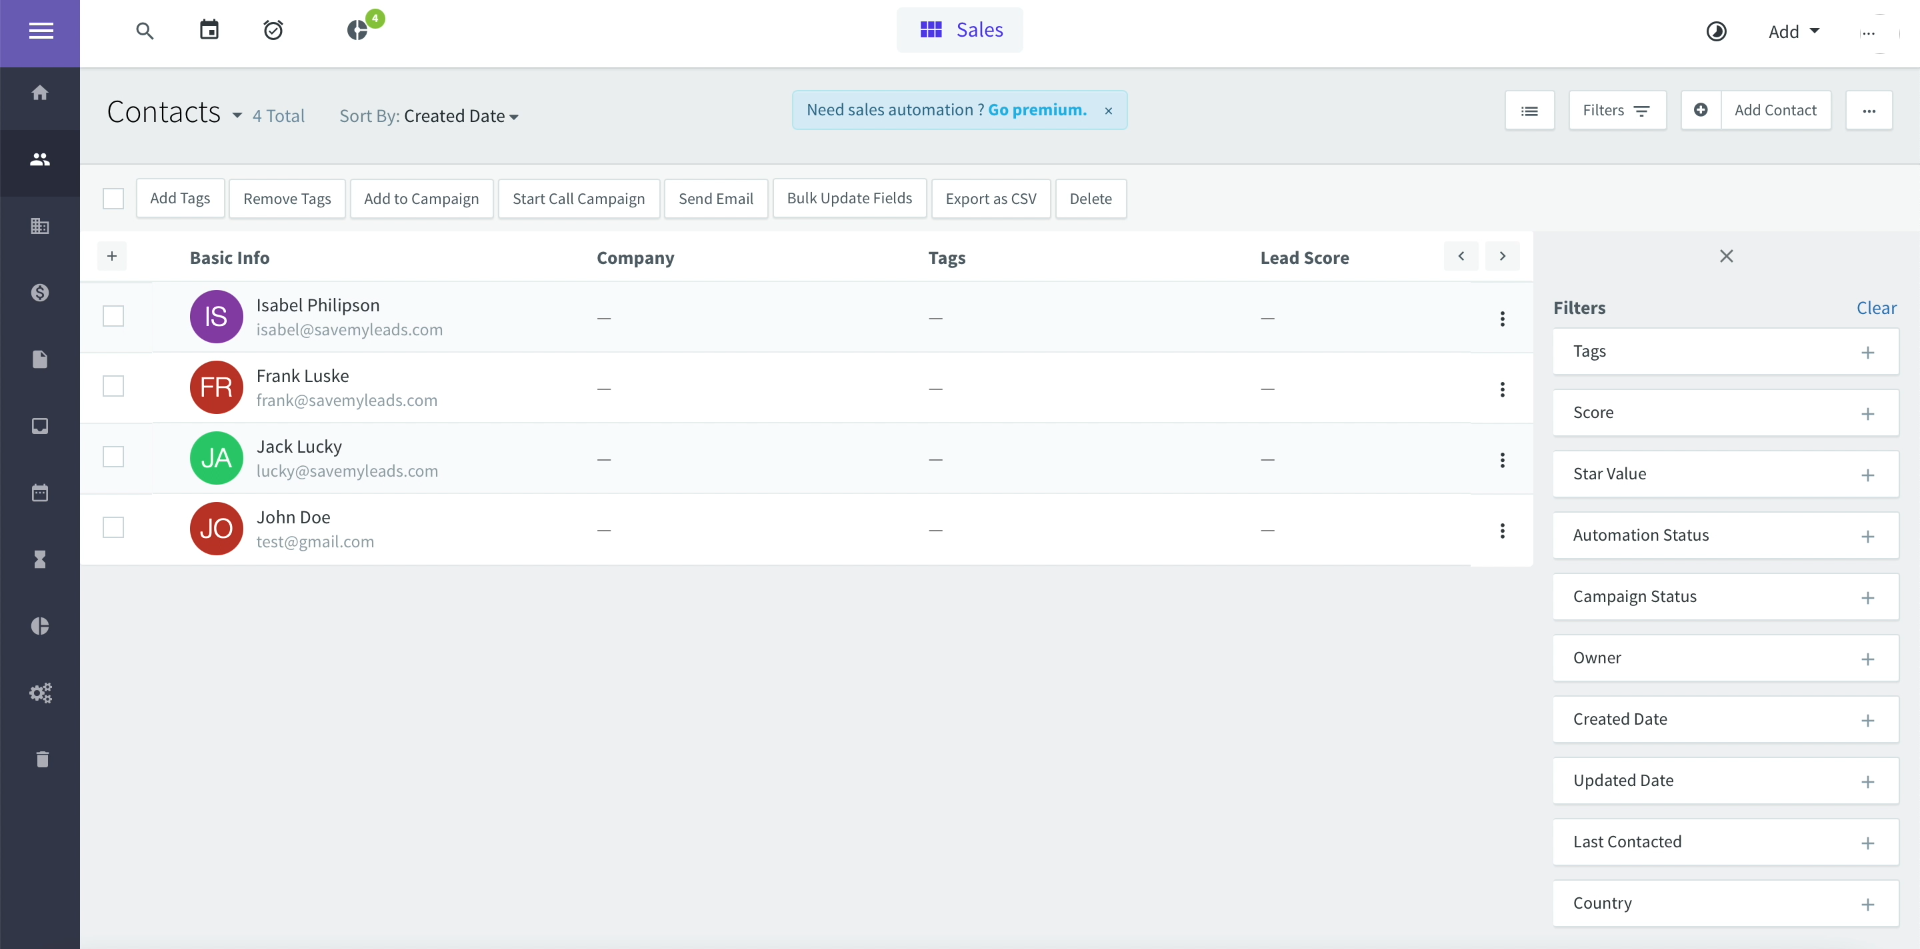
This is how leads uploaded from Facebook to AgileCRM via SaveMyLeads look like:
How to set up Facebook and AgileCRM integration
To automate the transfer of contacts from Facebook to AgileCRM via SaveMyLeads, you do not need to write any code. Our service can be used by anyone without special knowledge. It is enough to register on the site, select the Facebook + AgileCRM connection and follow the simple prompts on the screen.
This step-by-step guide will help you understand how the service works. Before you begin, make sure you've already set up your Facebook ad campaign and created a lead form. Also, if the form is still empty, send any one contact through it - this will be needed for the test.
Connect Facebook Leads Ads
Register on the SaveMyLeads website. Click "Create connection" to create a new connection.
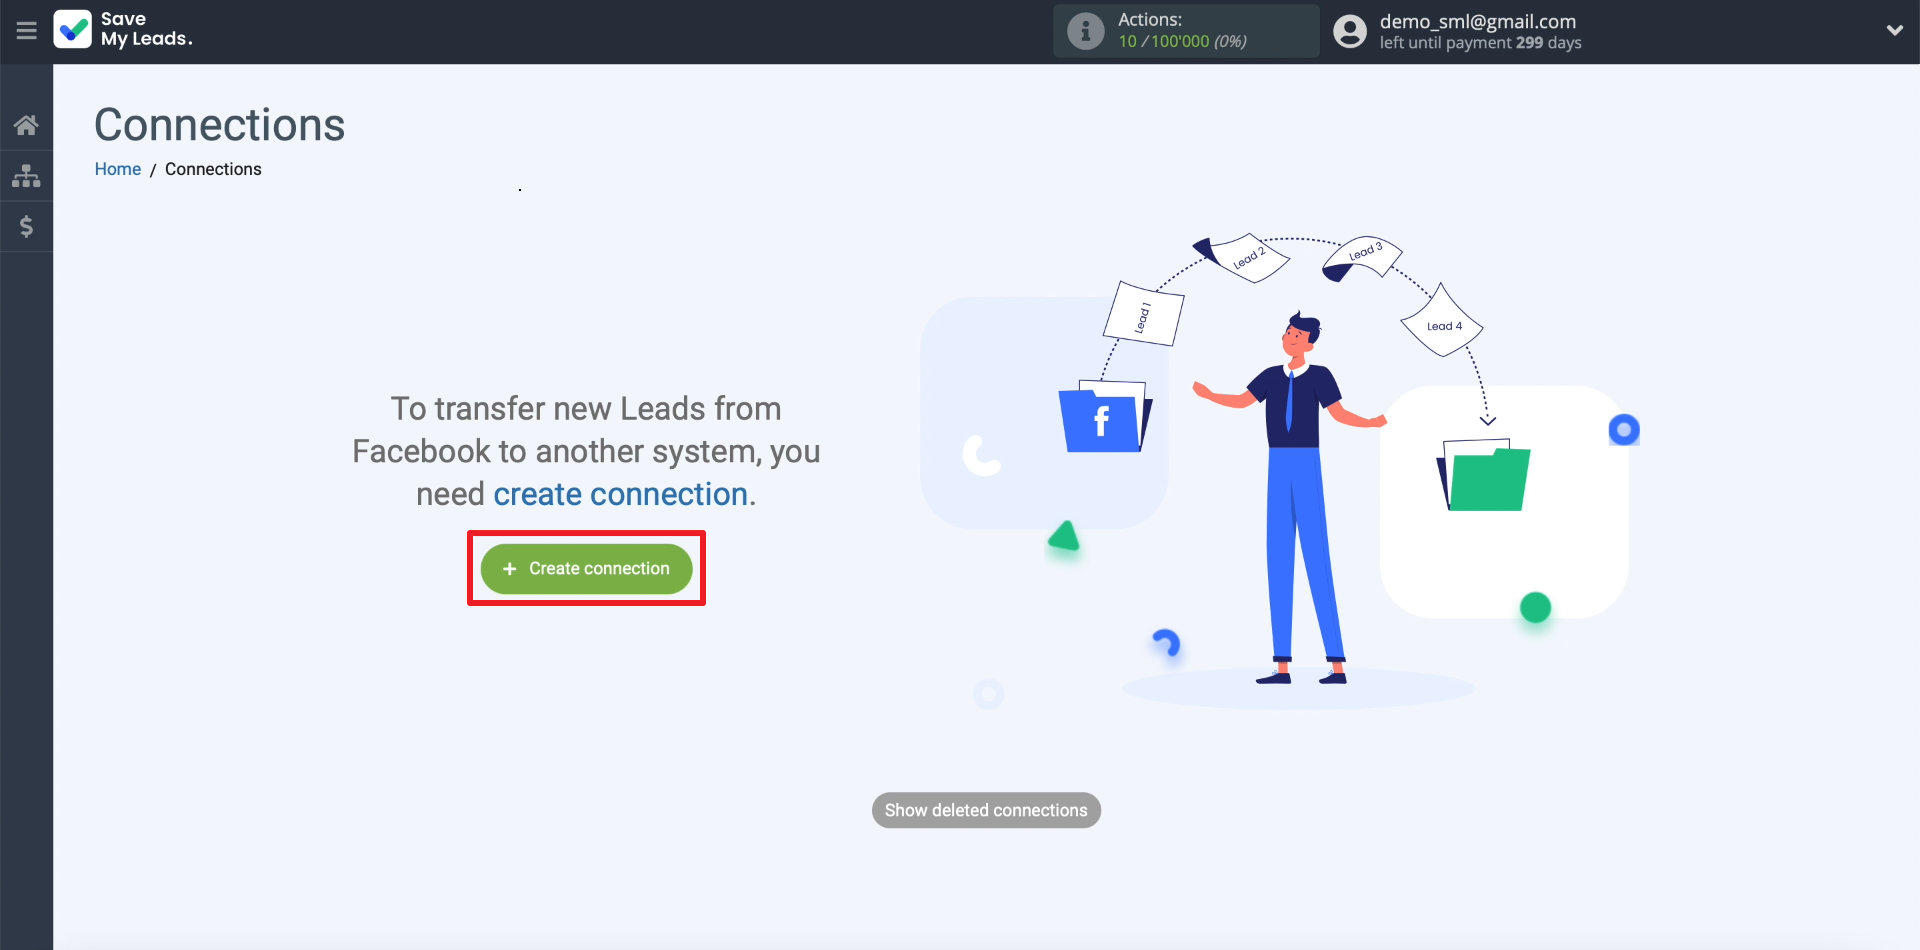
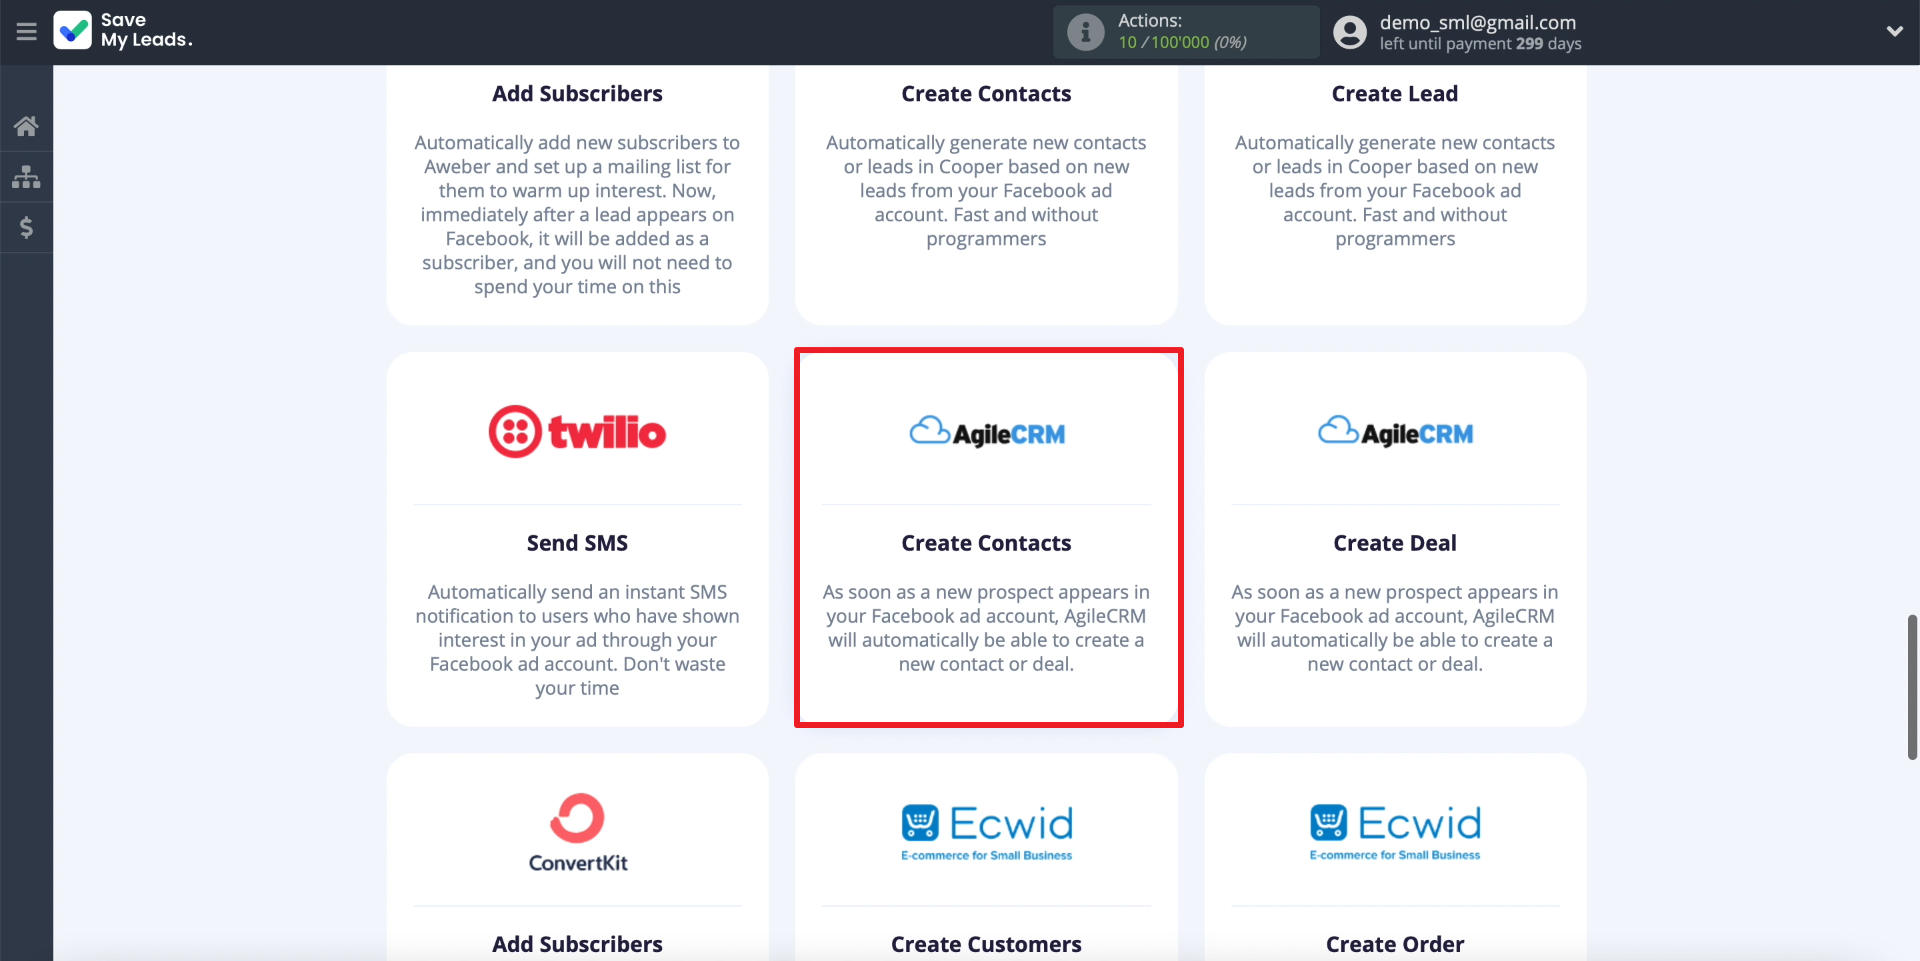
The screen will display a list of connections that can be configured using SaveMyLeads. Each of them allows you to configure the transfer of data from Facebook to a specific external service. There are two options for connecting to the AgileCRM service in the list: the first is for transferring contacts, the second is for uploading deals. We choose the first of them.
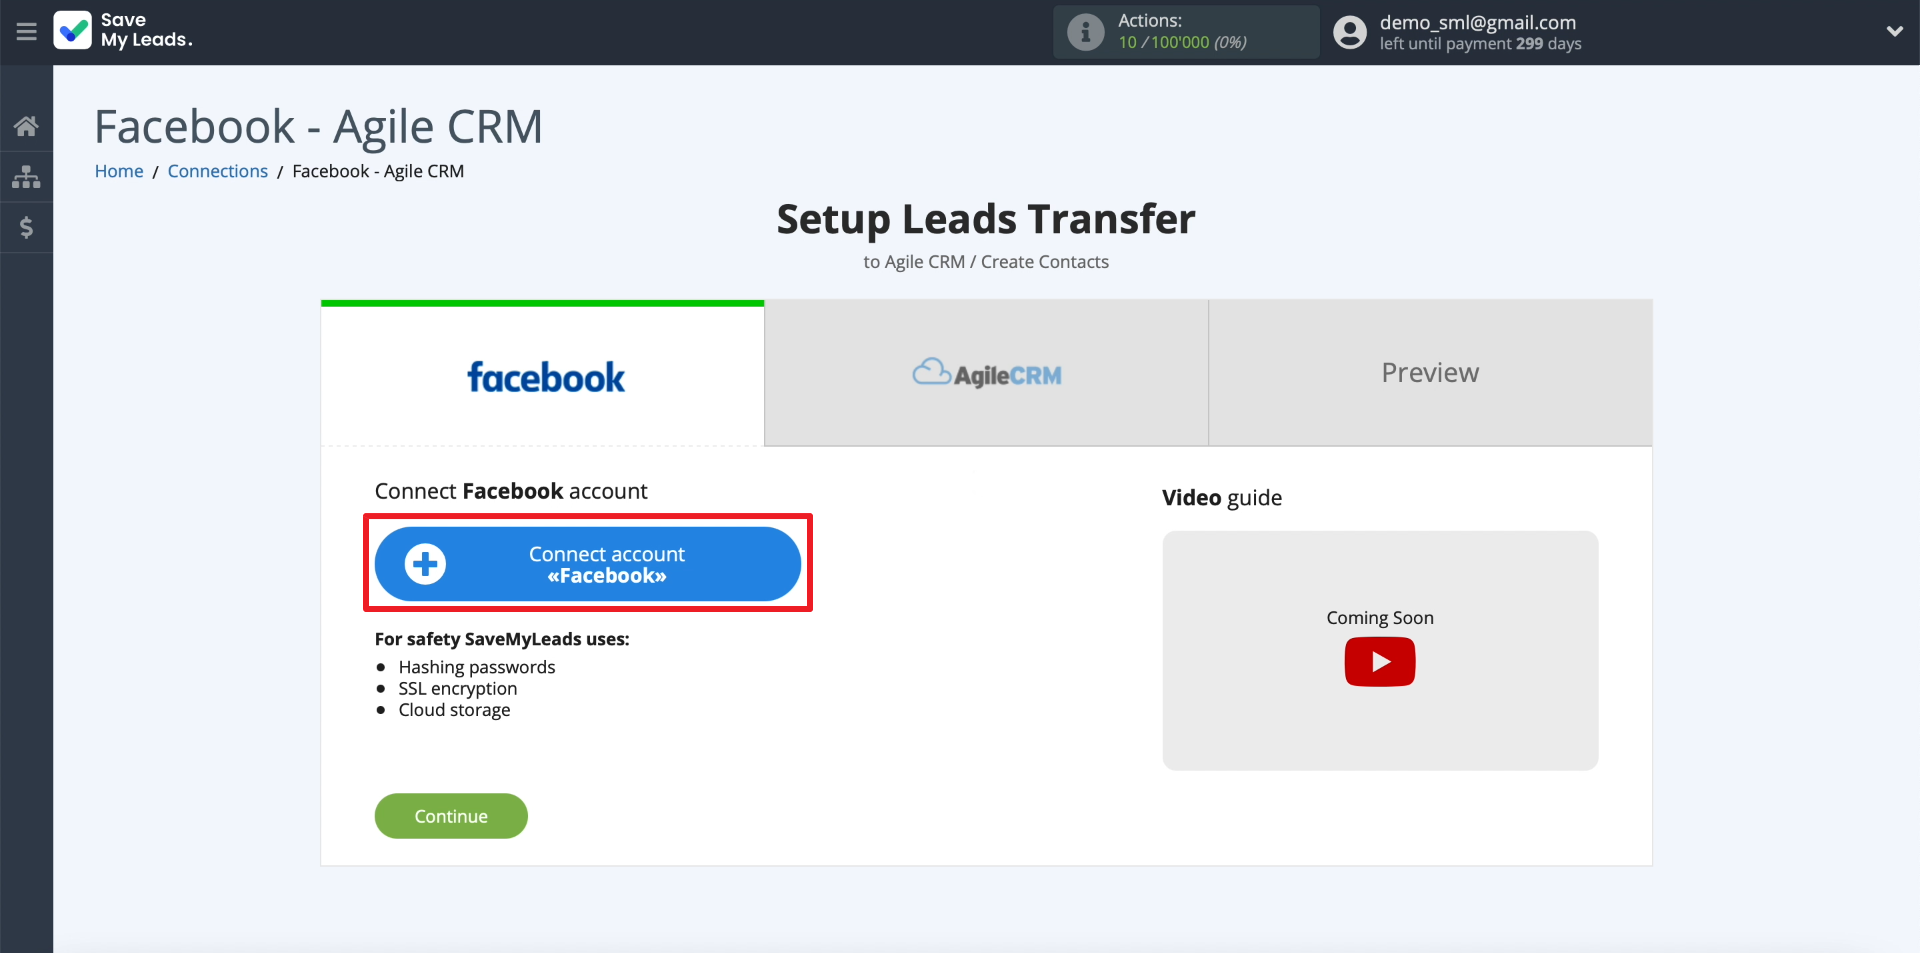
We connect the data source, that is, Facebook. To do this, click "Connect account "Facebook" and connect the account that we use to manage advertising. When prompted, enter your username and password. Give SaveMyLeads all the requested permissions so that the service can access the leads.
Now we need to show SaveMyLeads where it can upload leads from. To do this, first specify the business page to which the ad is linked. Then we choose our lead form.
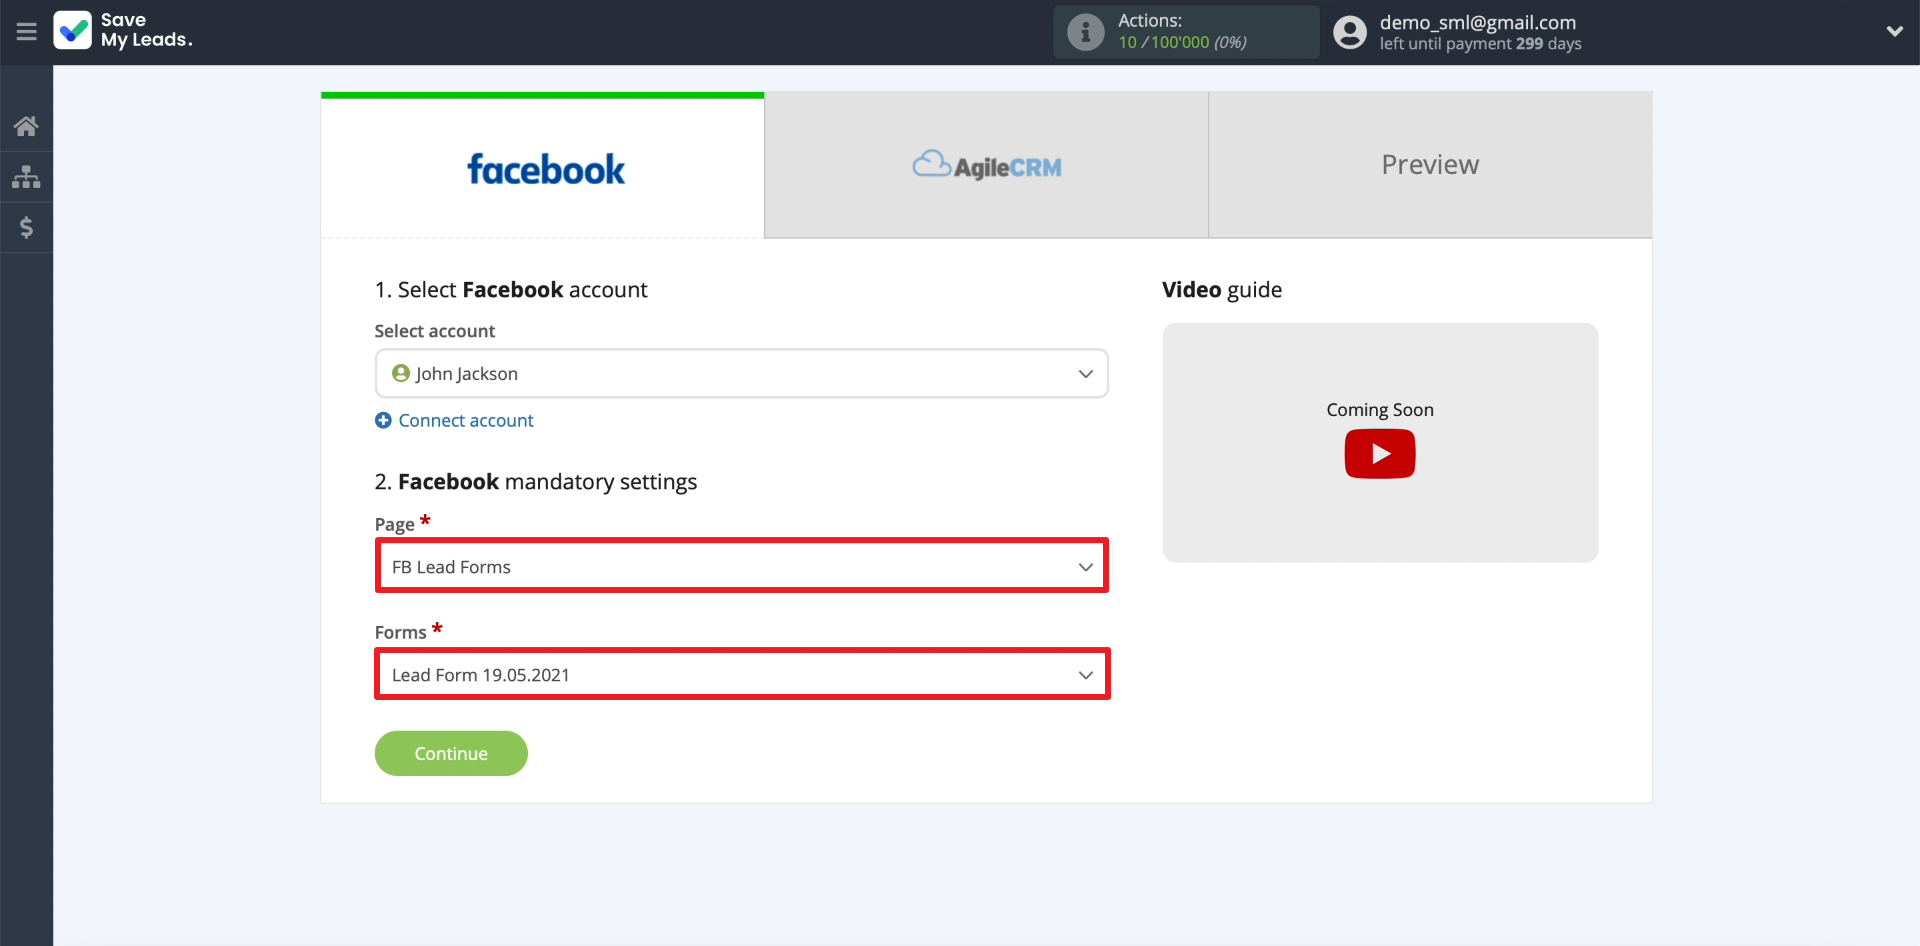
You can only specify one form per connection. If you want to set up uploading contacts from several forms, create a separate connection for each of them.
Connect AgileCRM
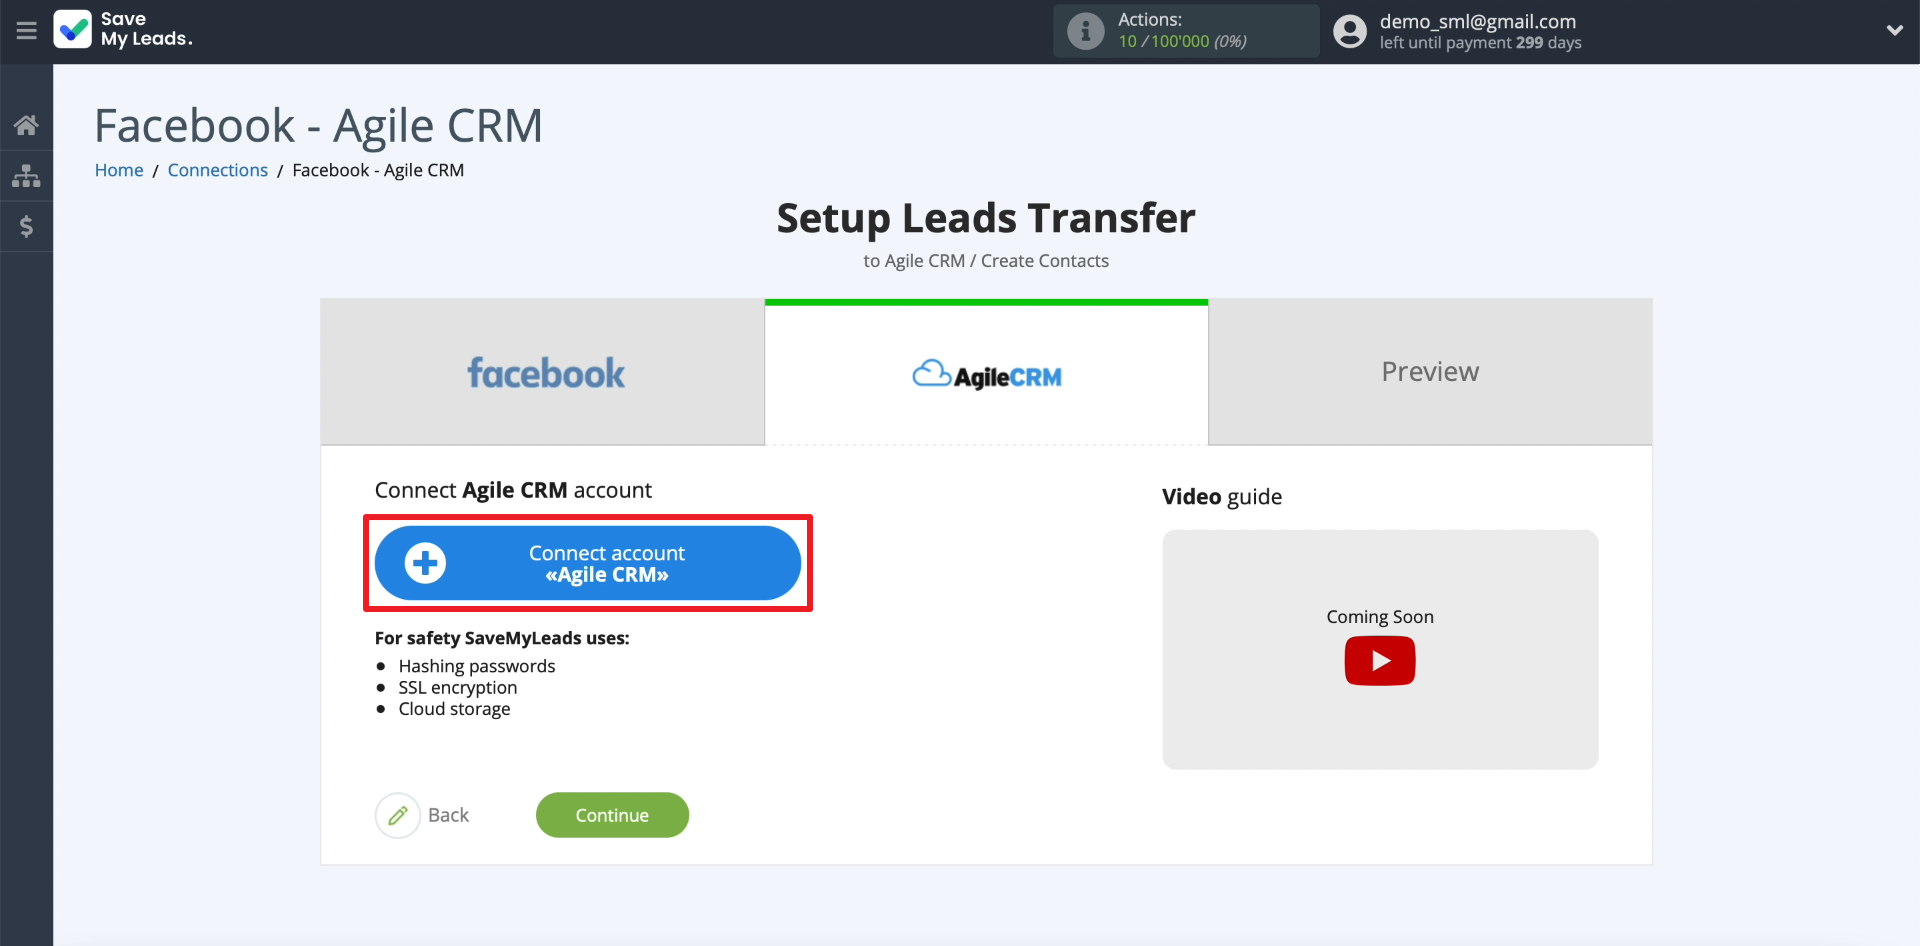
Now we connect the data receiver service: click "Connect account "AgileCRM".
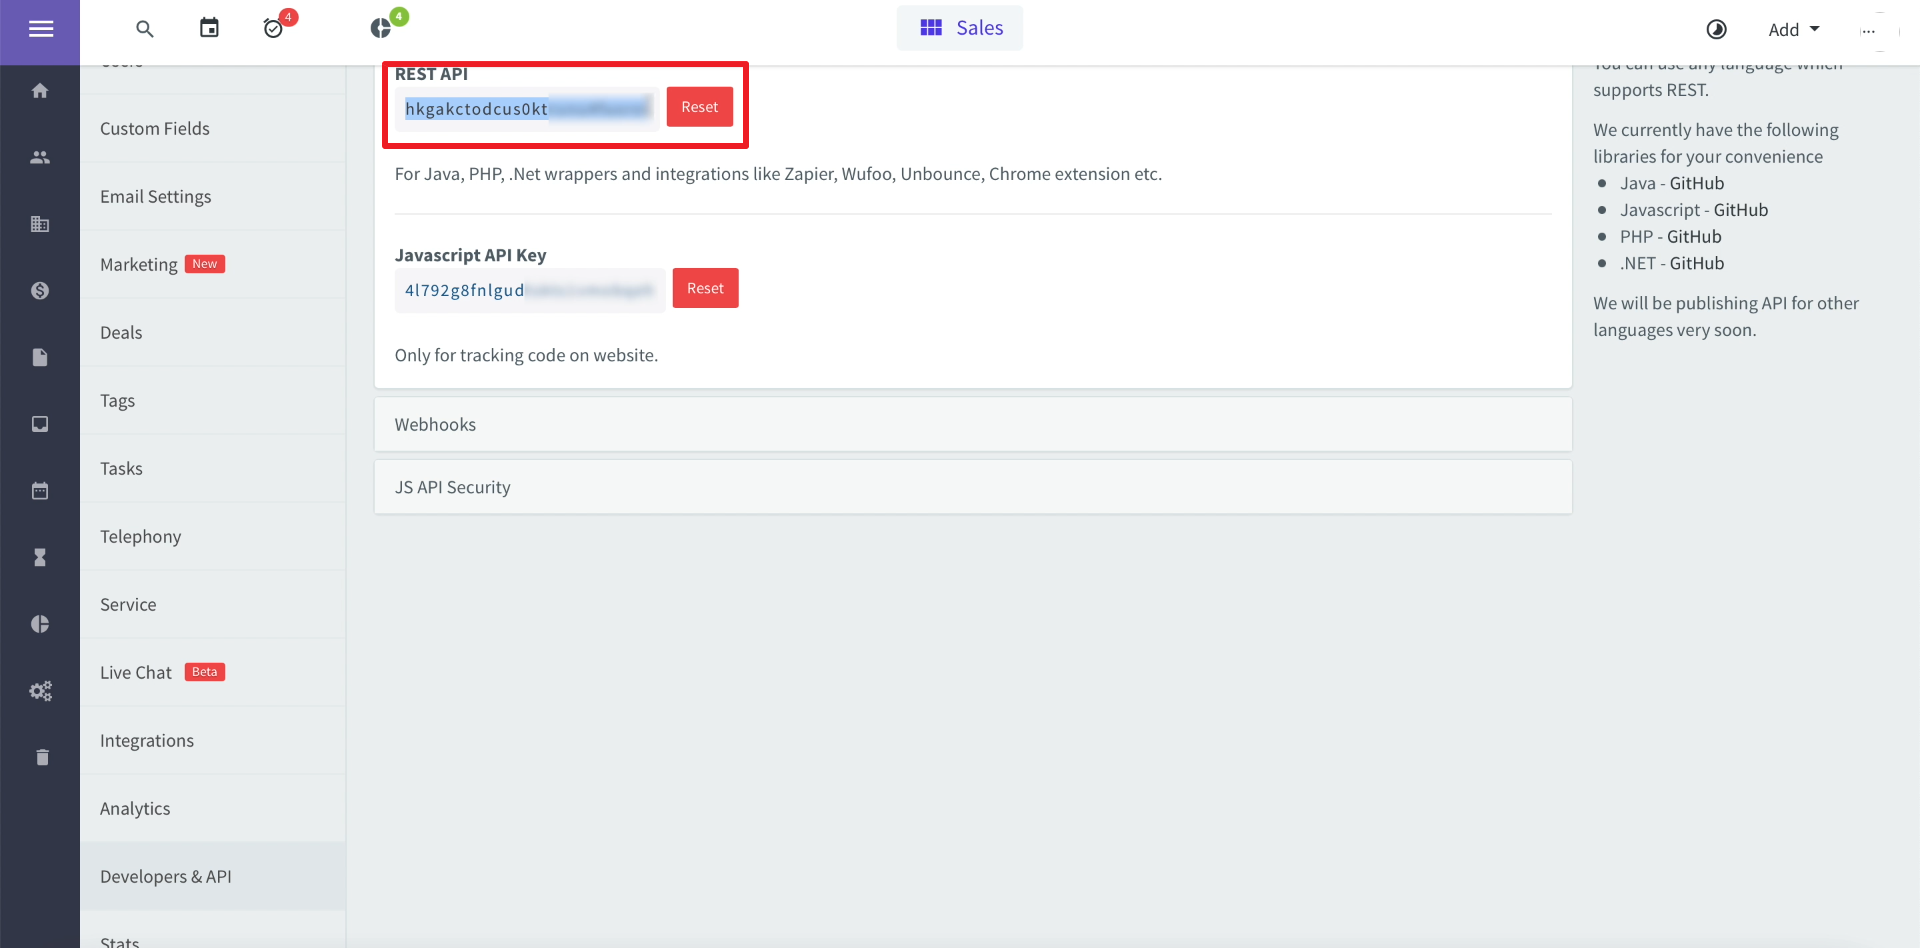
In the window that appears, enter the account name, as well as the login, domain and API key of your account. A domain is a combination of characters up to the first dot in the address of the AgileCRM user's personal account.
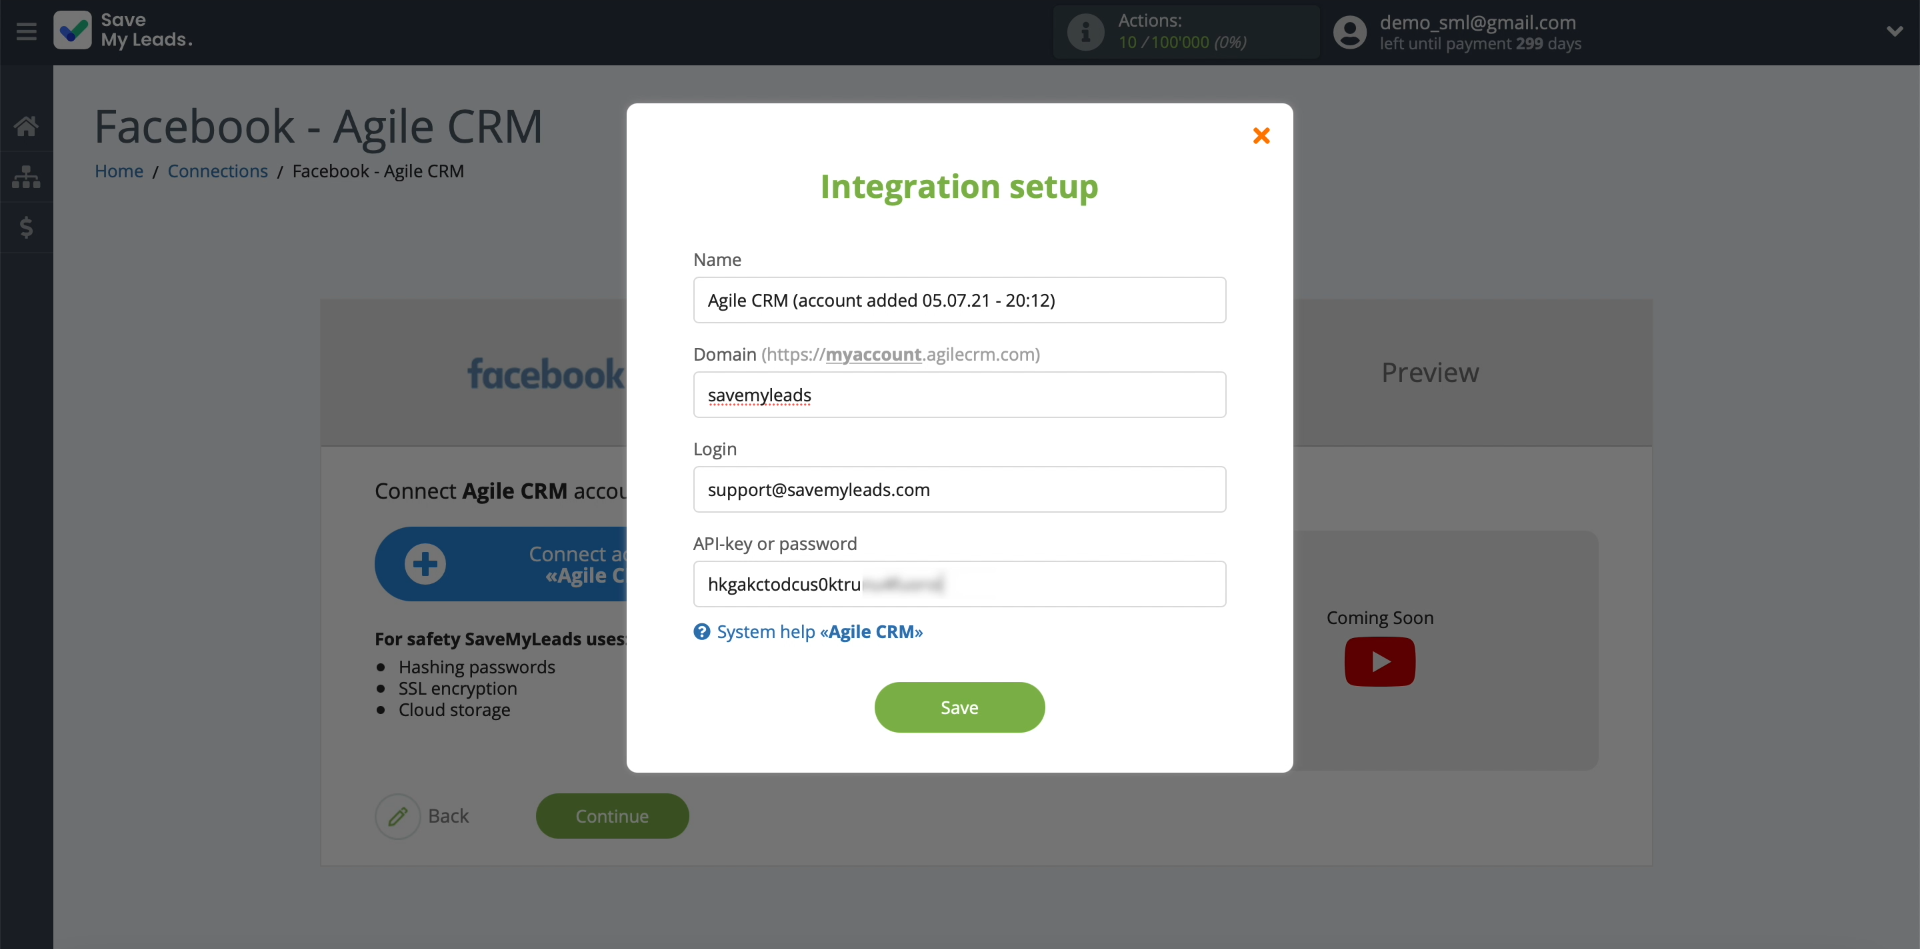
The API key can be found in the personal account settings in the "Developers & API" section on the AgileCRM website.
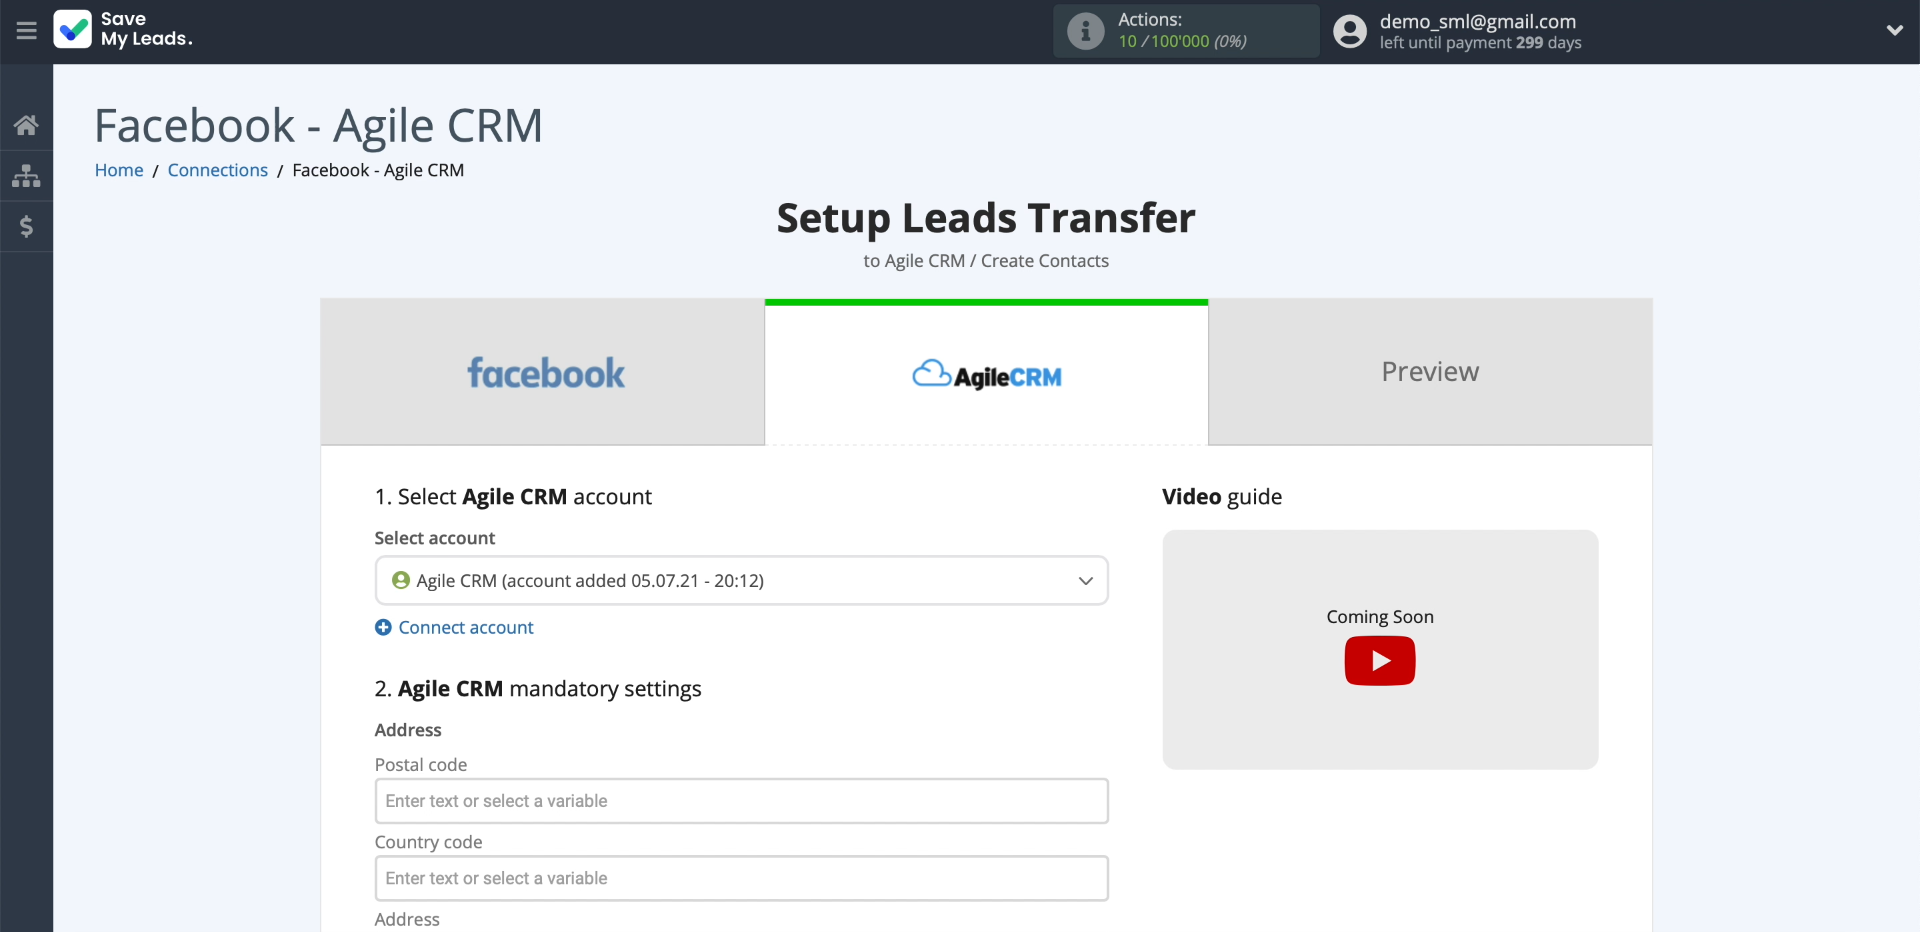
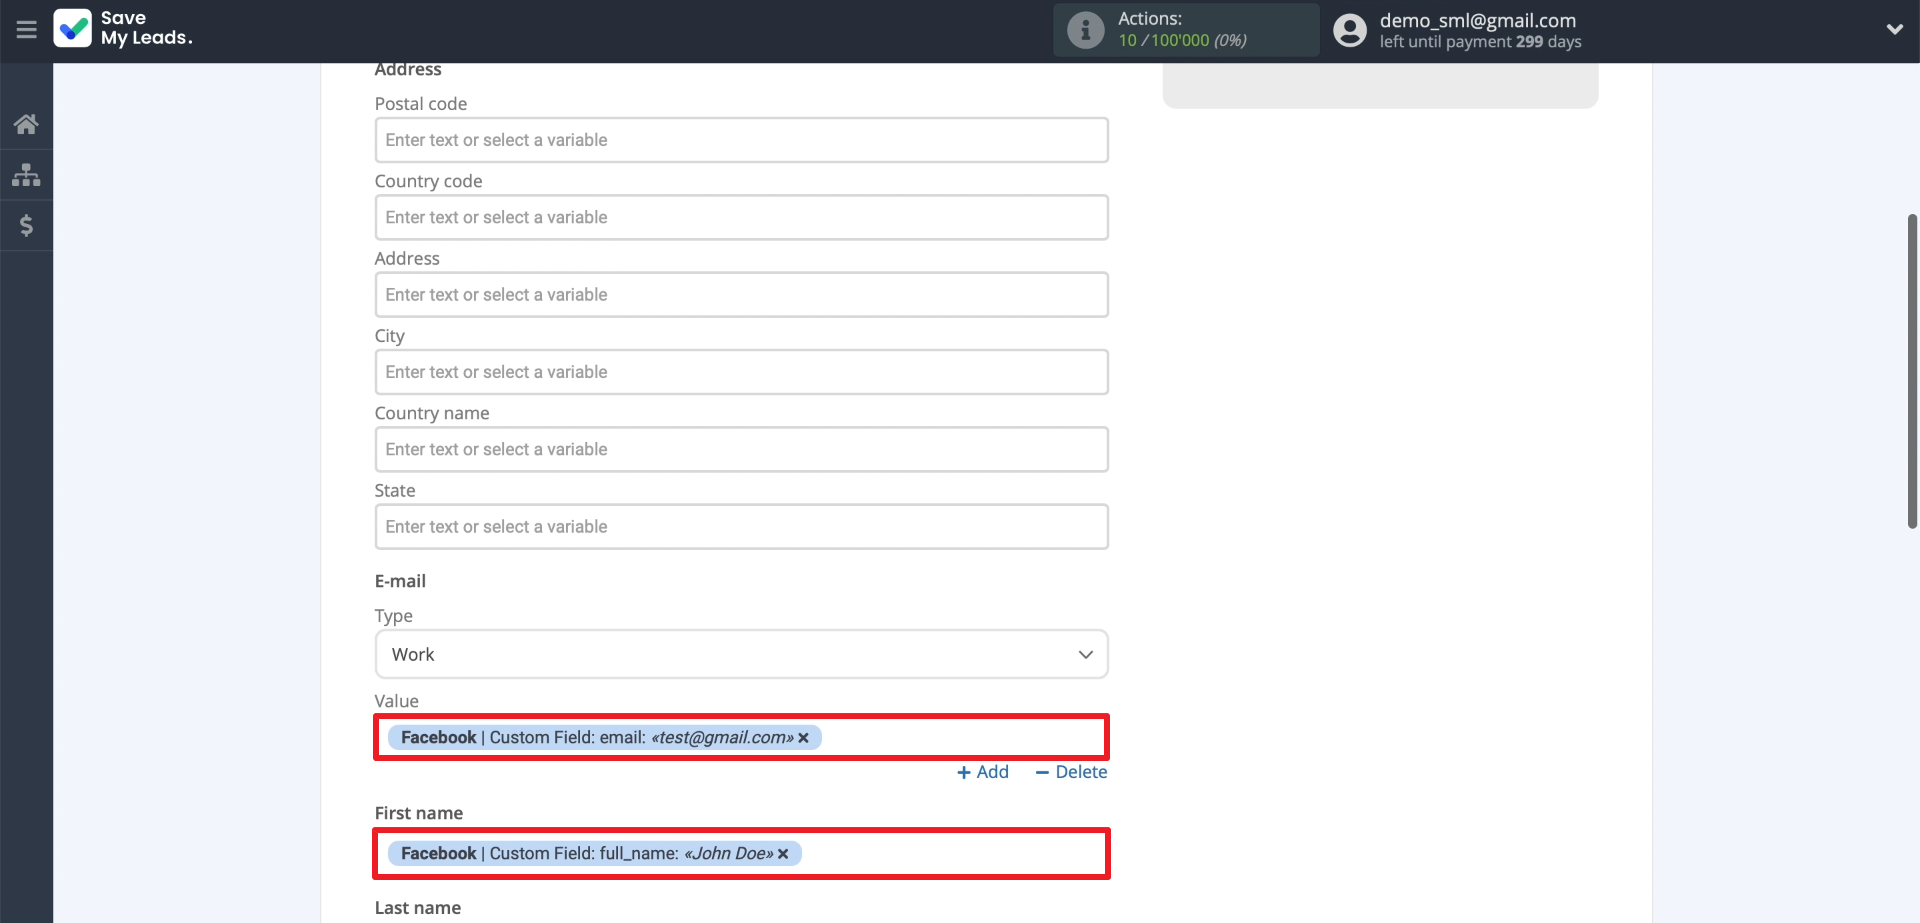
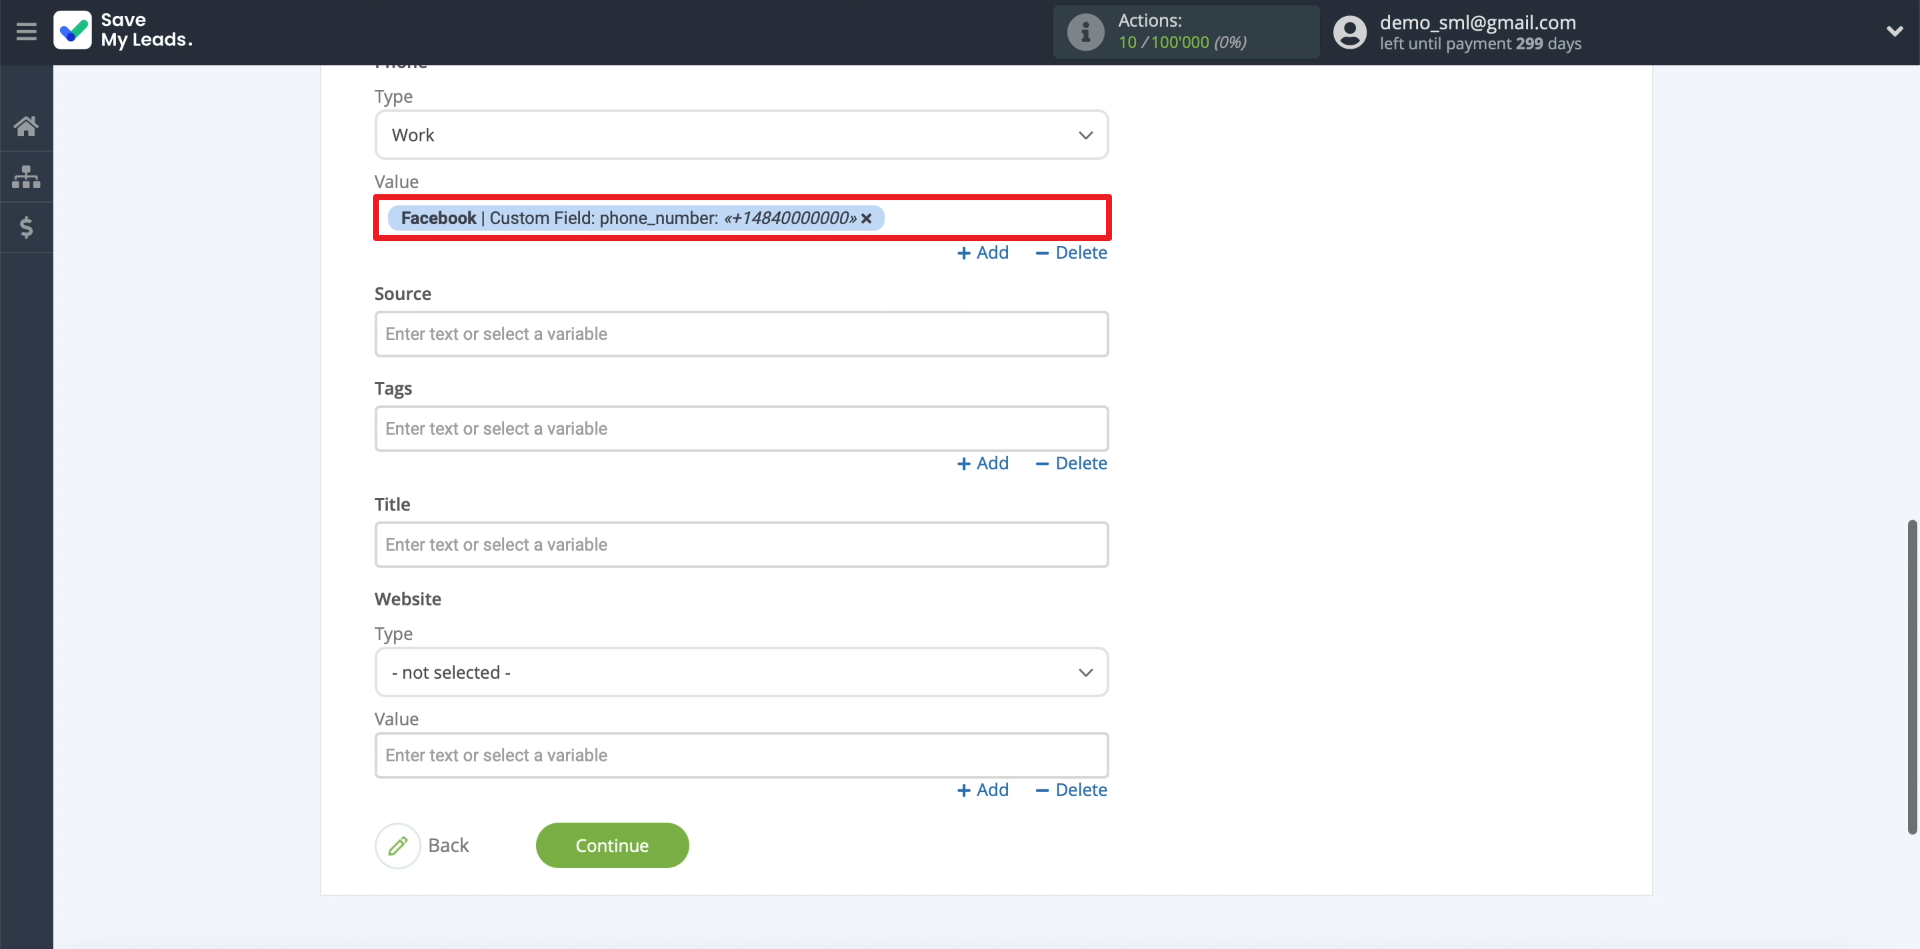
Now you need to specify exactly what data SaveMyLeads will transfer for each lead from Facebook to AgileCRM. To do this, click on the fields we need and select what information will be sent through them from the lead form to the client's CRM card.
- Automate the work with leads from the Facebook advertising account
- Empower with integrations and instant transfer of leads
- Don't spend money on developers or integrators
- Save time by automating routine tasks
In the example on the screenshots, the fields are filled in such a way that SaveMyLeads transmits the email, name and phone number from each lead. Extra fields should be left blank.
Testing data transfer
Recall that automatic lead transfer works as follows. First, SaveMyLeads uploads a new contact from the Facebook lead form. Then sends its data to AgileCRM. It's time to test if everything works correctly.
First, we check whether the upload of data from Facebook to SaveMyLeads is configured correctly. The screen should display the contact details that we selected in the previous step. If necessary, go back a step and edit the dataset.
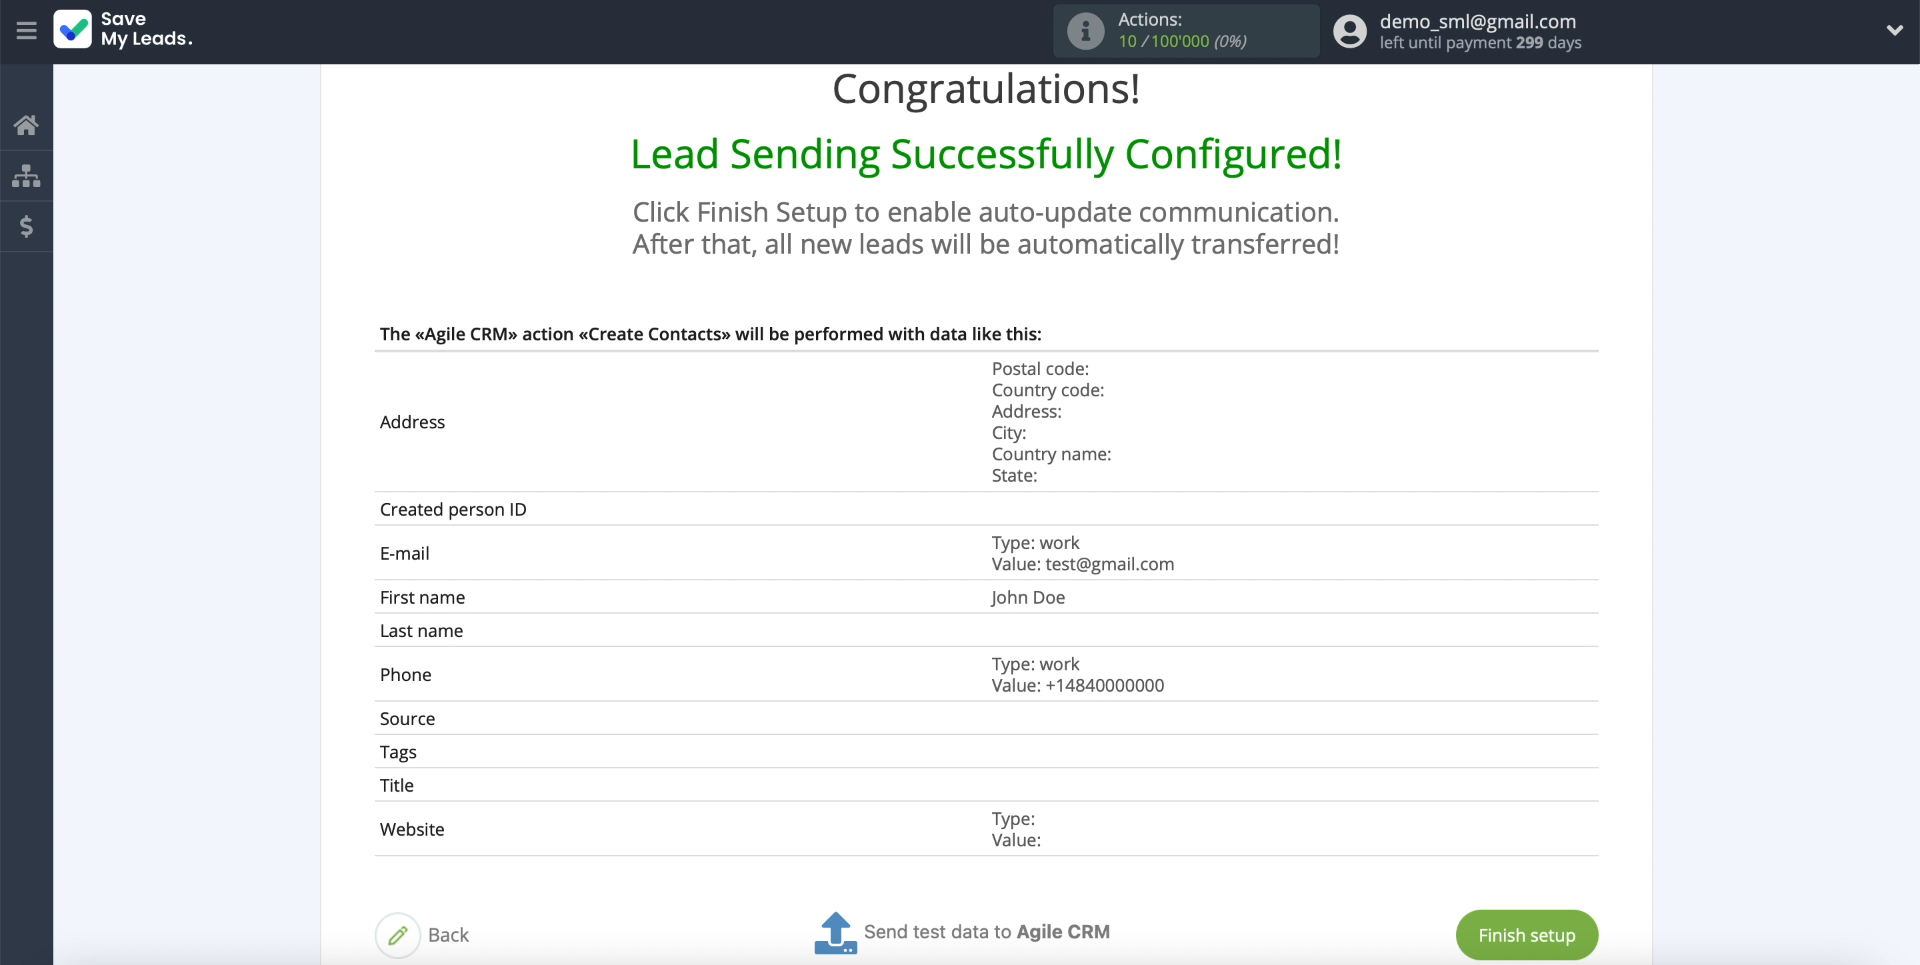
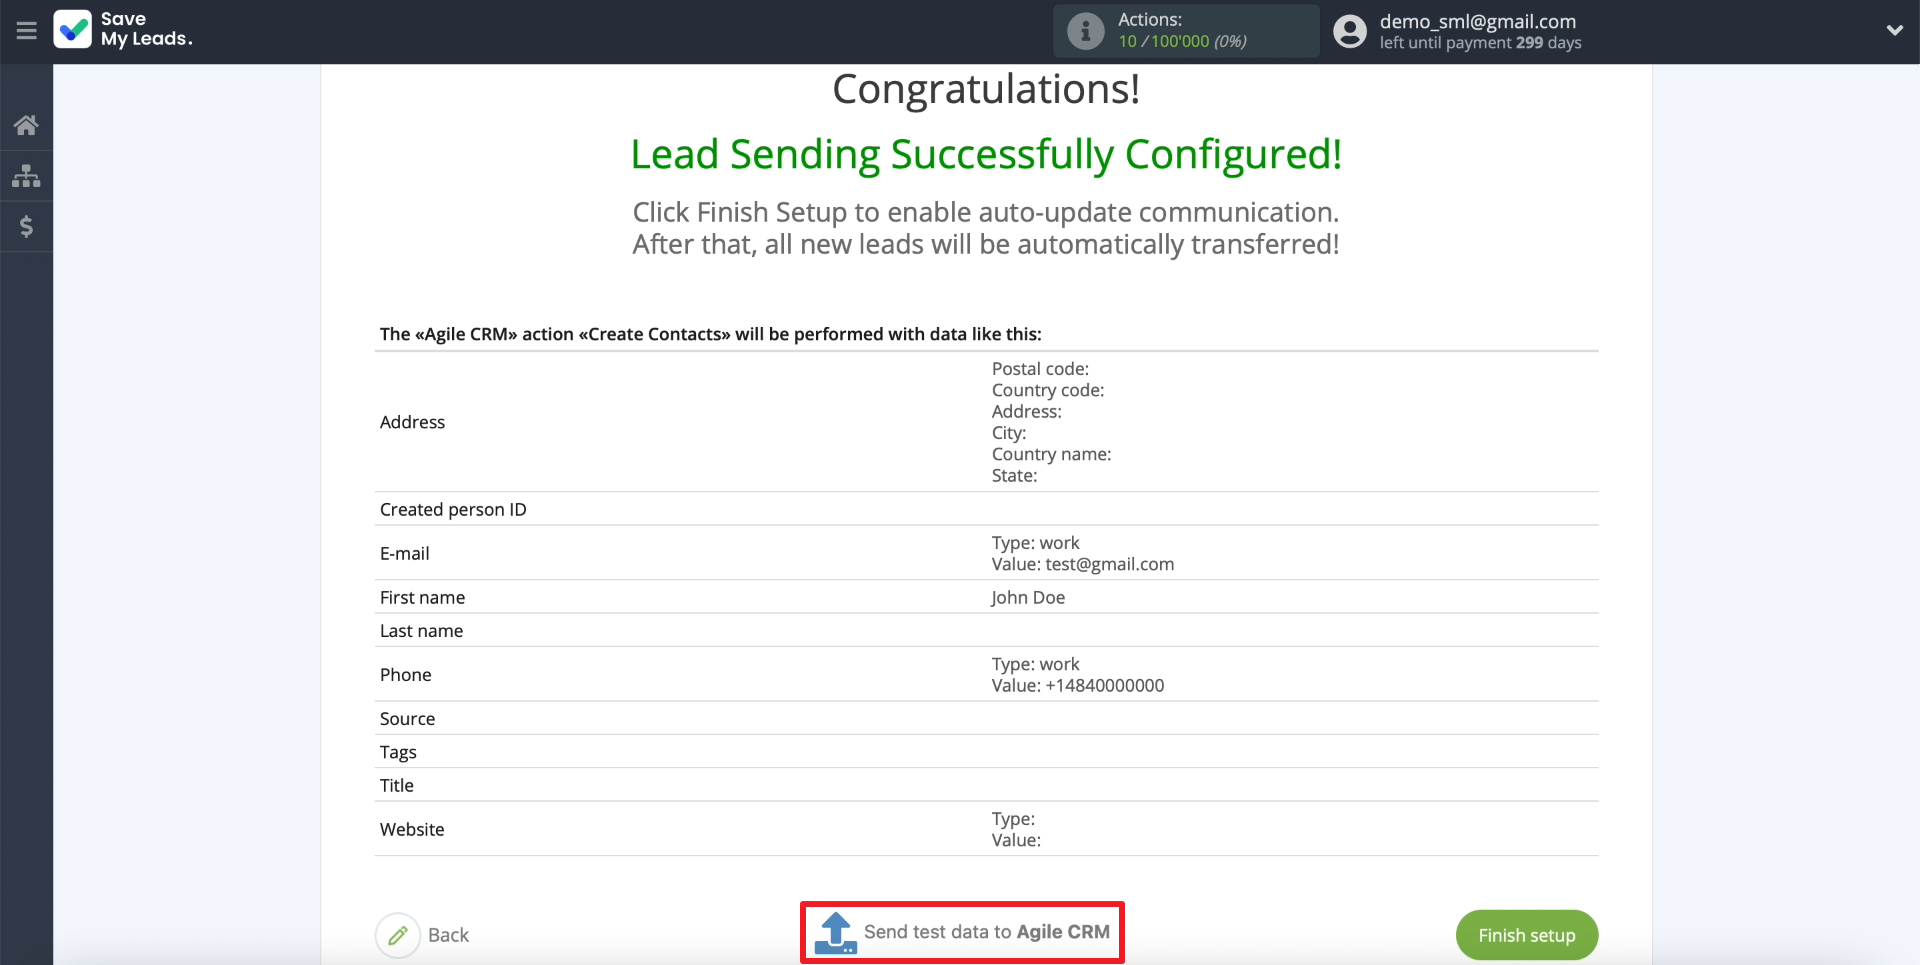
If everything is in order, we check whether sending the uploaded data to AgileCRM works correctly. To do this, click "Send test data to Agile CRM".
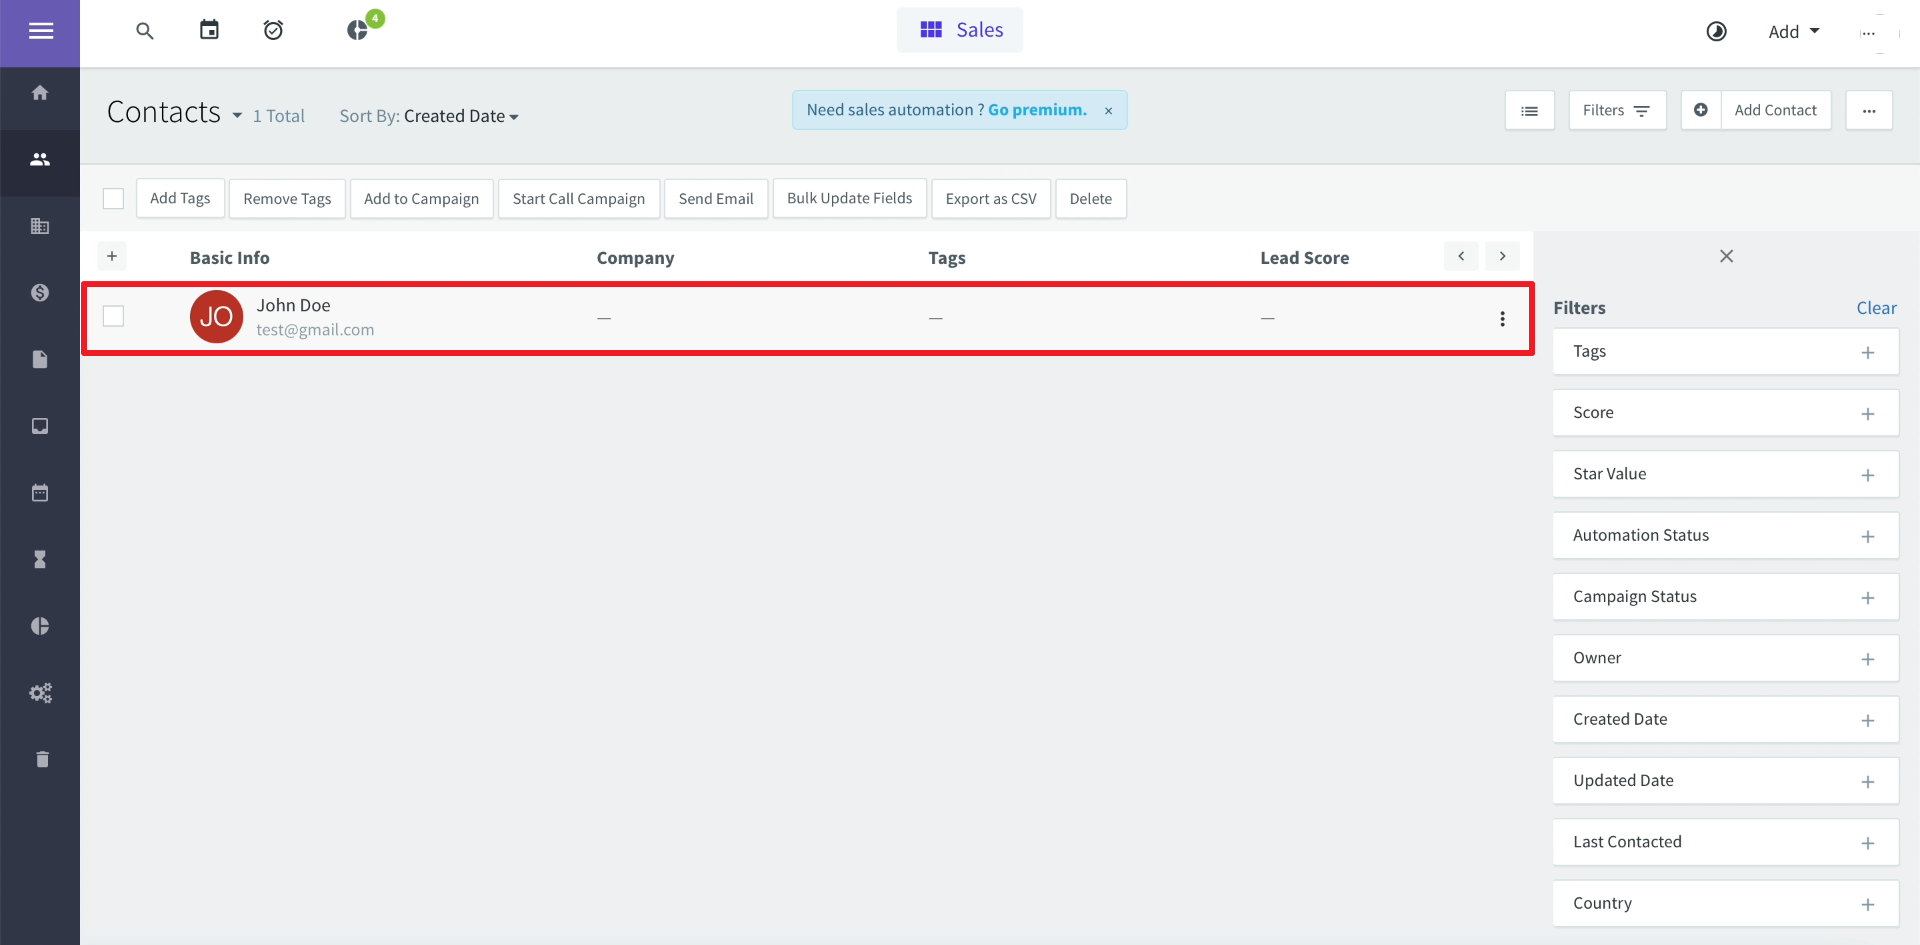
Next, open the AgileCRM personal account and see if the sent data has arrived. If there is nothing, we check the previous steps. If the data has arrived, we proceed to the final stage.
Finishing setup
Click "Finish setup" to start the data transfer.
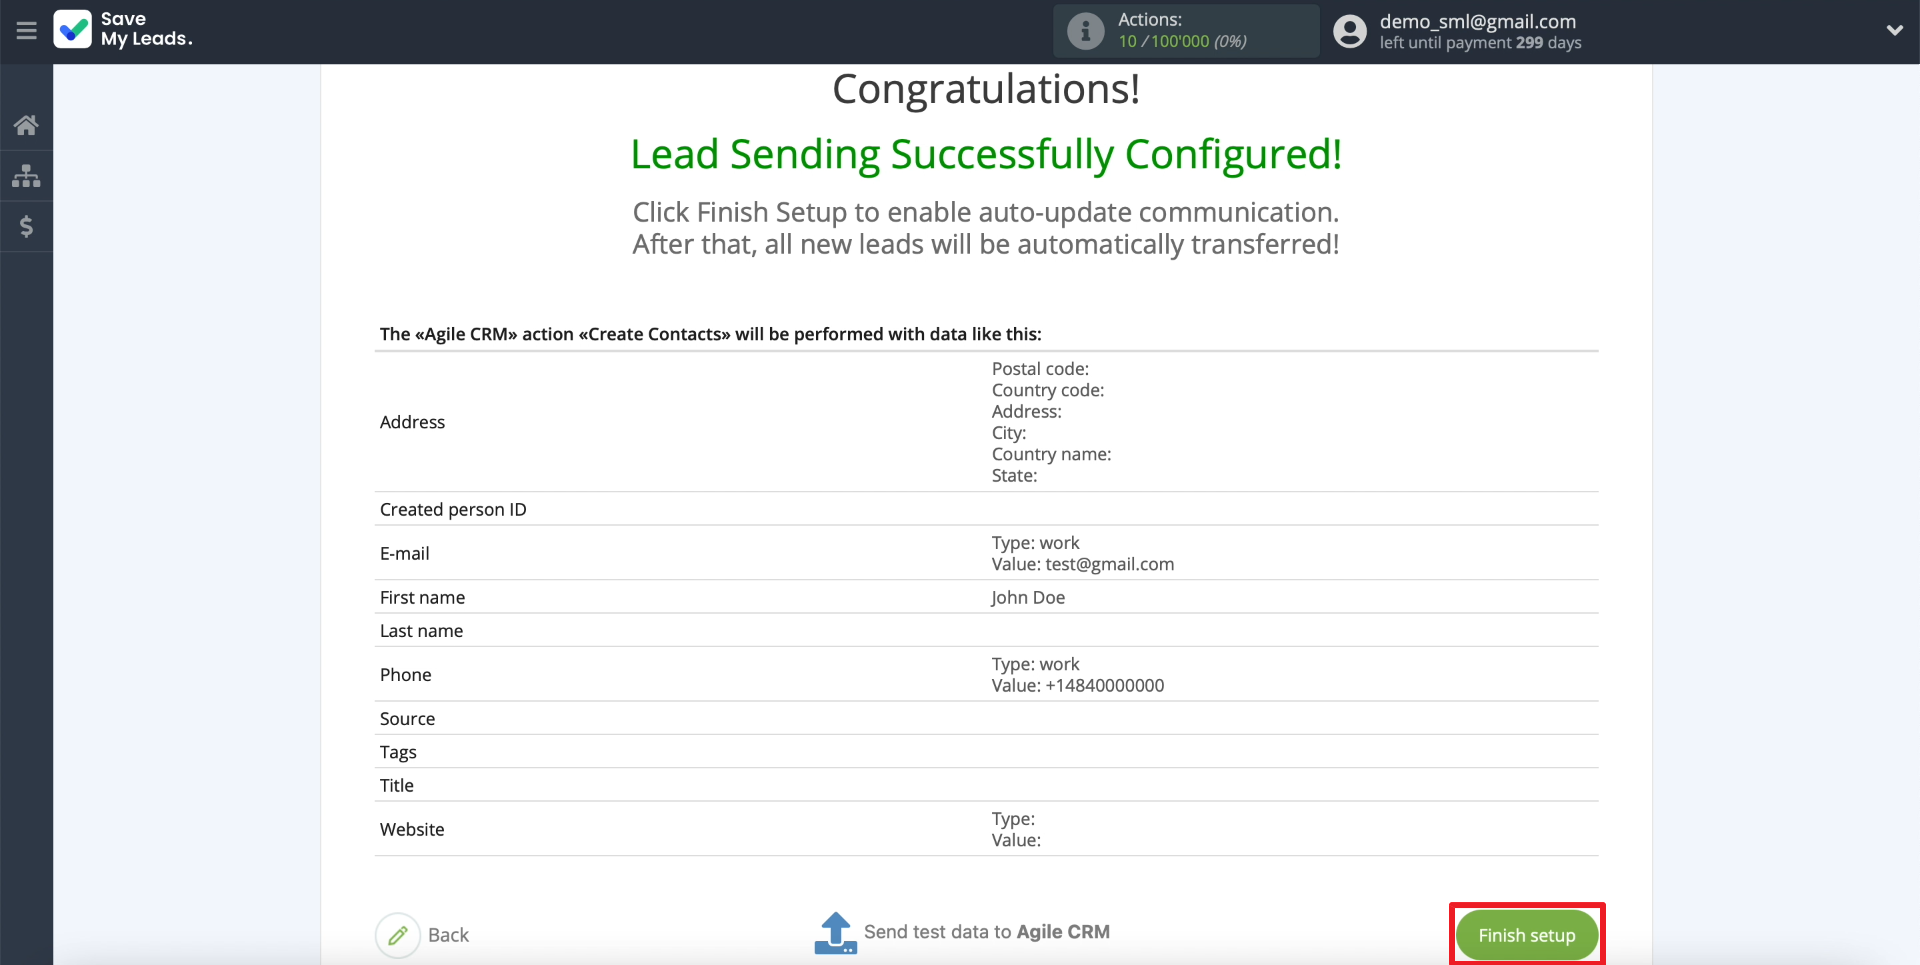
If necessary, you can specify any name for the created connection. To do this, just click on the gear and enter the required text in the appropriate field.
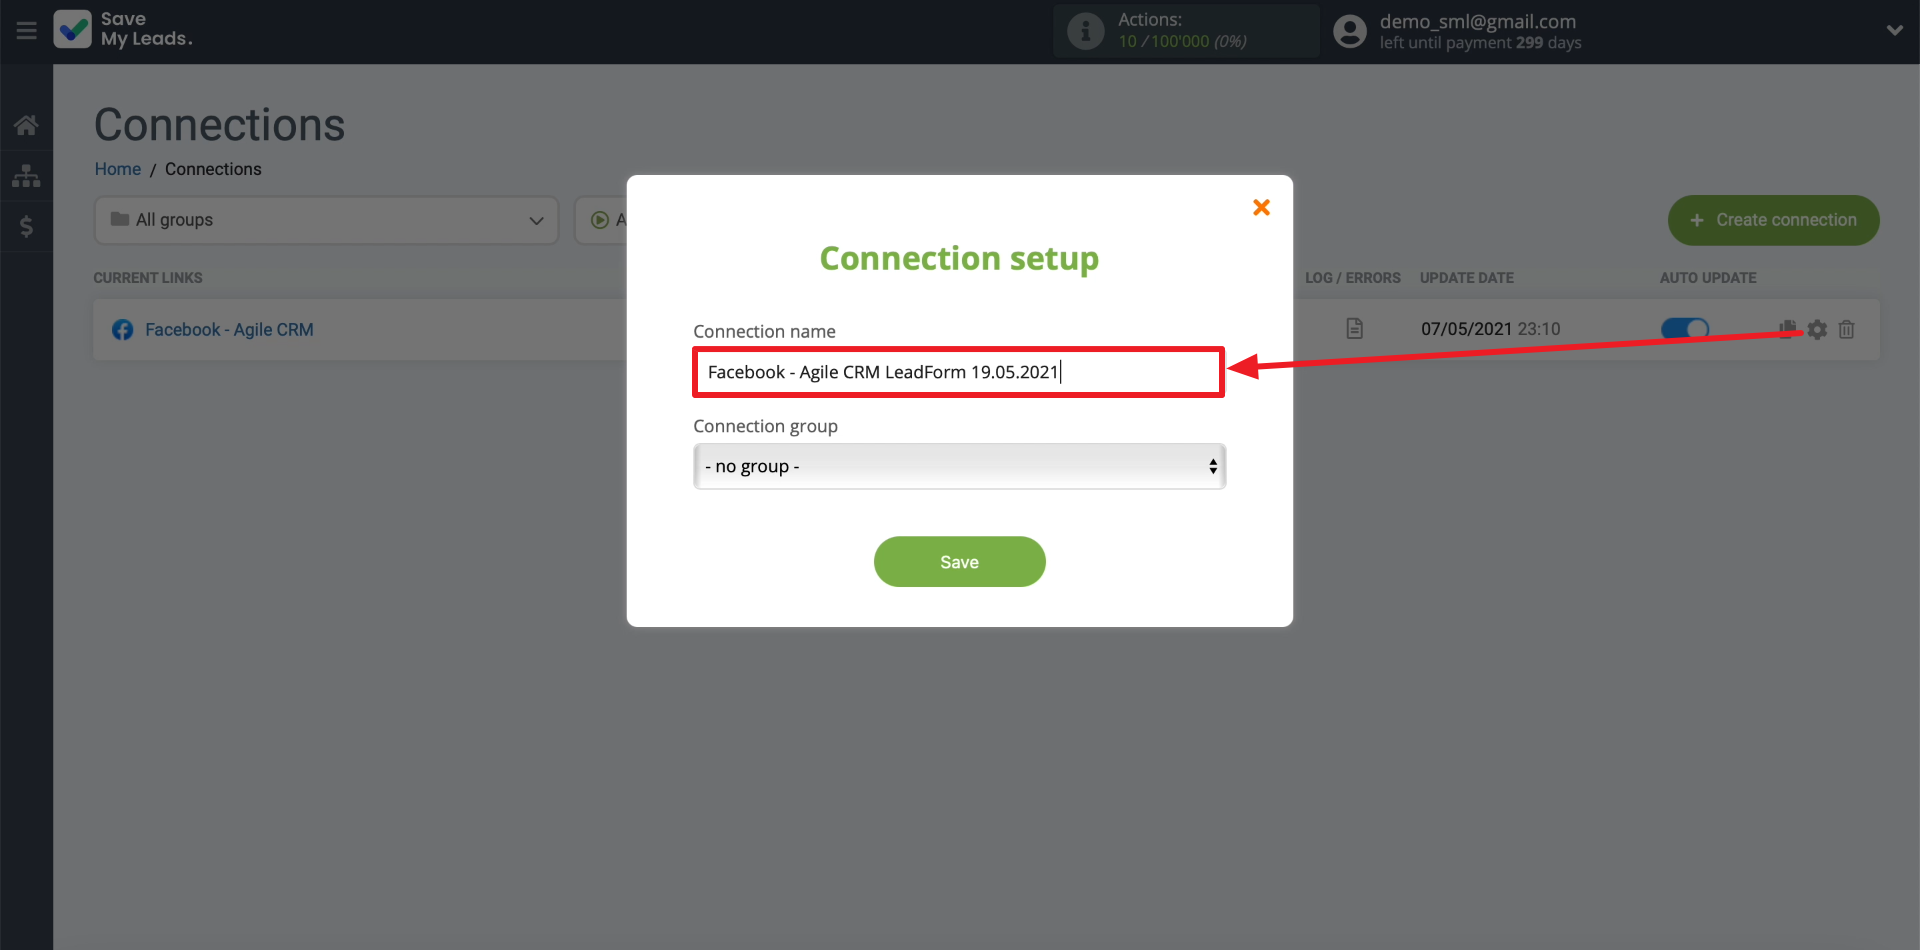
That's all. After that, SaveMyLeads will automatically upload leads from Facebook to AgileCRM according to the specified settings.
