Sinch is a global CPaaS platform for managing a wide range of communications. The service helps businesses in the fields of health care, sales, tourism, services, and media quickly interact with their target audience through text, voice, and video communication. In our article, you will learn how to set up Sinch and Facebook integration so that the service sends SMS messages to leads received from the social network automatically, without your participation.
Facebook Lead Ads is a tool that increases the efficiency of lead generation and was created for marketers involved in promotion. Essentially, this is a standard lead form with which a Facebook user declares their readiness to purchase a product, order a service, or declare their intention to attend a proposed event or sign up for a training course. To achieve this, they need to enter their contact information into the lead form (traditionally, this is the buyer’s first and last name, phone number, and/or email) and submit it. After this, the manager contacts the customer to confirm the order and discuss the details of payment, delivery, or an event.
Sinch is an online platform that gives businesses the opportunity to conduct high-quality multichannel communication with customers, both existing and potential. Its messaging system provides access to a number of instant messaging channels, such as SMS, MMS, and RCS. In addition, it easily integrates with today's popular instant messengers, including Viber, WhatsApp, Facebook Messenger, and others. Many tools for making voice calls and video communications significantly expand the choice of communication methods and allow you to use an individual approach with each client. The service provides separate functional packages for marketers, operational managers, and salespeople.
If you're promoting your business on Facebook and at the same time communicating with your clients through Sinch, you're likely spending a lot of time transferring contact information from lead forms to the communication platform's directory. Surely, you would really like for everything to happen automatically and for the message to “arrive” to a potential client immediately after they fill out the lead form. Those who regularly receive a lot of filled-out lead forms want this especially strongly. The process can indeed be completely automated, forgetting about manual labor as a relic of the past. To achieve this, you just need to connect the two platforms using our SaveMyLeads online connector. Facebook and Sinch integration will ensure prompt and uninterrupted sending of SMS messages to leads from Lead Ads. By delegating your routine to SaveMyLeads, you can dedicate your spare time to improving the quality of your customer interactions, thereby increasing personal and team productivity, customer engagement and satisfaction, and therefore sales.
How to Set Up Facebook Lead Ads and Sinch Integration
IT specialist can integrate Facebook with Sinch via API. You can ask a colleague from the technical department or a third-party programmer to set it up. Both will cope with the task you set, but in the first case, you will probably lose time waiting for it to be completed, and in the second, you will spend money on paying for an expensive service. What to choose: wait or agree to such expenses? We have an optimally balanced solution for you. Our online connector, SaveMyLeads, will help you save both time and money. With our no-code service, you can set up the connection you need in just a few minutes. Its interface and operating algorithm are so simple that even a completely inexperienced user can do it.
If you imagine the integration of Facebook and Sinch in the form of a diagram, it will look like this: “source-connector-receiver”. In this case, the SaveMyLeads system is aimed at tracking new leads on the social network Facebook. After detecting a lead, it initiates sending an SMS message through the Sinch service. To automate this process, you only need to take a few steps. So let's get started.
Setting Up a Data Source – Facebook
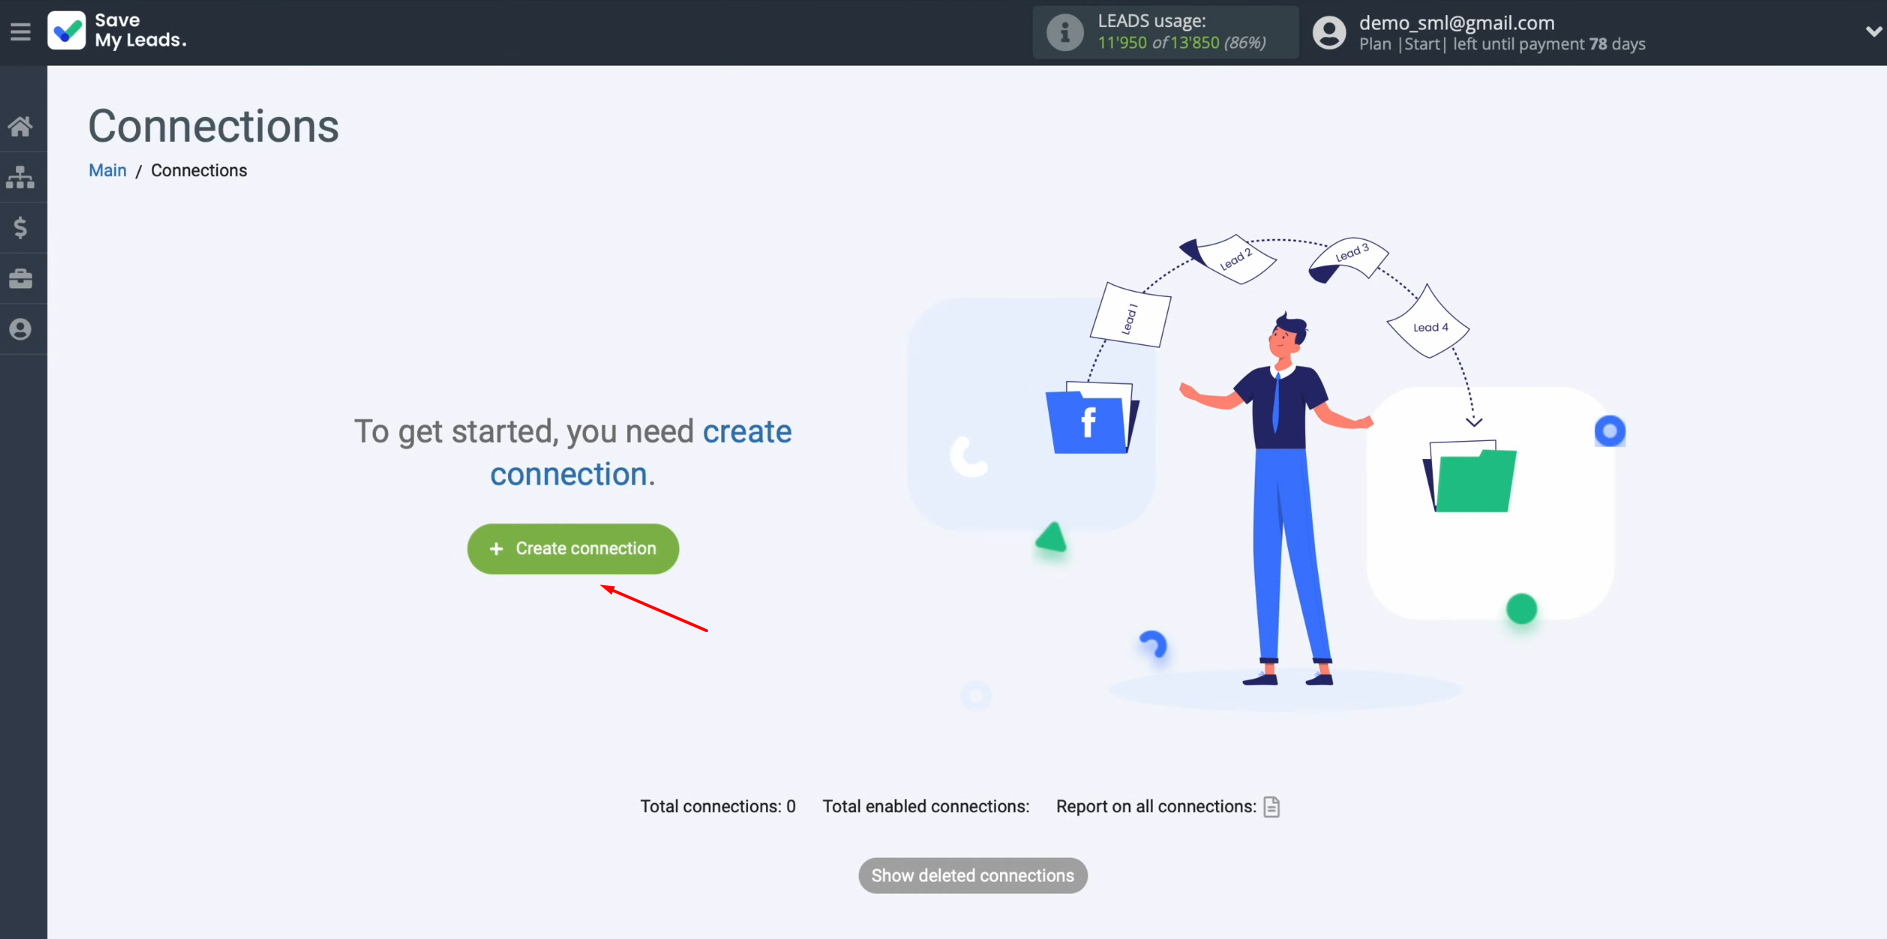
To set up Facebook integration with Sinch, you need to create a new connection. Click on the button "Create connection".
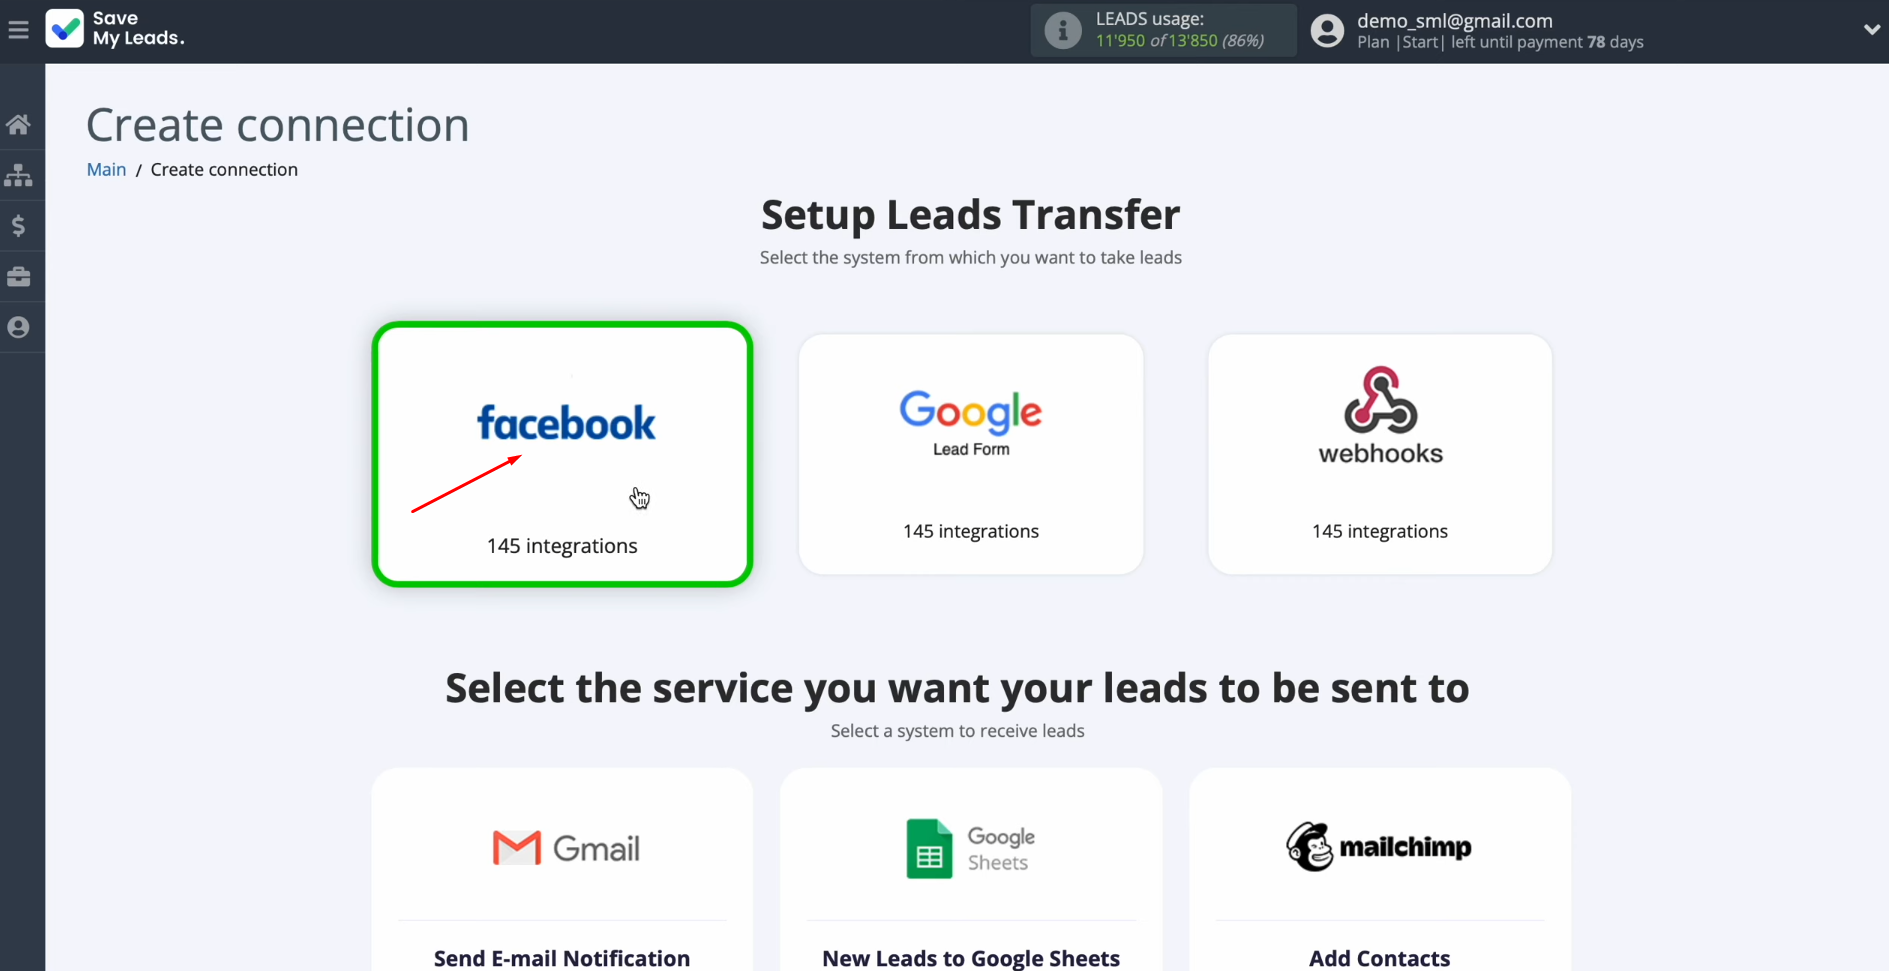
Next, you have to select one of
the sources from which you want to receive new data. In this case,
choose “Facebook”.
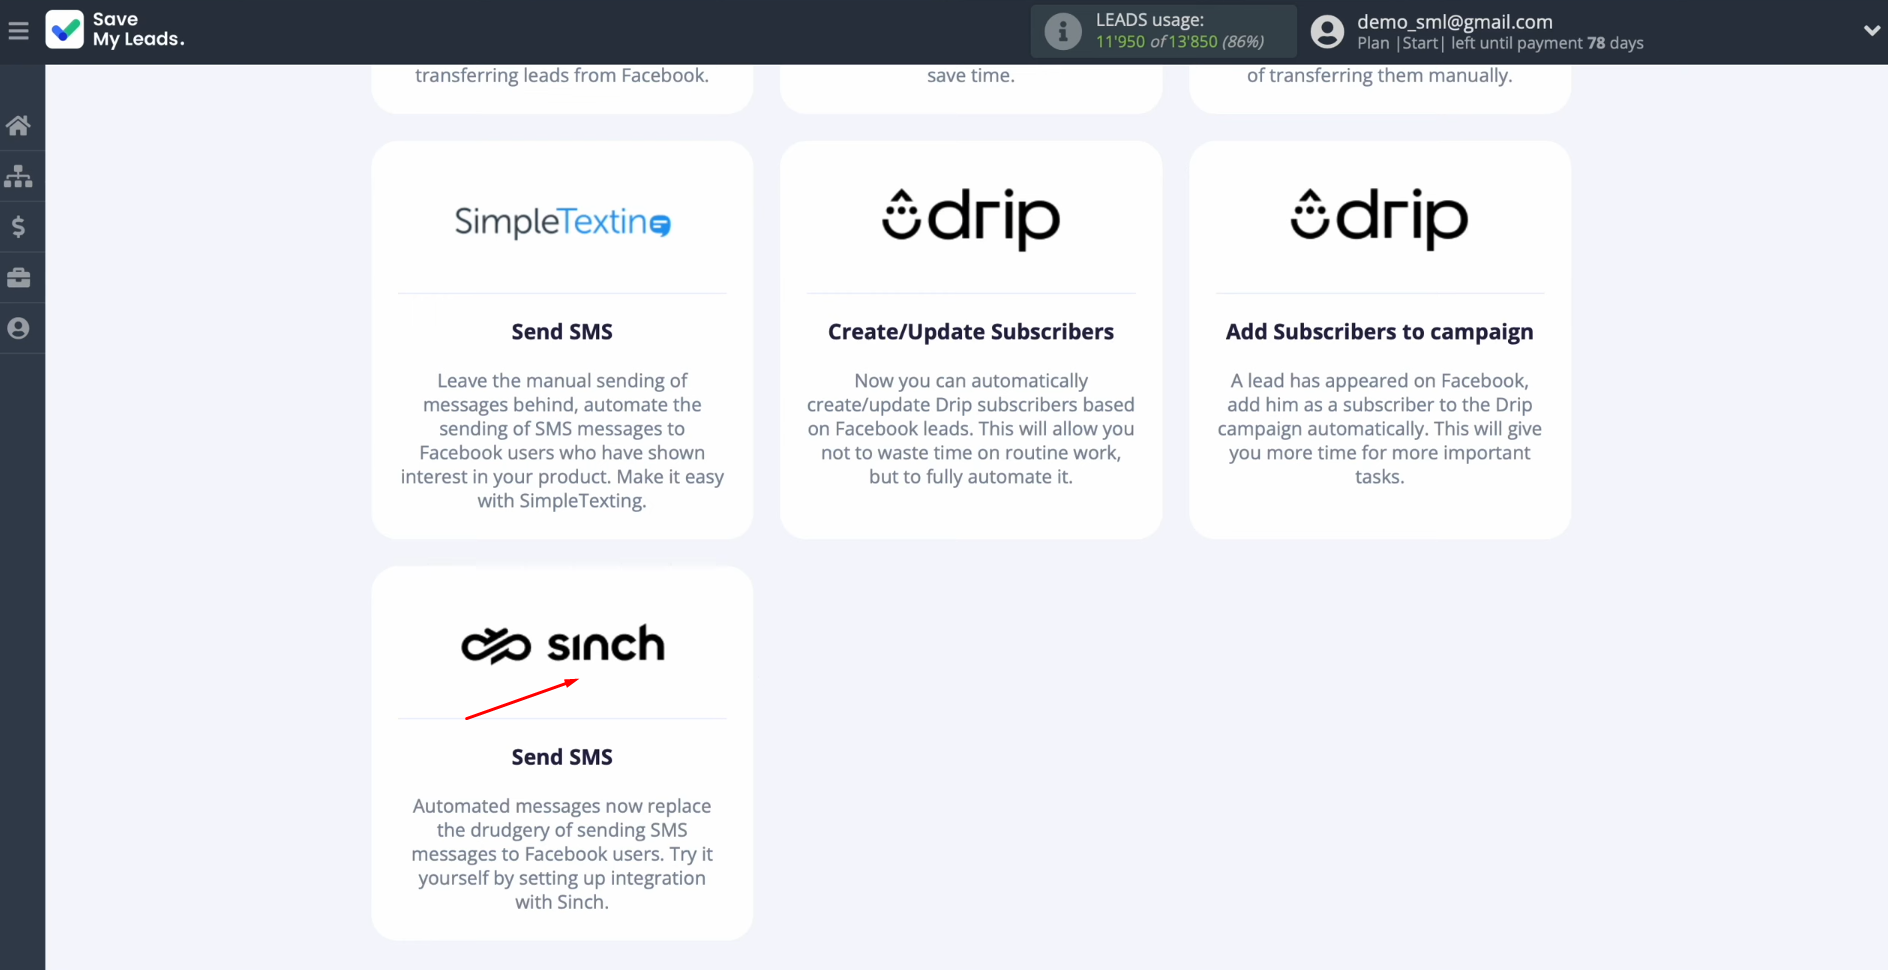
Now, you must select the system
where you would like to transfer new leads from Facebook. In this case, select “Sinch (Send SMS)”.
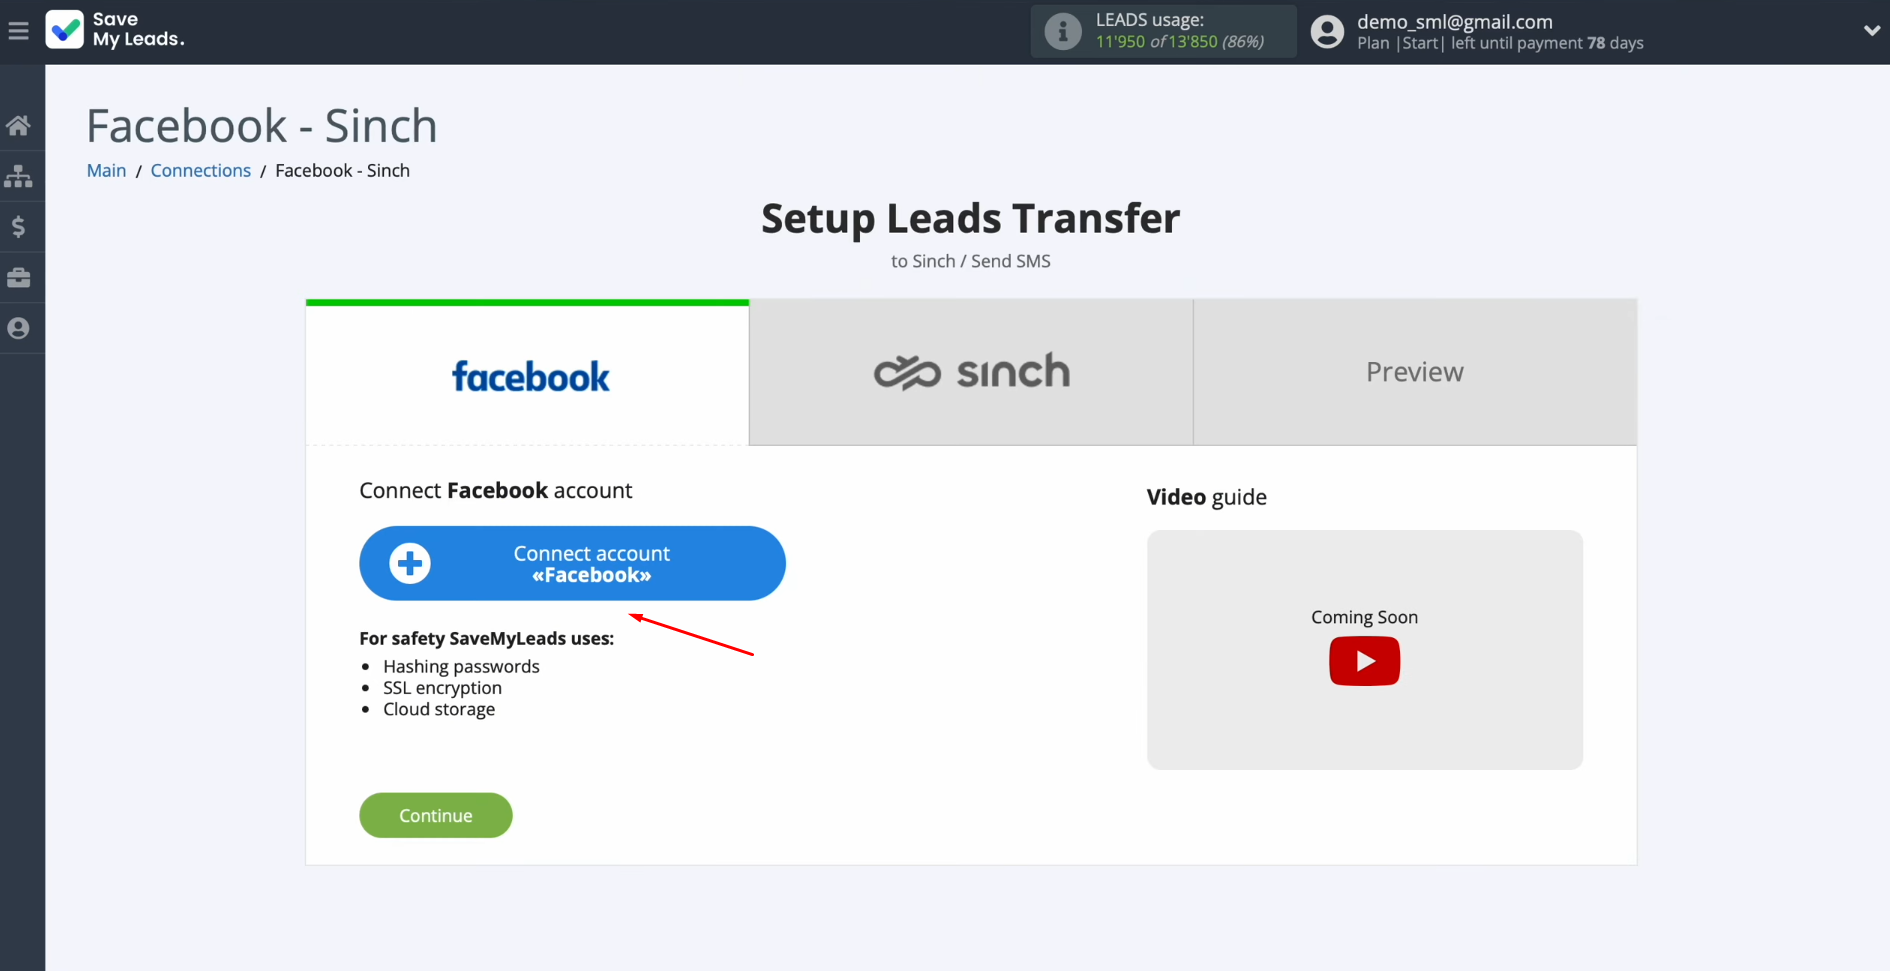
At this stage, you have to connect your Facebook account to SaveMyLeads. Click on the blue button.
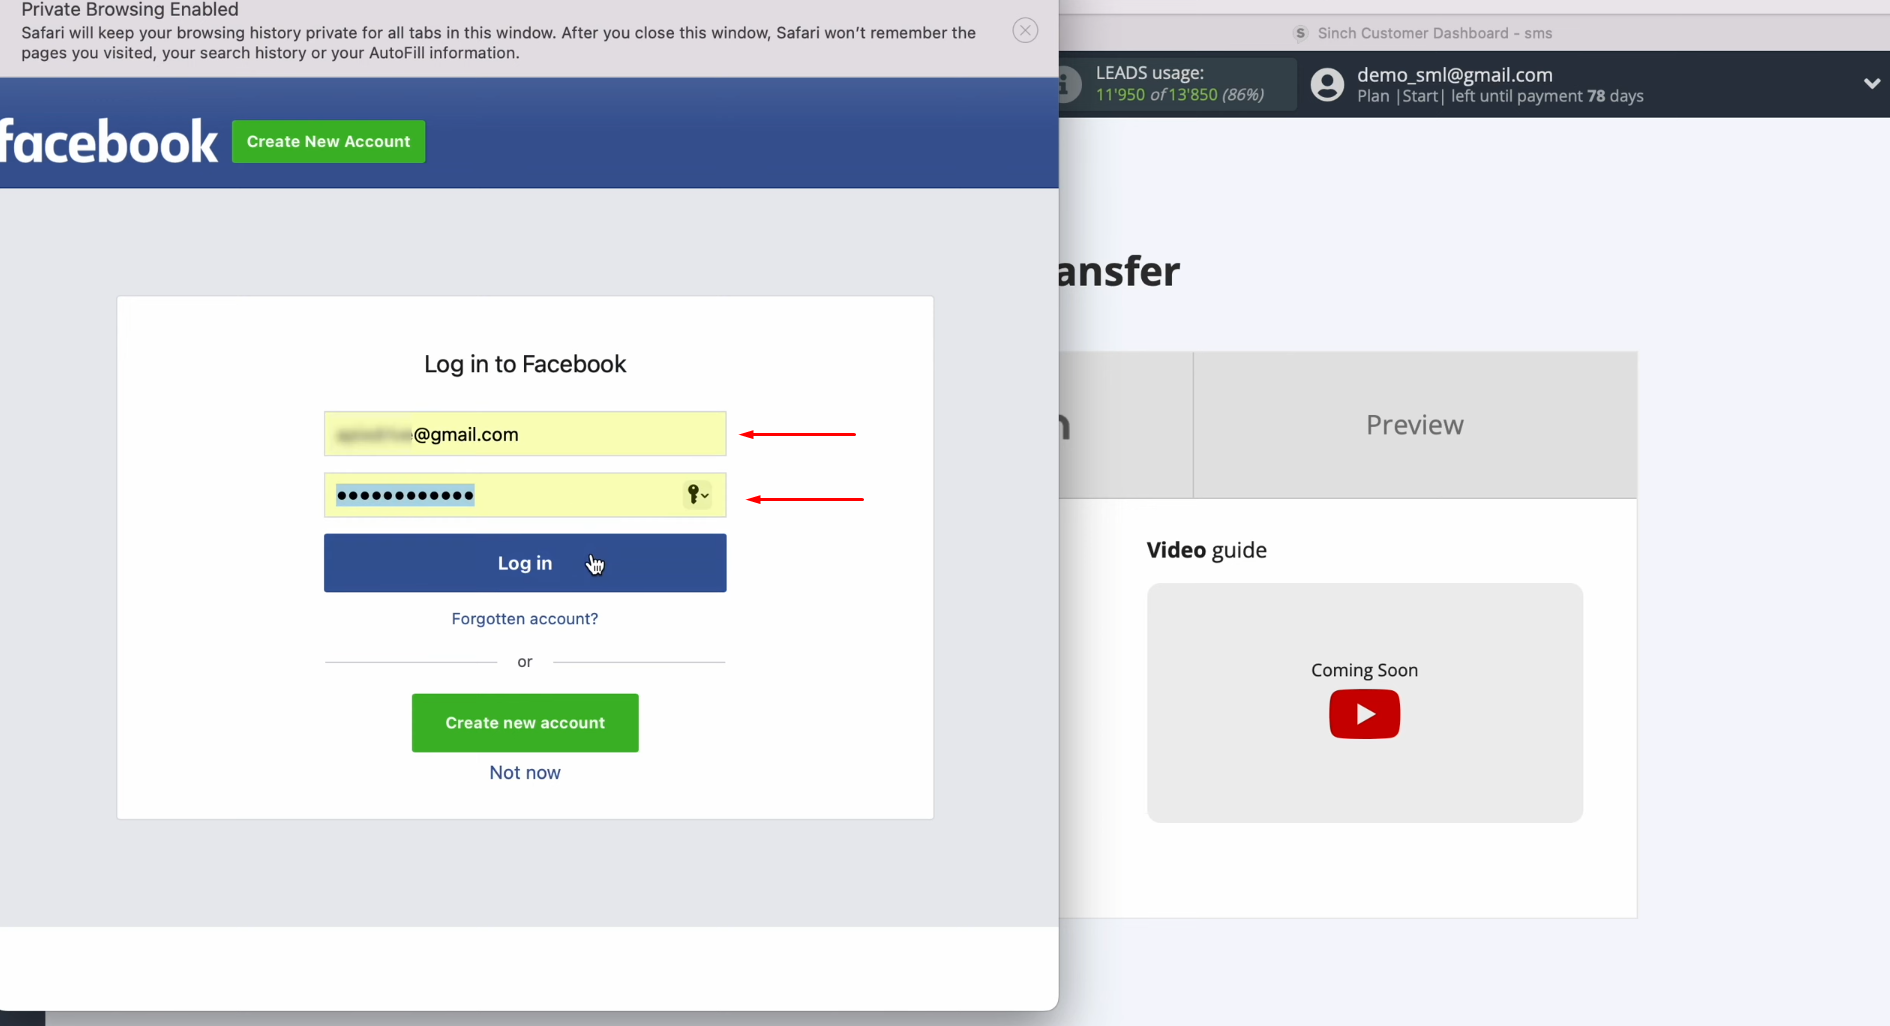
You must specify the login and password of your
personal Facebook account. Click “Log in”.
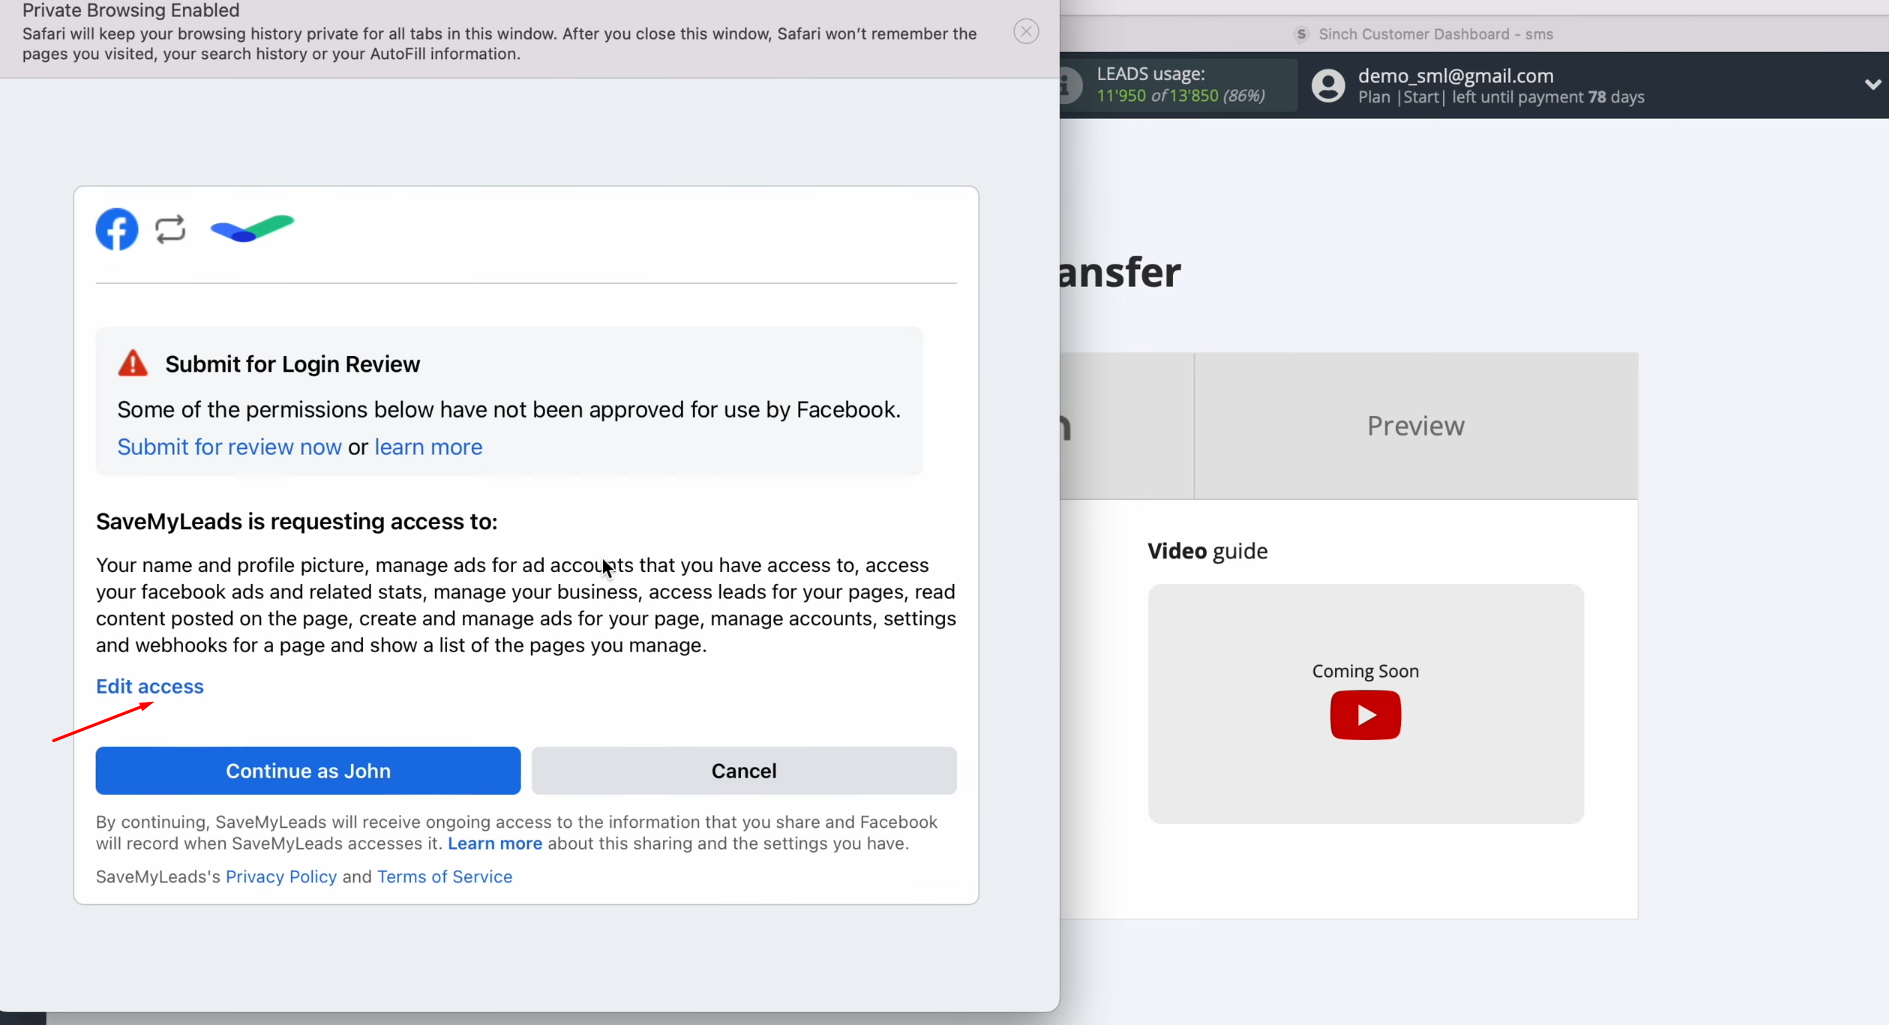
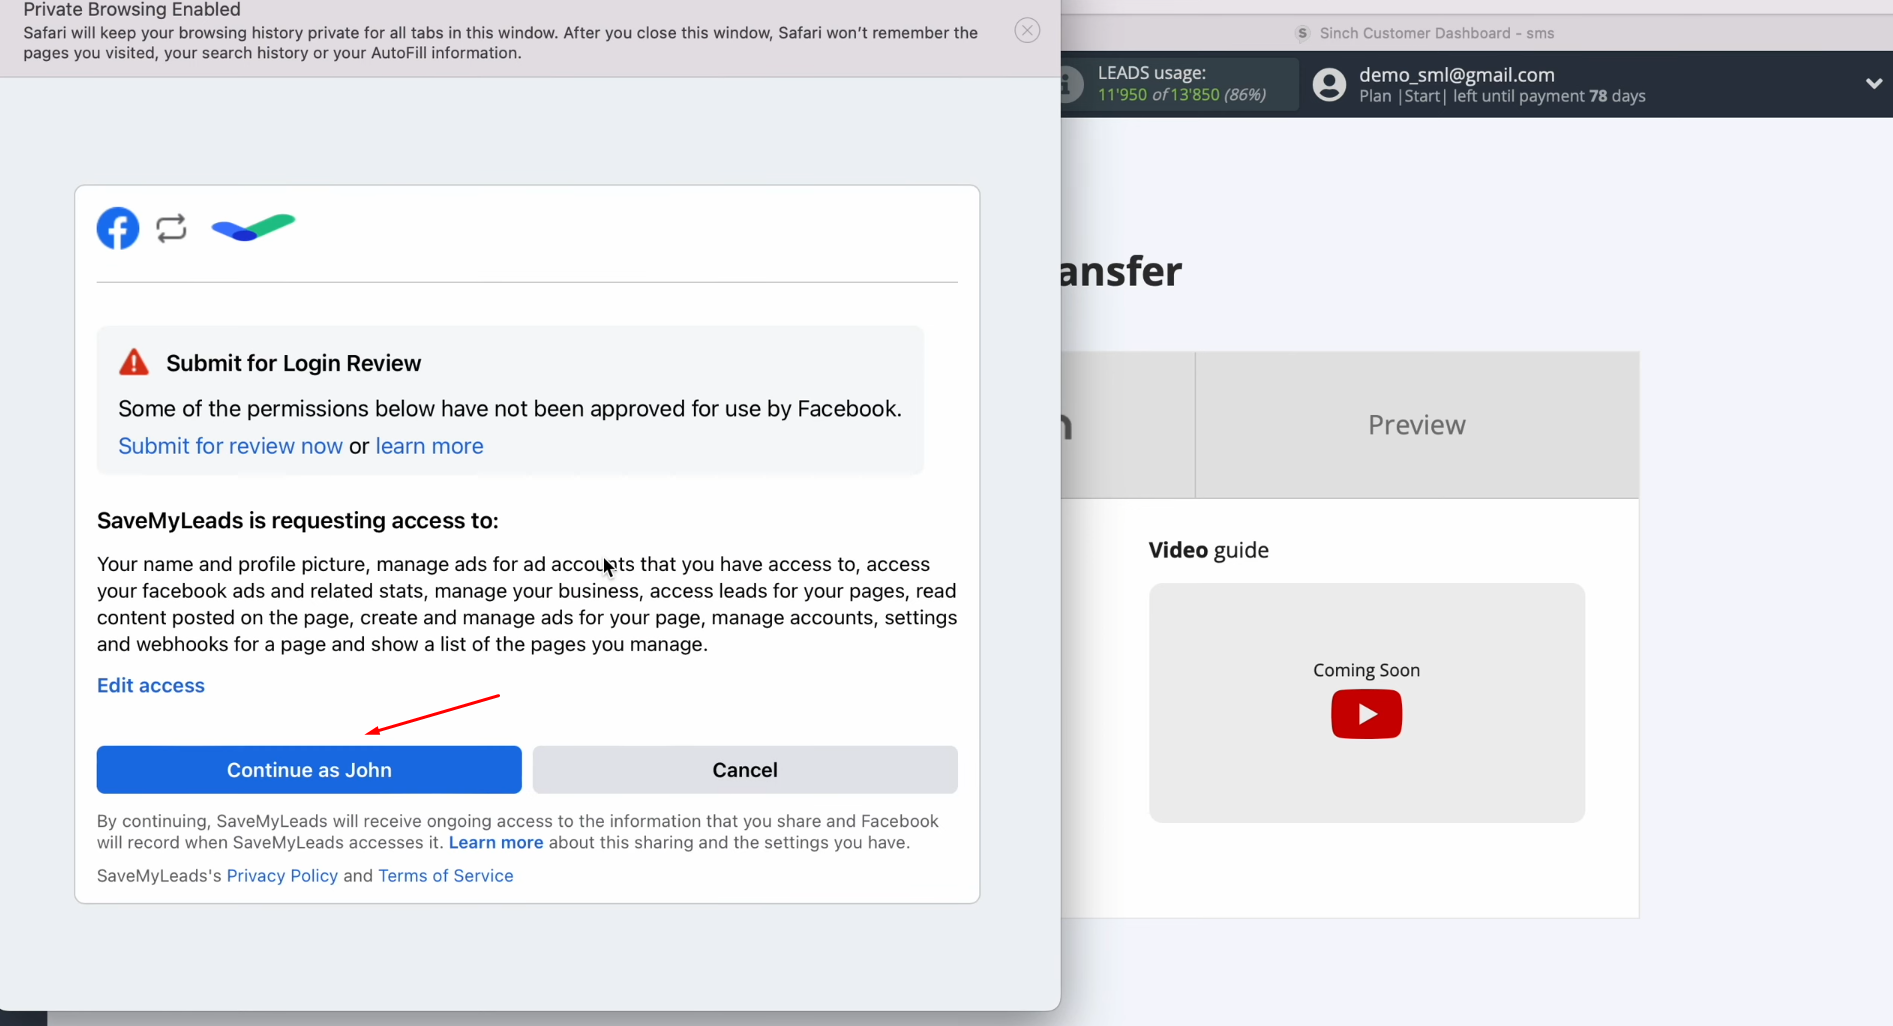
In this
window, you can read about what data from your Facebook account SaveMyLeads
requests access to. Click “Edit access”.
Leave all checkboxes
enabled.
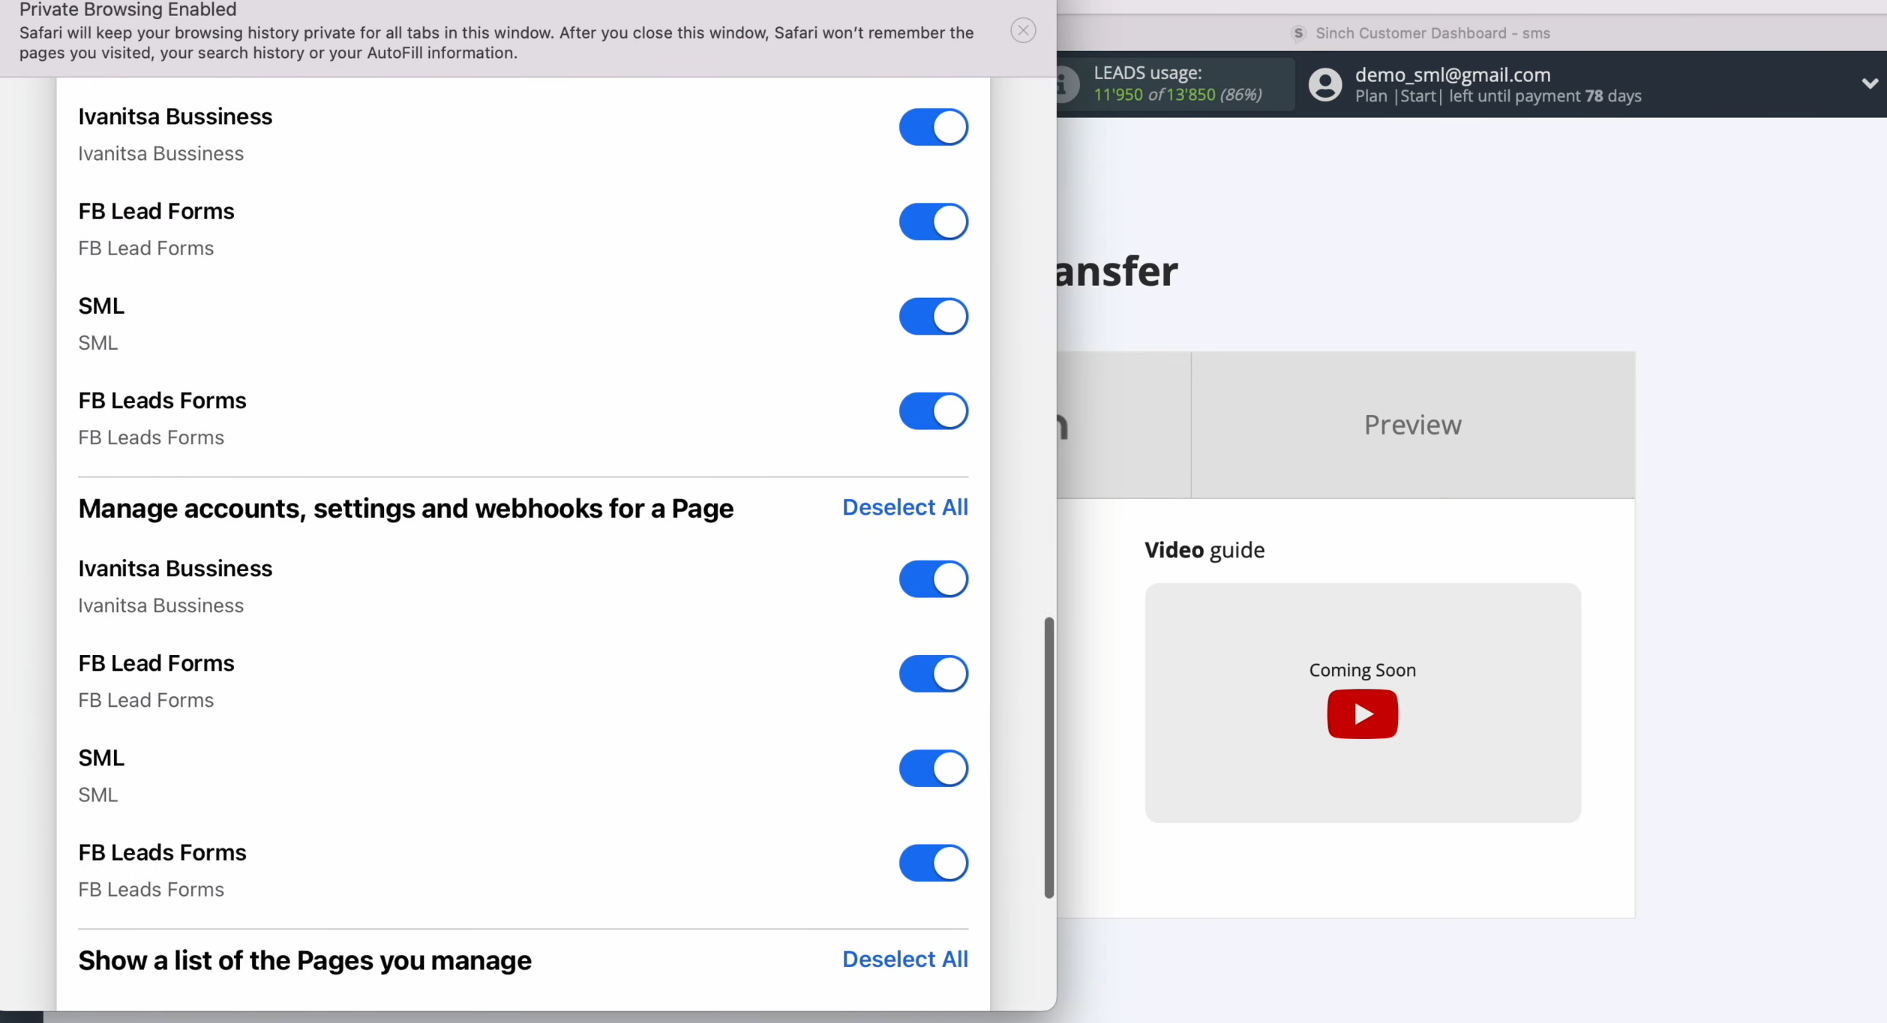
Click
“Continue”.
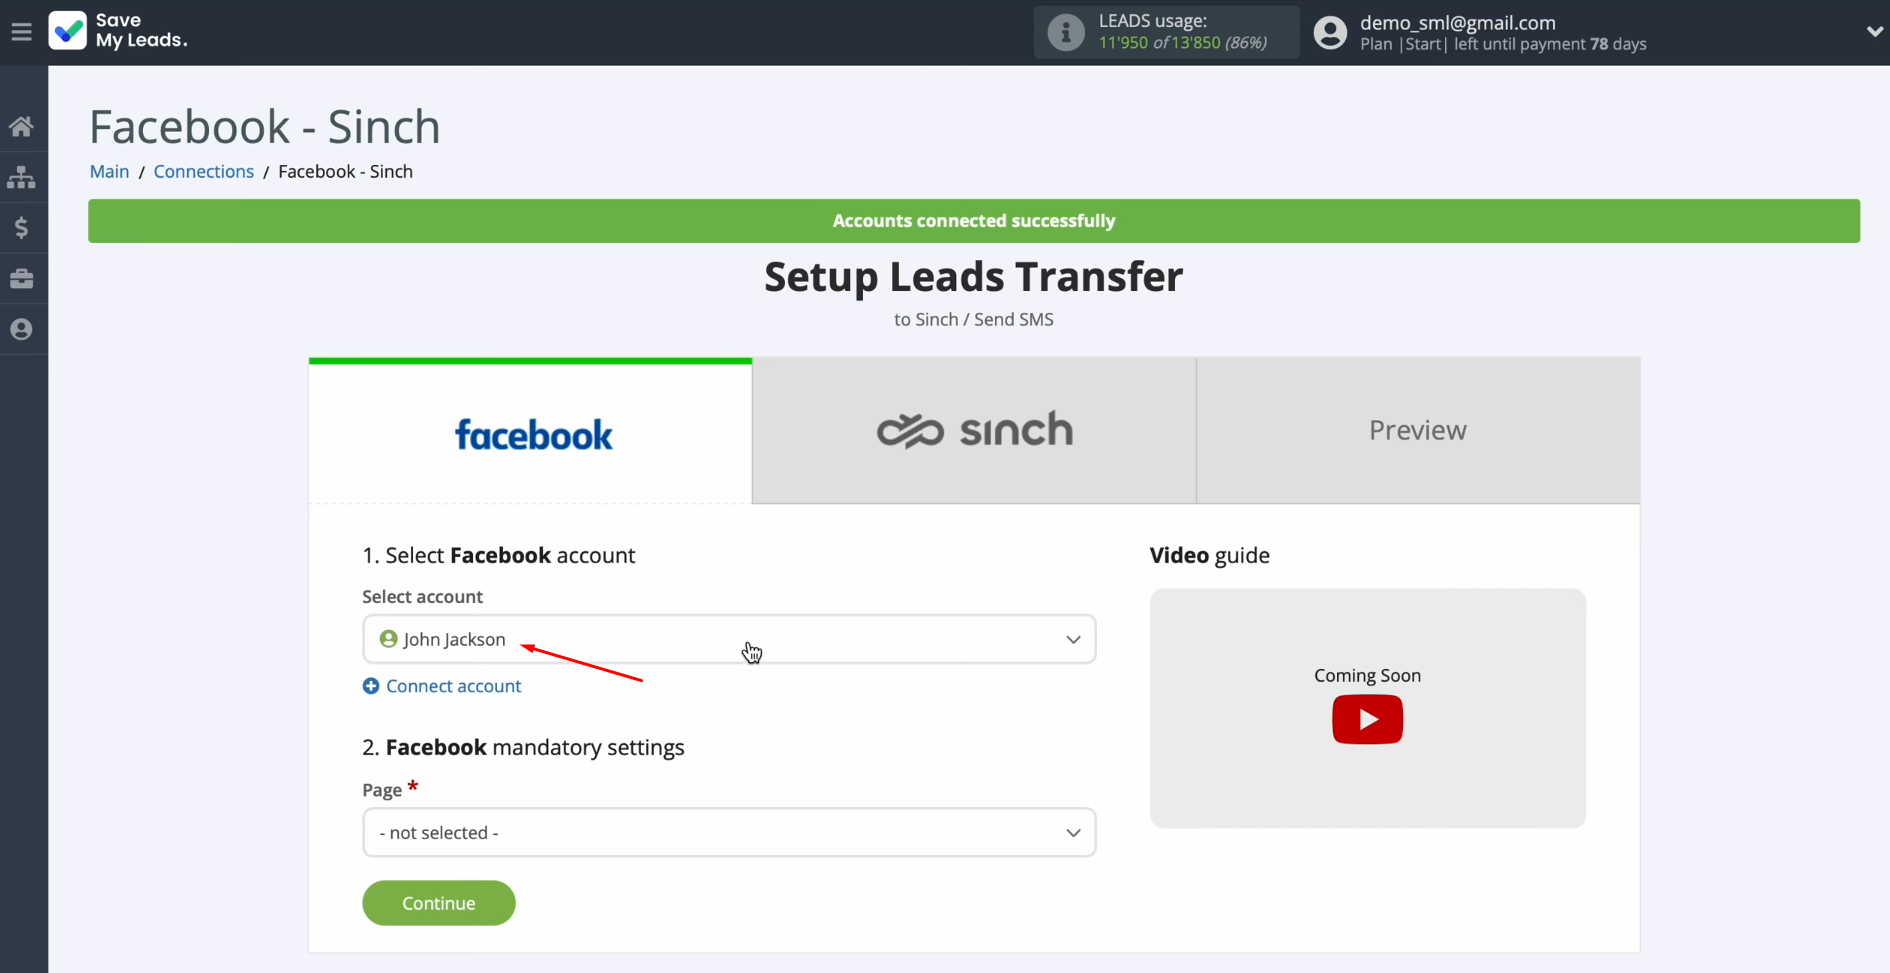
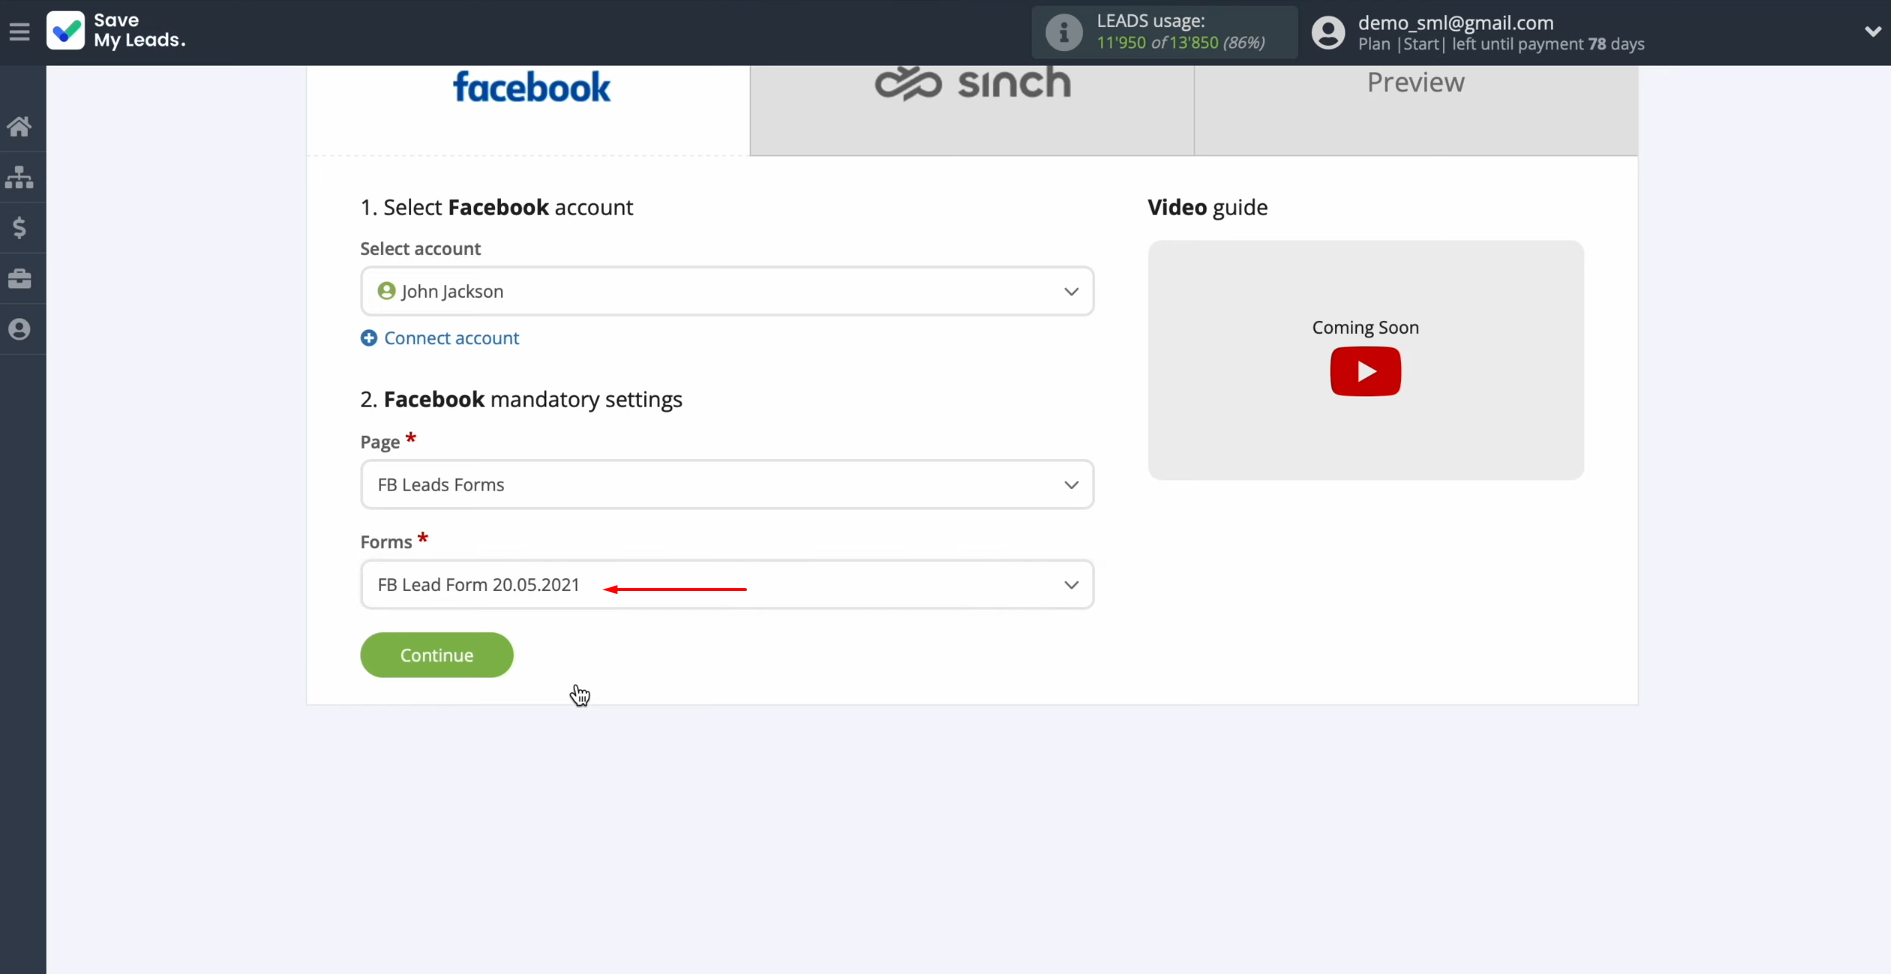
When the connected login is displayed in the list, select it.
Now, you need to select the advertising page.
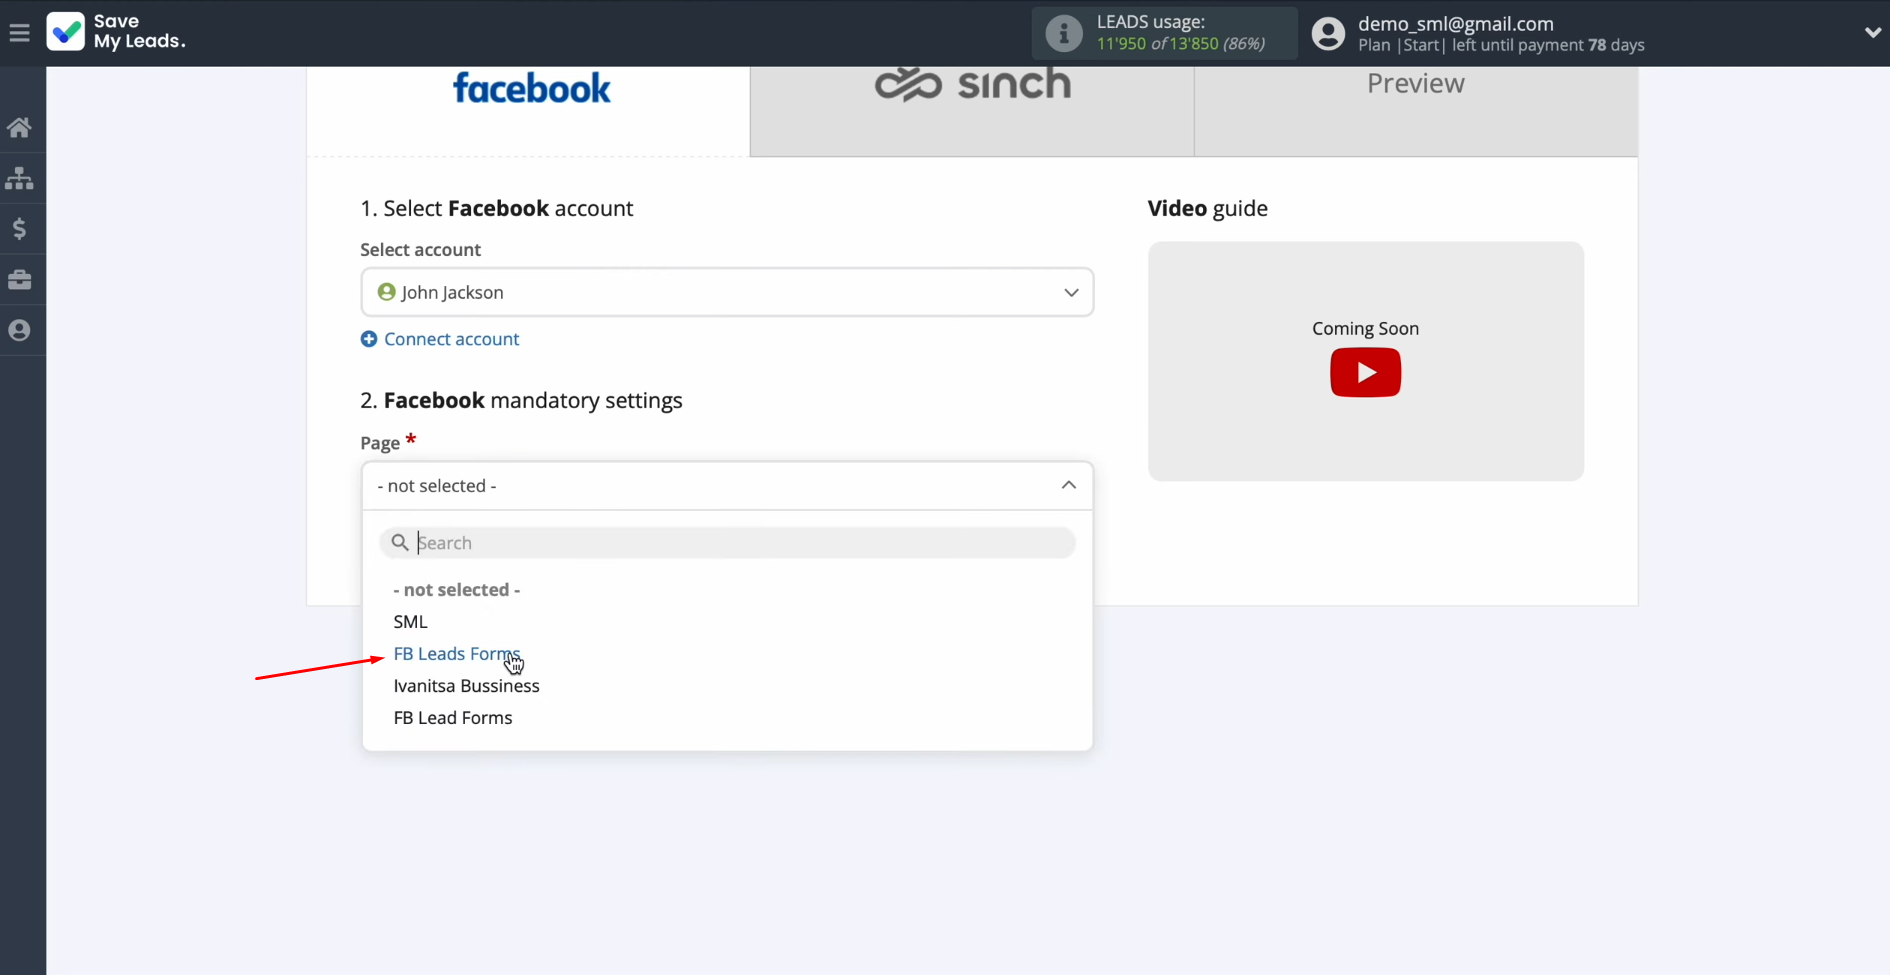
Select the form for which you want to receive new leads.
Click “Continue”.
Setting Up a Data Receiver – Sinch
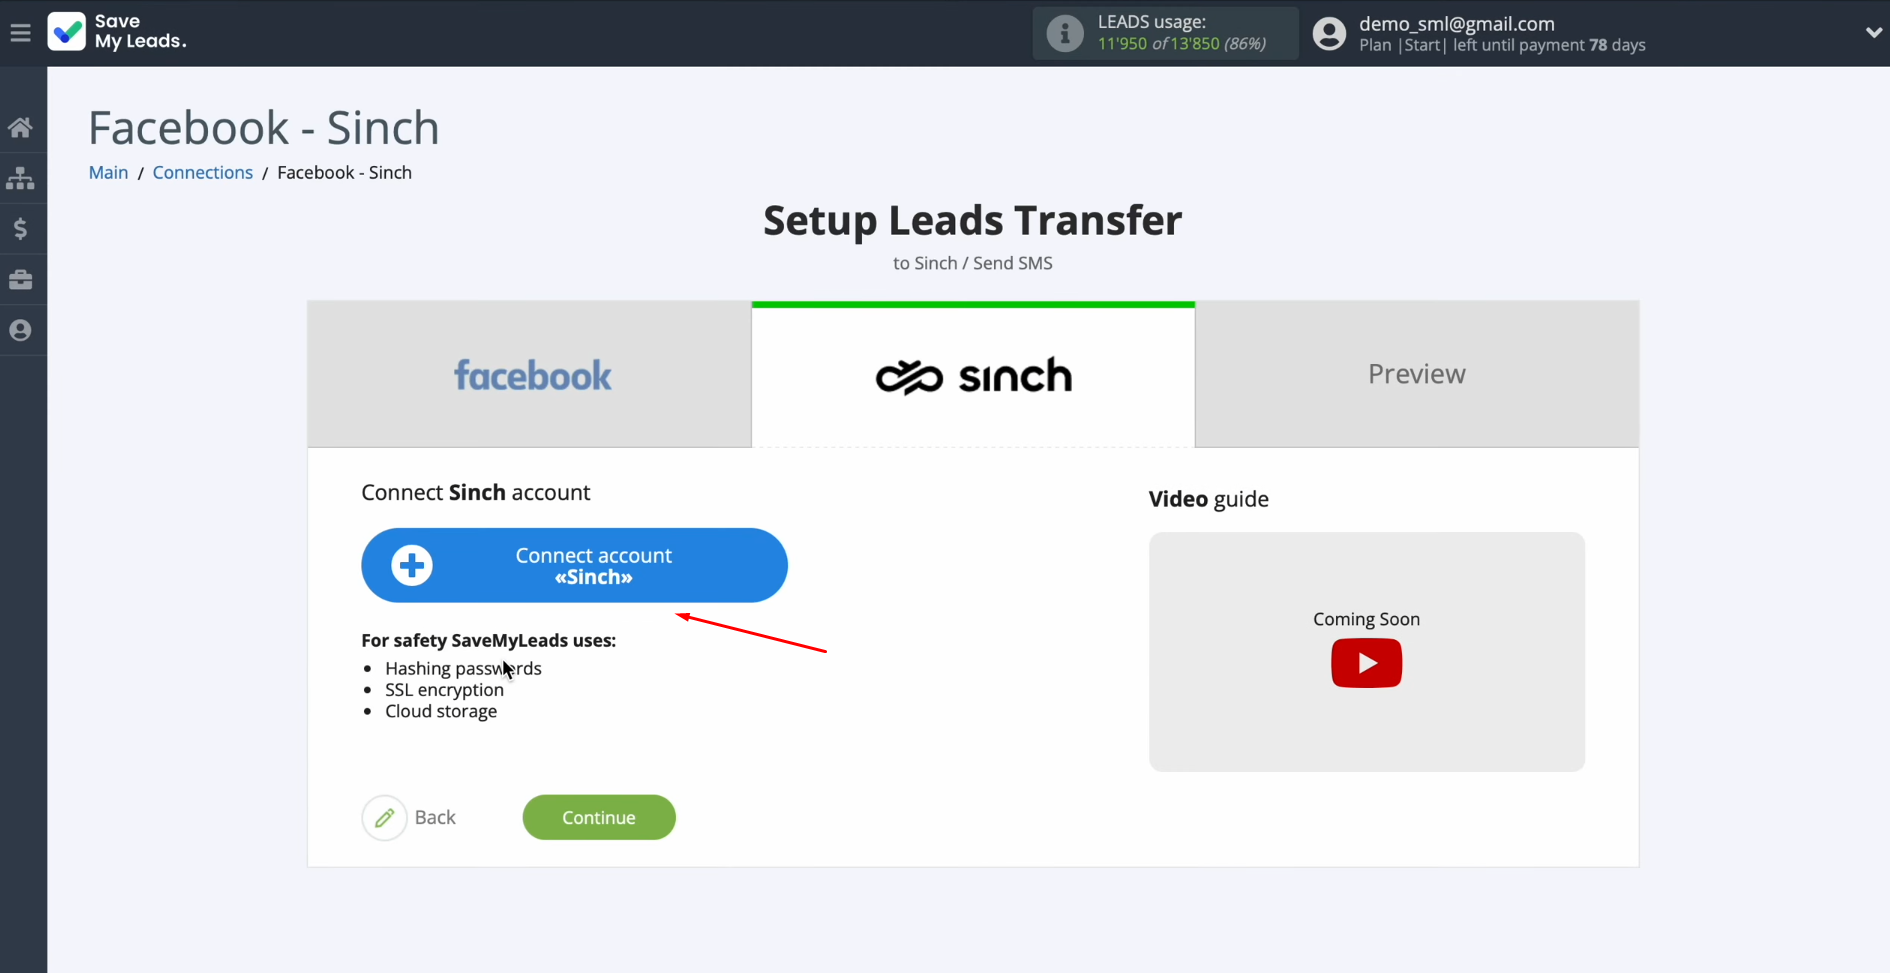
To set up Sinch integration with Facebook, you need to connect your Sinch account to SaveMyLeads. Click on the blue button.
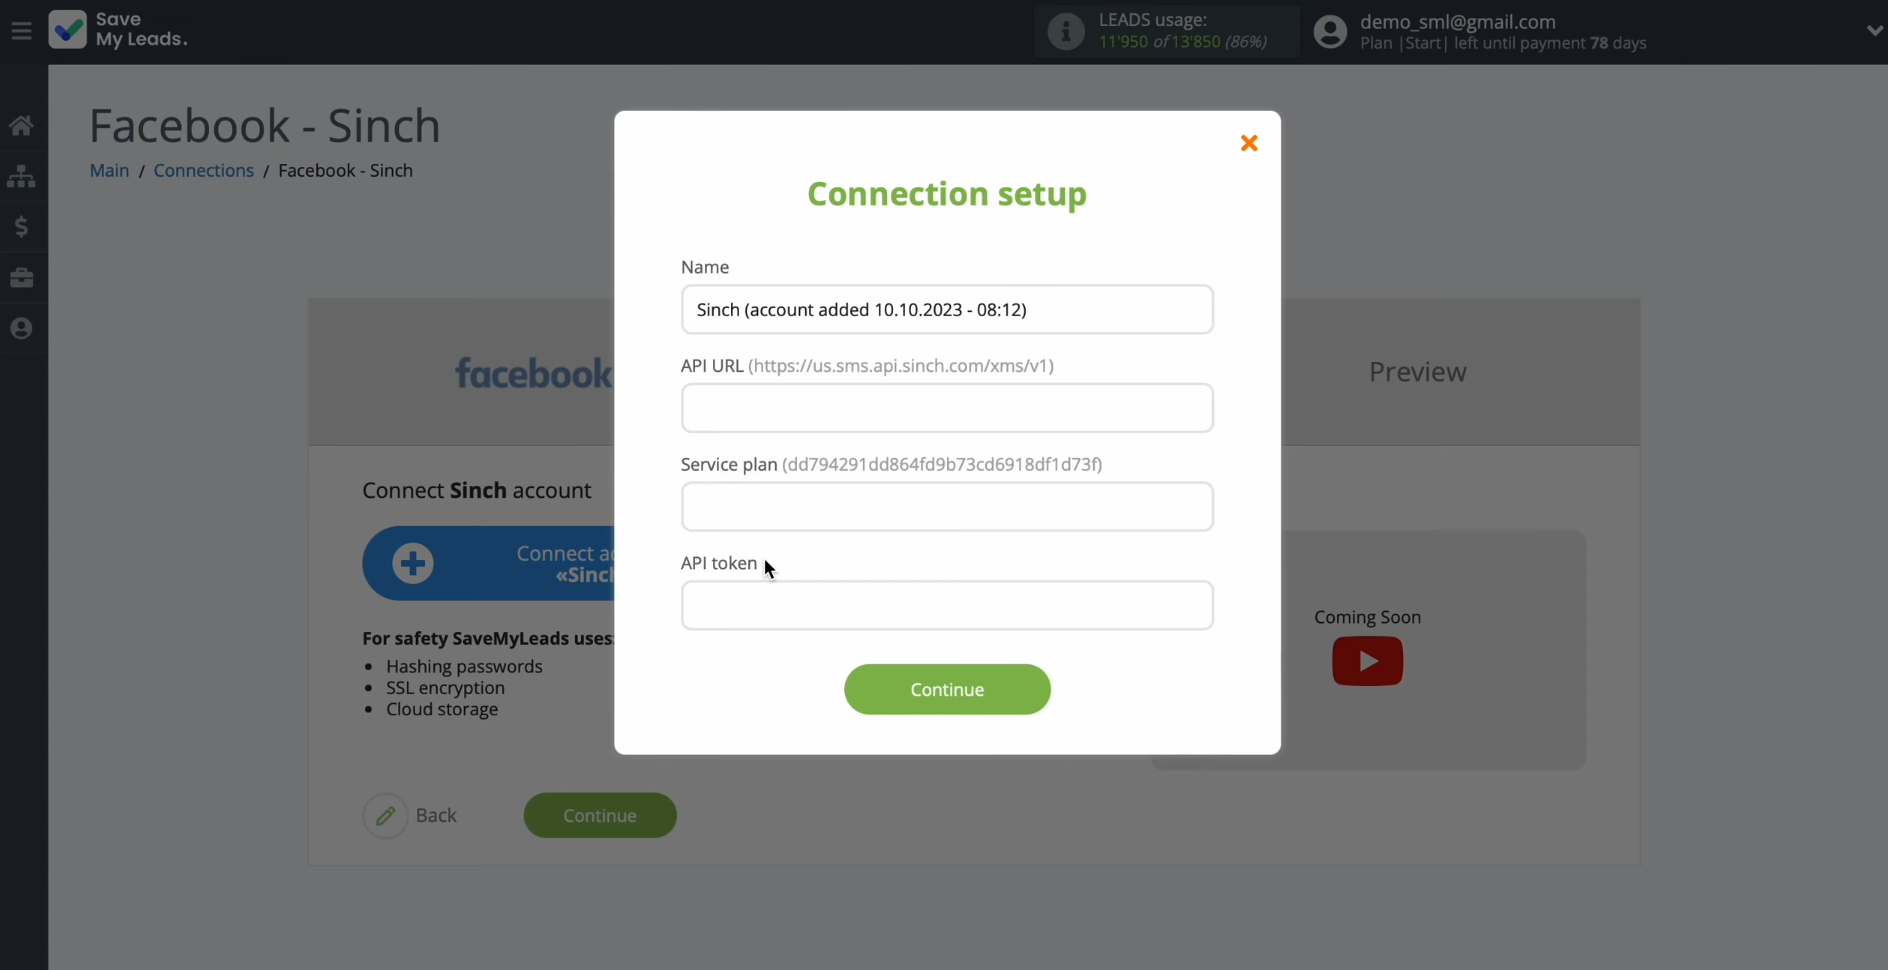
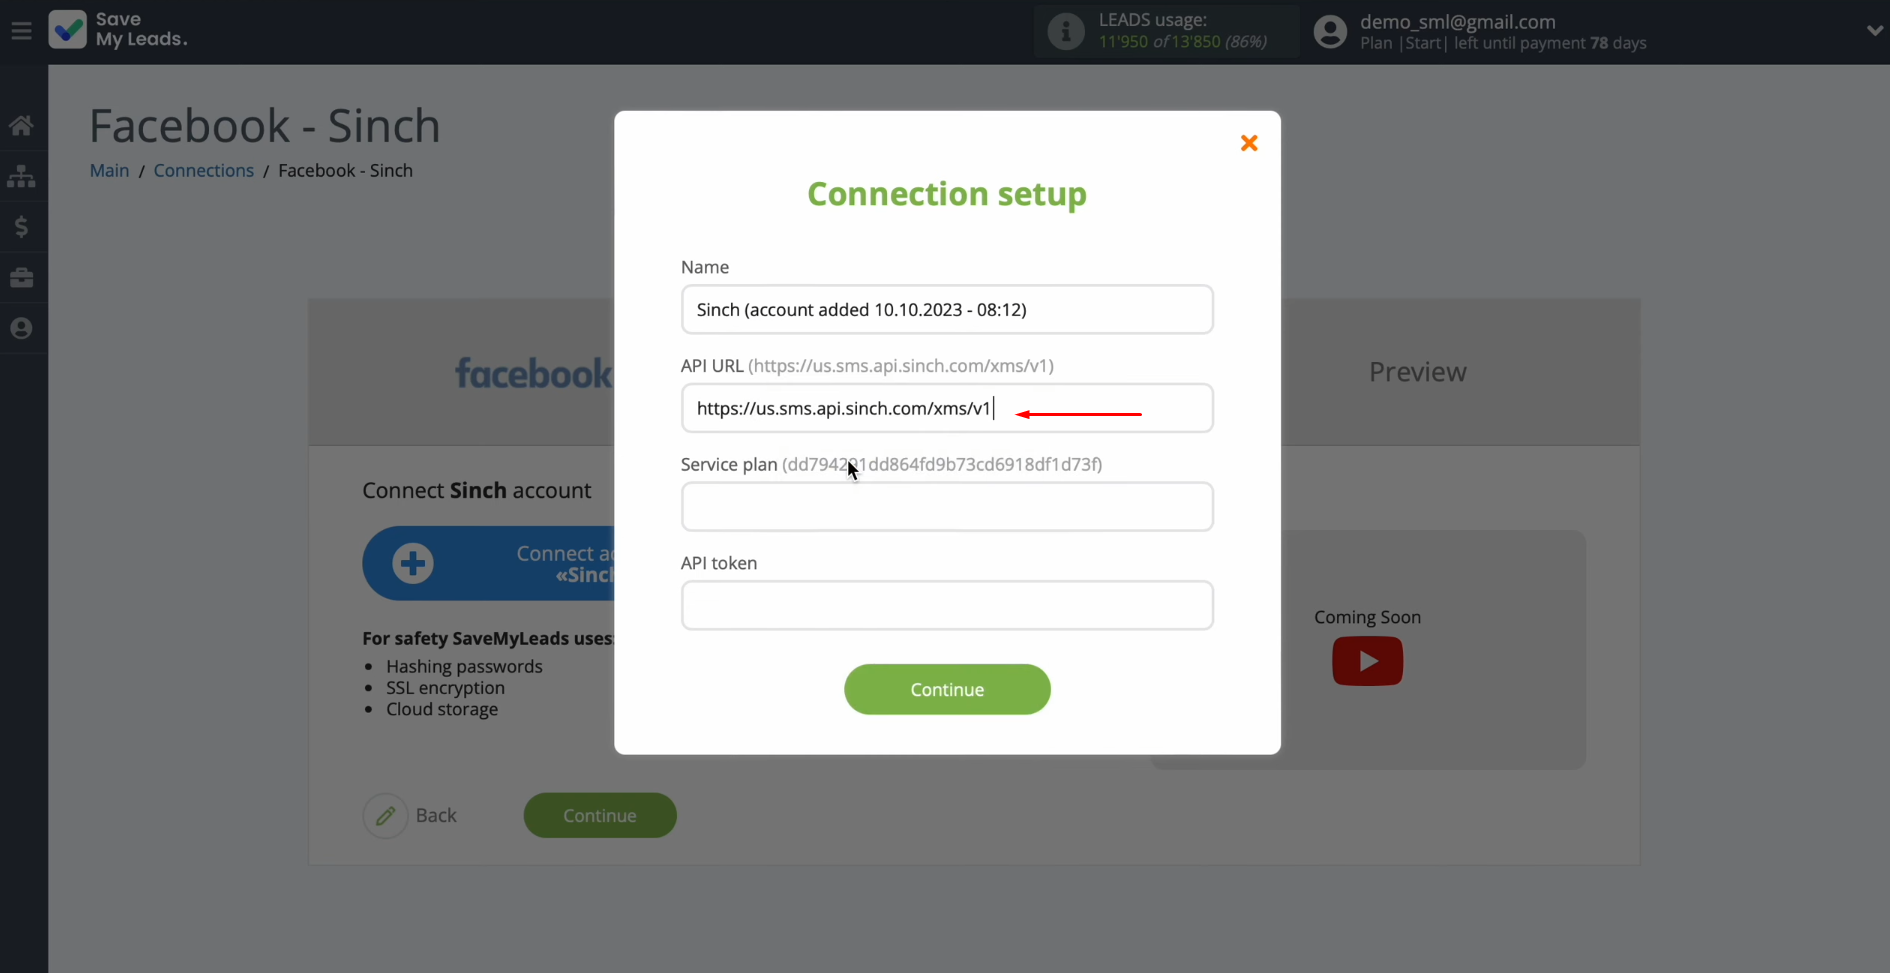
In this window, you must specify the API URL, service plan, and API
token.
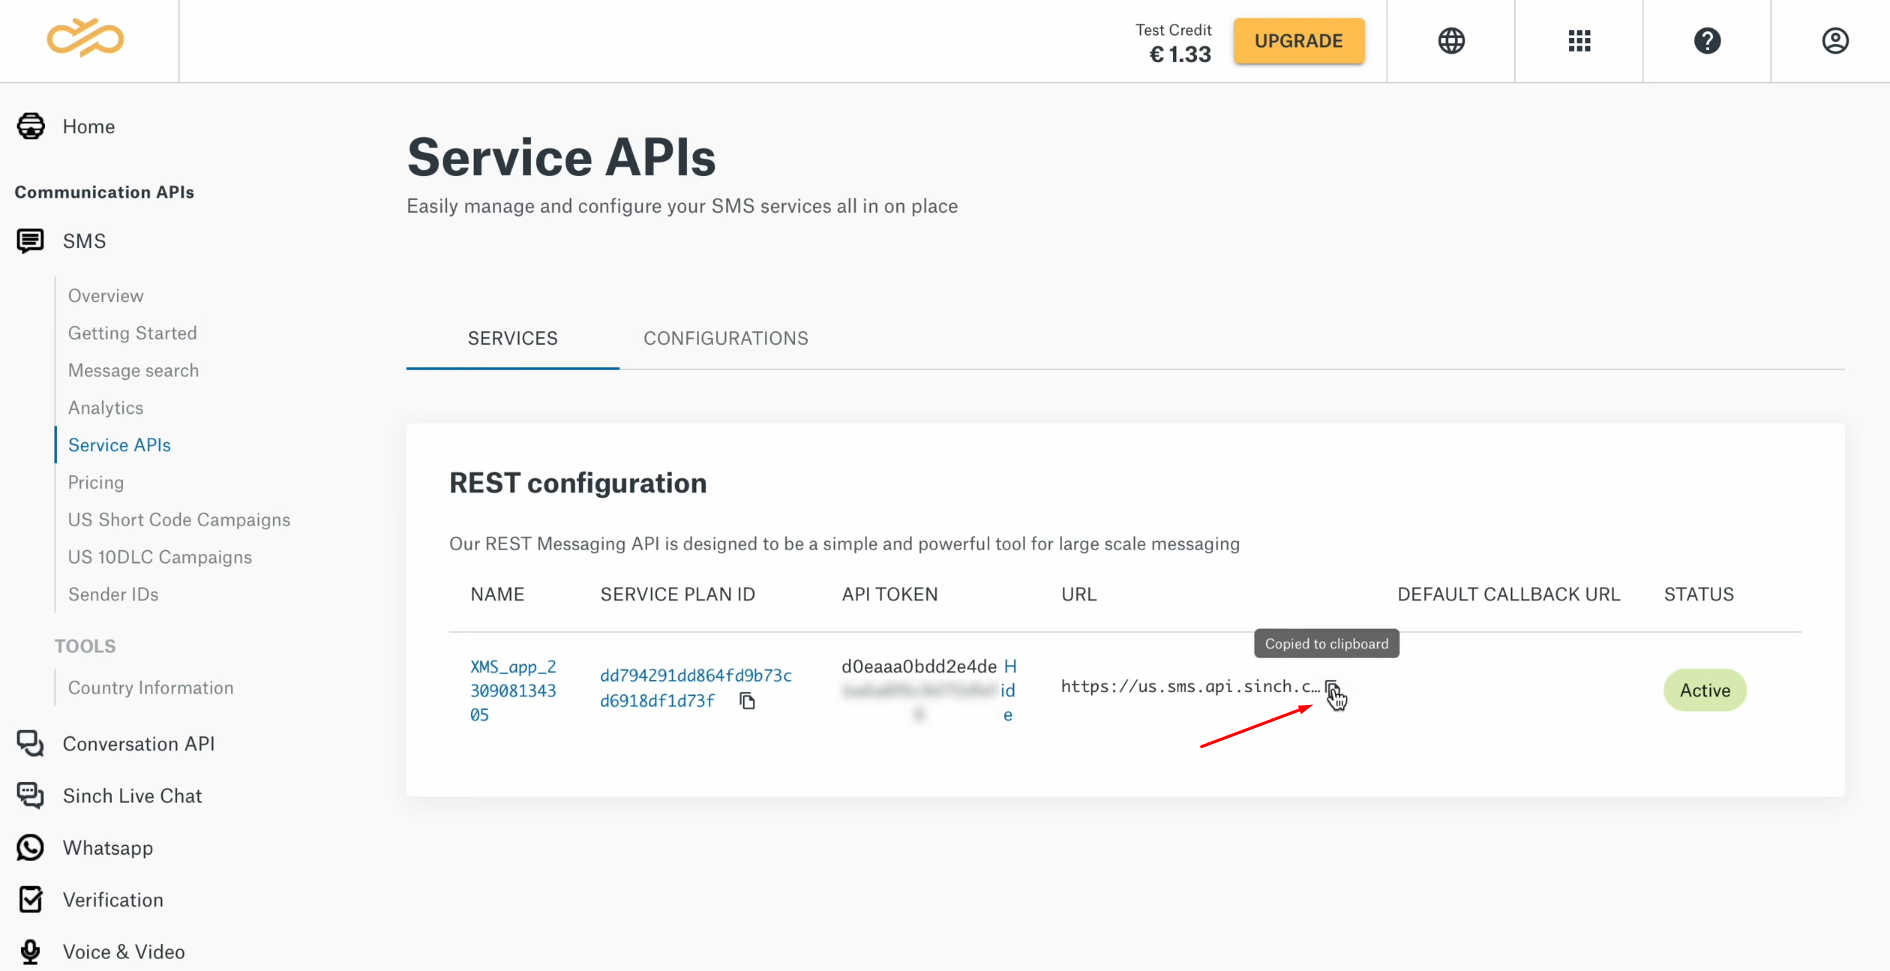
To get this data, go to your Sinch personal account. Next, go to the SMS service and
select the API section.
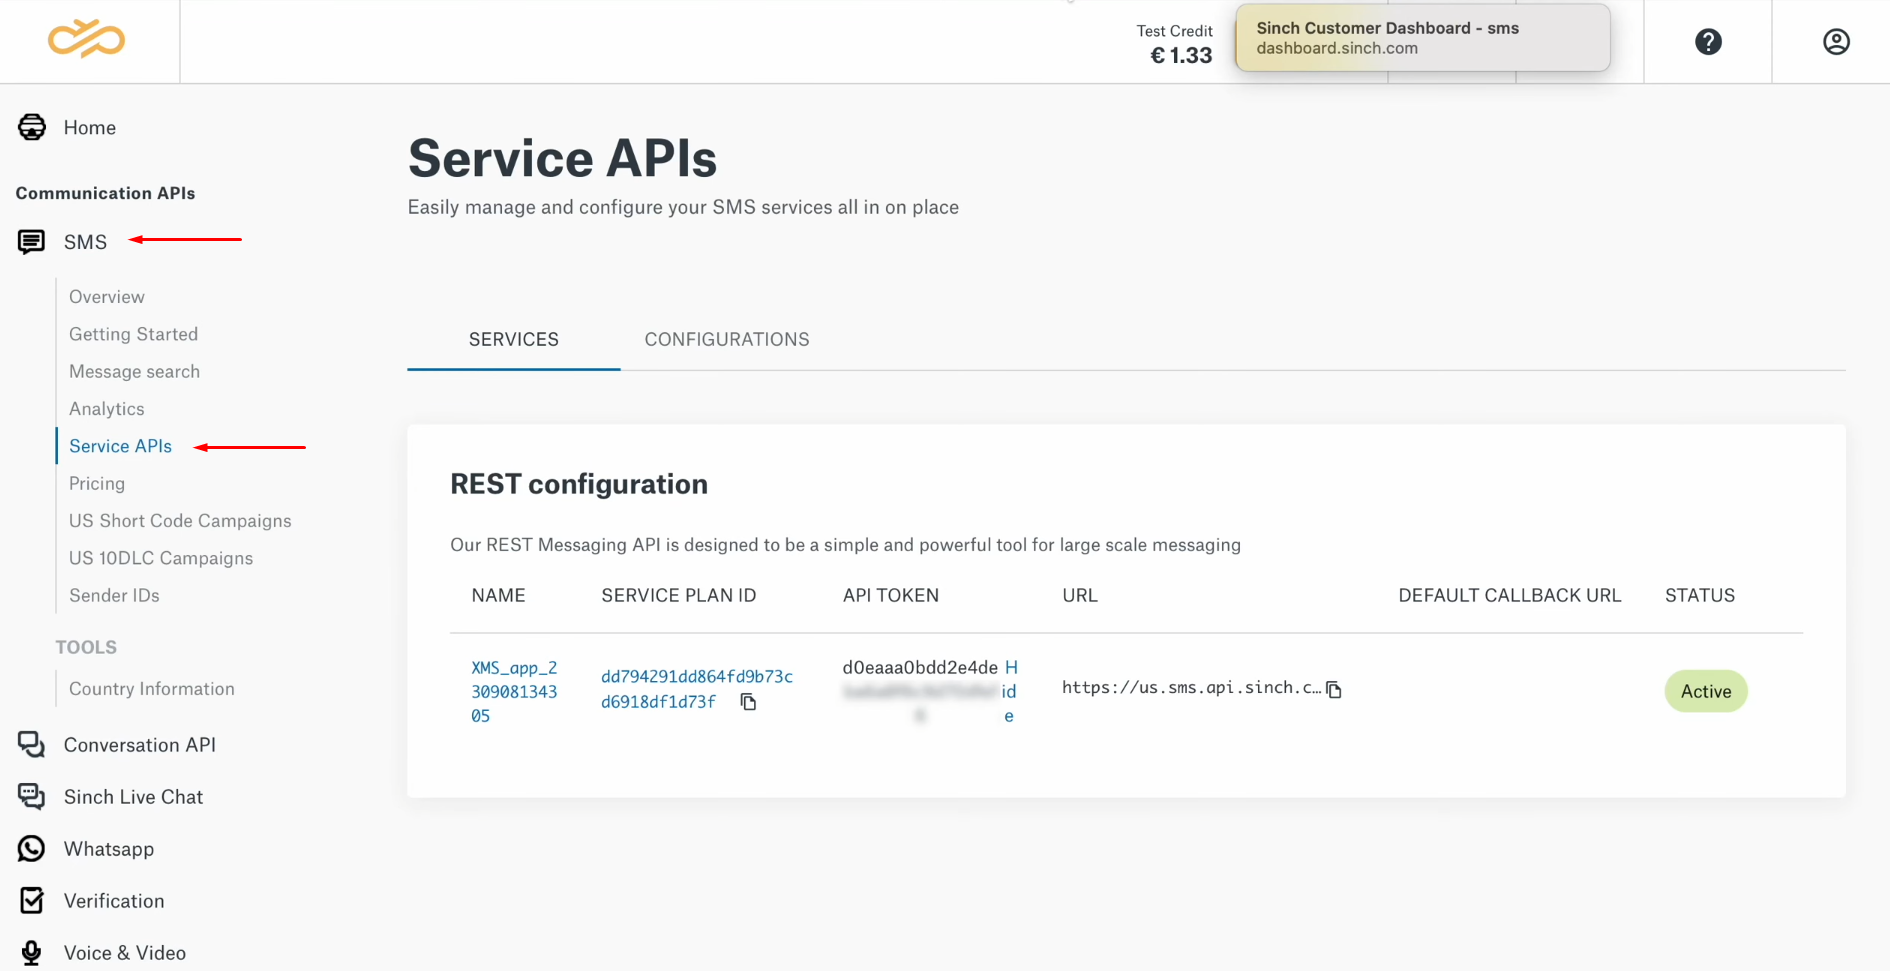
Copy the URL.
Paste the URL into the appropriate field in SaveMyLeads.
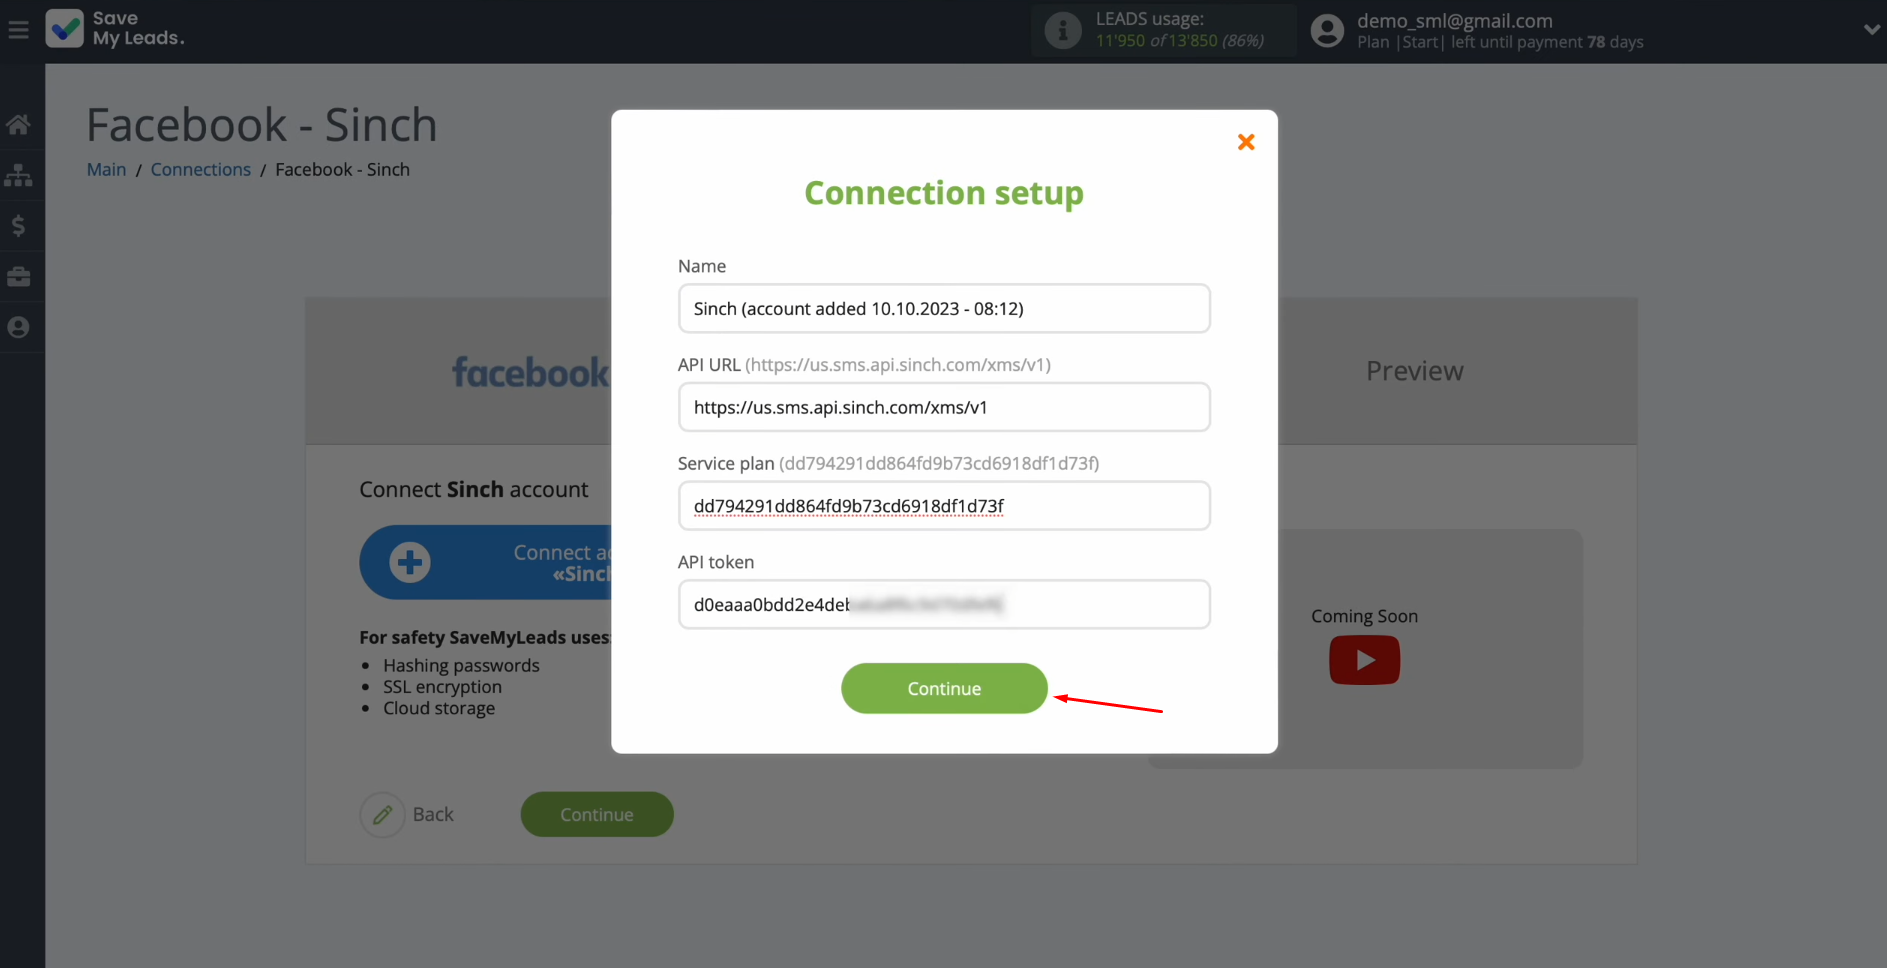
Using this
example, copy the service
plan ID and API token and paste them into
the appropriate fields in SaveMyLeads. When all the required fields are filled in, click “Continue”.
When the connected account appears in the list of active accounts,
select it.
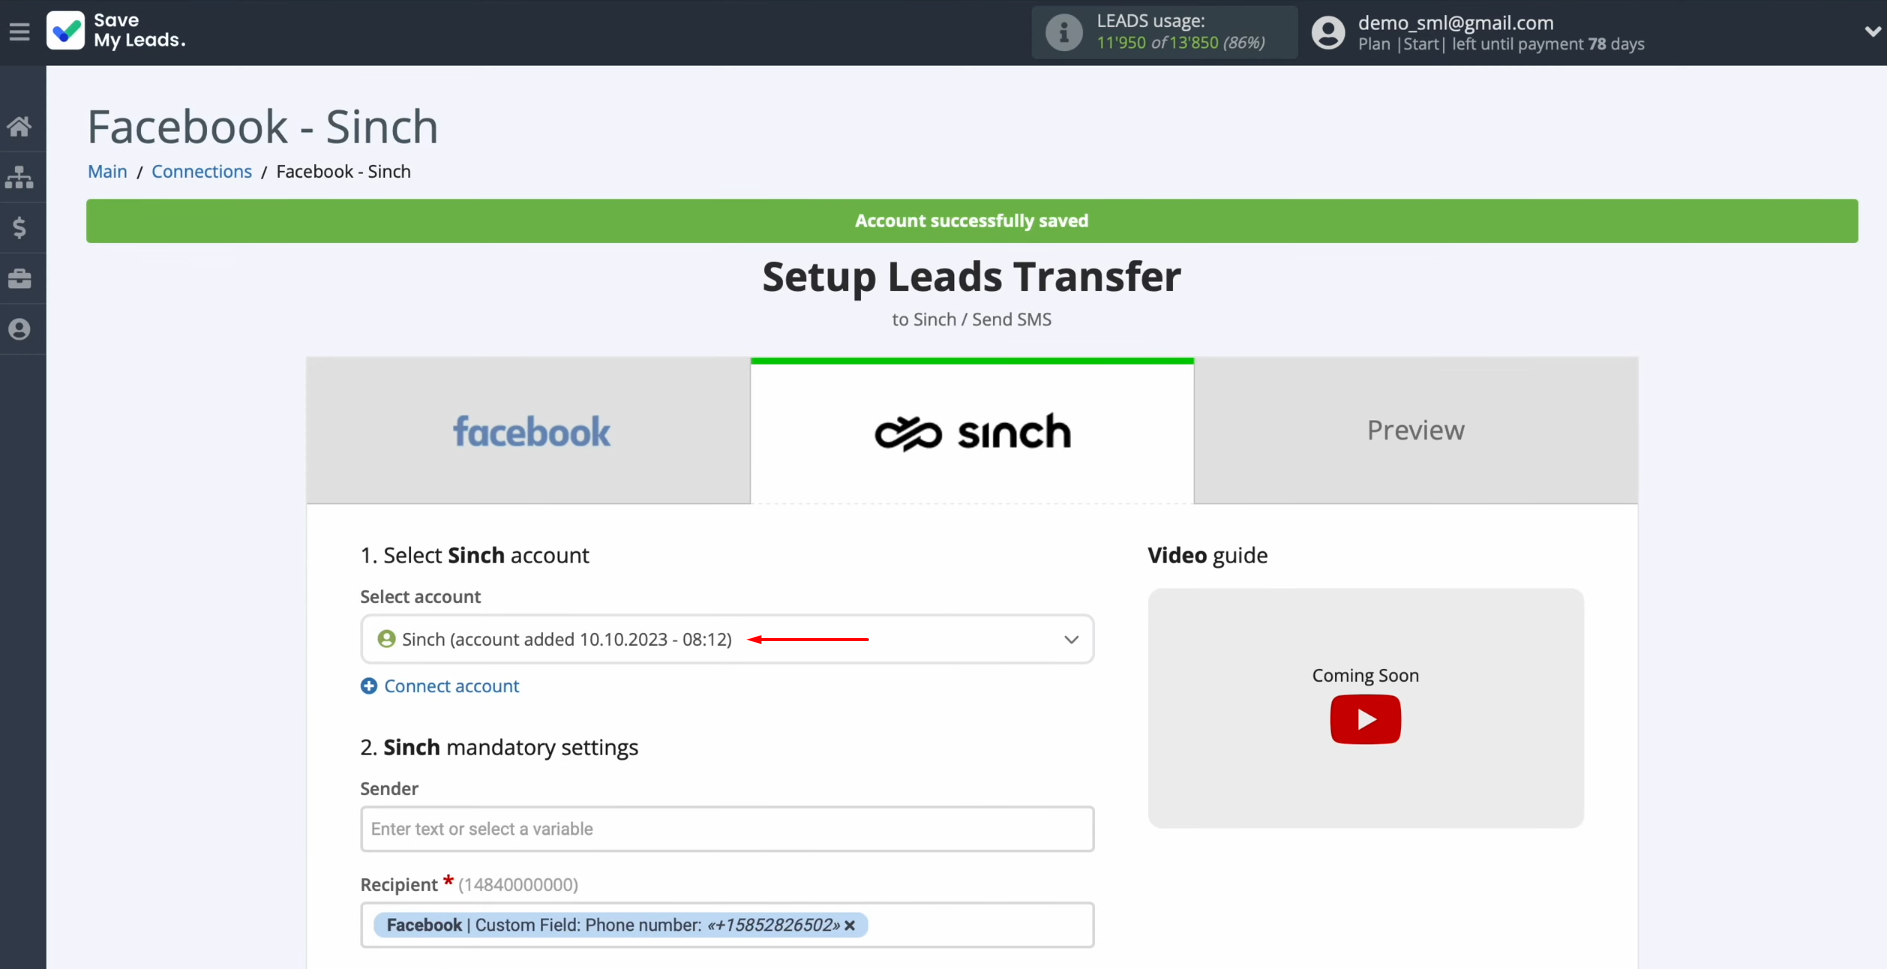
Next, you see Sinch fields for
sending SMS messages. In the sender field, you need to enter the name of the sender, which must have been previously
registered in your Sinch
personal account.
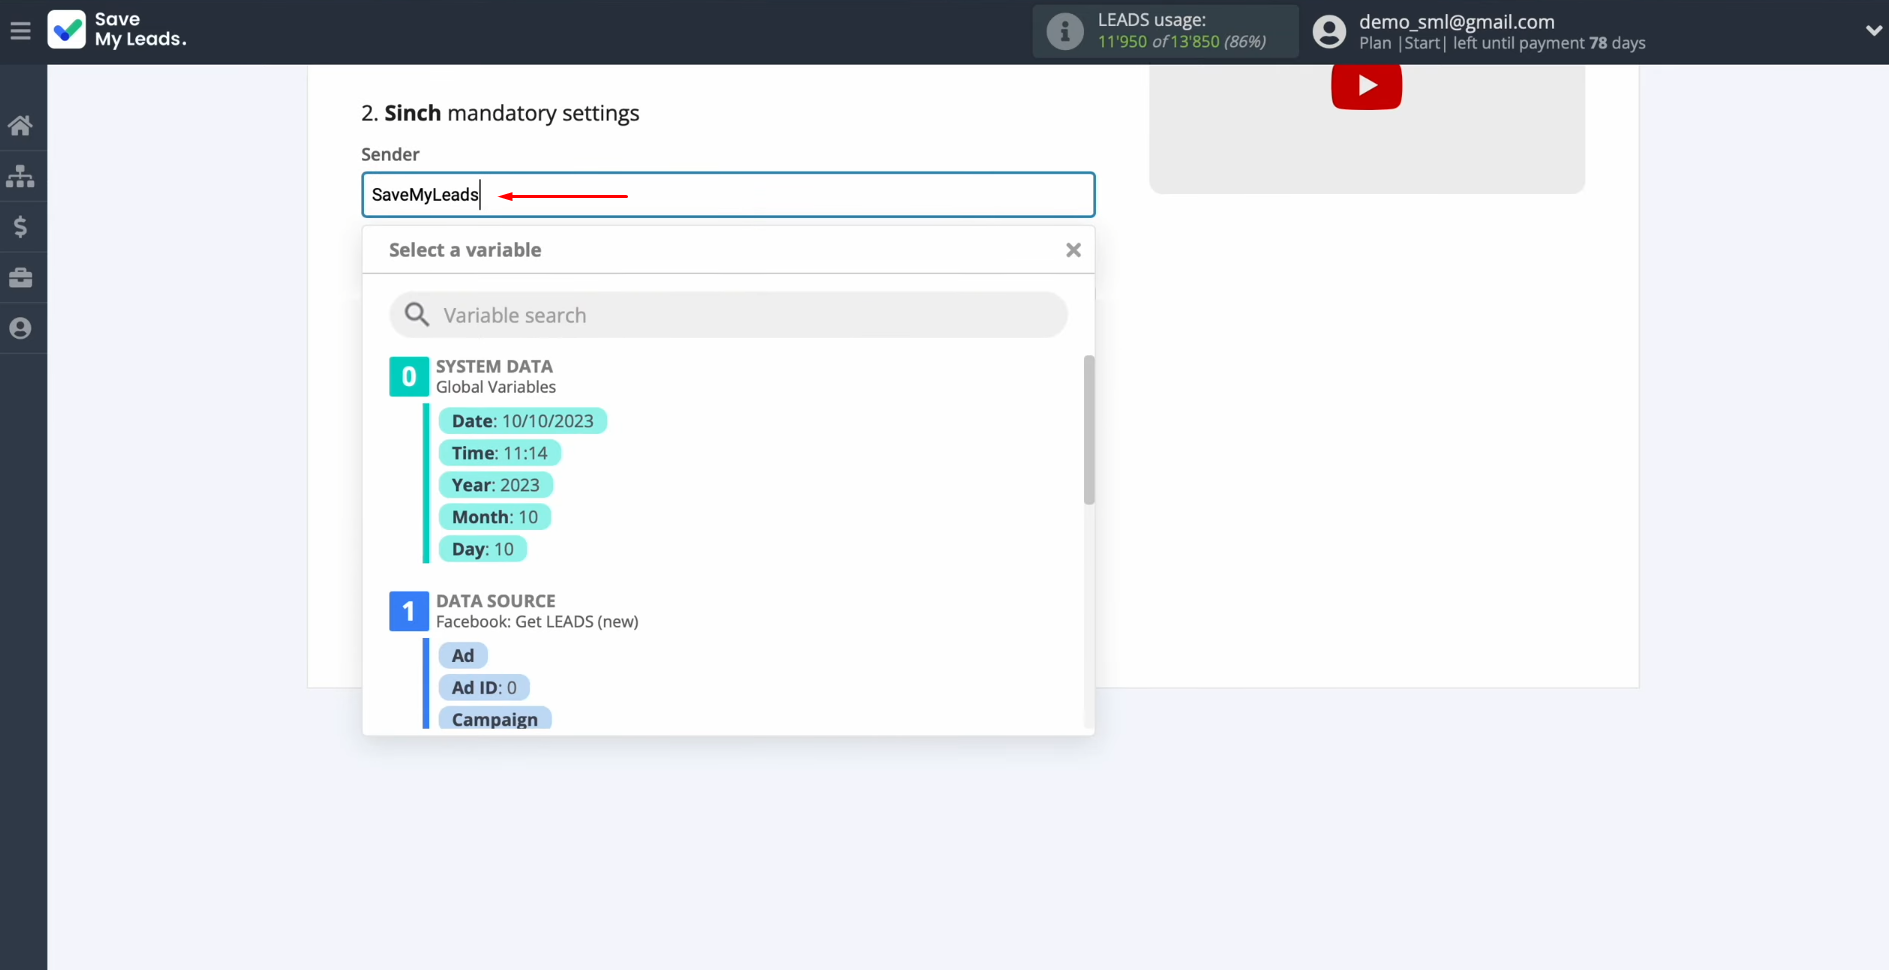
In the recipient field, you need to
assign a variable from Facebook that contains the phone number. To achieve this, click in the field and select a variable from the drop-down list.
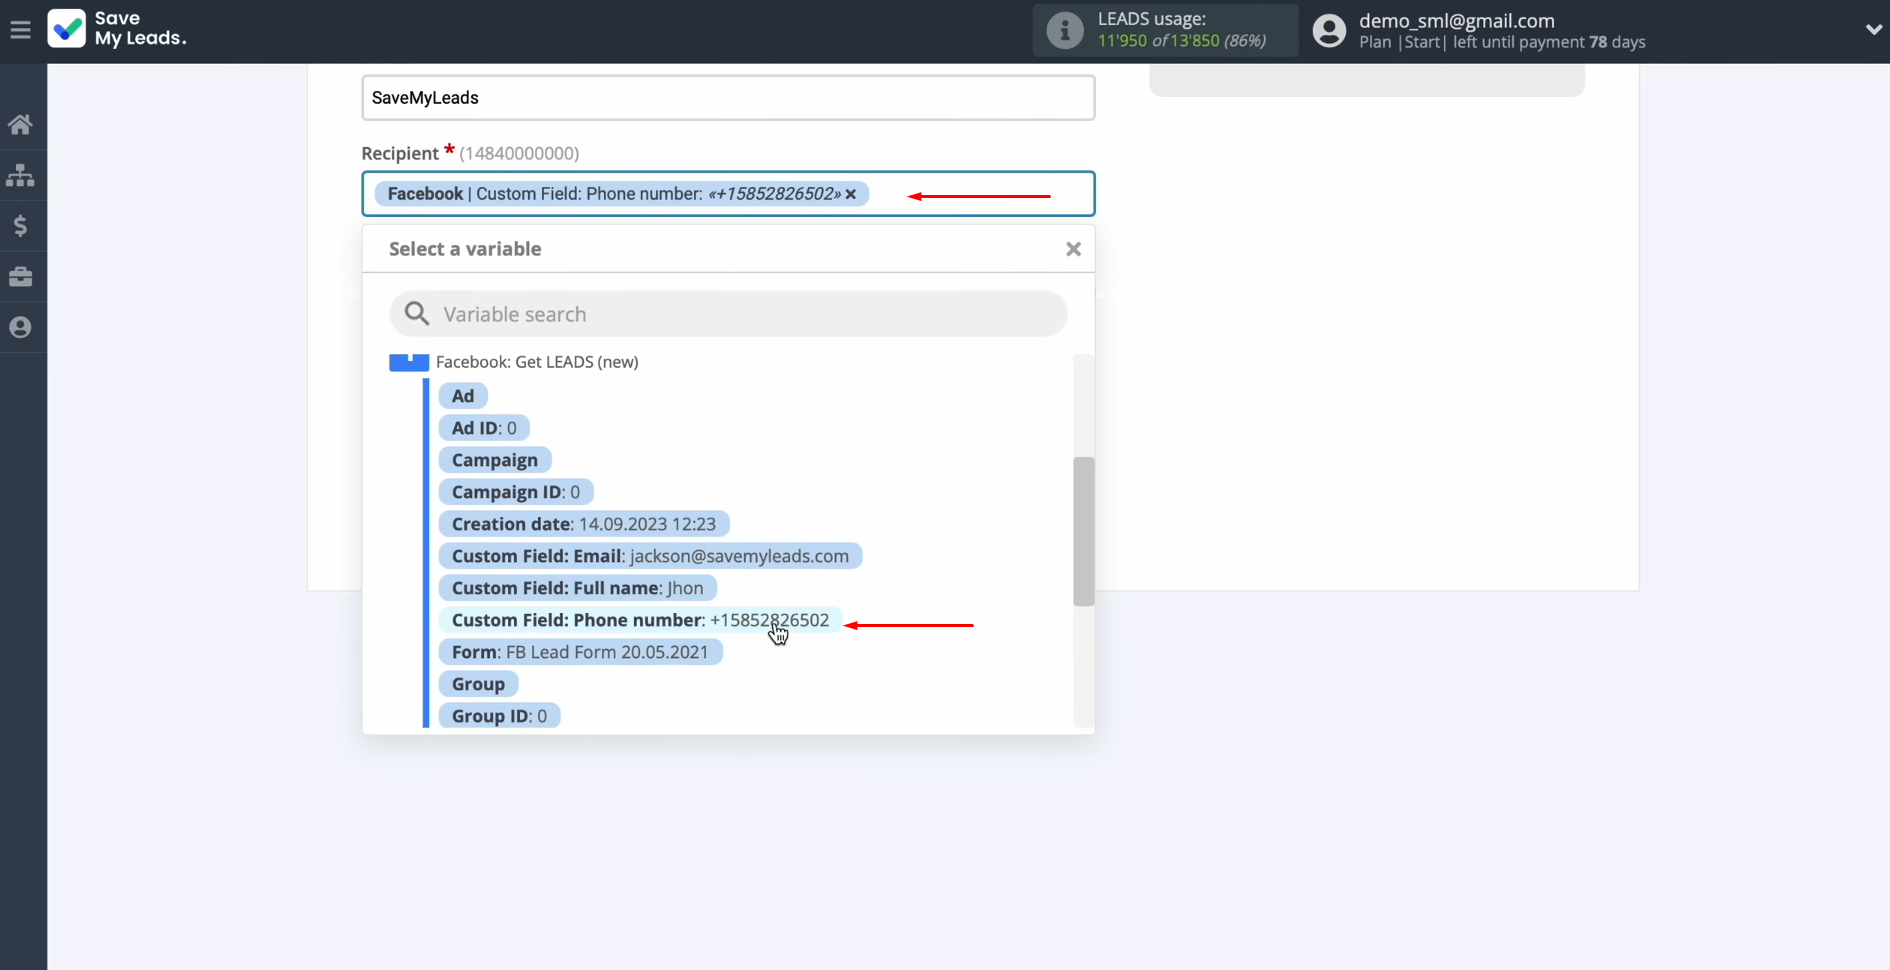
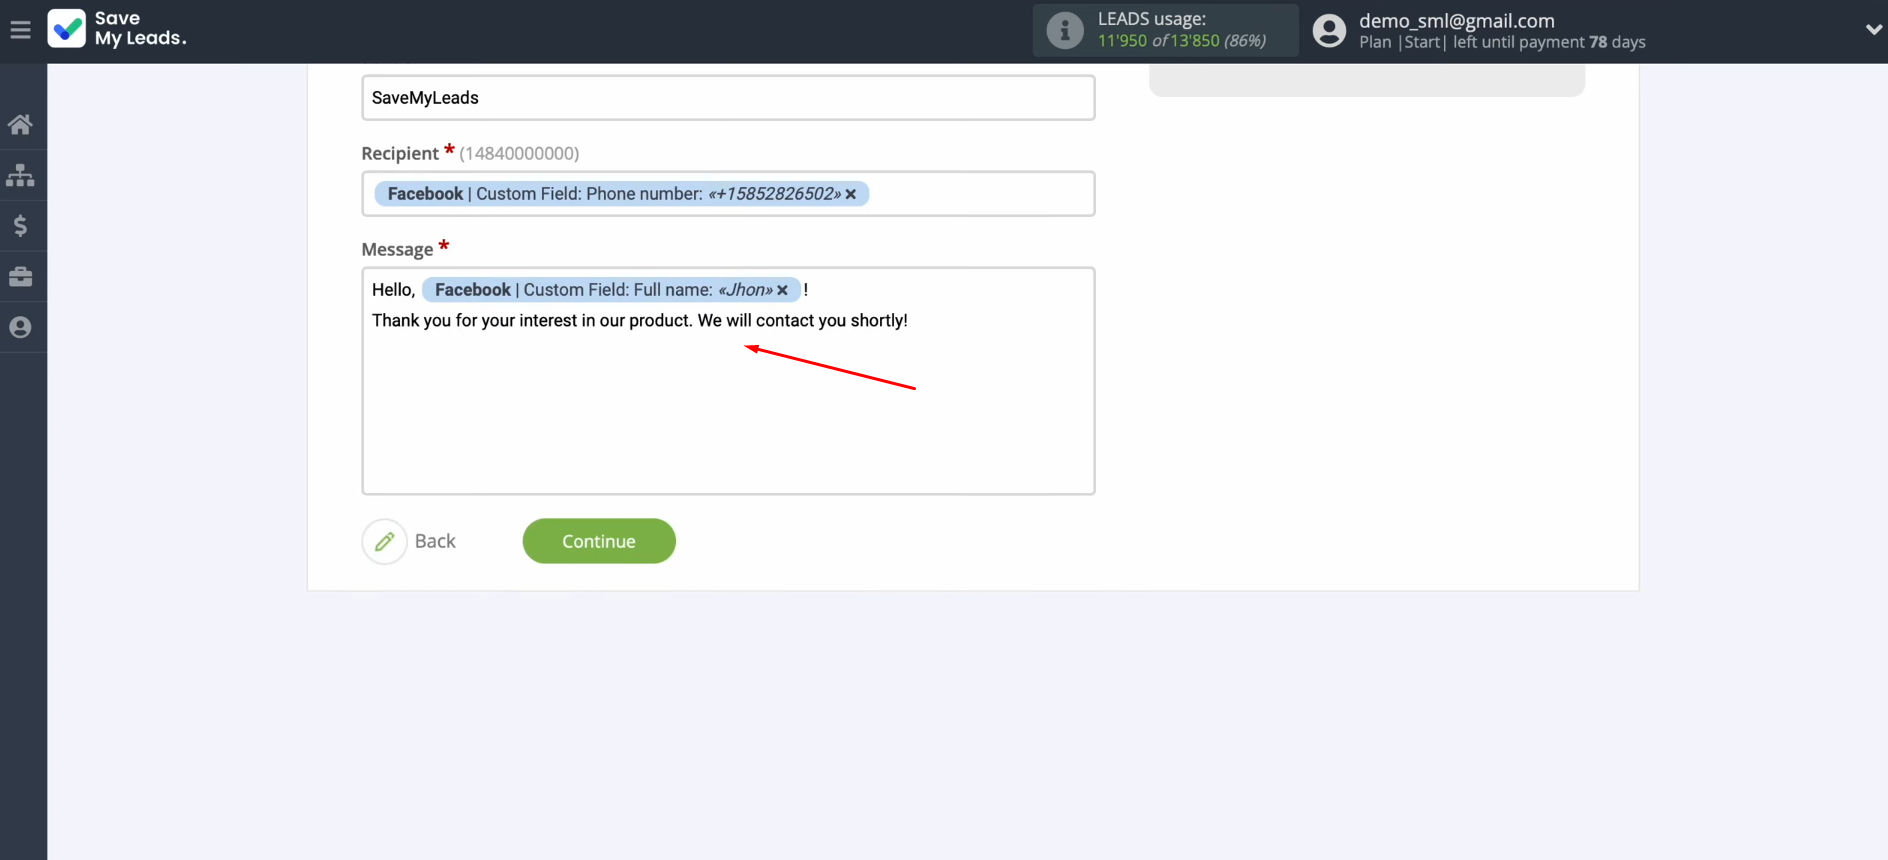
In the message field, you have to create a message that will be sent as
an SMS to each lead from Facebook. Please note that you can use plain text as well as
variables from the drop-down list. When all
required fields are filled in, click “Continue”.
At this stage, you see an
example of the data that will be sent as an SMS message via the Sinch service with each new lead from Facebook. If you are not satisfied with
something, click “Back”, and you will go back a step. To check the correctness of the settings,
click “Send test data to Sinch”.
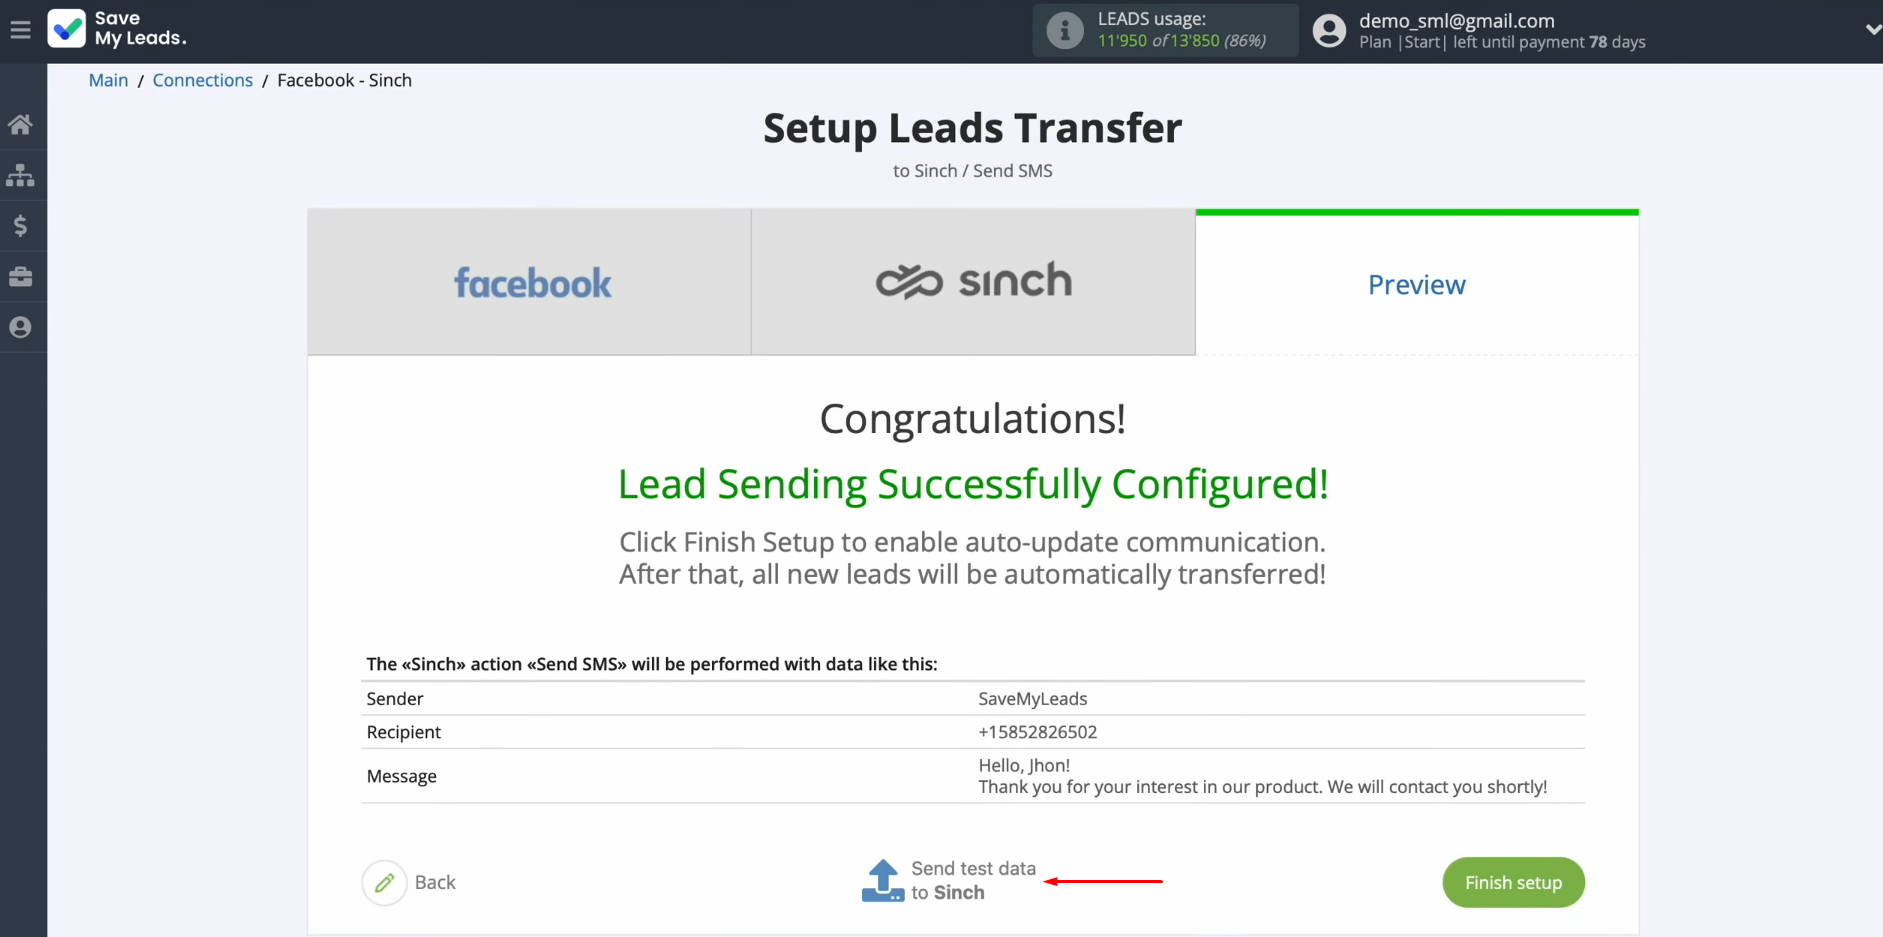
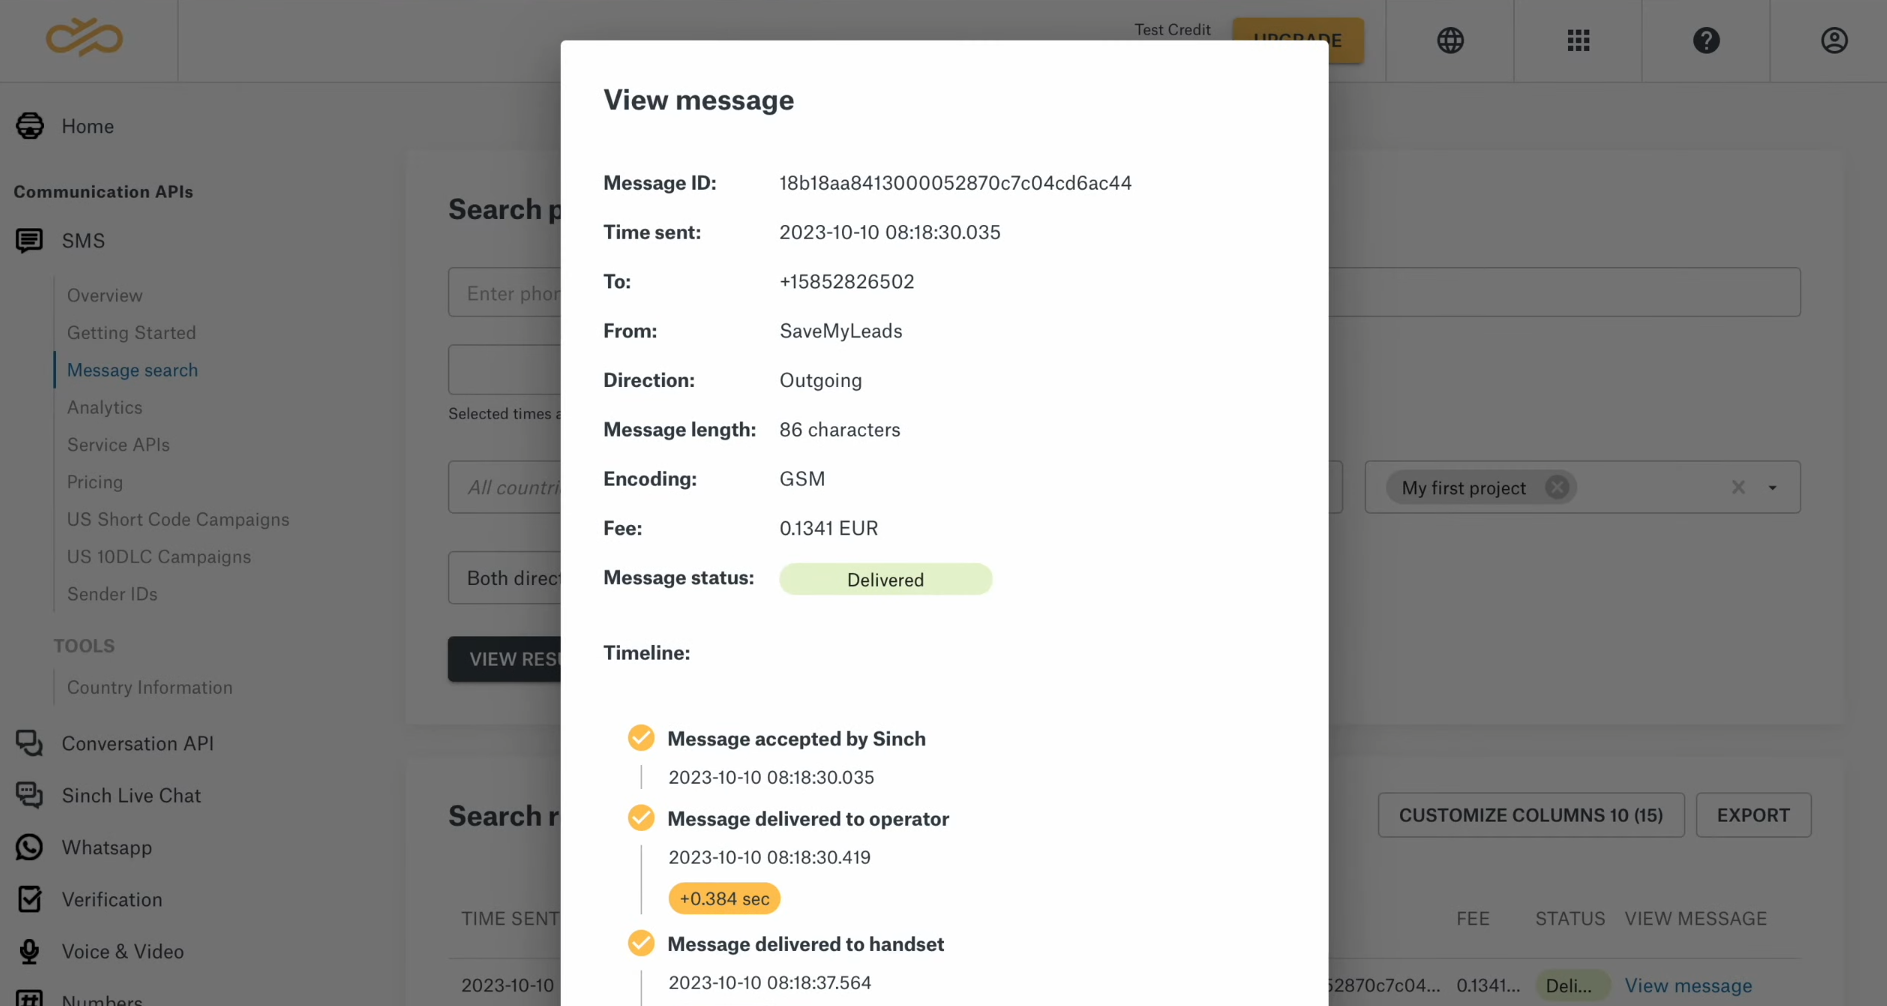
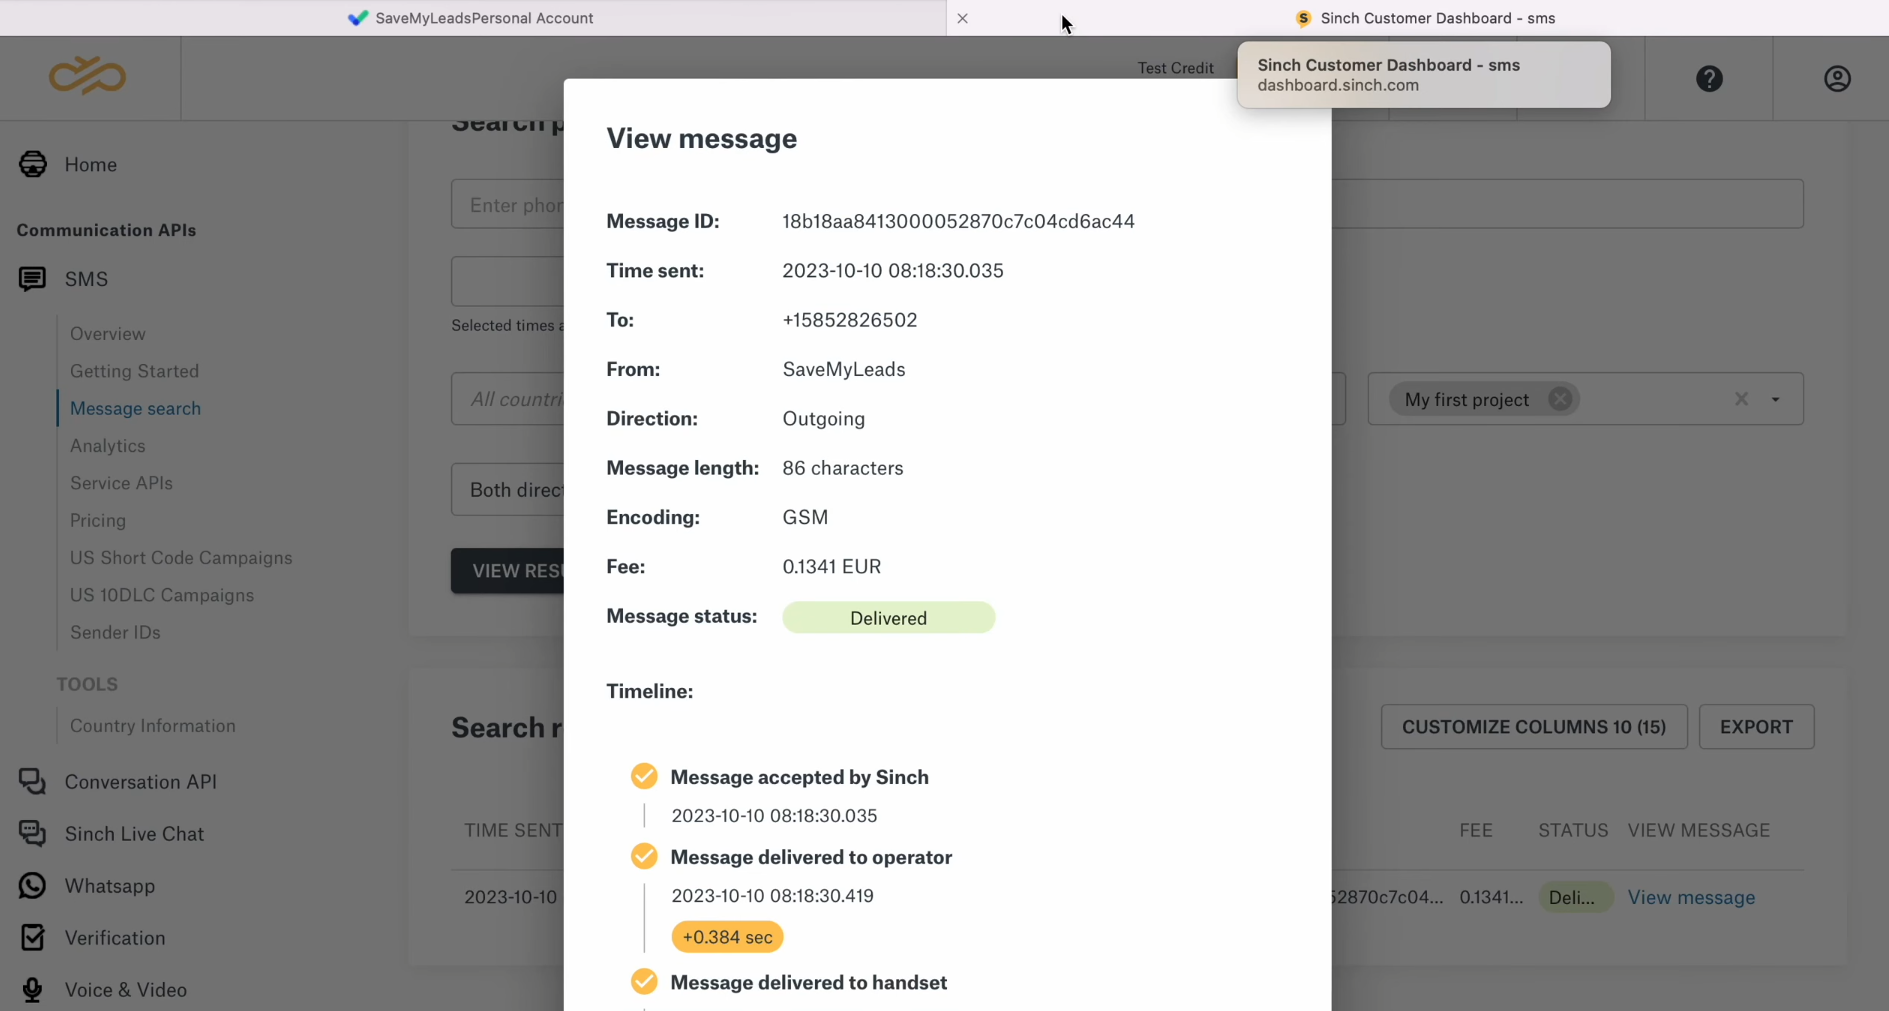
After successful sending, go to
Sinch and check the result. If you are satisfied with everything, return to SaveMyLeads and
continue setting it.
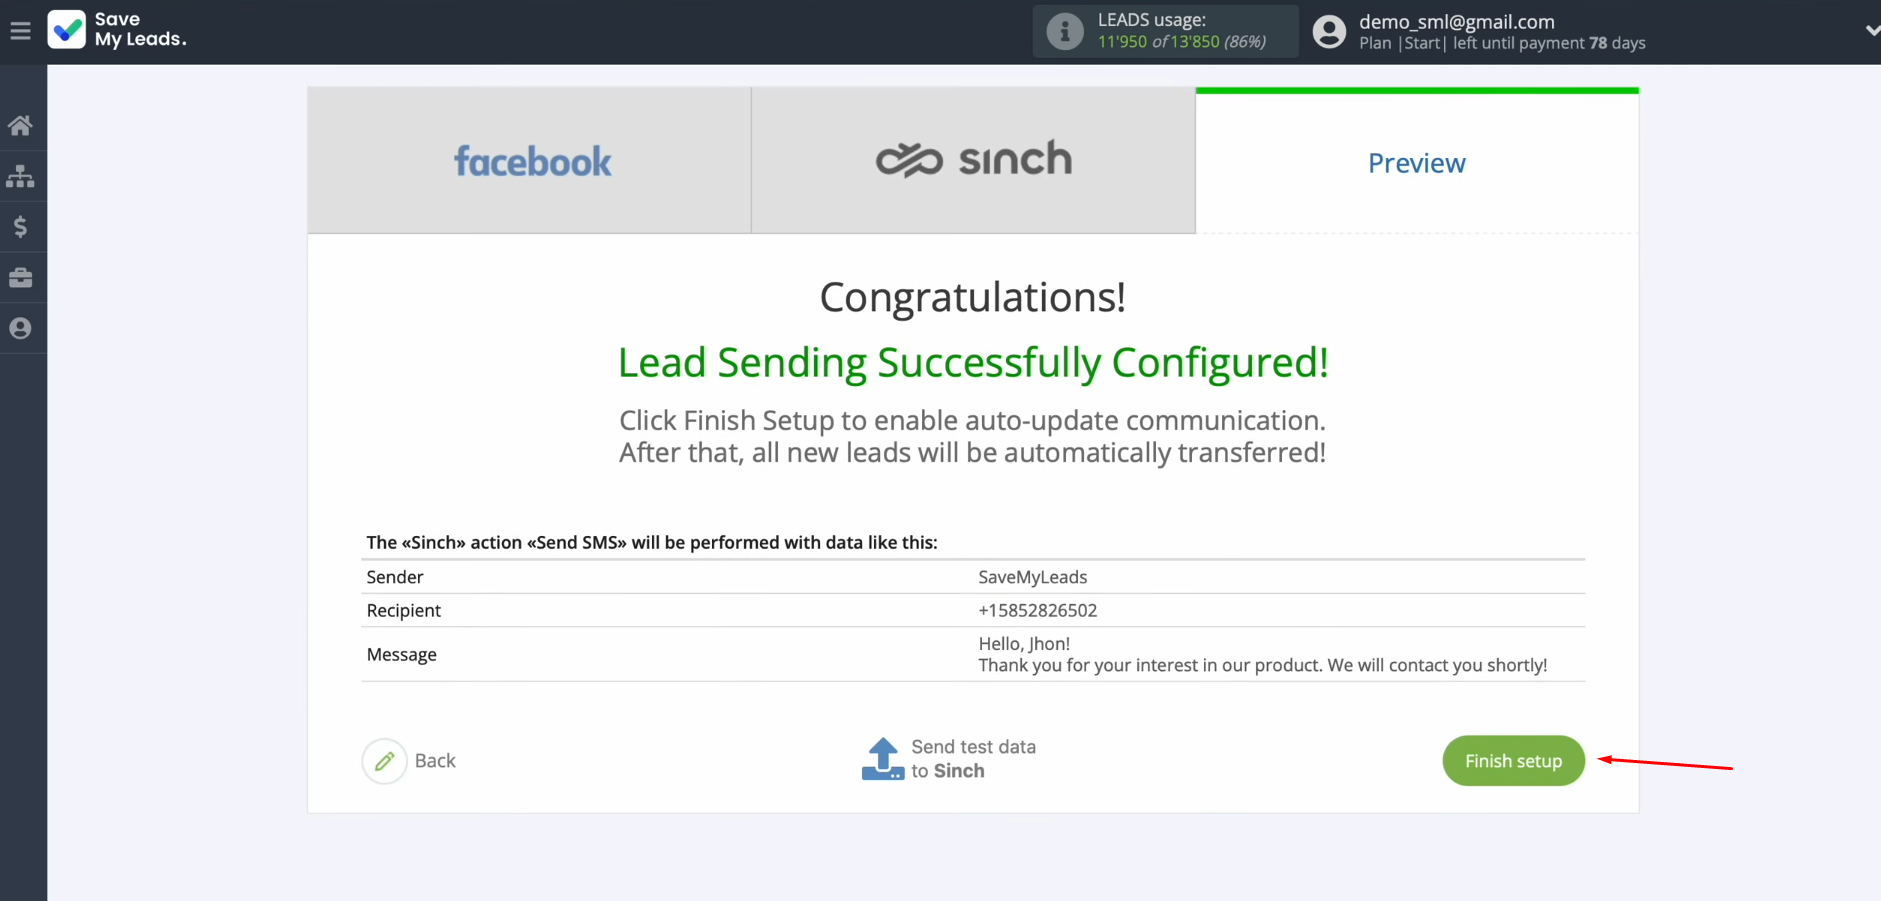
Setting Up Auto-Update
In order for each new lead from Facebook to instantly receive an SMS message via the Sinch service, you need to enable auto-update. To achieve this, click “Finish setup”.
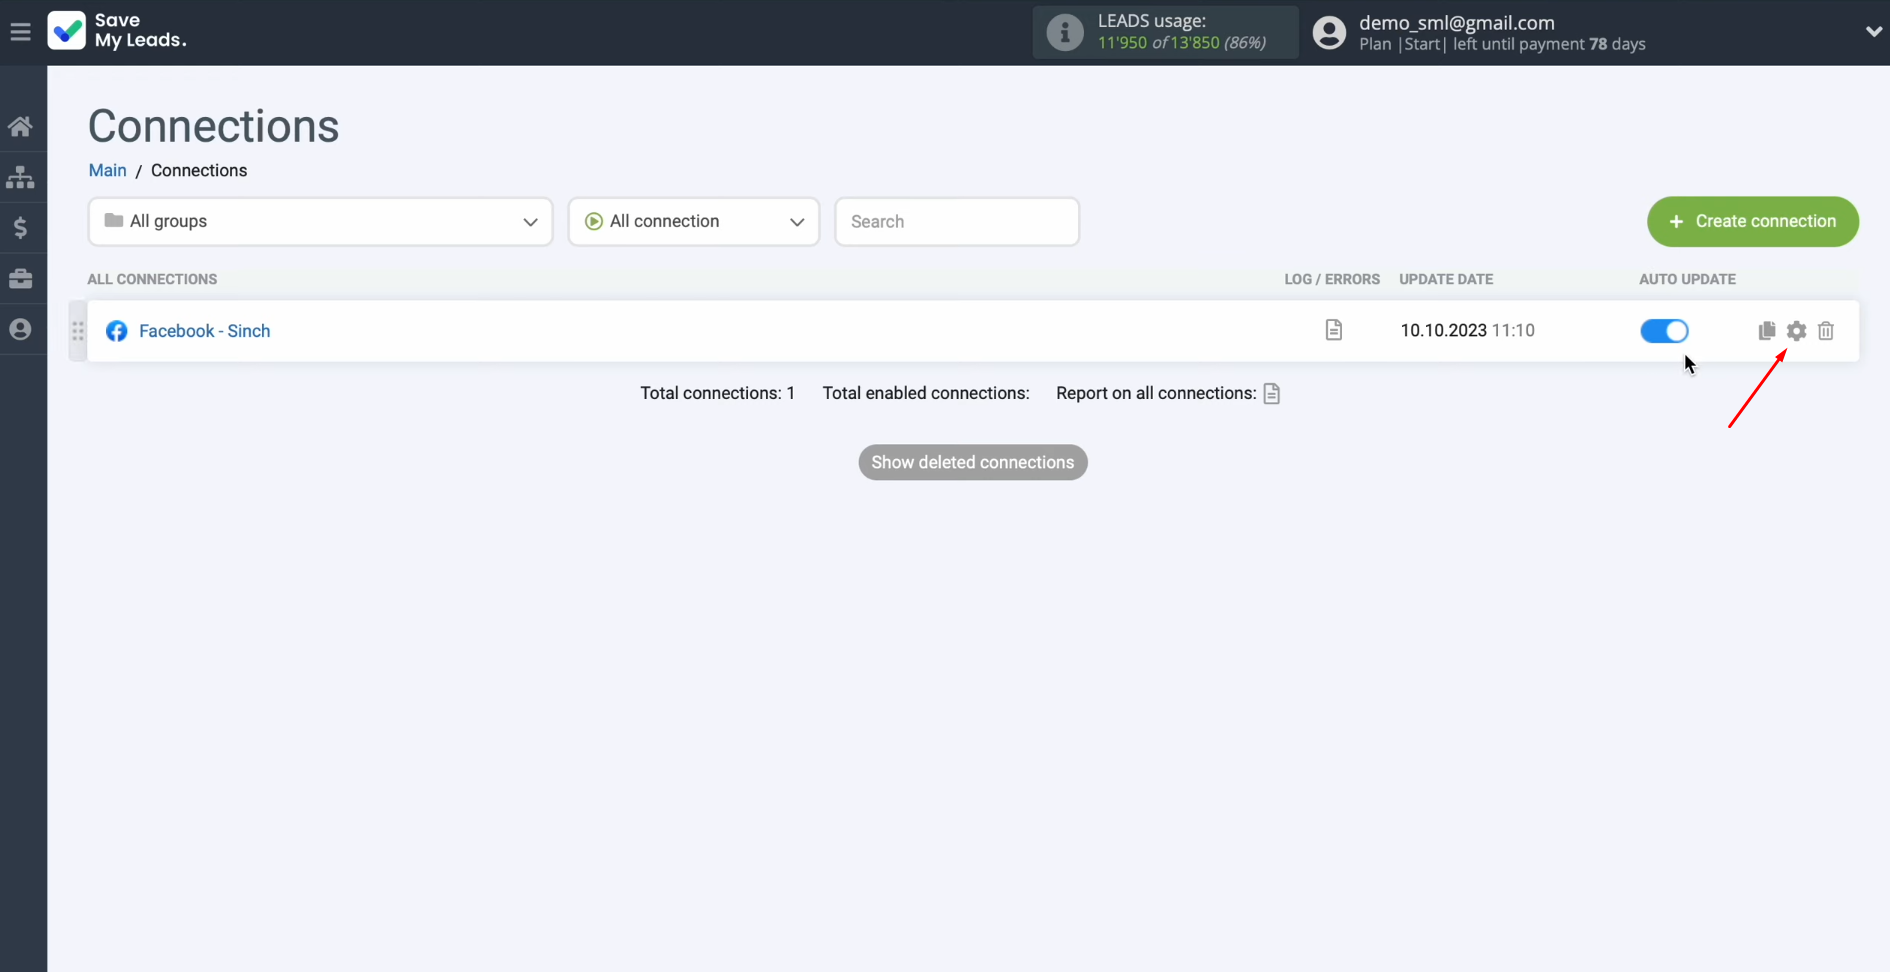
If you want
to change the connection name, you can do this in its settings. For this, click on the gear icon.
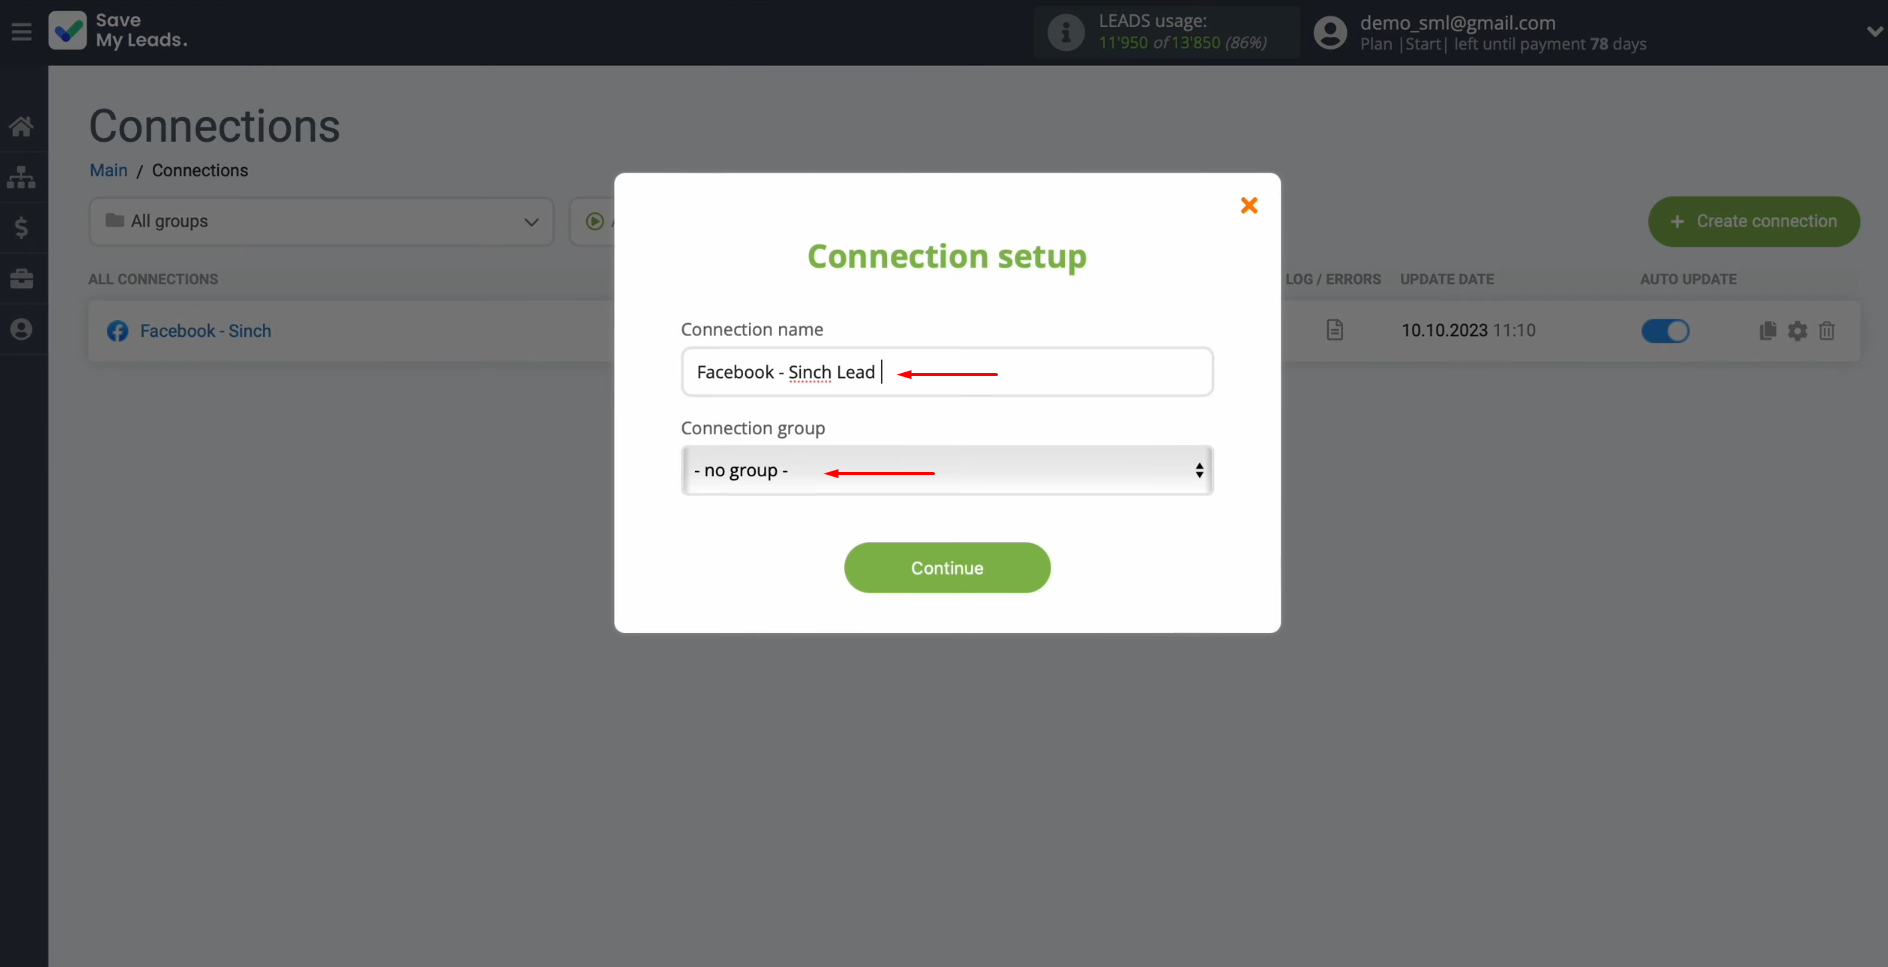
Here, you can change the
connection name and add your connection to a group. After that, click “Continue”.
That's all. Facebook
+ Sinch integration is complete.
Result of Facebook-Leads and Sinch integration
If you followed our instructions, you should be able to successfully set up a connection that allows you to automatically send an SMS message from Sinch to every new lead from Facebook. Sinch + Facebook integration will give you the opportunity to no longer transfer contact information of leads from a social network to a communication service and start sending messages manually. This will free up your time, which you can use to tackle more important or creative tasks.
- Automate the work with leads from the Facebook advertising account
- Empower with integrations and instant transfer of leads
- Don't spend money on developers or integrators
- Save time by automating routine tasks
Automation of business processes is one of the most important trends not only today but also in the near future. The SaveMyLeads connector is a lightweight yet powerful tool that will help you quickly set up integrations, increasing your productivity and competitiveness without putting a significant strain on your budget.
Would you like your employees to receive real-time data on new Facebook leads, and automatically send a welcome email or SMS to users who have responded to your social media ad? All this and more can be implemented using the SaveMyLeads system. Connect the necessary services to your Facebook advertising account and automate data transfer and routine work. Let your employees focus on what really matters, rather than wasting time manually transferring data or sending out template emails.
