PeopleForce is an HRM/HRIS platform for recruiting and personnel management. Almost all the tools that HR managers may need in their work are concentrated here. With this service, they no longer have to deal with maintaining paper documentation, storing hundreds of spreadsheets, and managing dozens of browser tabs. By the way, it is suitable not only for recruiters but also for company managers, teams, and individual employees. In our article, you will learn how to set up PeopleForce and Facebook integration to automate the creation of candidates in the HRM platform based on completed Facebook lead forms.
Facebook today helps to solve various tasks. The popularity of this social network and the solid set of tools it has for interacting with the audience make it possible to successfully solve recruiting problems. Of course, it cannot be called a 100% alternative to specialized resources for finding employees. Nevertheless, it can serve as a good addition to them.
PeopleForce is a flexible HRM system that optimizes the work of HR specialists and automates recruiting processes. It significantly speeds up and simplifies hiring, onboarding, performance management, time tracking, and other tasks. It helps businesses centralize information about employees, increase the speed of recruiting, track candidates, and automate business routines.
Do you use Facebook and PeopleForce in your work? If so, then you probably had to manually transfer data from lead forms filled out by applicants on the social network to an HRM system. Did you know that this process can be automated? Now we will tell you how to do this.
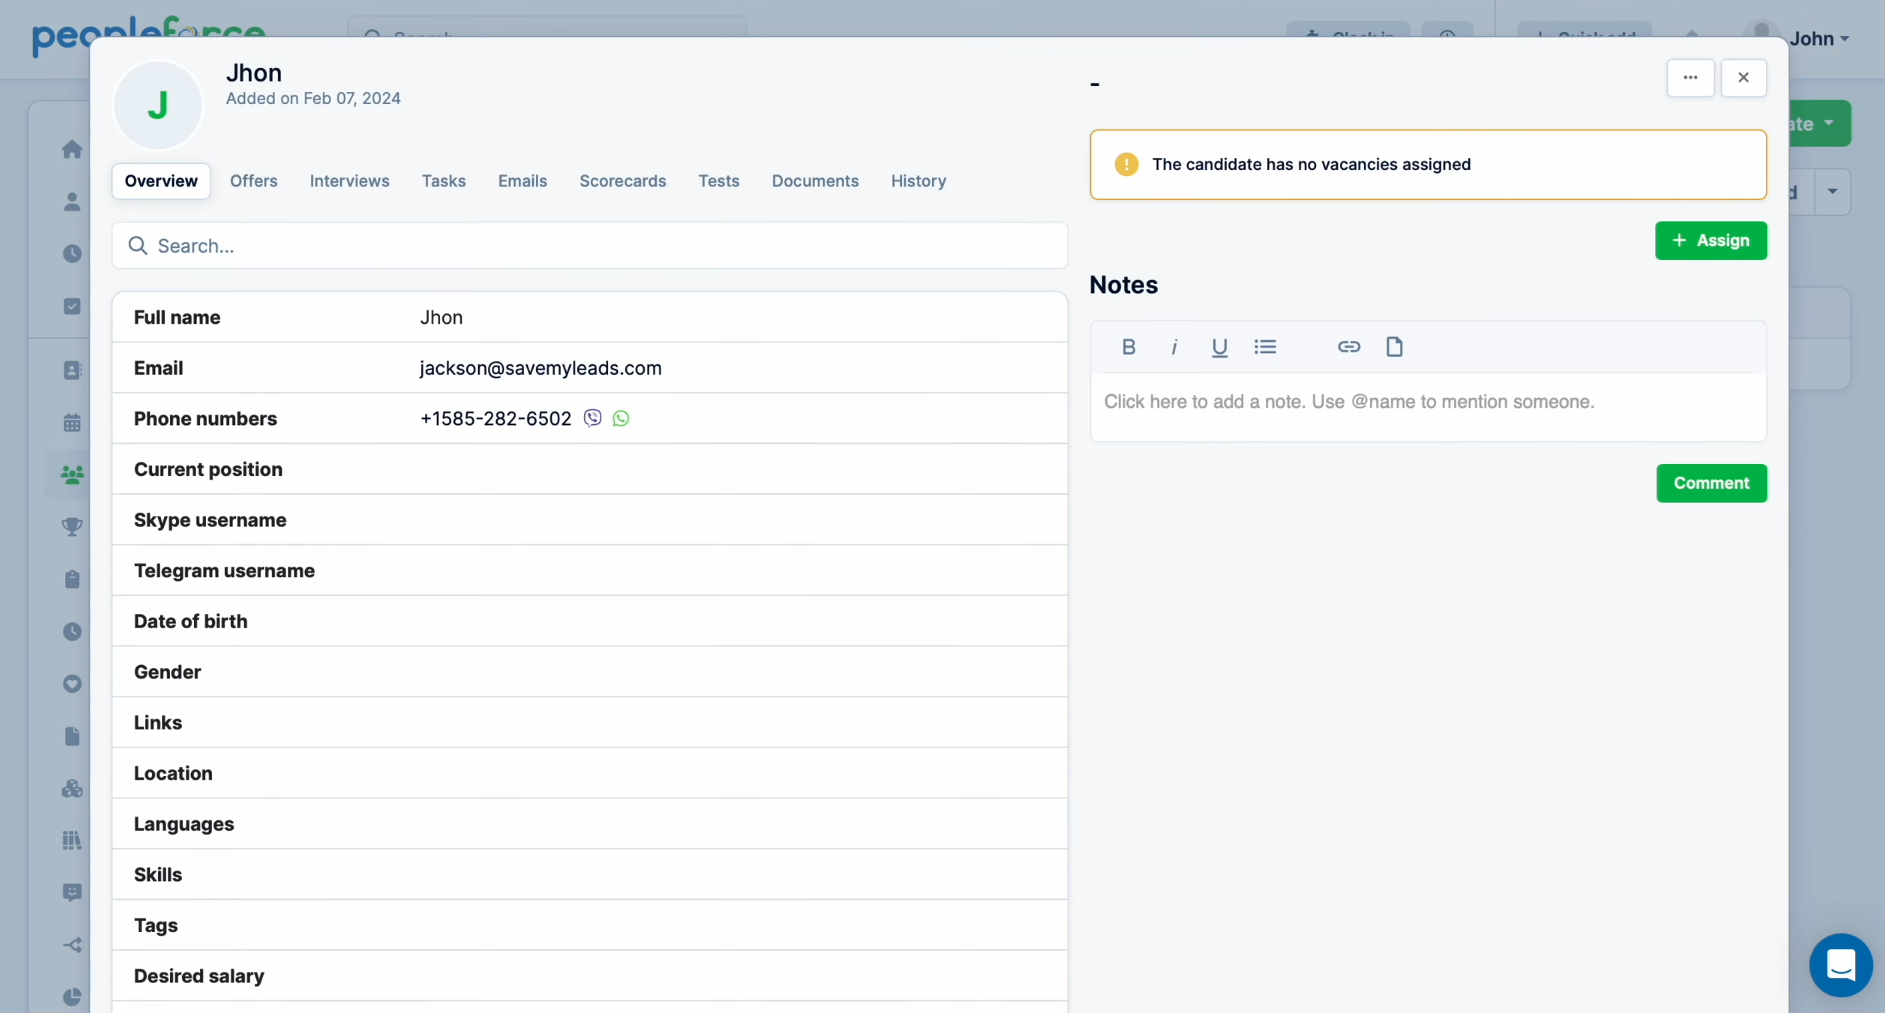
How to Set up Facebook and PeopleForce Integration
To set up automatic data transfer from Facebook to PeopleForce, we recommend using the SaveMyLeads online connector. This is a no-code tool with which you can quickly and easily set up integrations between different systems and platforms. SaveMyLeads provides many ready-made solutions for Google services, Email and SMS services, CRM systems, task managers, instant messengers, and more.
Algorithm of our actions:
- Create a recruiting lead form.
- Set up your Facebook account in SaveMyLeads as a data source.
- Connect your PeopleForce account to the integration as a data receiver.
The result is an automated, seamless process for migrating applicant data from every submitted Facebook lead form to the PeopleForce system. We won’t give instructions here on how to create a recruiting lead form (it’s easy, and you most likely already know how to do it). But we suggest considering the next steps in more detail.
Configuring the Data Source – Facebook
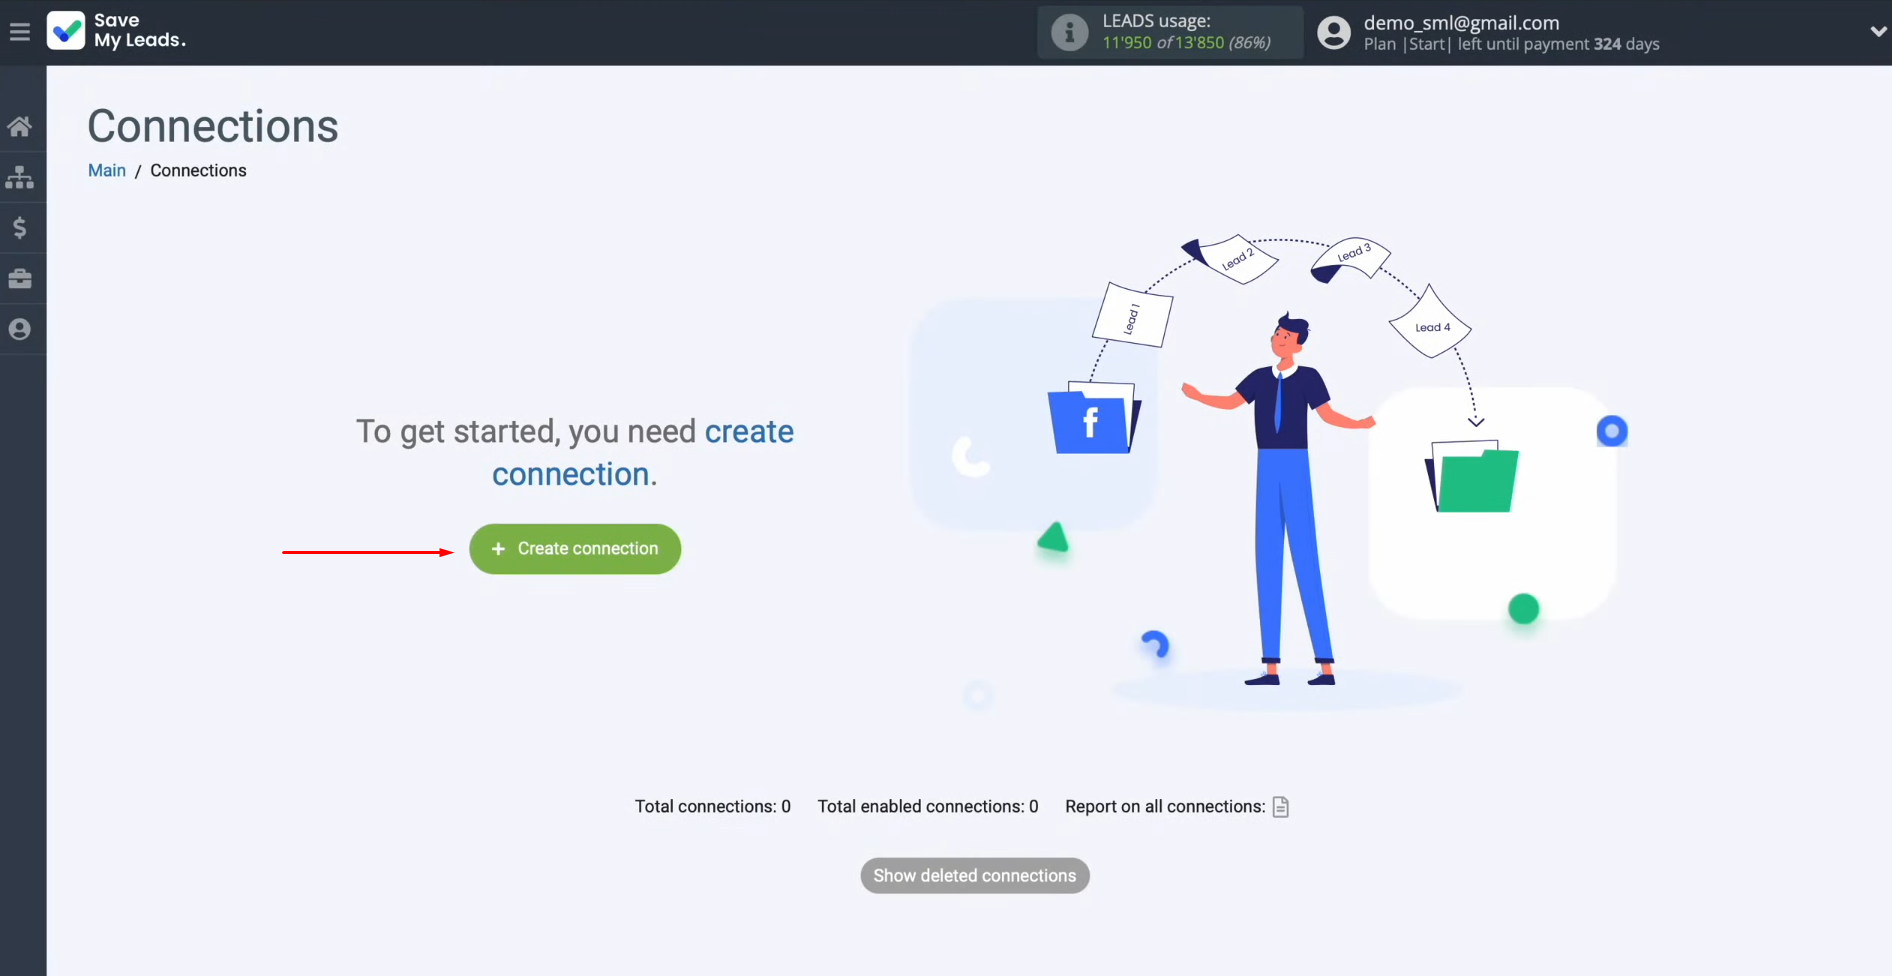
To set up the Facebook integration with PeopleForce, first you have to create a new connection. For this, click on the green button, “Create connection”.
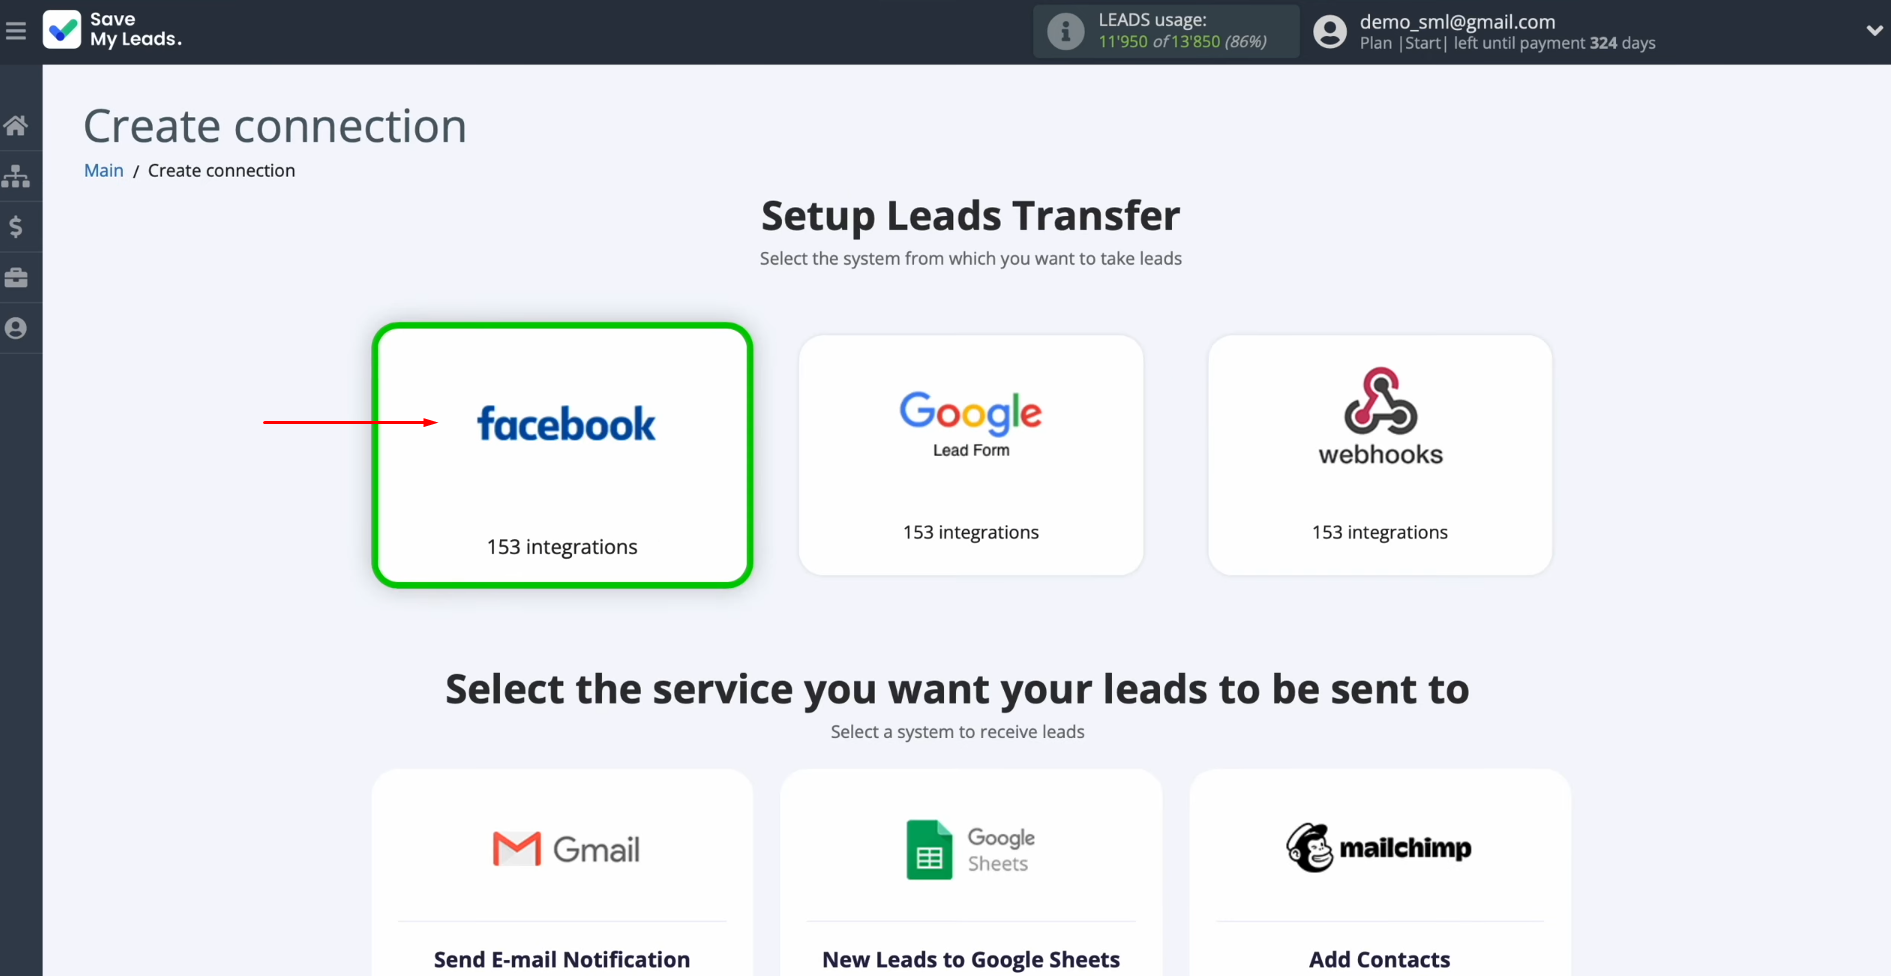
Next, you need to select the data source system. In this case, we select Facebook.
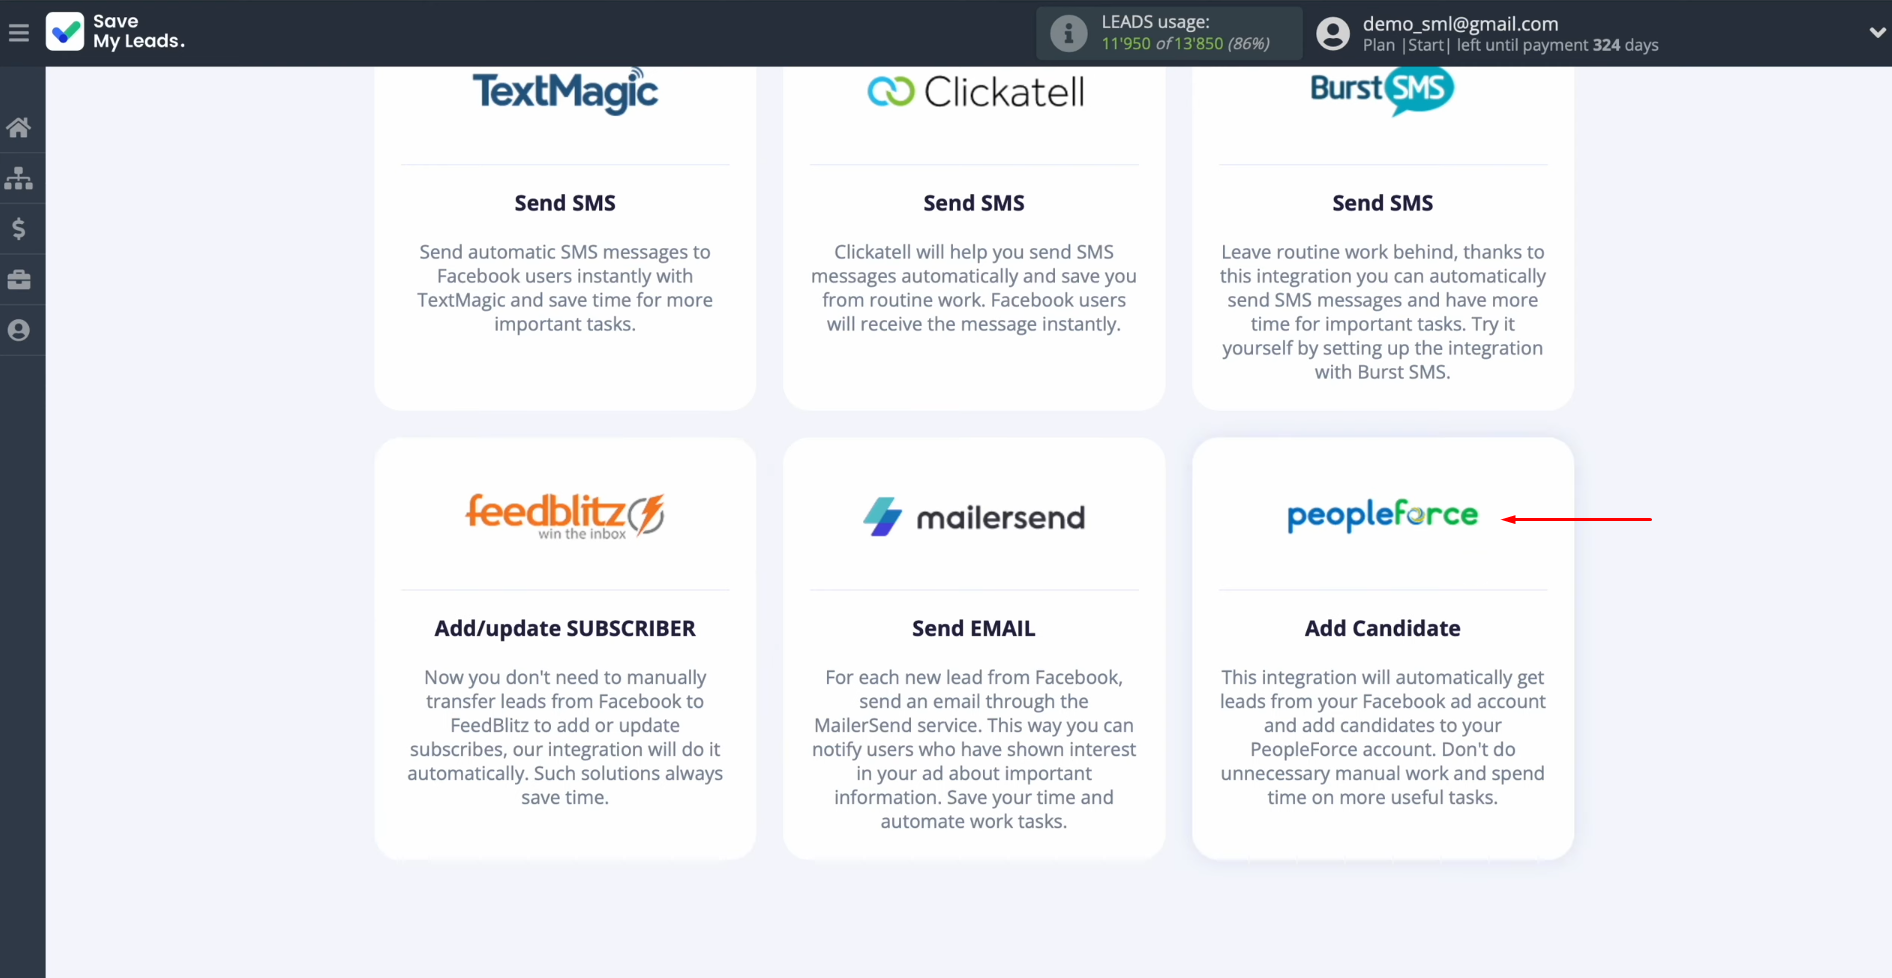
Now, select the system to which you want to transfer new leads from Facebook. In this case, choose PeopleForce (Add Candidate).
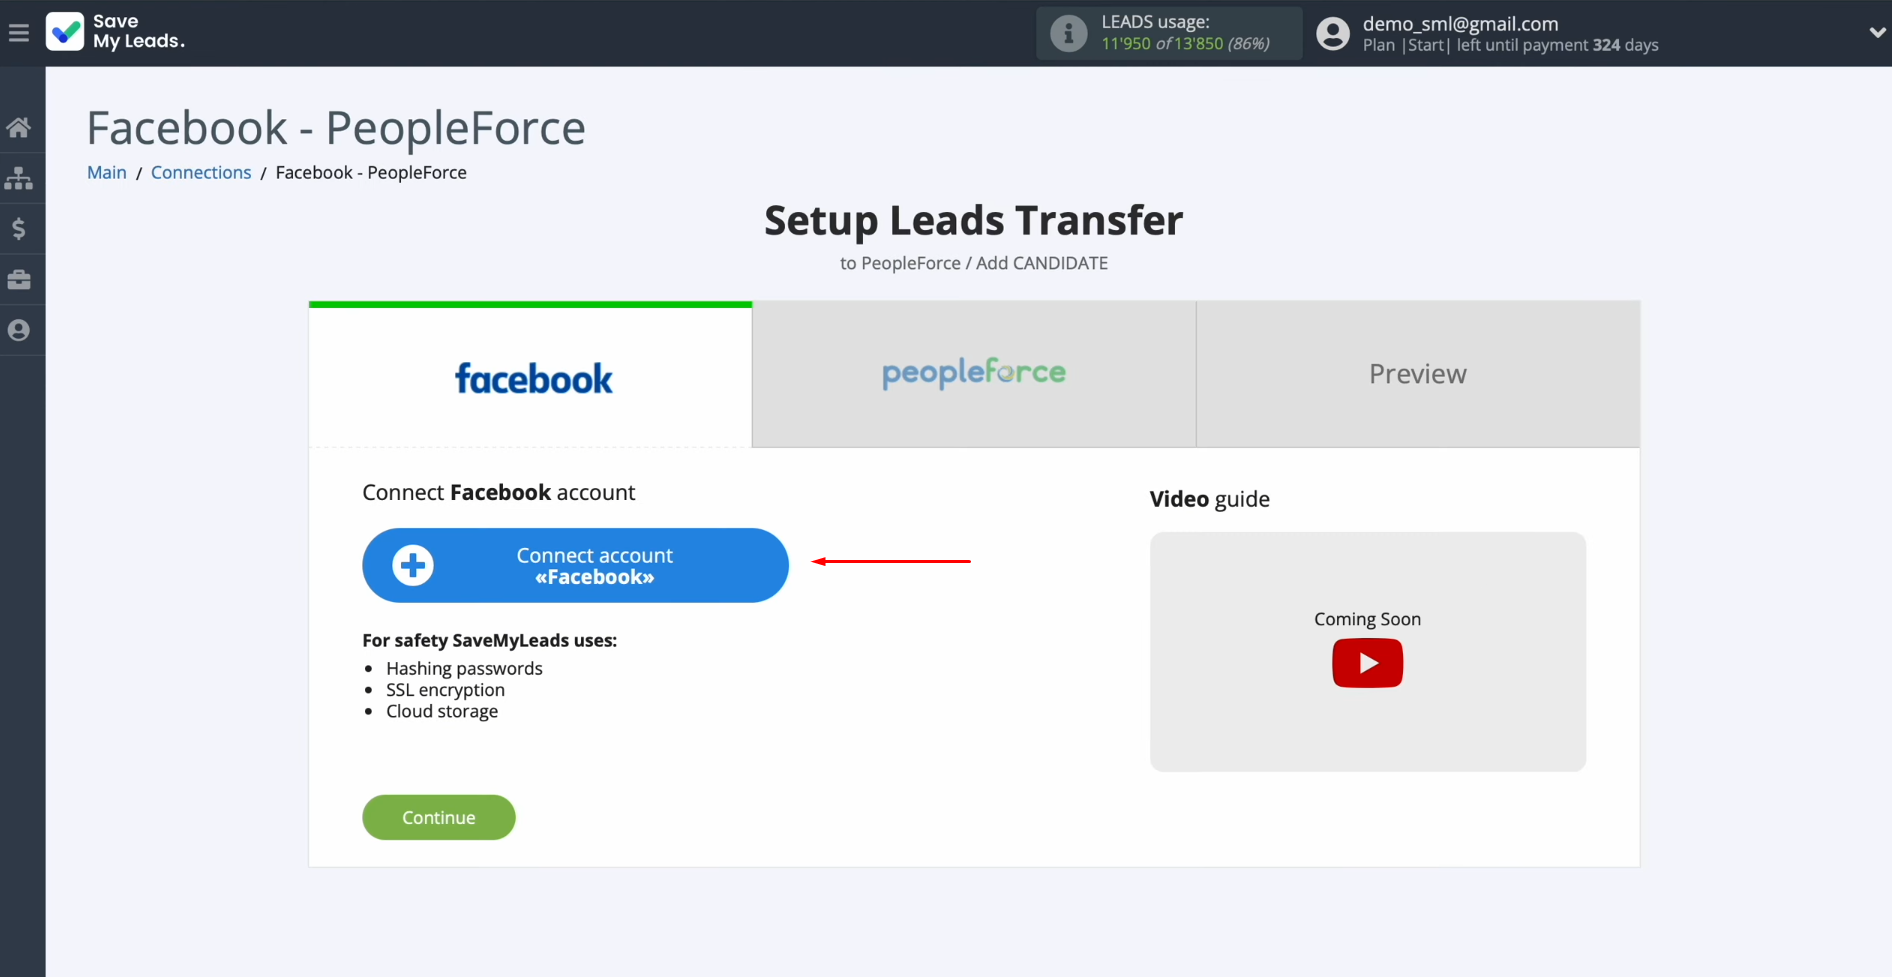
At this stage, you must connect your Facebook account to SaveMyLeads. To do this, click on the blue button.
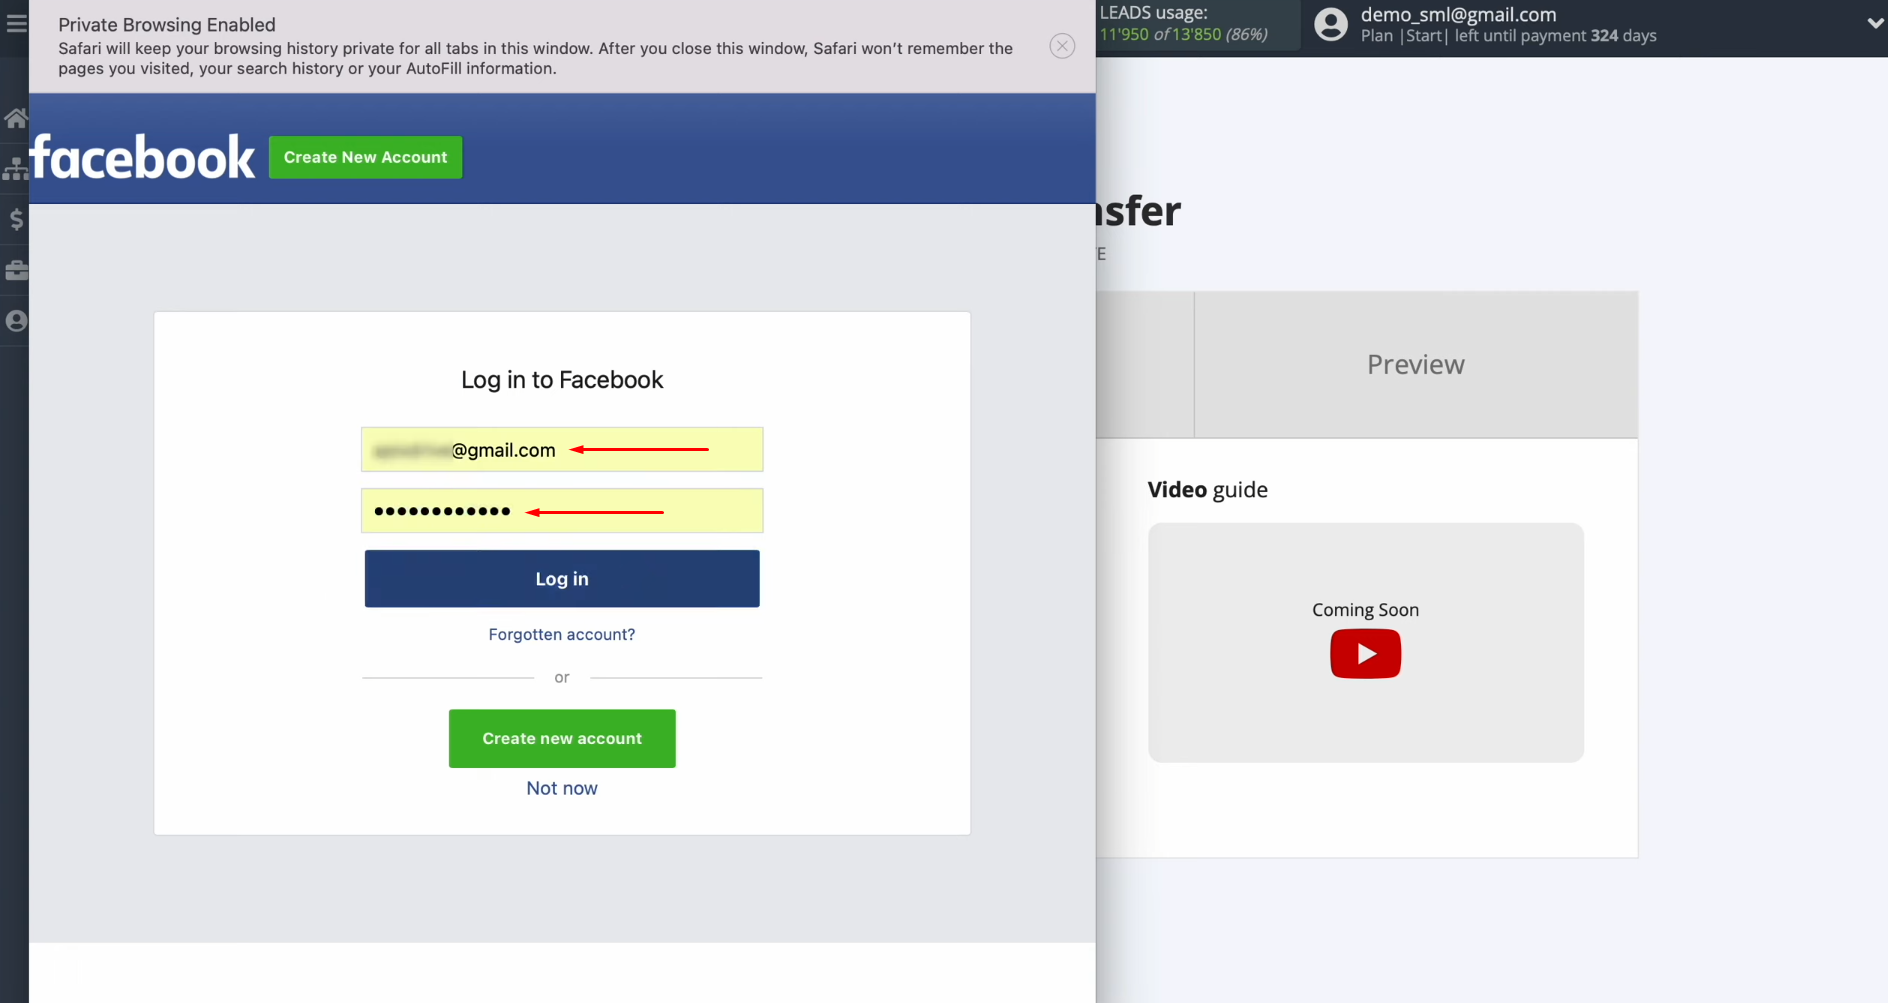
In this window, you must specify your Facebook personal account login and password. Click “Log in”.
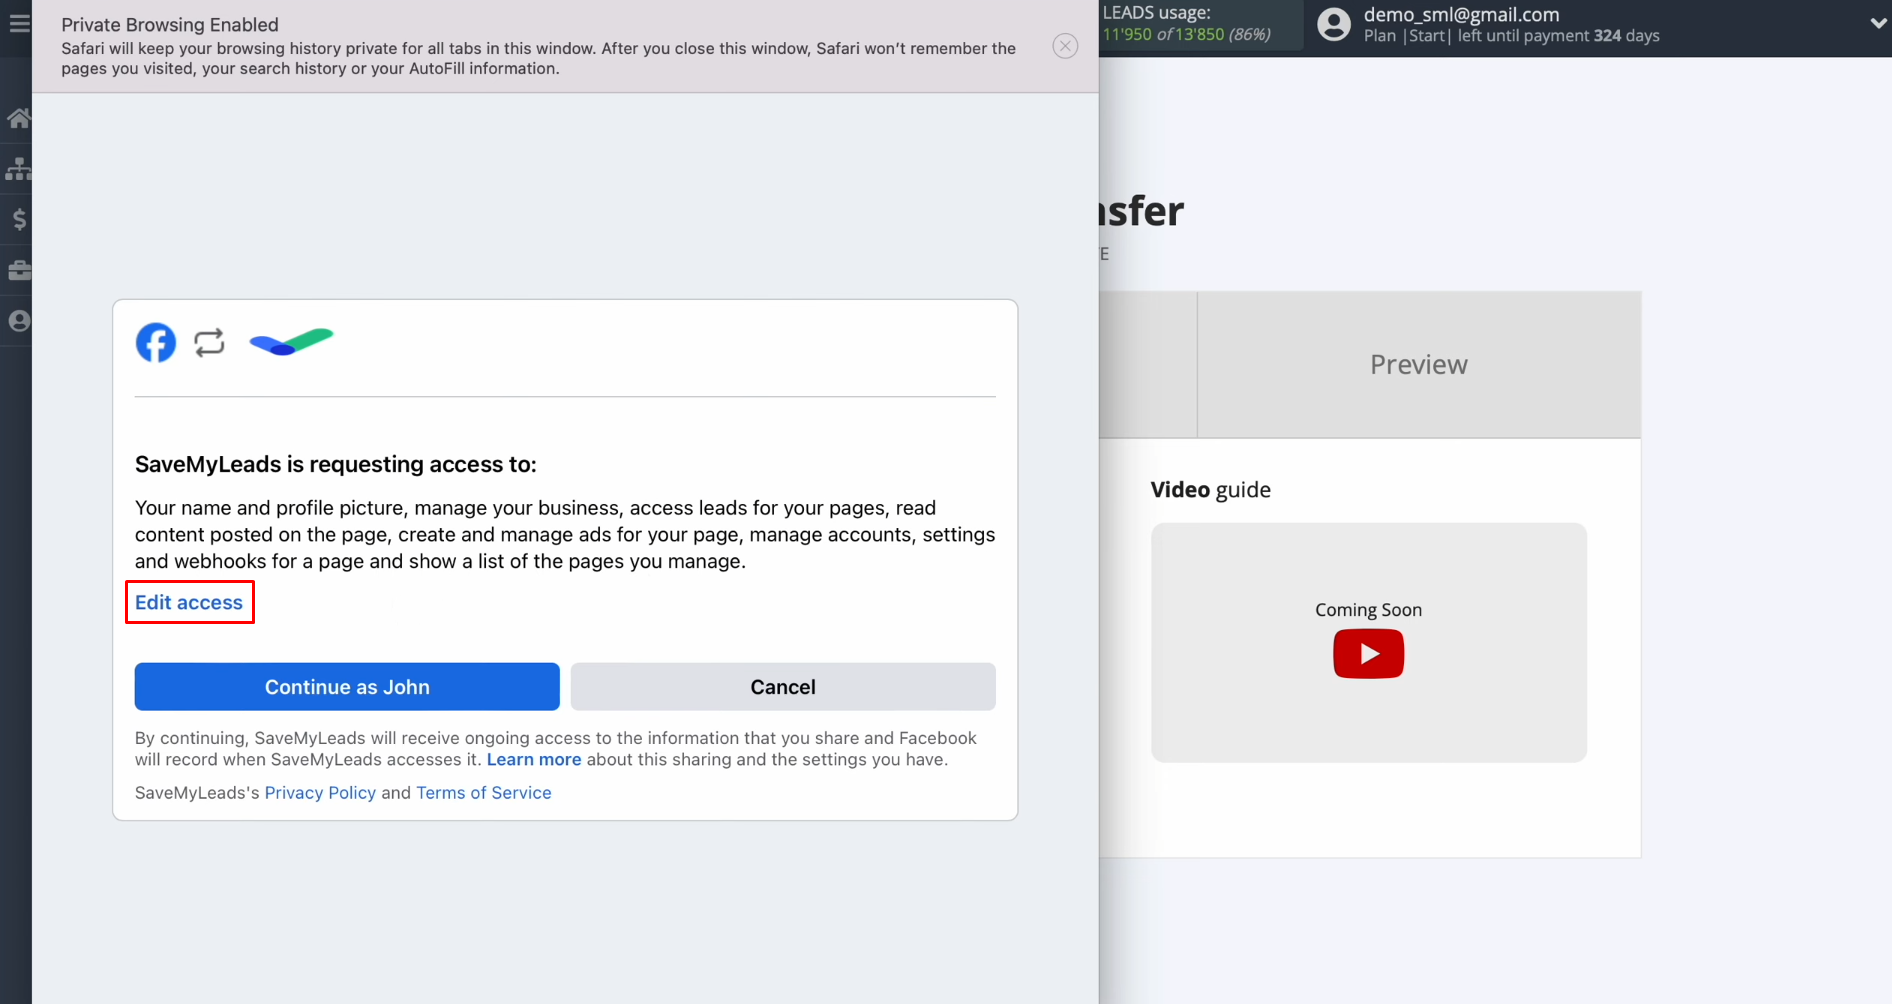
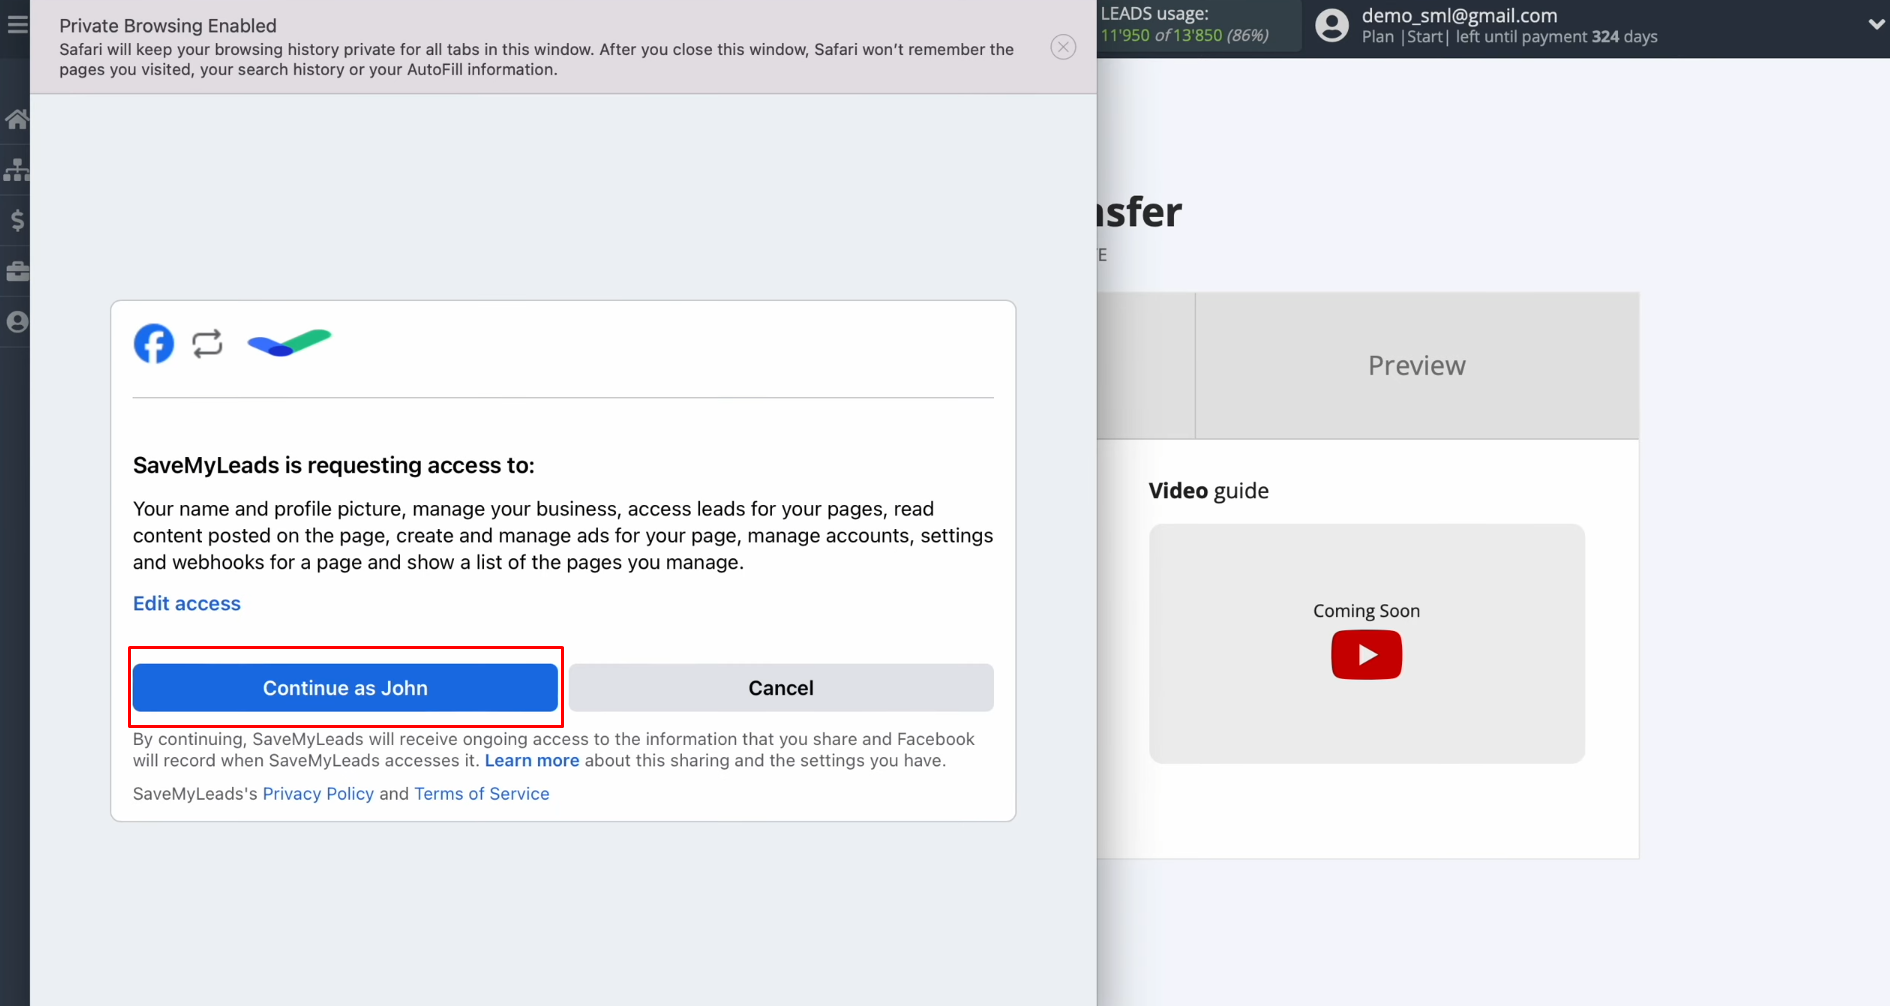
At this
stage, you have to provide SaveMyLeads with access to work with your
Facebook account. To do this, go to settings. Click
on “Edit access”.
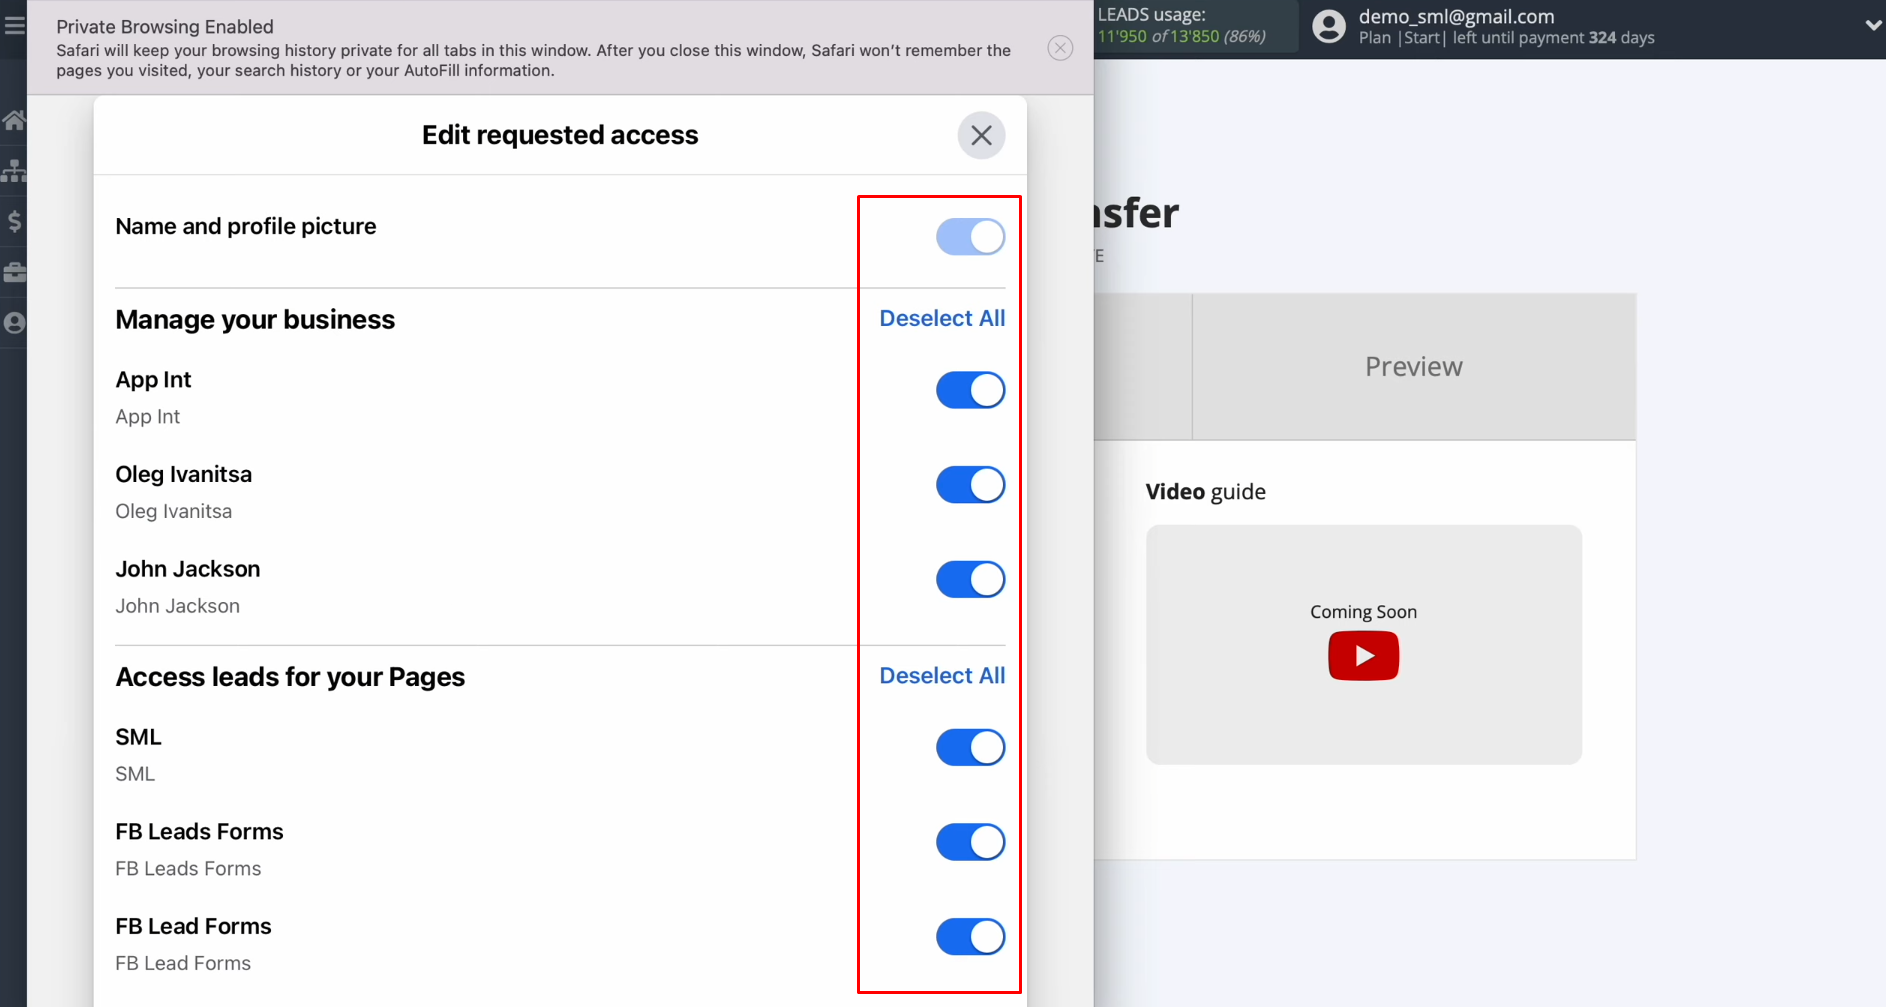
You need to leave
all access checkboxes enabled.
Click on the “Continue as…”.
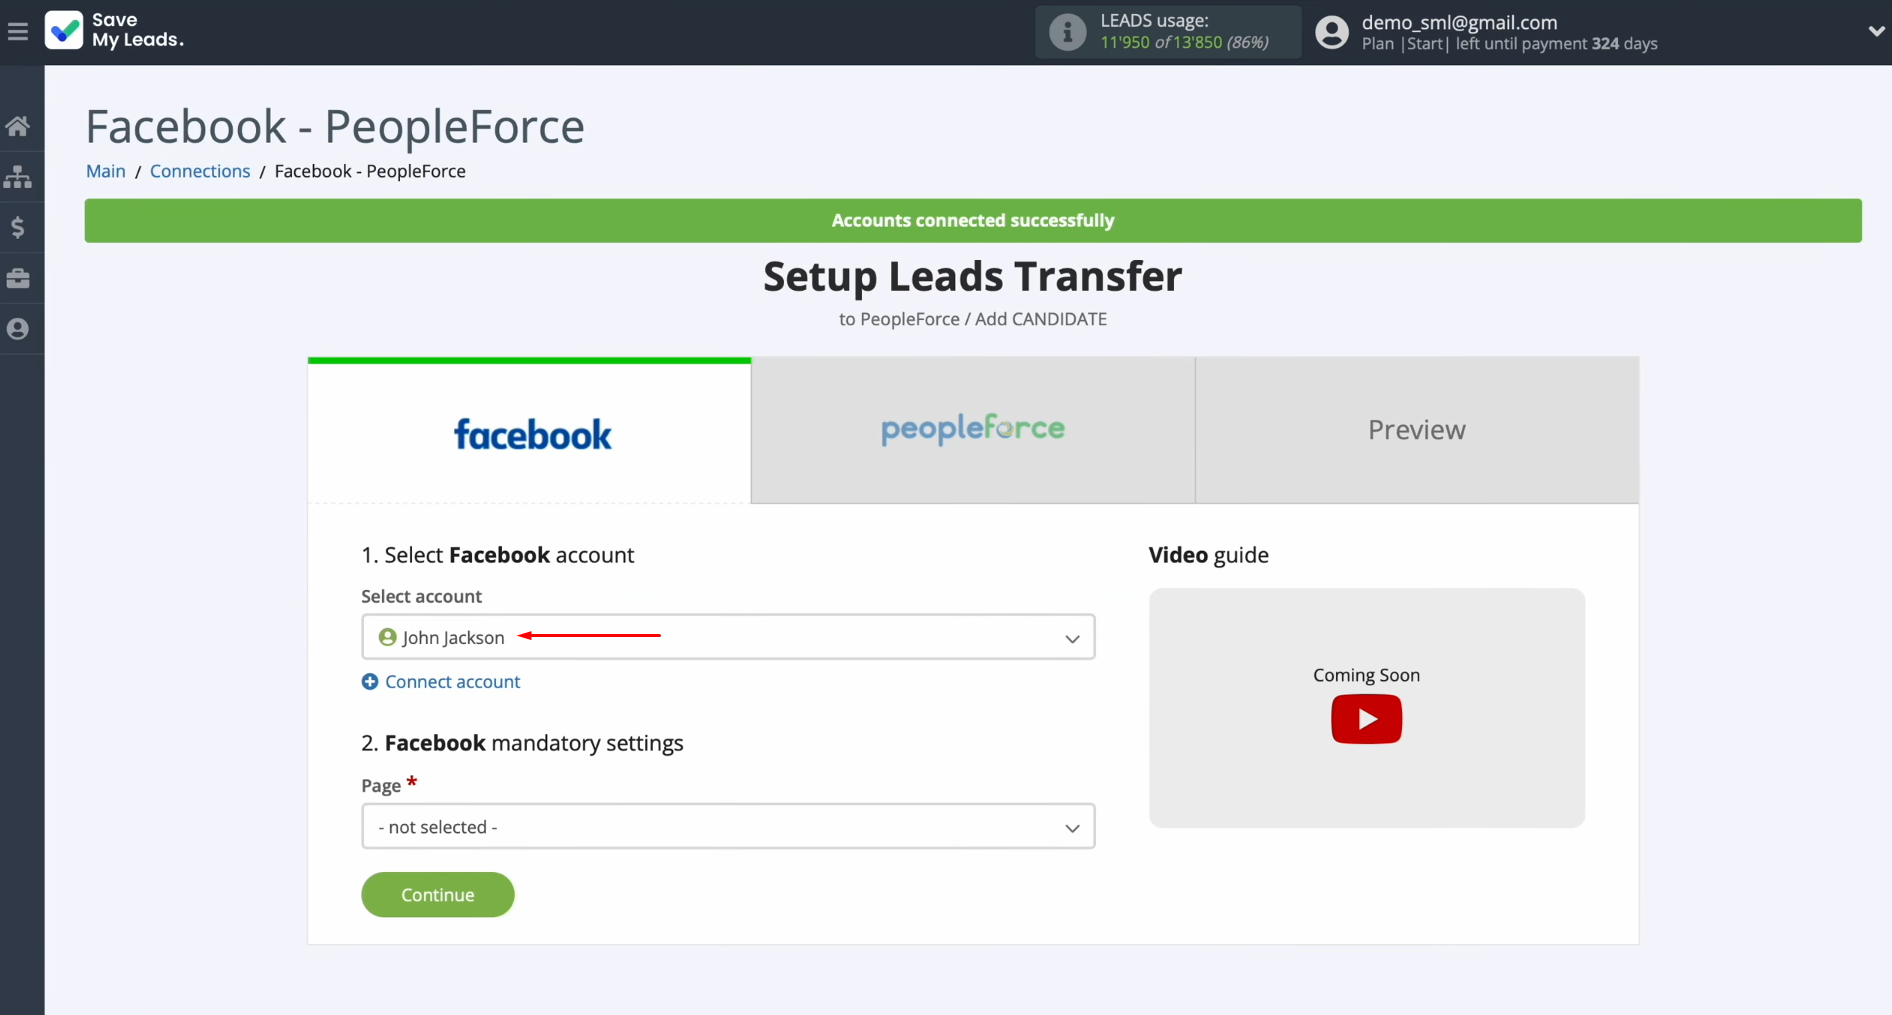
When the connected account
appears in the list, select it.
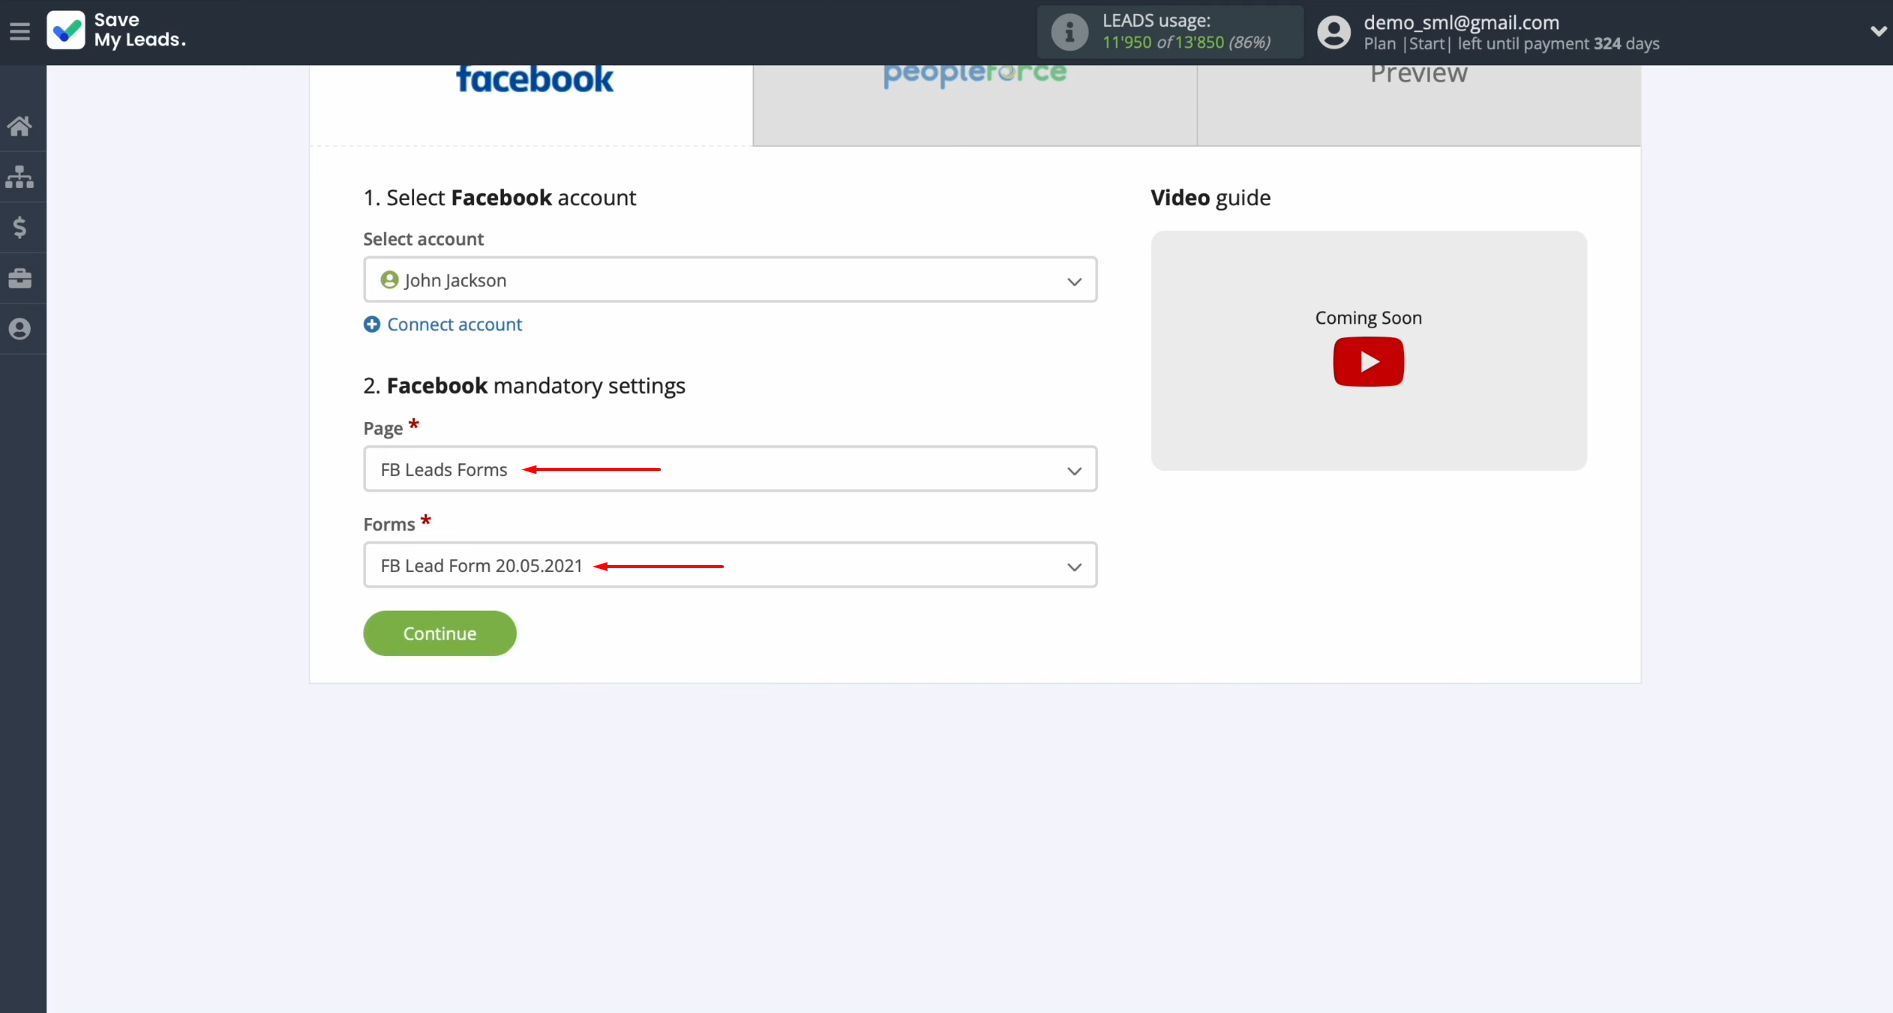
Next, you need to select the advertising page and lead form from which you want to receive
new leads from Facebook. Click “Continue”.
Configuring the Data Receiver – PeopleForce
To set up the PeopleForce integration with Facebook, you have to connect your PeopleForce account to SaveMyLeads. For this, click on the blue button.
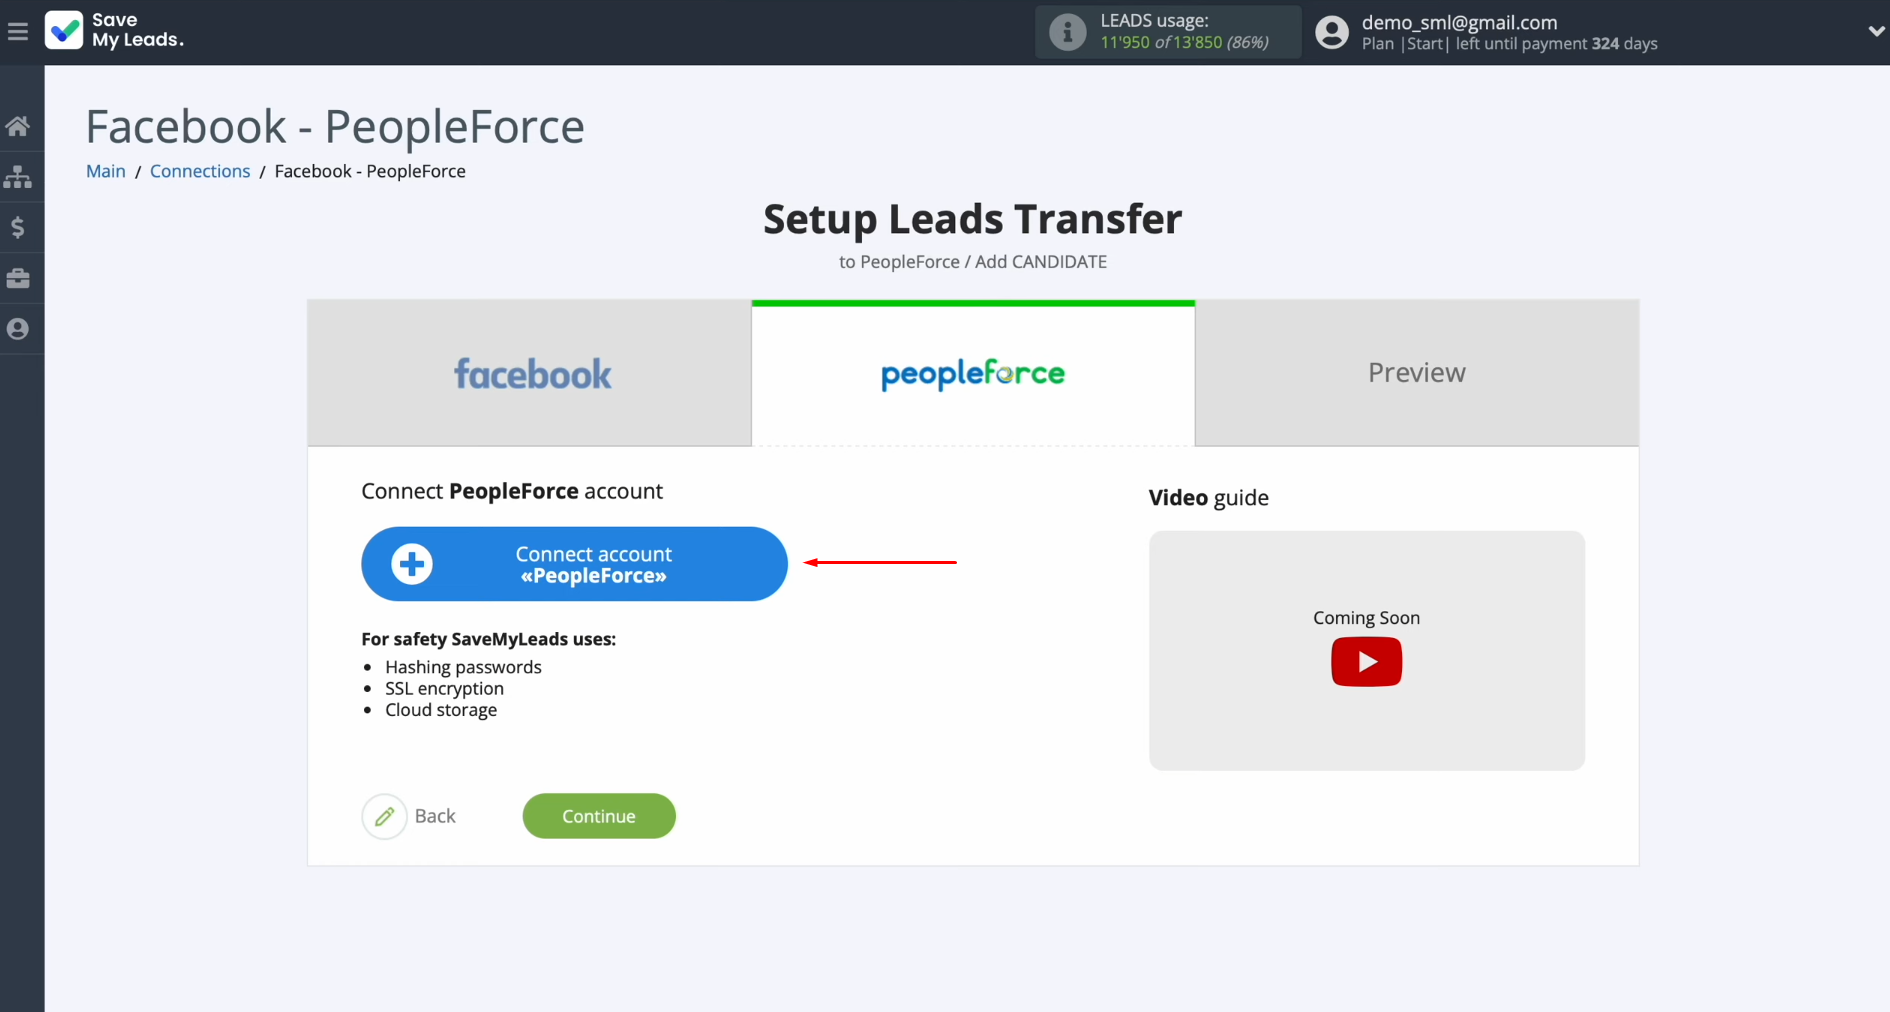
In this window, you must specify the API key.
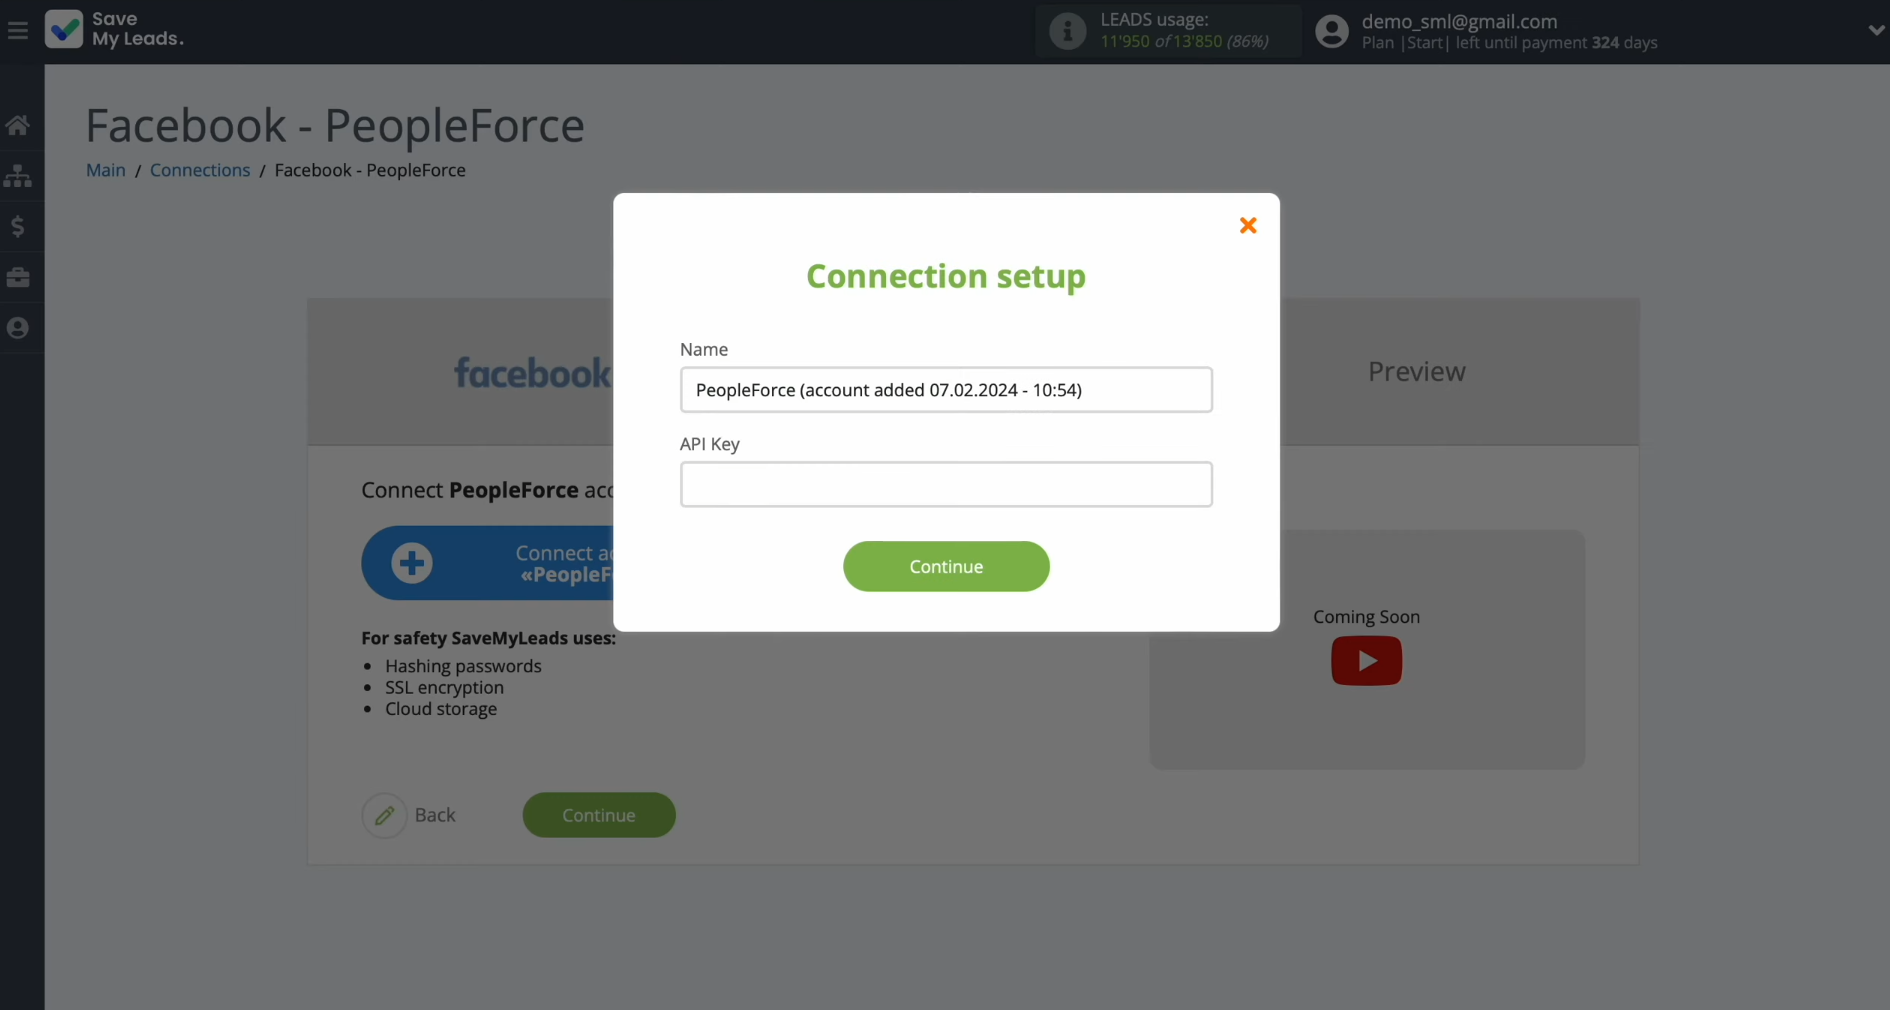
To get it, go to your PeopleForce personal account and click on the “Settings”.
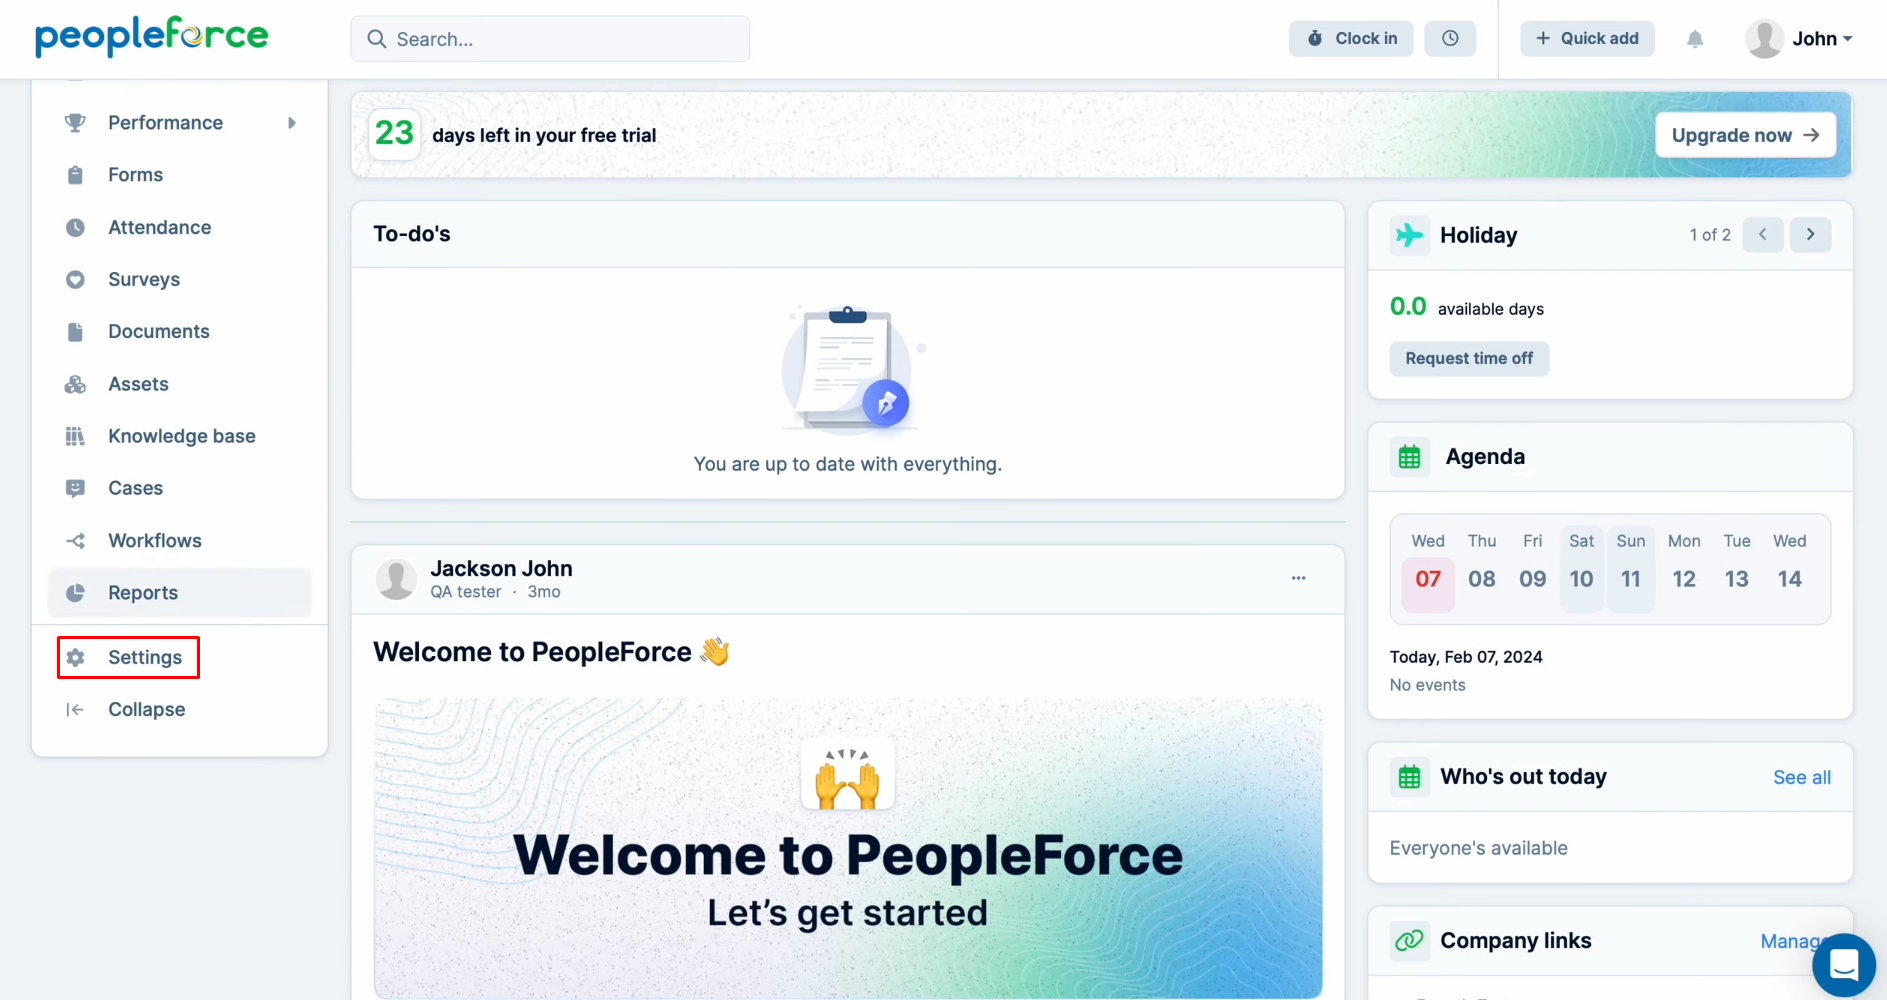
Find the “API keys” section.
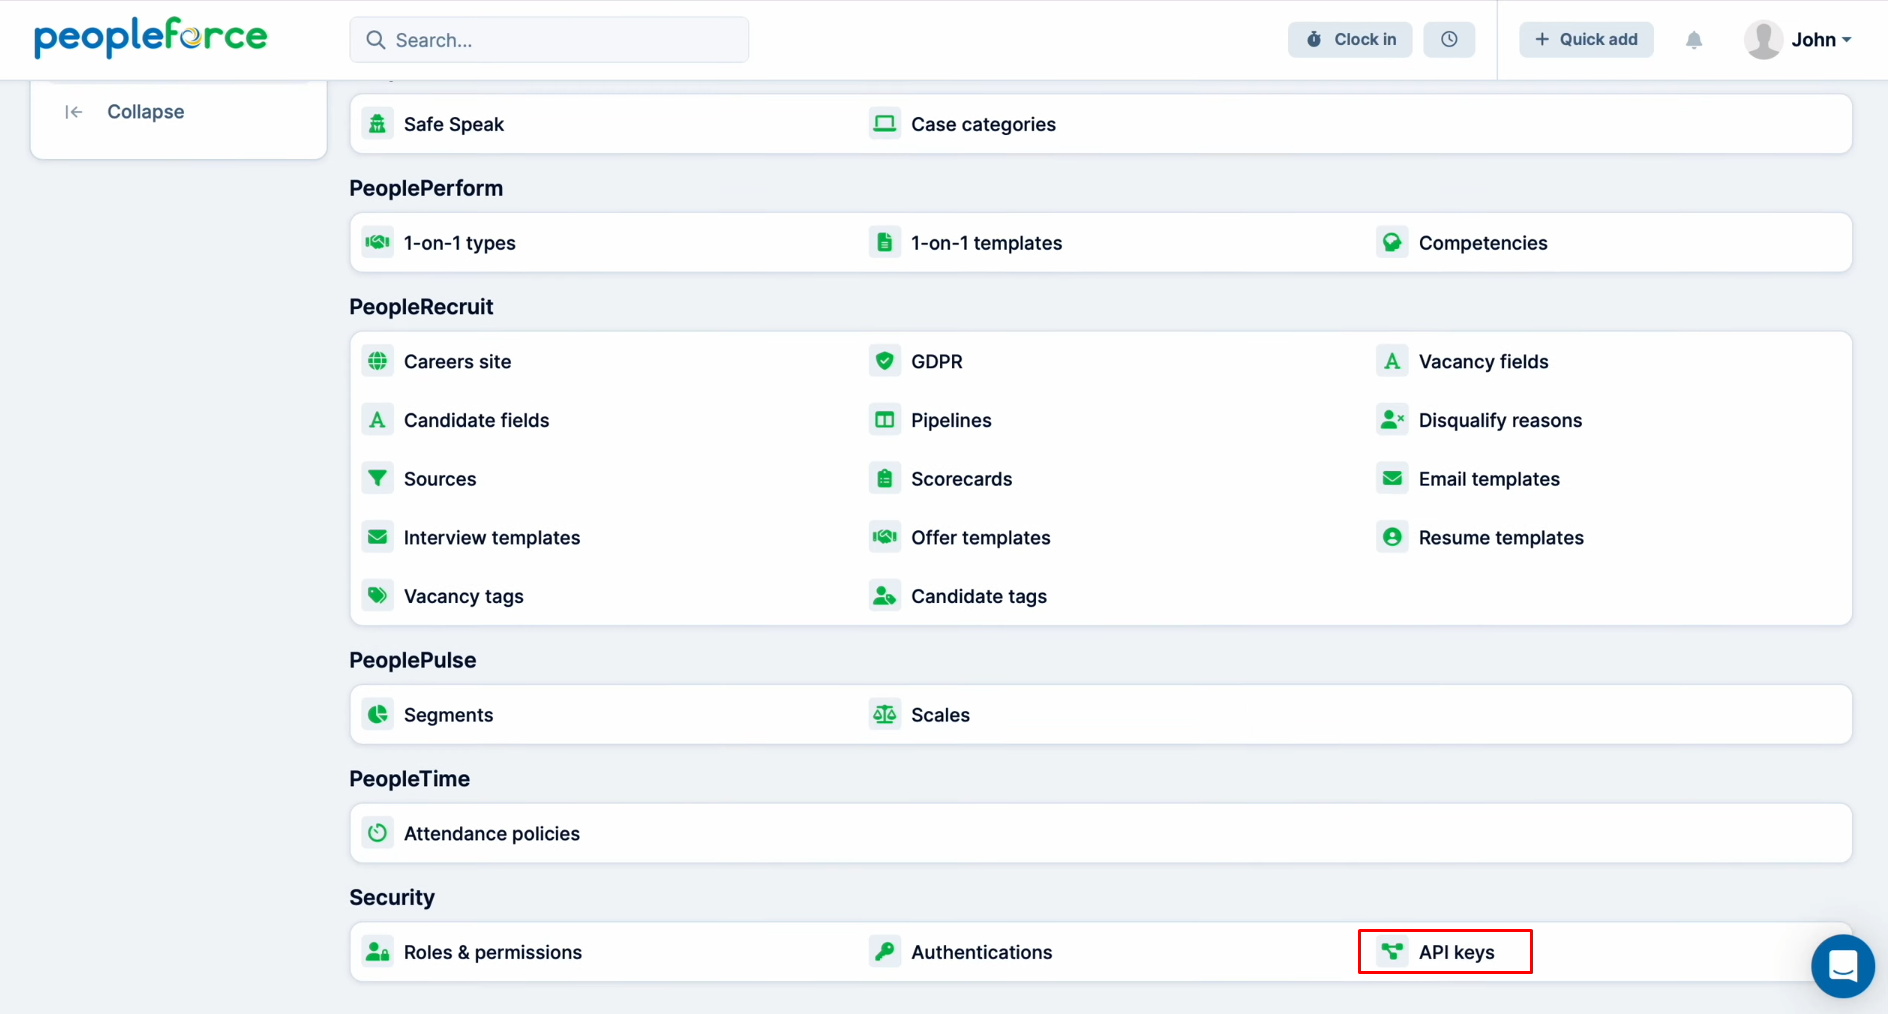
Click “Generate”.
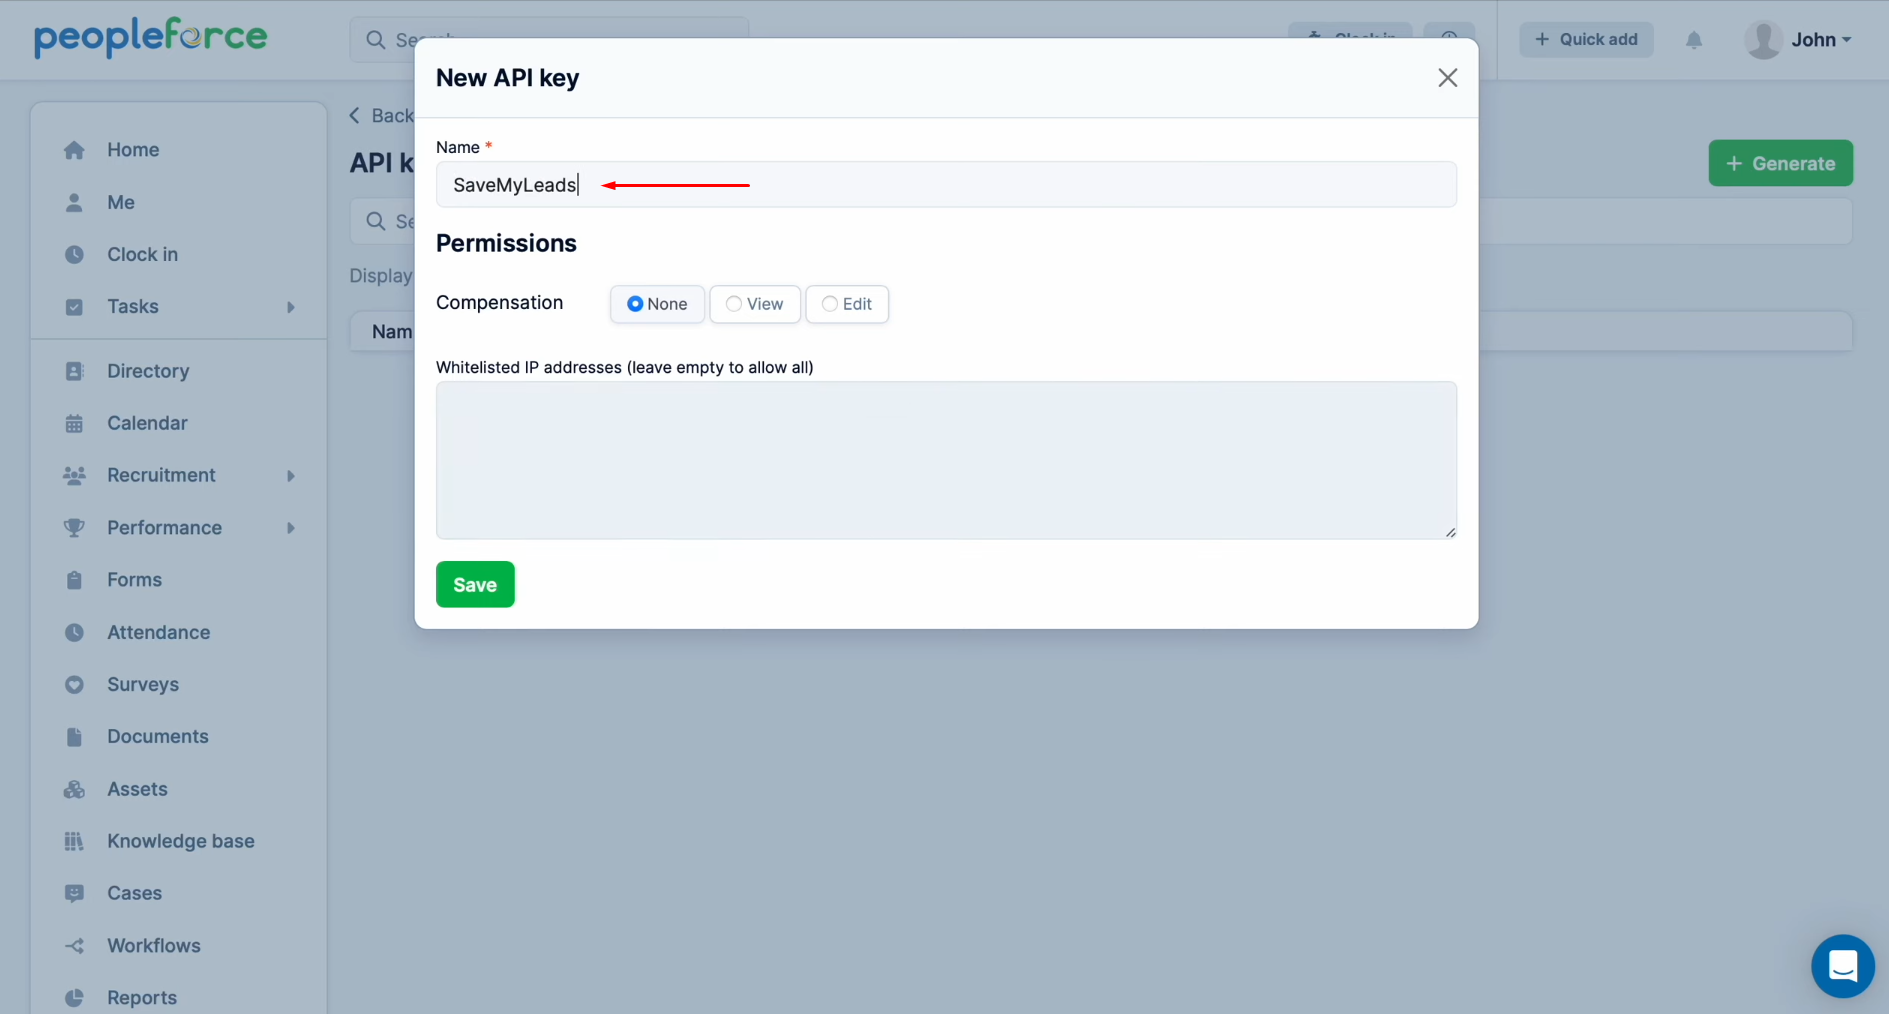
Specify a name for the new key. Then, click “Save”.
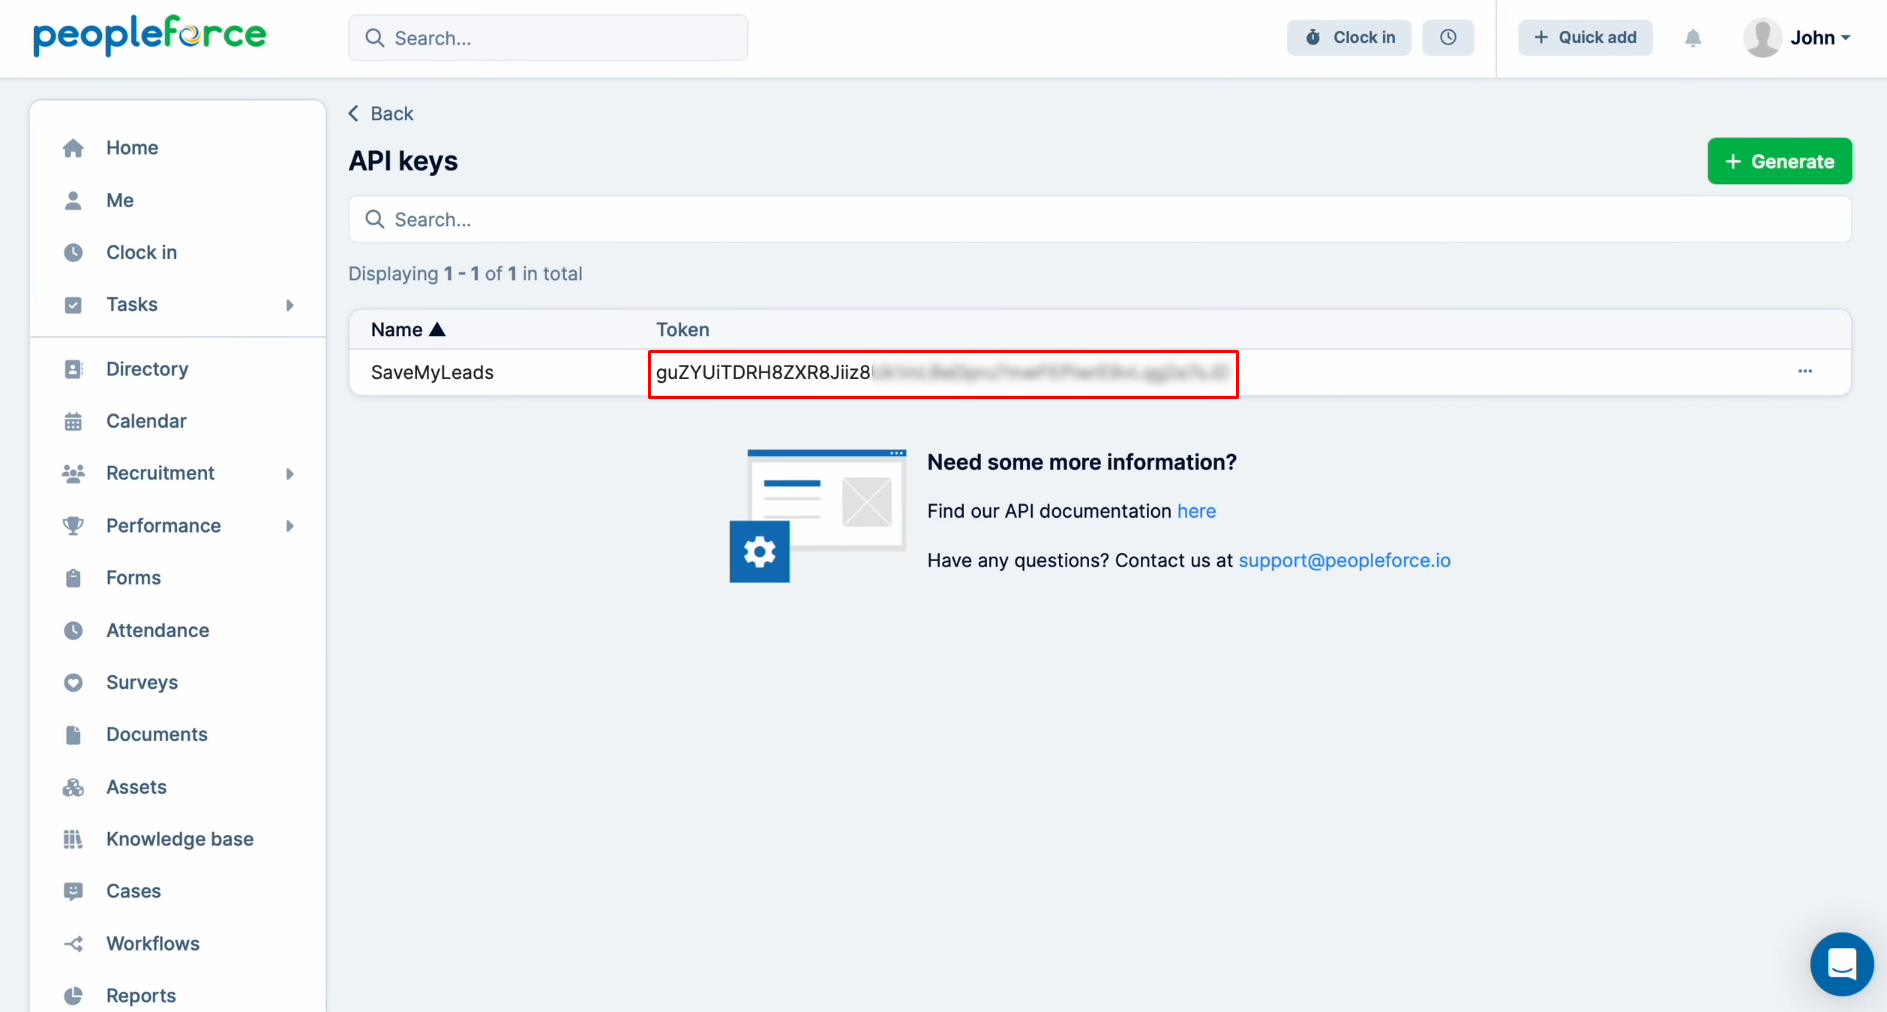
Copy the API key.
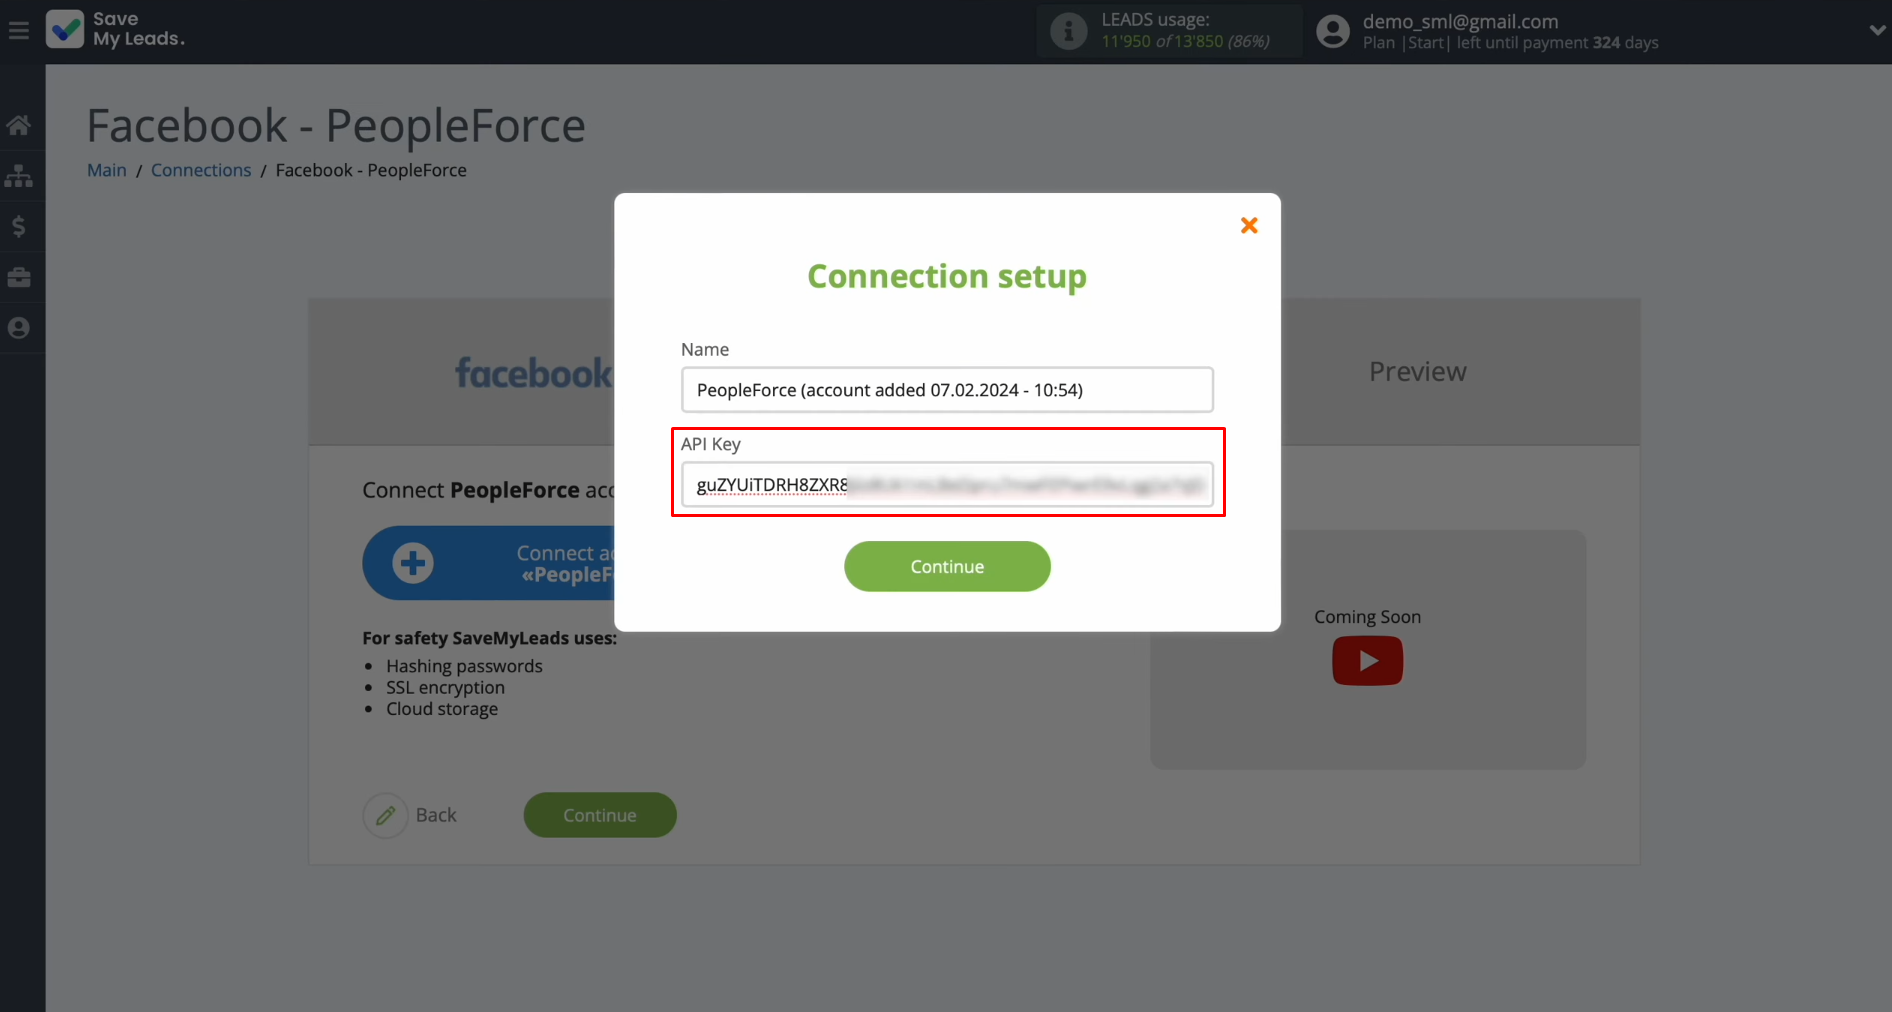
Paste the API key into the appropriate
field in SaveMyLeads. When
the required field is filled in, click “Continue”.
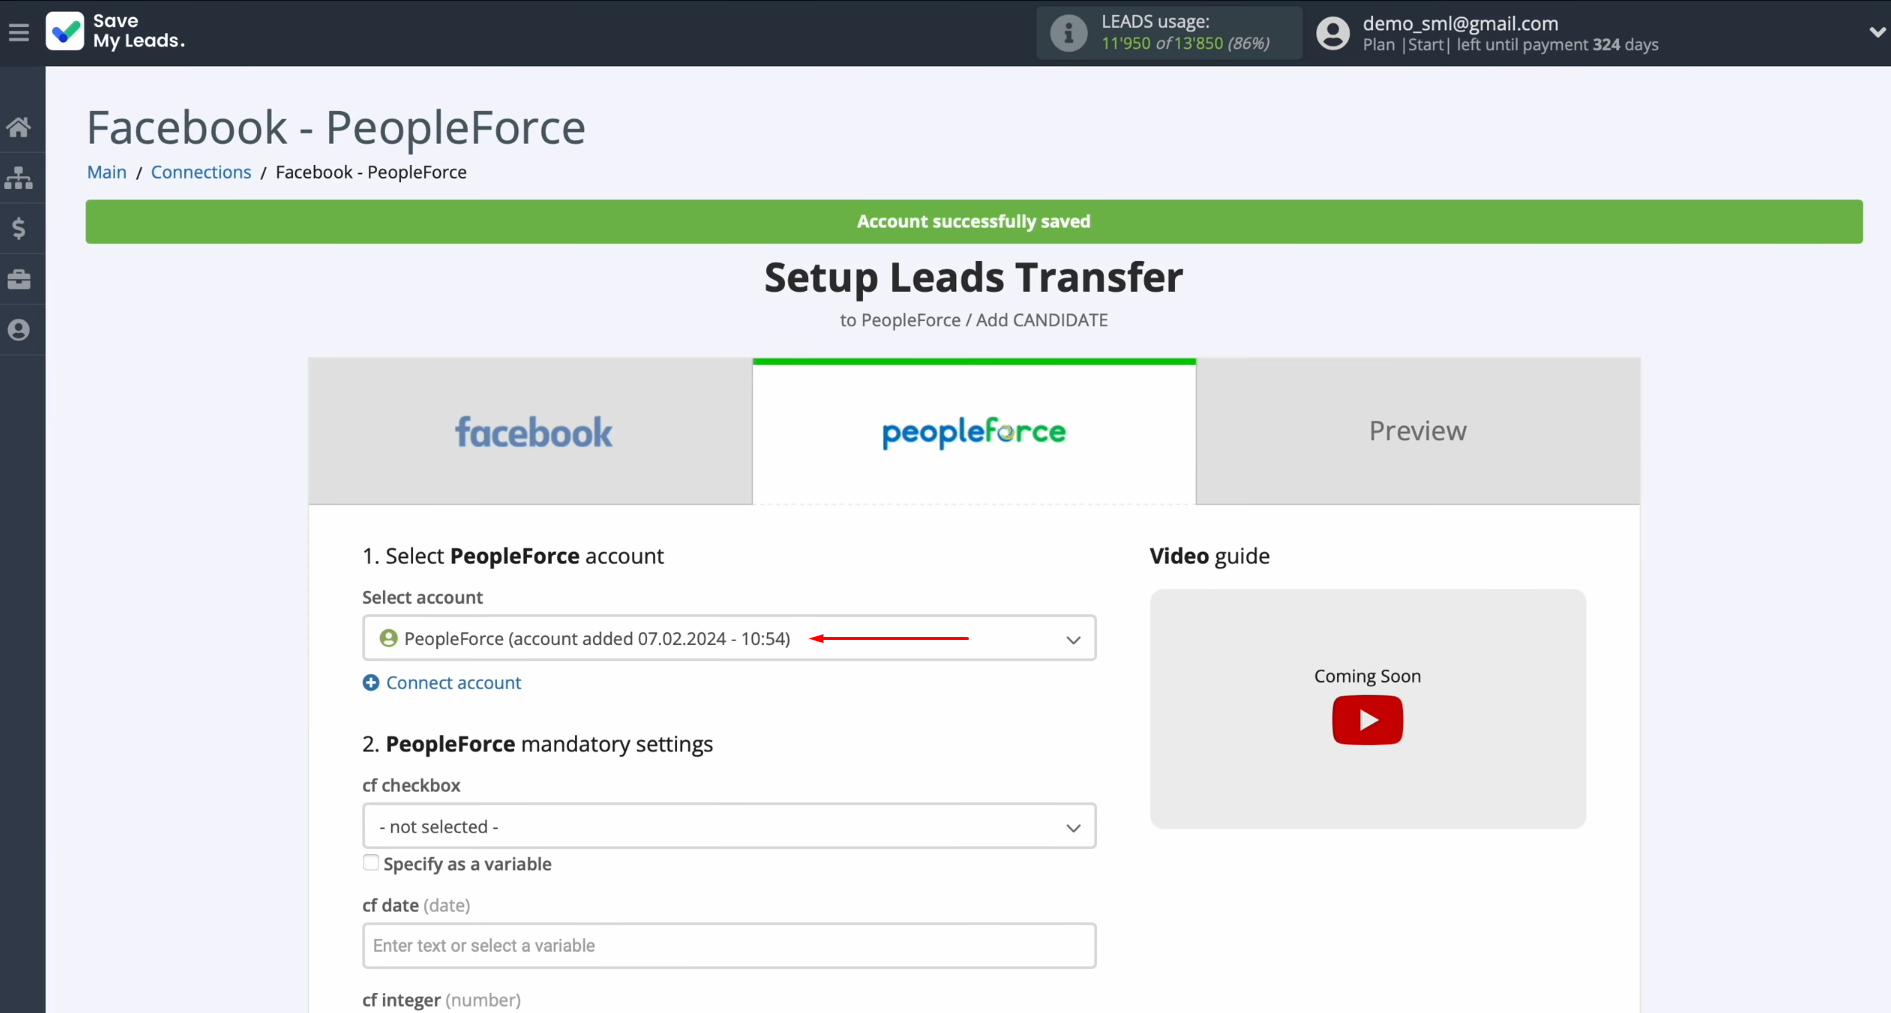
When the connected login appears
in the list, select it.
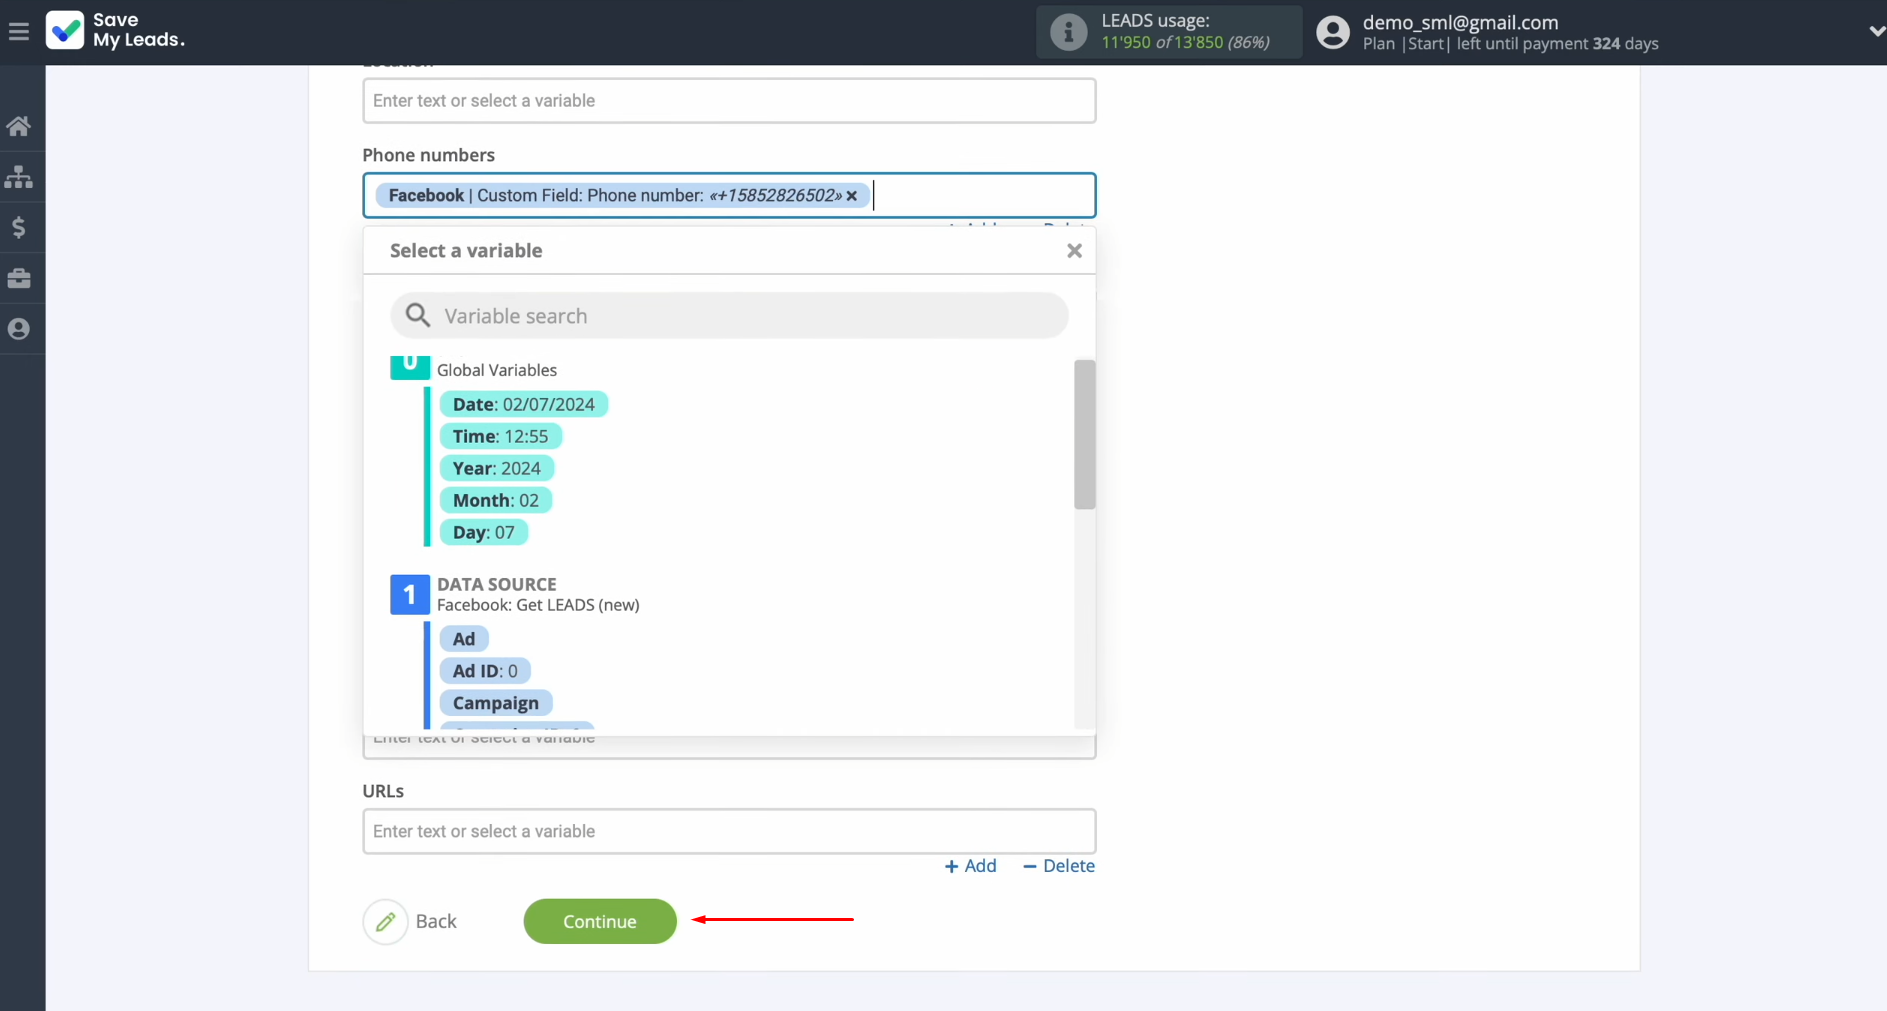
At this point, you can see the PeopleForce fields to create a new candidate. You can assign variables from
Facebook to these fields. To achieve this, click on the field and select a
variable from the drop-down list.
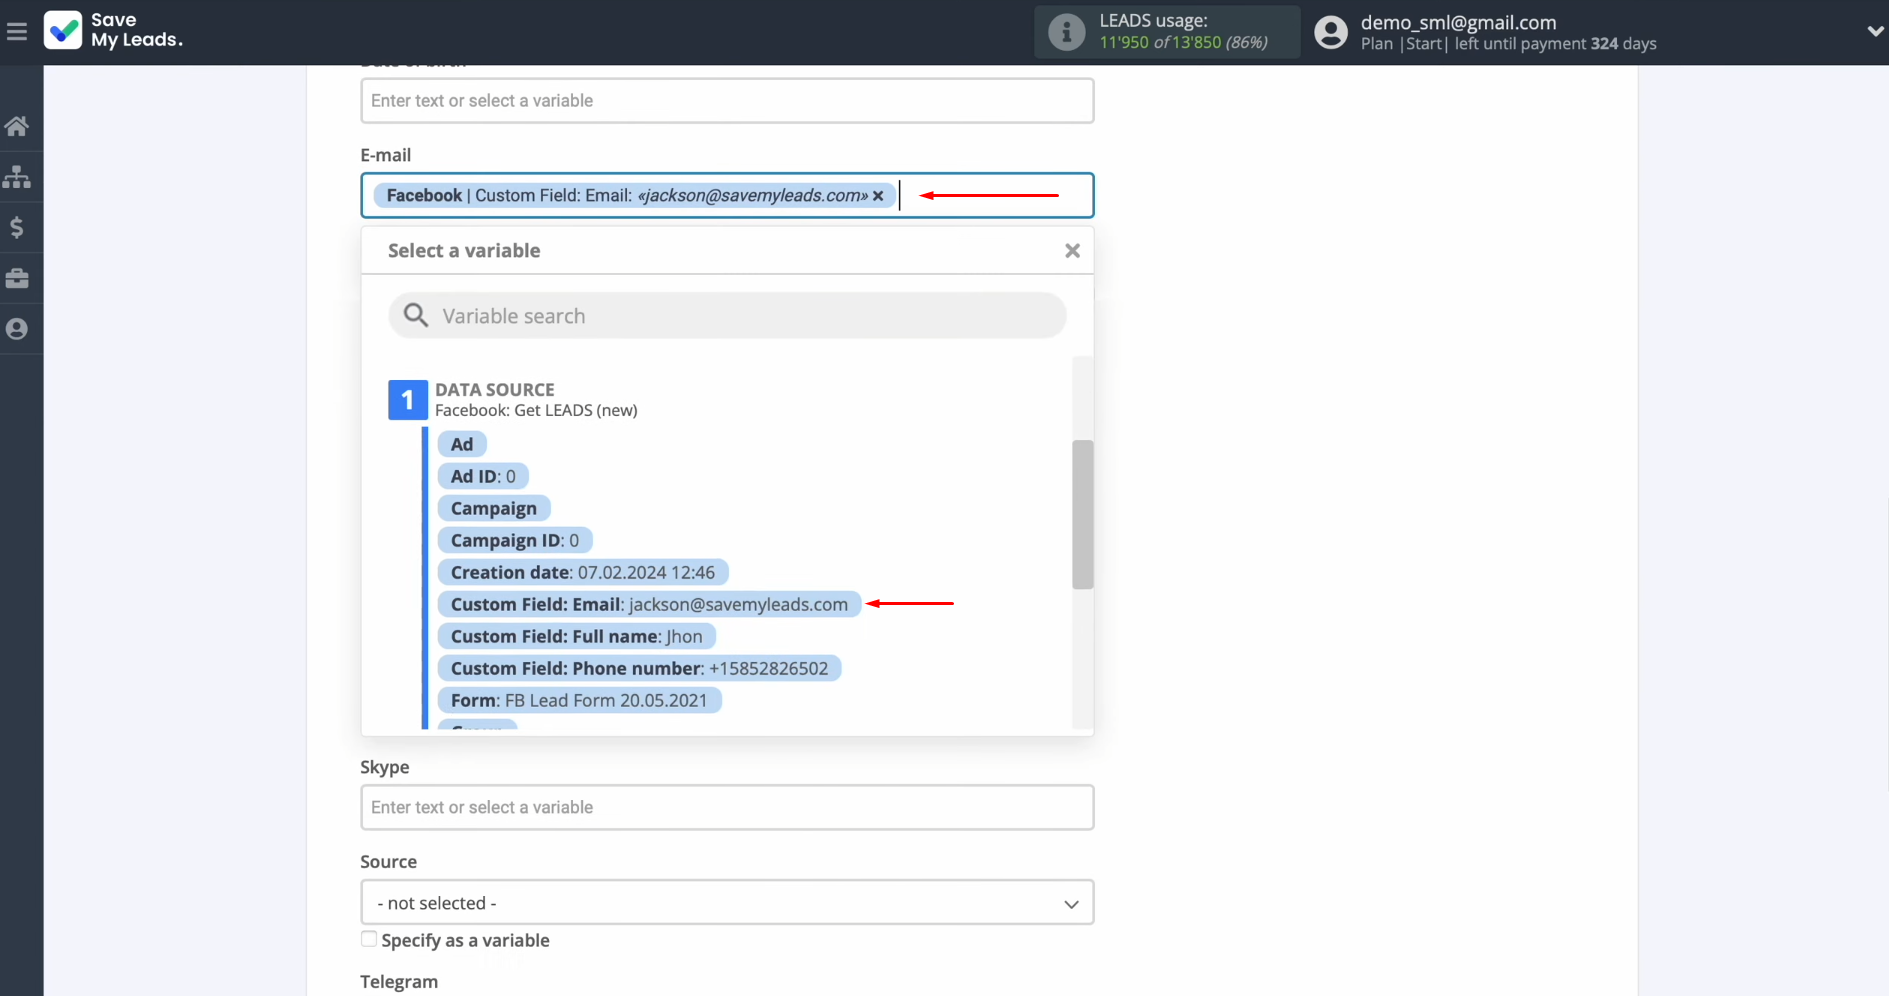
When the required fields are
filled in, click "Continue".
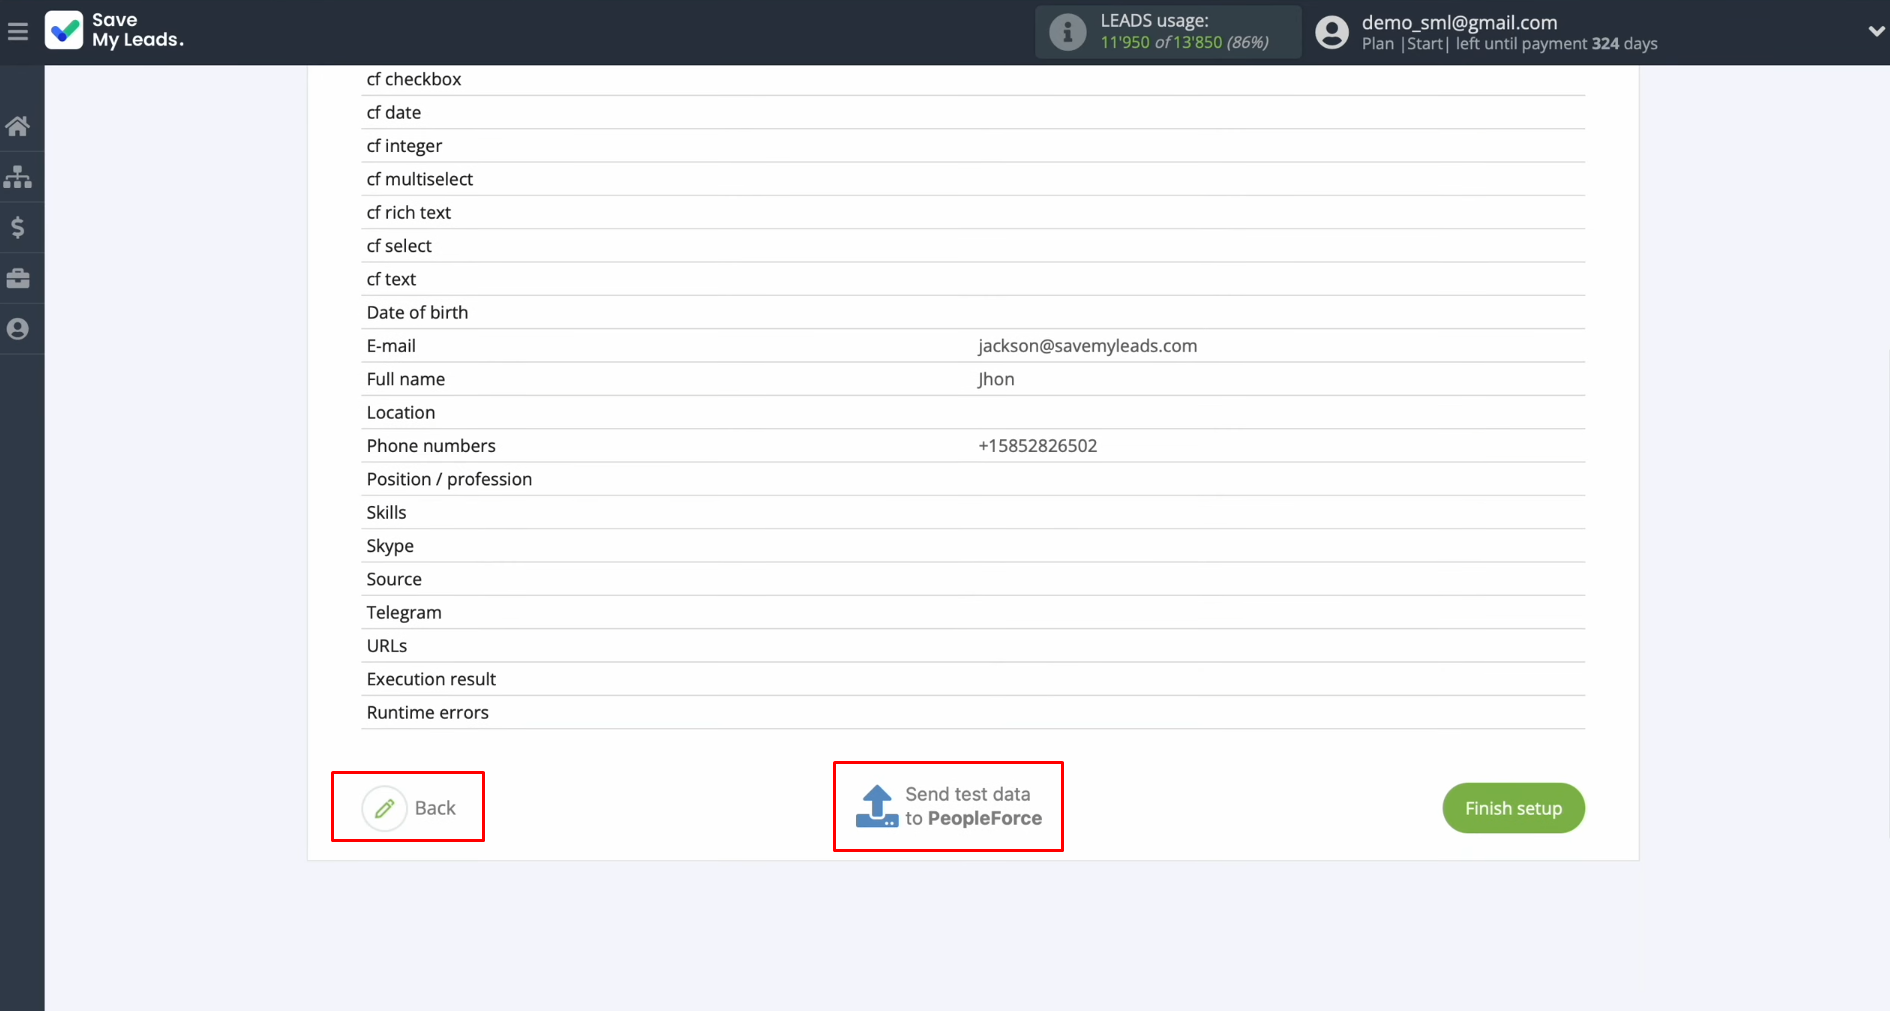
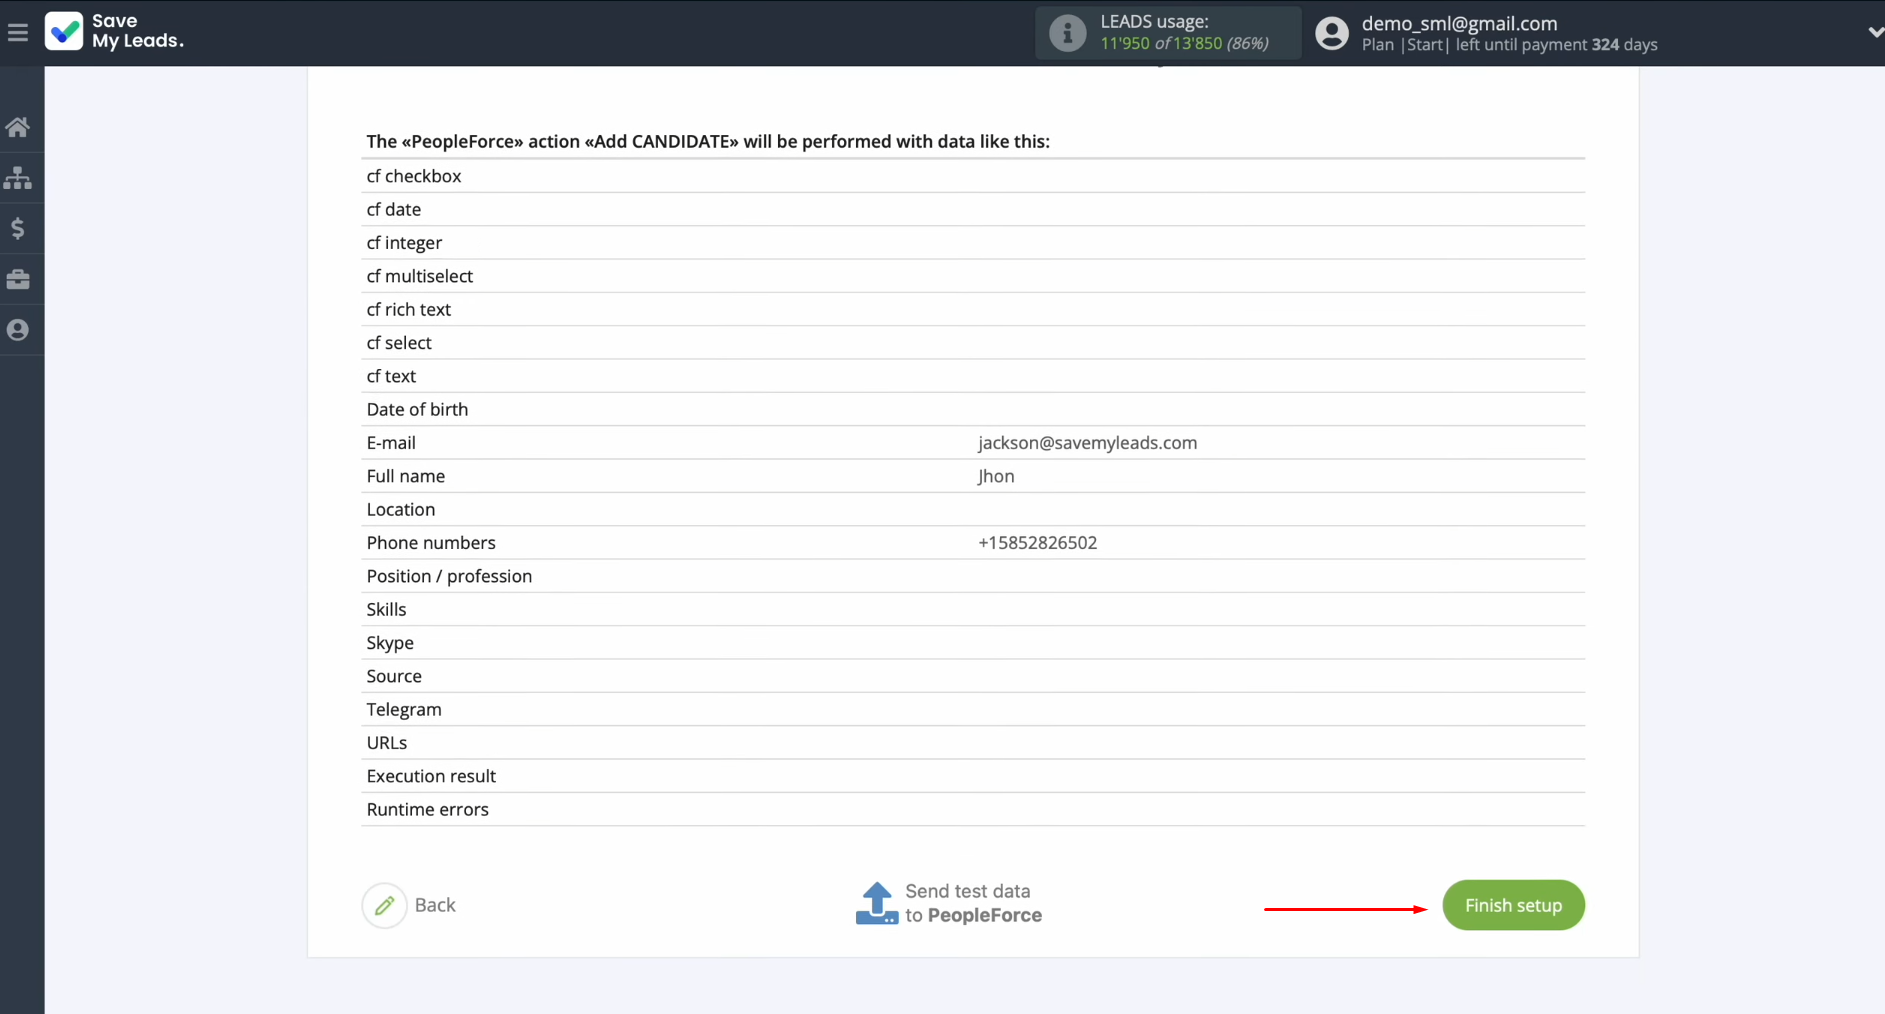
At this point, you see an example of the data that will be sent to PeopleForce to create new candidates for each new lead from Facebook. If you are not satisfied with
something, click “Back” and go back a step. To check the correctness of the
settings, click “Send test data to PeopleForce”.
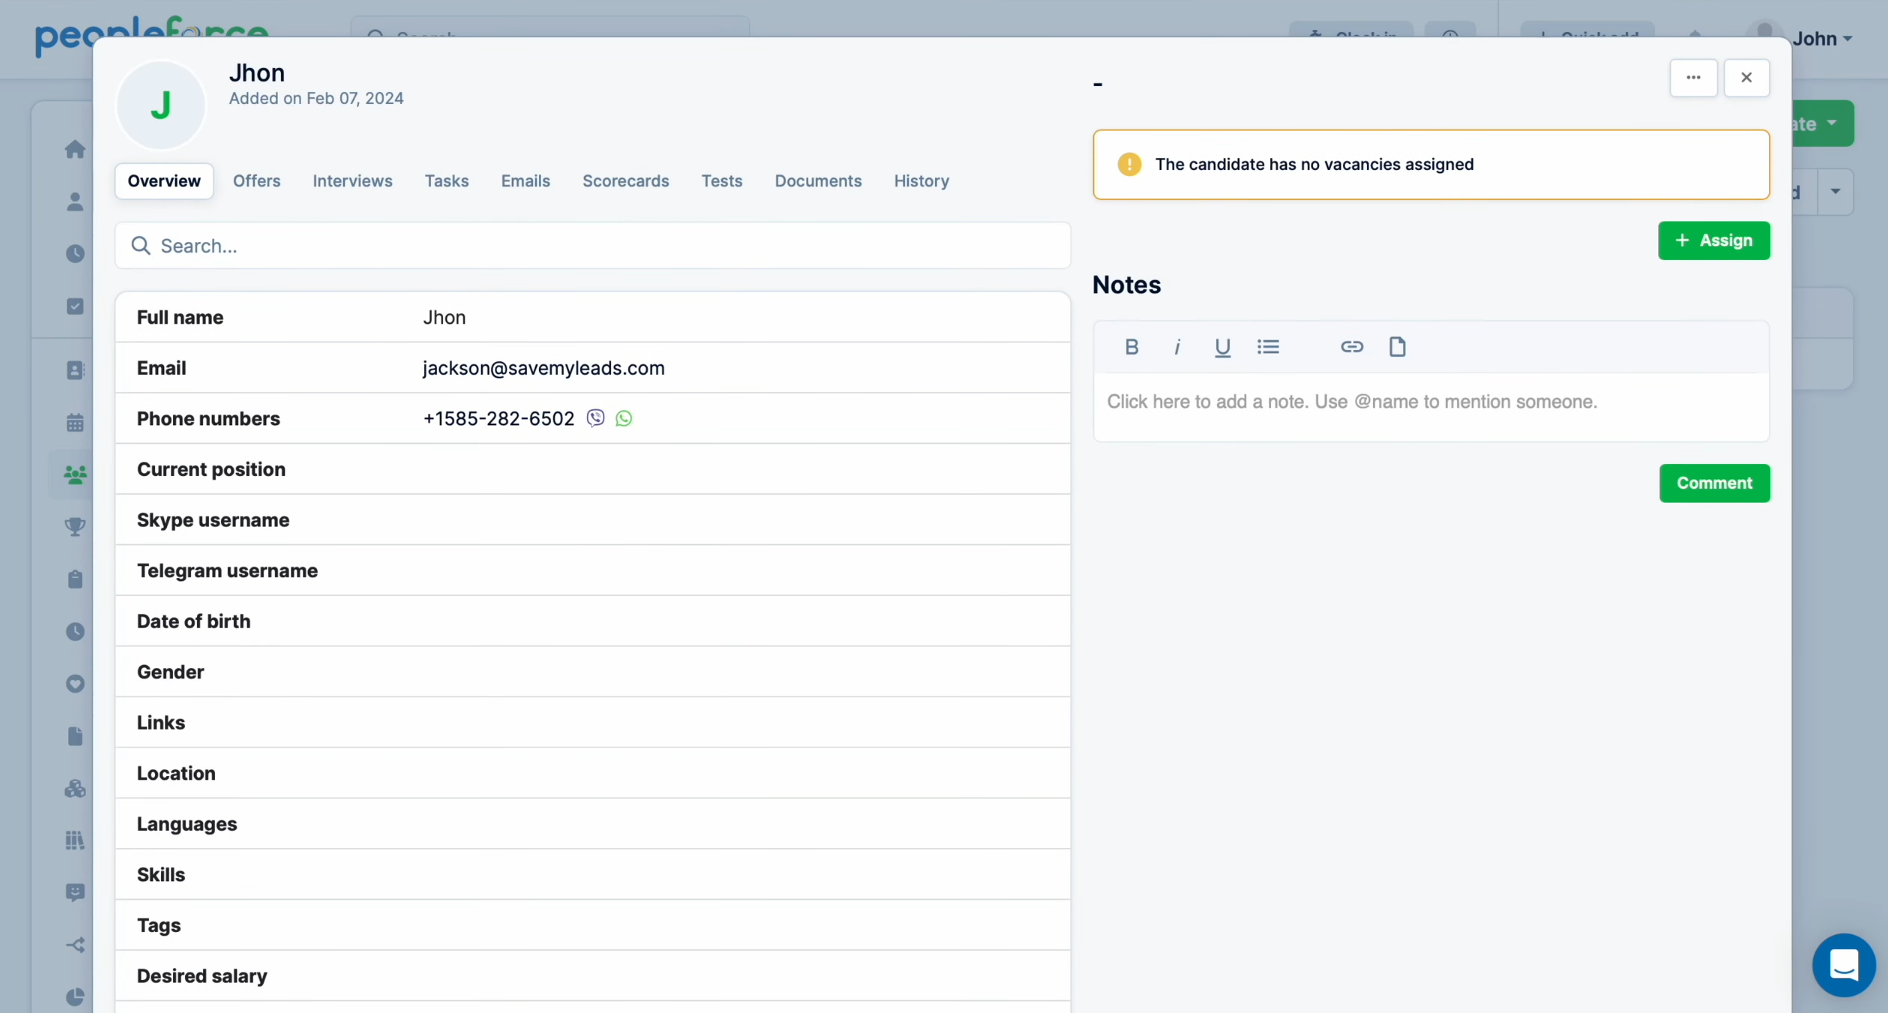
After successfully submitting, go to PeopleForce and check the result.
If you are satisfied with everything, return to SaveMyLeads and
continue setting up Facebook Lead Ads PeopleForce
integration.
Setting up Auto-update
In order for new leads to be instantly transferred to PeopleForce in the form of new candidates, you have to enable auto-update. To do this, click on “Finish setup”.
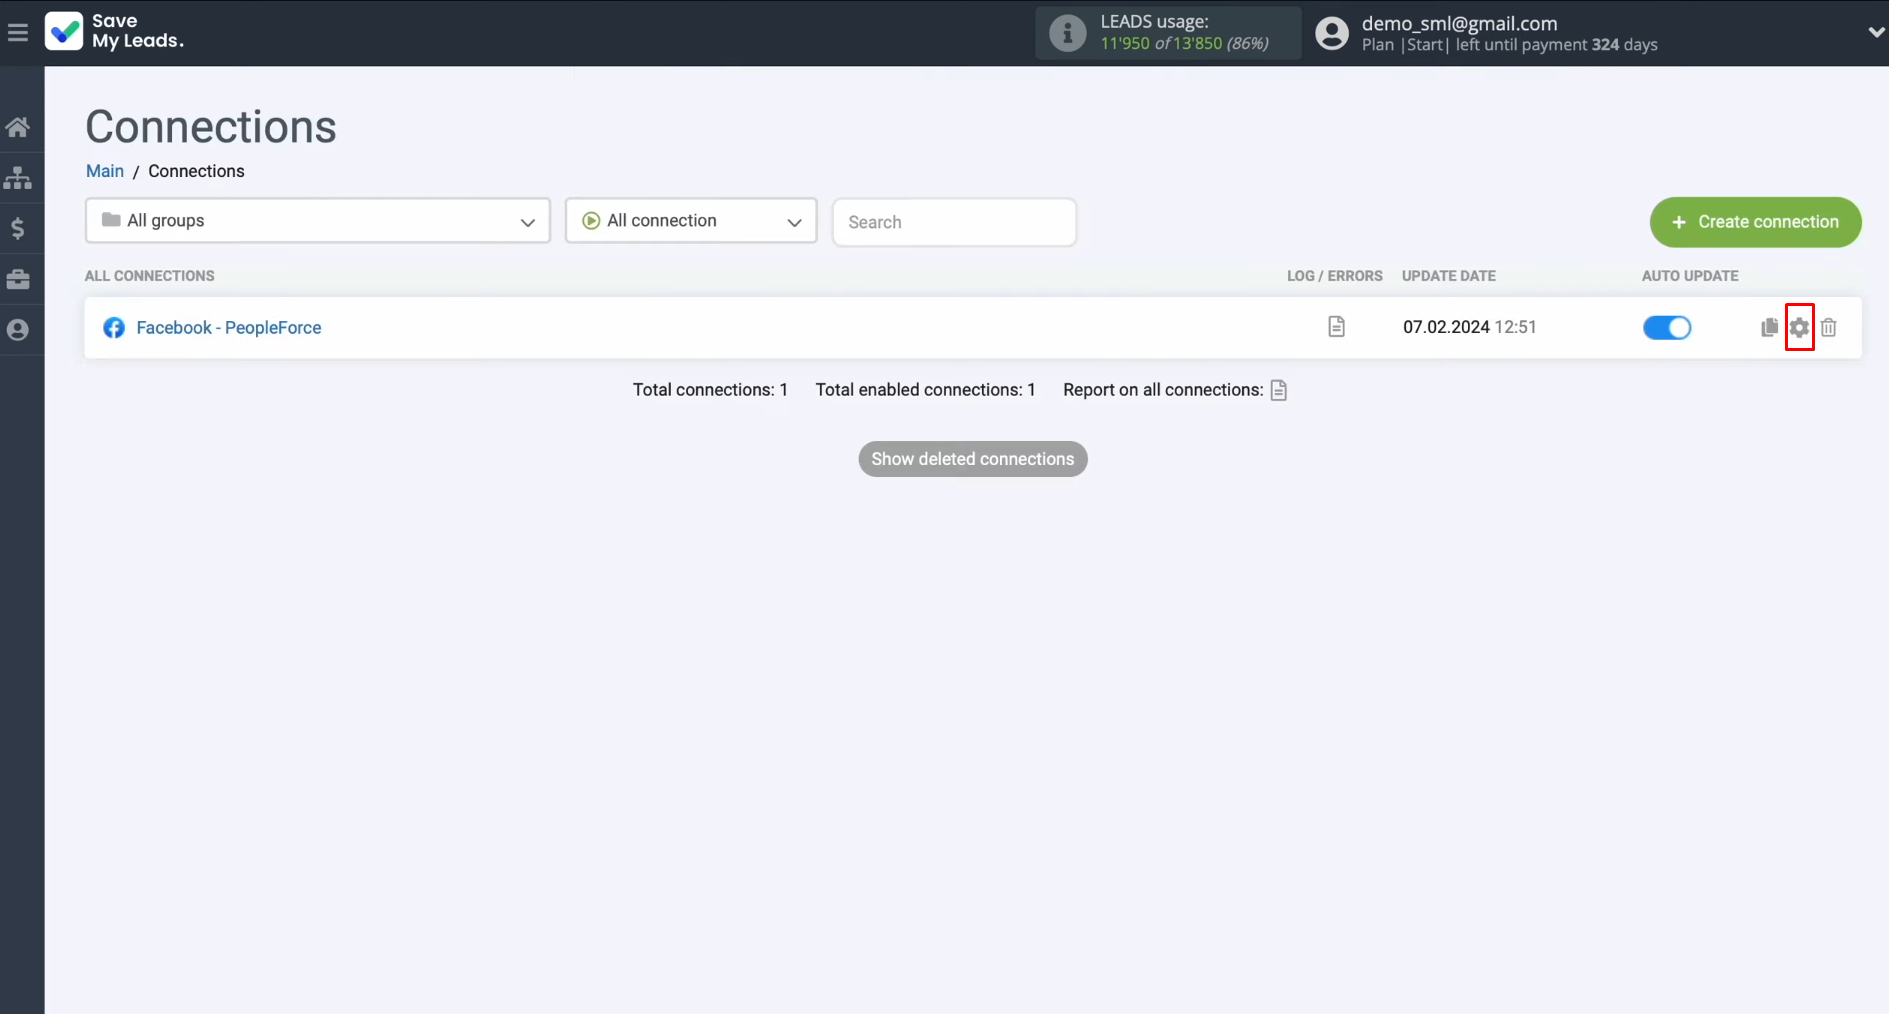
If you want to change the connection name, you can do so in its
settings. Click on the gear icon.
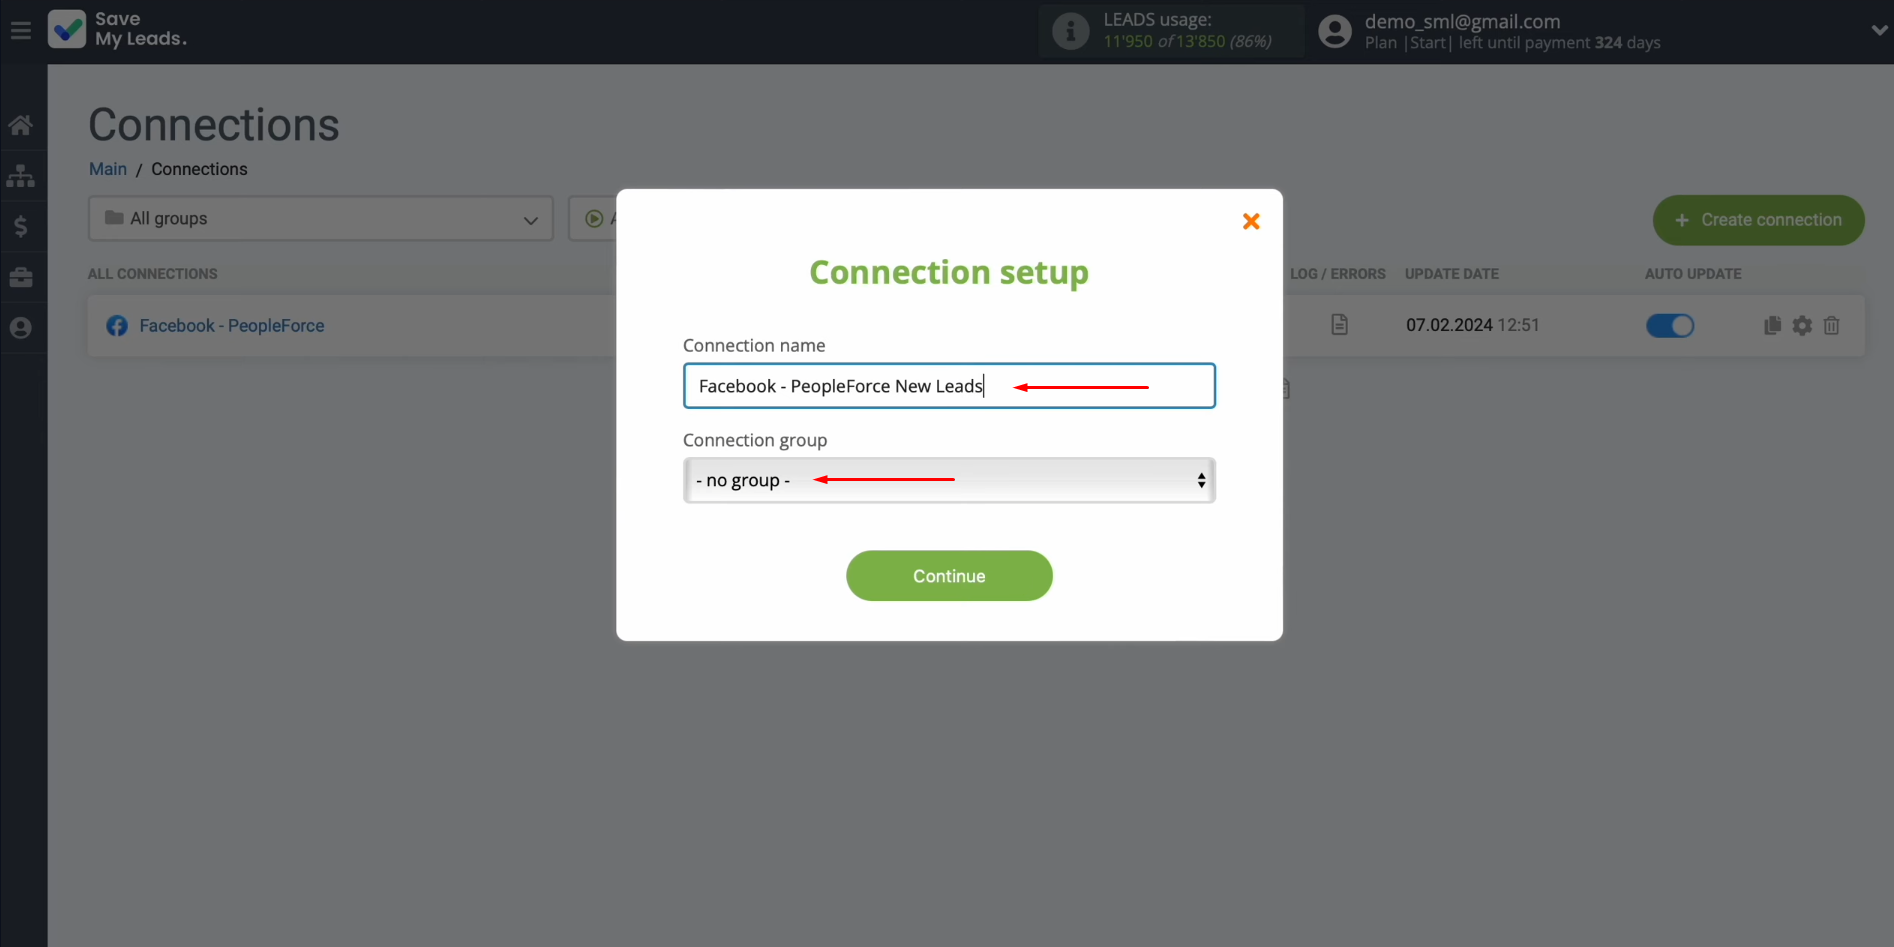
Here, you can change the connection name and add your
connection to a group. After that, click on “Continue”.
That's
all. The PeopleForce Facebook integration has been completed.
The Result of Facebook-Leads and PeopleForce Integration
So what did we end up with? Converting every submitted lead form into a completed candidate in PeopleForce. Such automation significantly increases the speed of responses to applicants and simplifies the work of employees, freeing them from at least one workflow. The SaveMyLeads online connector helped us set up automated data transfer. If you have followed our instructions, then you have probably already realized that you do not need any special skills to create an integration. Thanks to the intuitive interface and operating principle of the service, setting up the connection between the necessary platforms takes from 5 to 10 minutes, even for an inexperienced user. Utilize the capabilities of Facebook PeopleForce integration, created in the SaveMyLeads system, for maximum recruiting. Automation can help you increase productivity and simplify your HR processes.
