Clickatell is a messaging service that gives companies the ability to quickly communicate with customers through popular social messenger platforms. Clickatell and Facebook integration will allow you to increase your conversion rates and improve your customer retention rates. How to achieve these results will become clear when you find out what the principle of such automation is.
Let's look at the technical side of the connection between Facebook and Clickatell. As a result of the integration of these systems, a lead who submits a completed form on a social network automatically gets into the database of the messaging service and immediately receives a message from there. This is precisely what you need. By automating the workflow in this way, you will significantly save time, making manual data entry into the database a thing of the past forever, and you will increase your own and your team's efficiency as well as the quality of interaction with clients. And now the most important thing – how do I this? Our article will help you set up Facebook and Clickatell integration to automate the transfer of leads from the social network to the database of this service and instantly send them SMS messages.
How to Set up Facebook-Leads and Clickatell Integration
So, the task before you is to set up and launch automatic data transfers from Facebook to Clickatell. Sound scary? Maybe. But with the SaveMyLeads online connector, you have absolutely nothing to fear. Our efficient no-code tool will help you quickly and easily set up this integration, as well as many others if needed. The SaveMyLeads service provides ready-made solutions for various CRM systems, instant messengers, SMS-services, email-services, and Google-services, task managers and so on.
Action plan:
- Create a lead form.
- Connect your commercial Facebook account (data source) to SaveMyLeads and set it up.
- Connect your Clickatell account (data sink) to SaveMyLeads and make the appropriate settings in the online connector.
- Set up auto-update mode.
The result of all these manipulations is the successful launch of an automatic transfer of data from each submitted lead form to a new entry in the Clickatell database, accompanied by sending an SMS message with a pre-compiled text to the potential client. Let's look at the next steps of the Facebook Clickatell integration in more detail.
Setting up the Data Source – Facebook
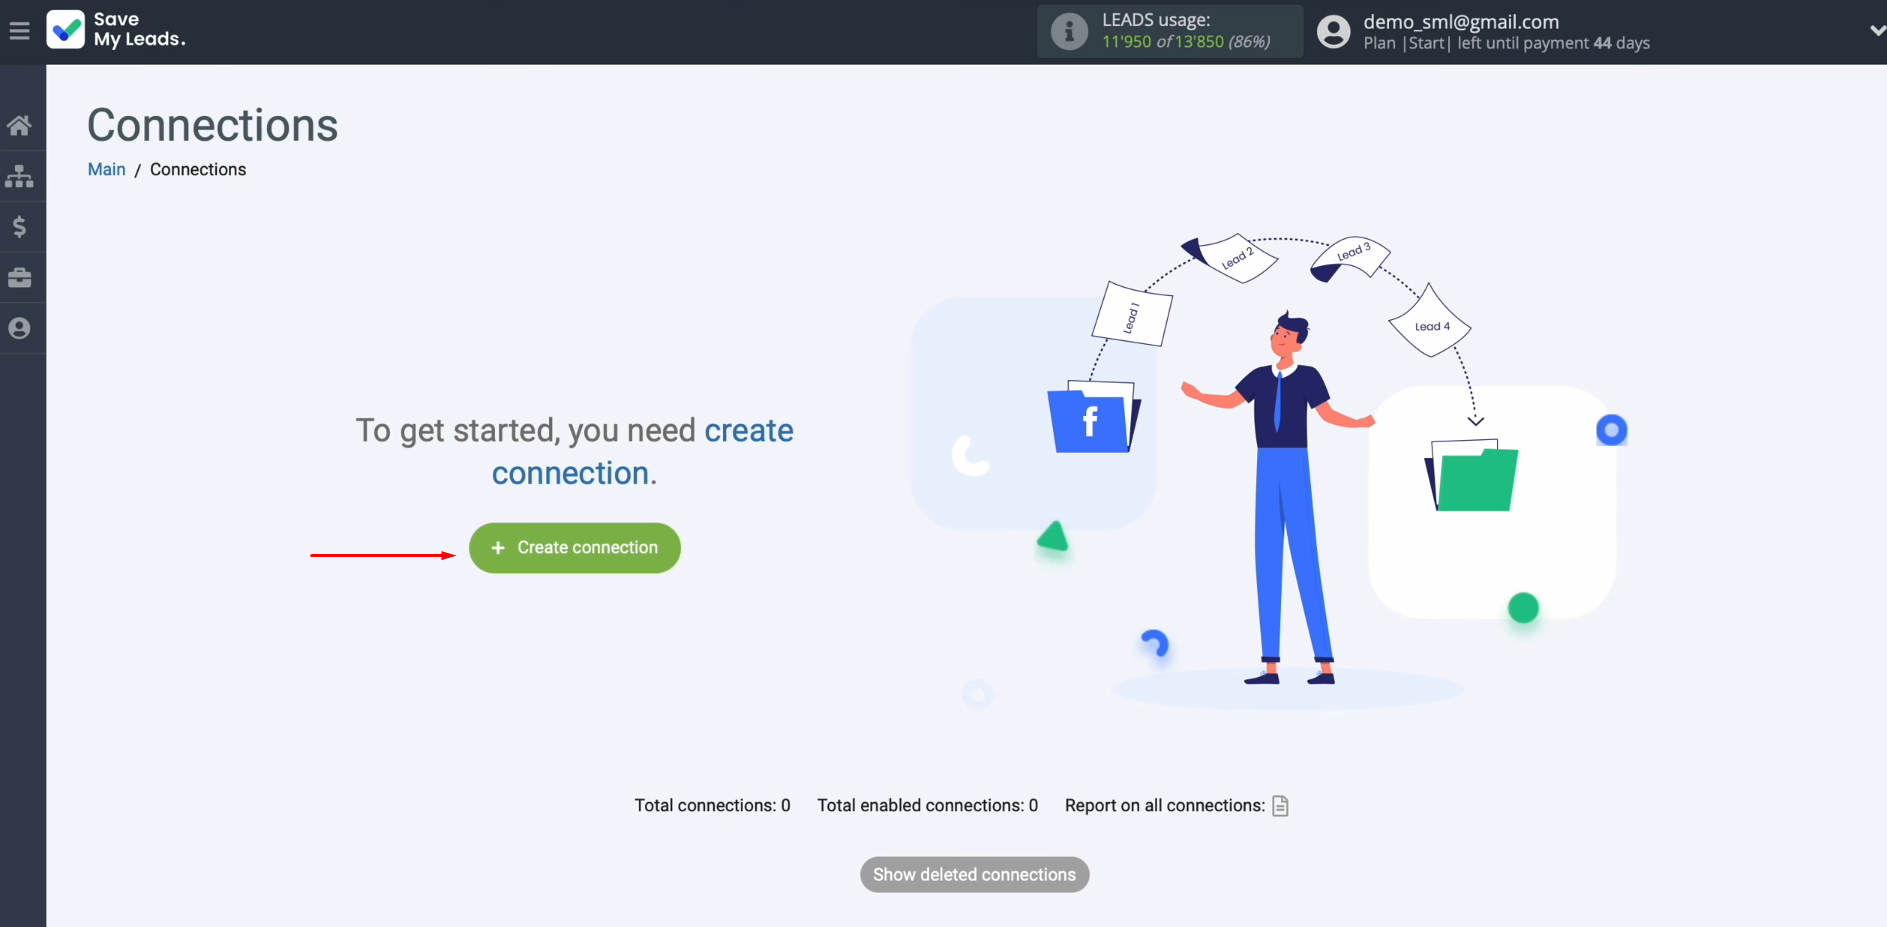
To set up Clickatell integration with Facebook, create a new connection. Click on the green button.
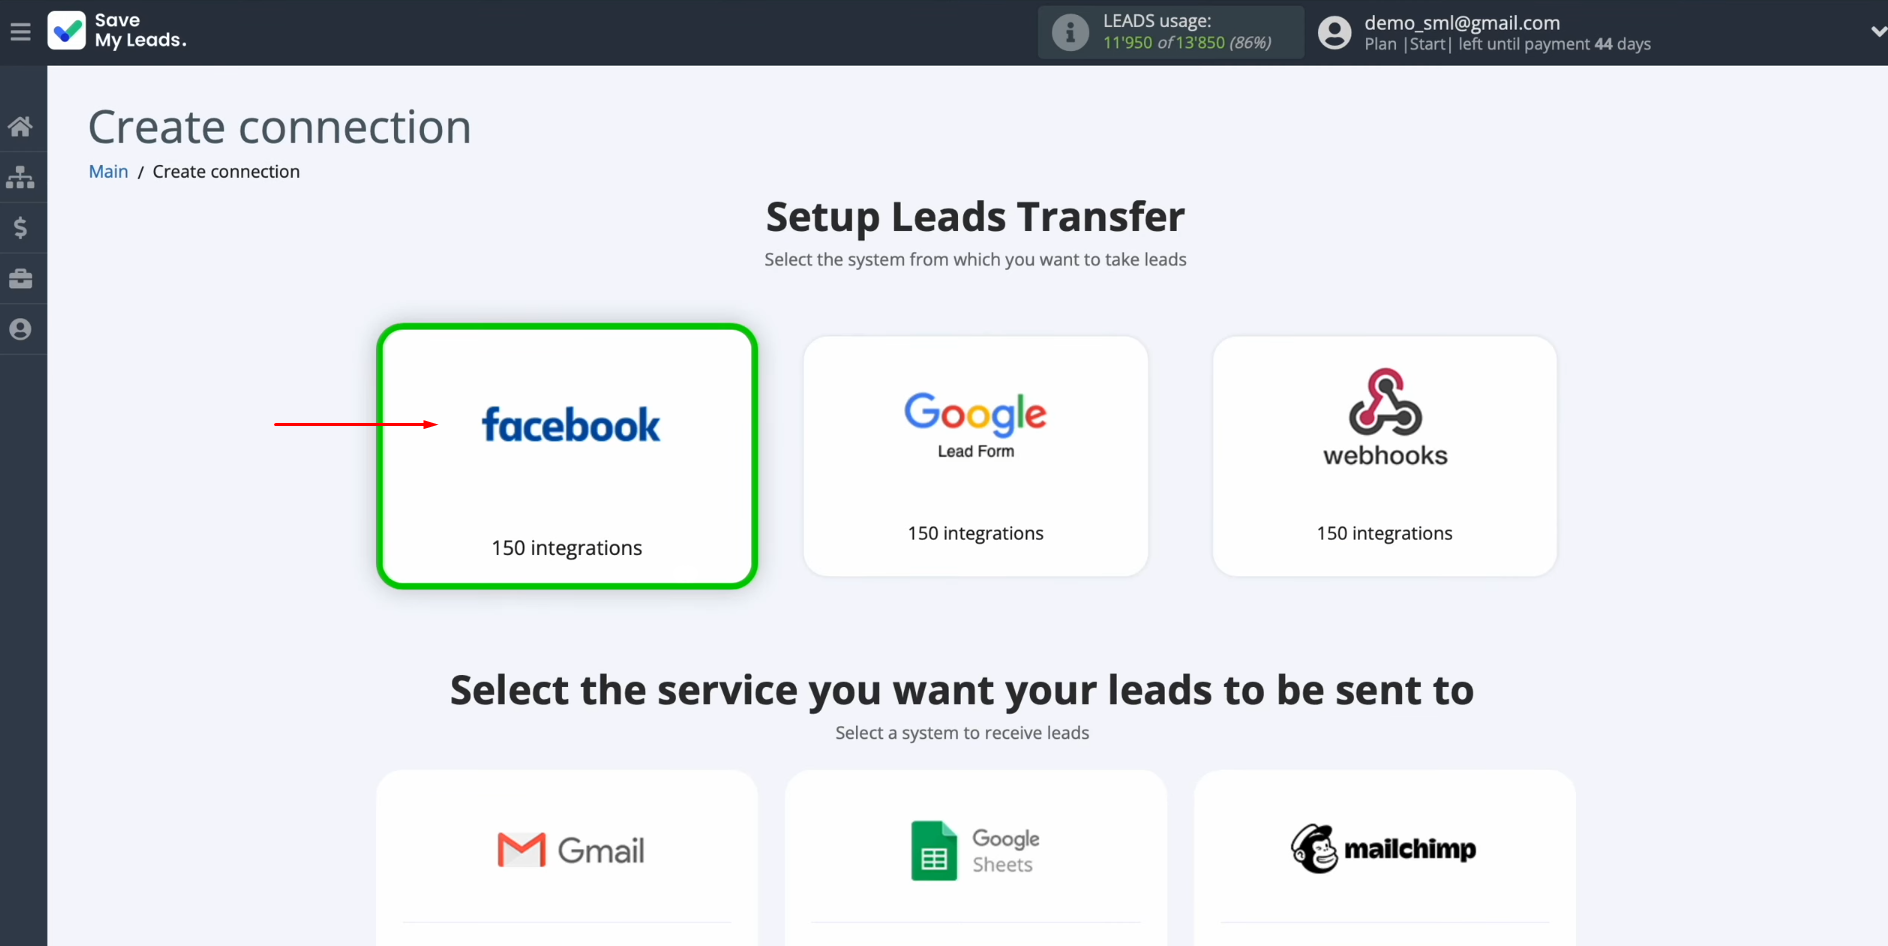
Select
the data source system. In this case, select Facebook.
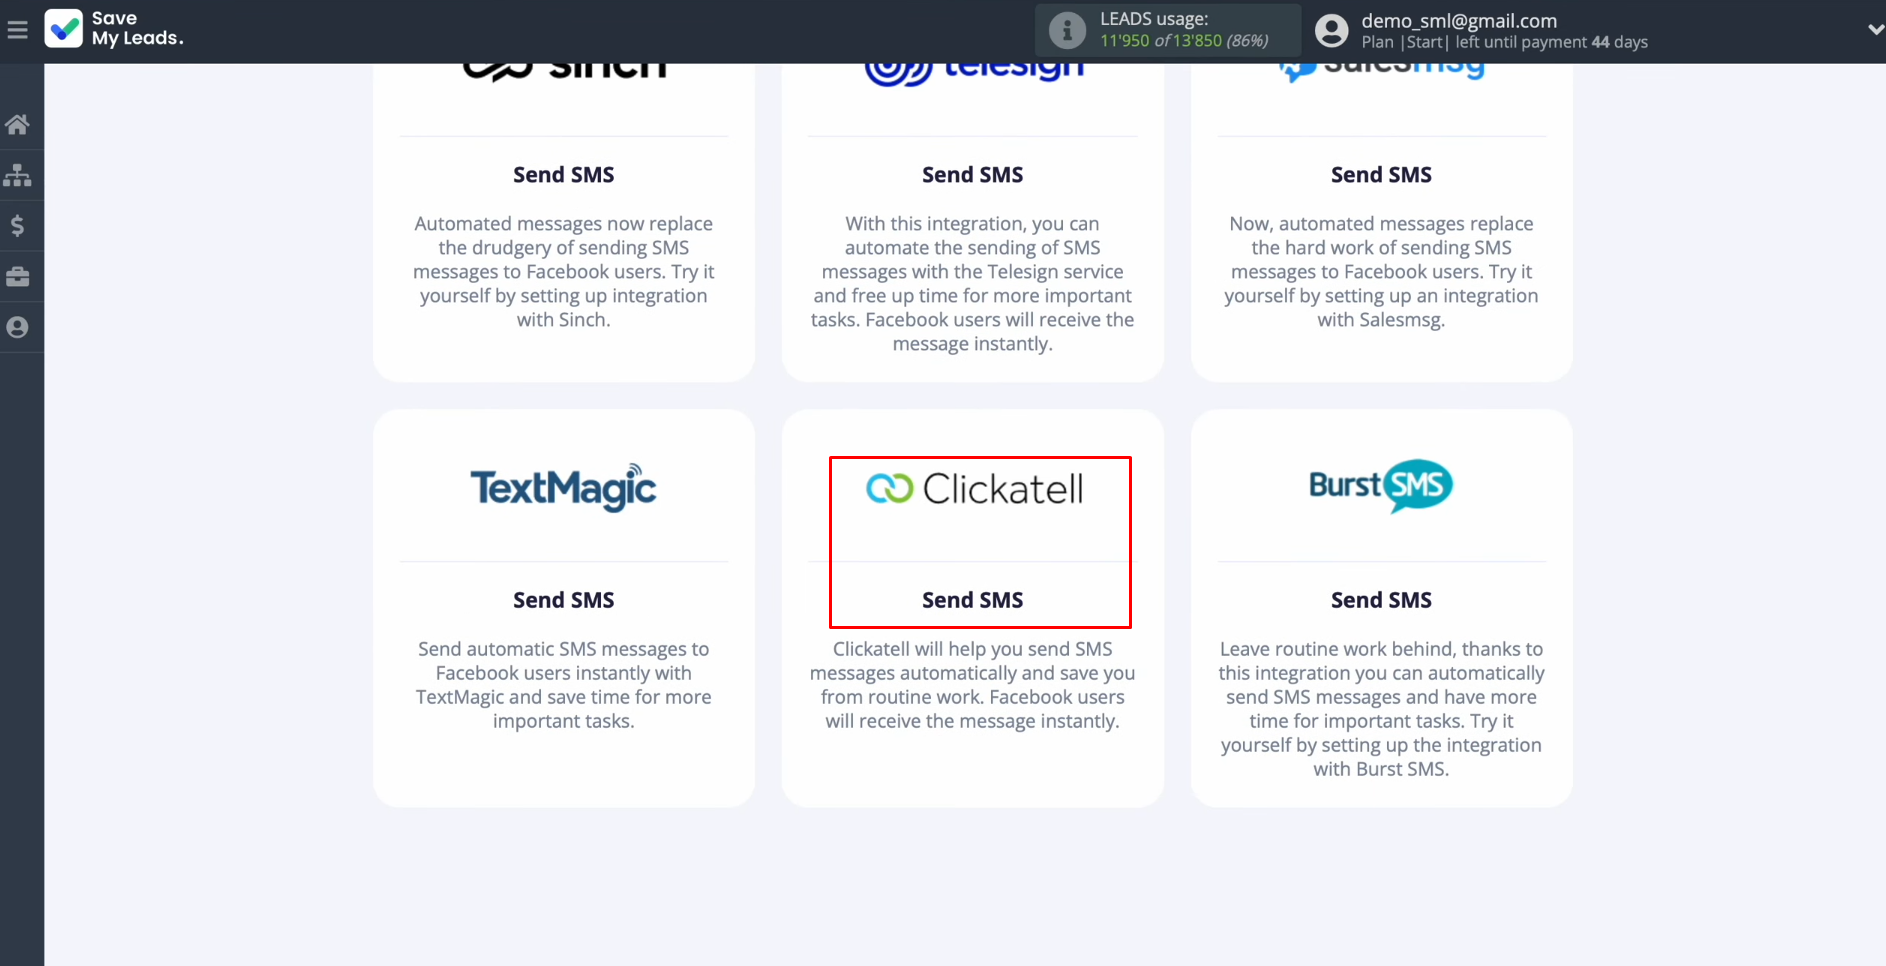
Select the
system where you are going to transfer your new leads from Facebook. In this case, choose Clickatell.
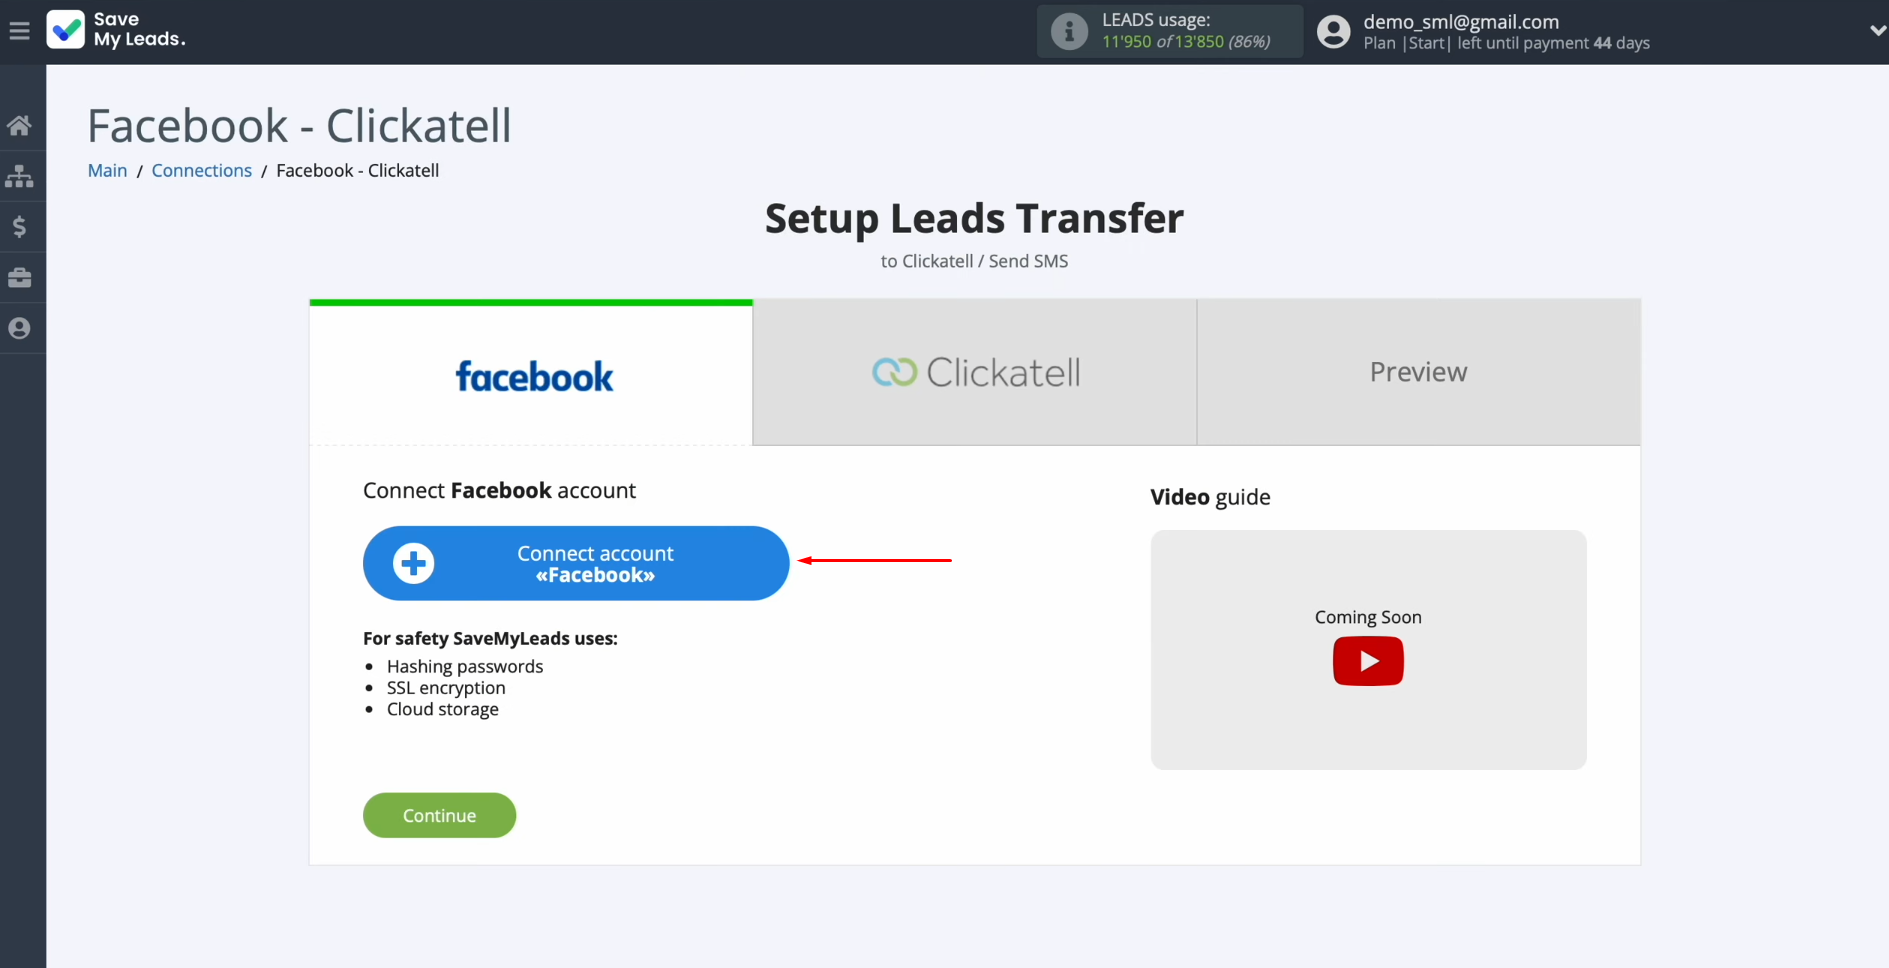
Connect your Facebook account to SaveMyLeads.
Click on the blue button.
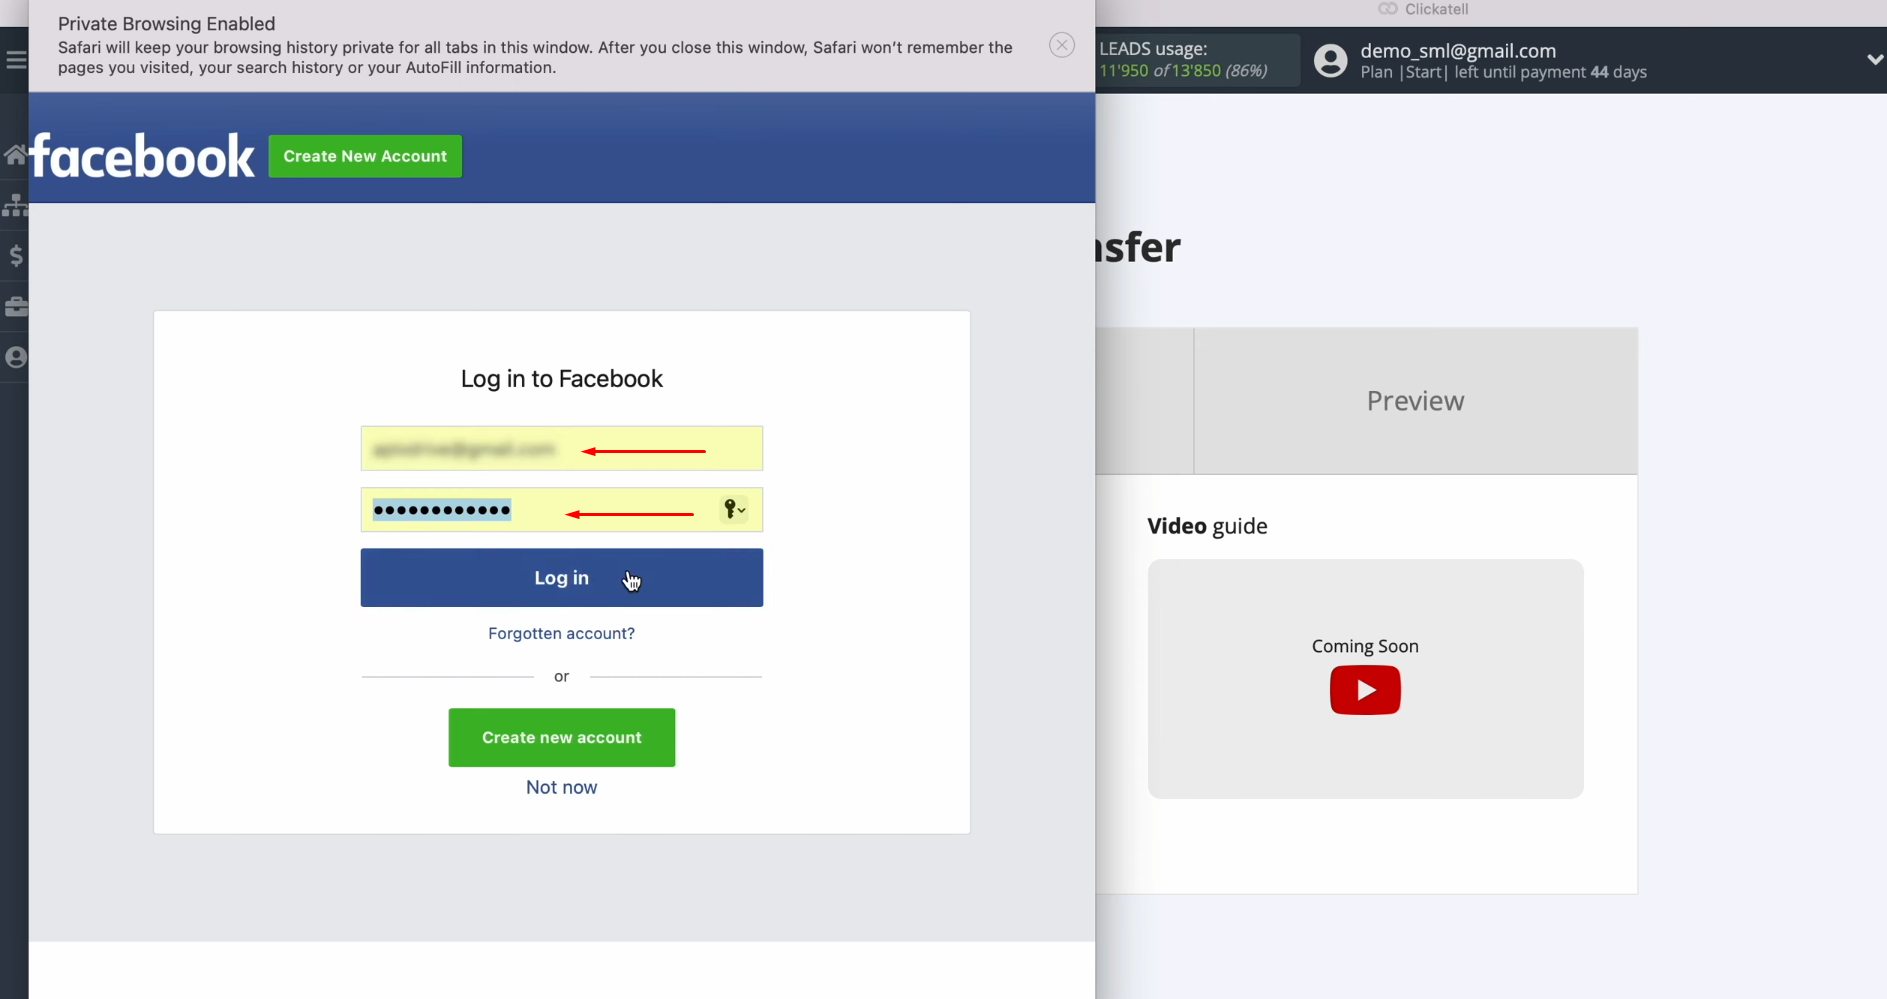
Specify the login and password of your Facebook personal account. Click “Log in”.
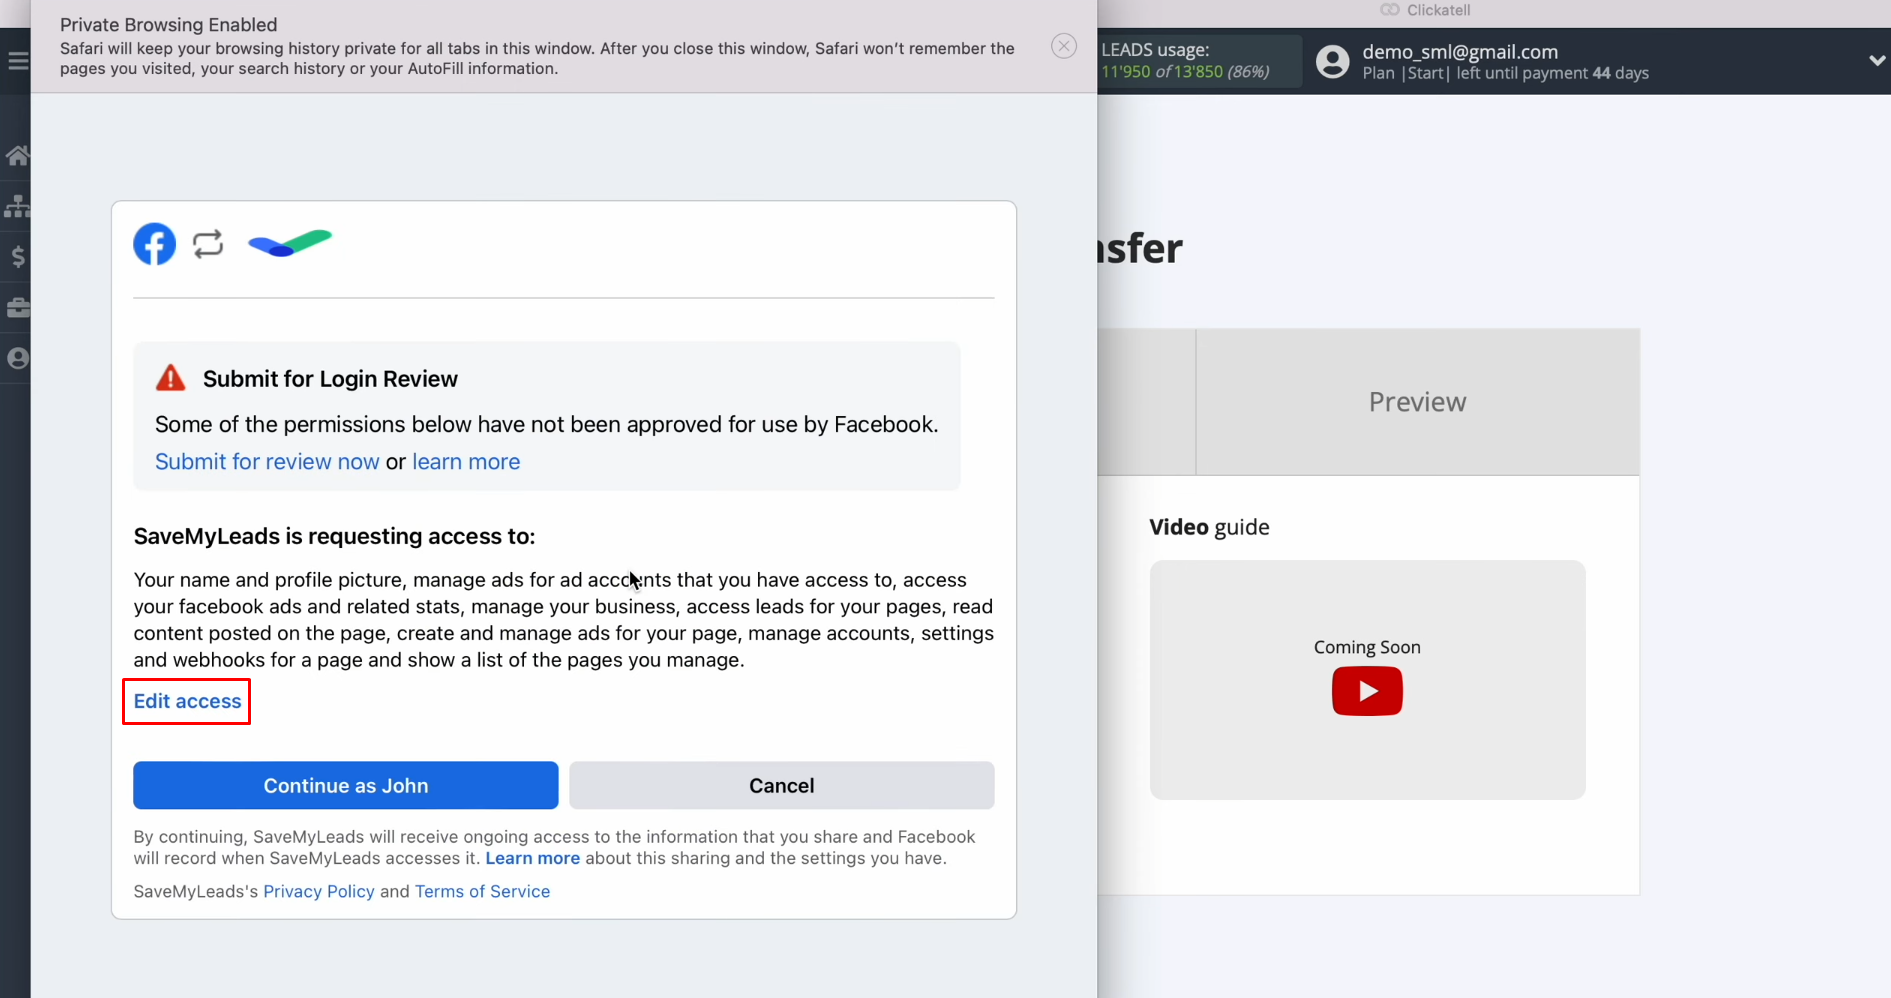
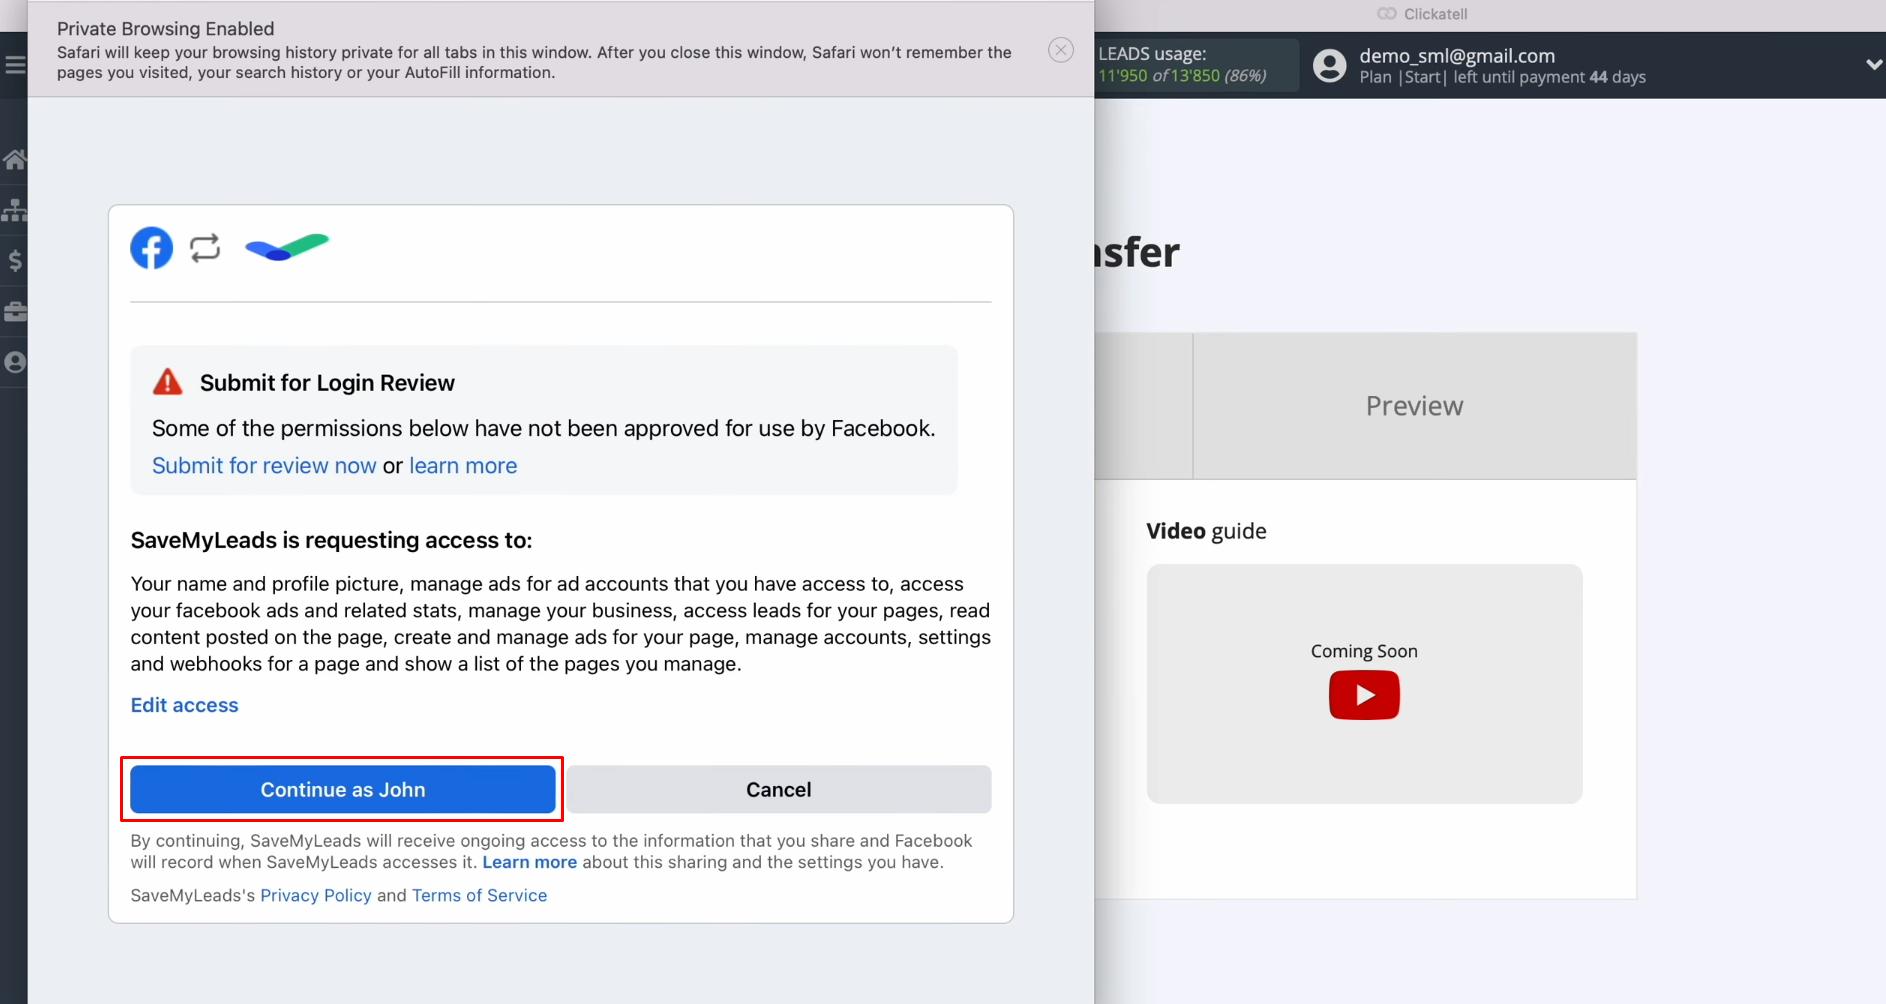
Click
“Edit access”.
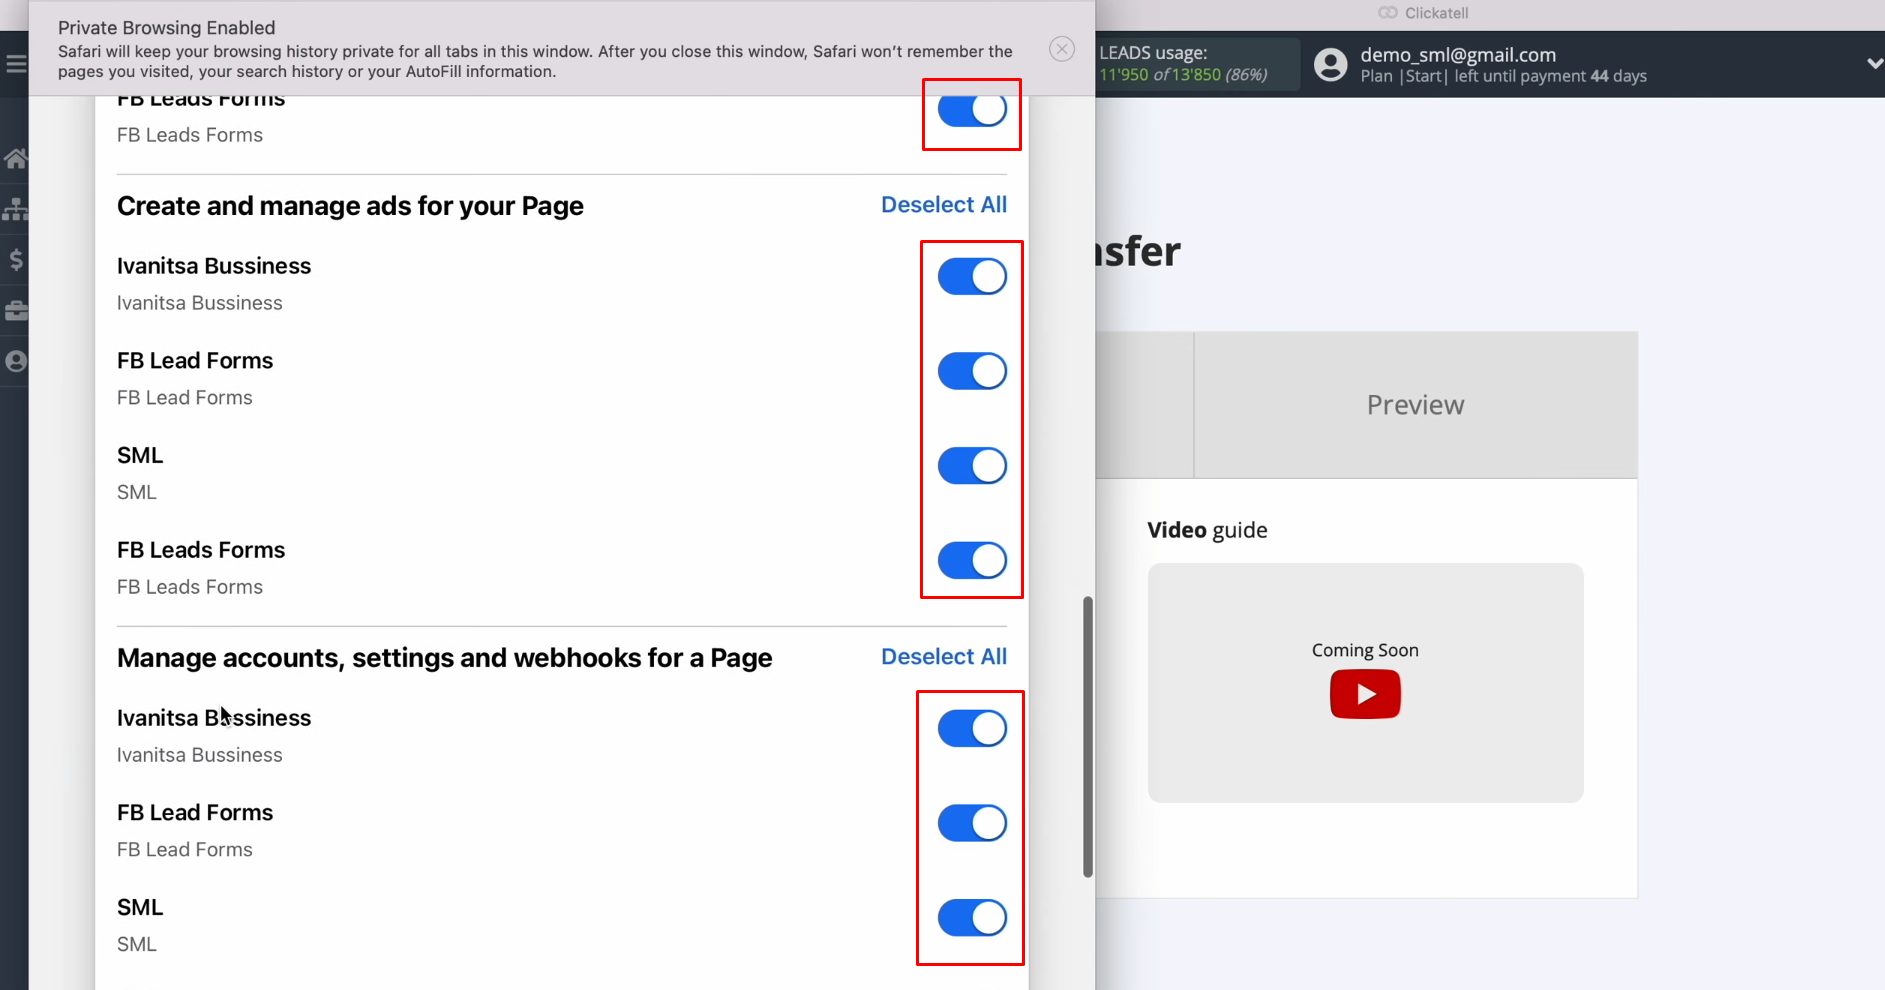
Leave all access checkboxes enabled.
Click
“Continue as…”.
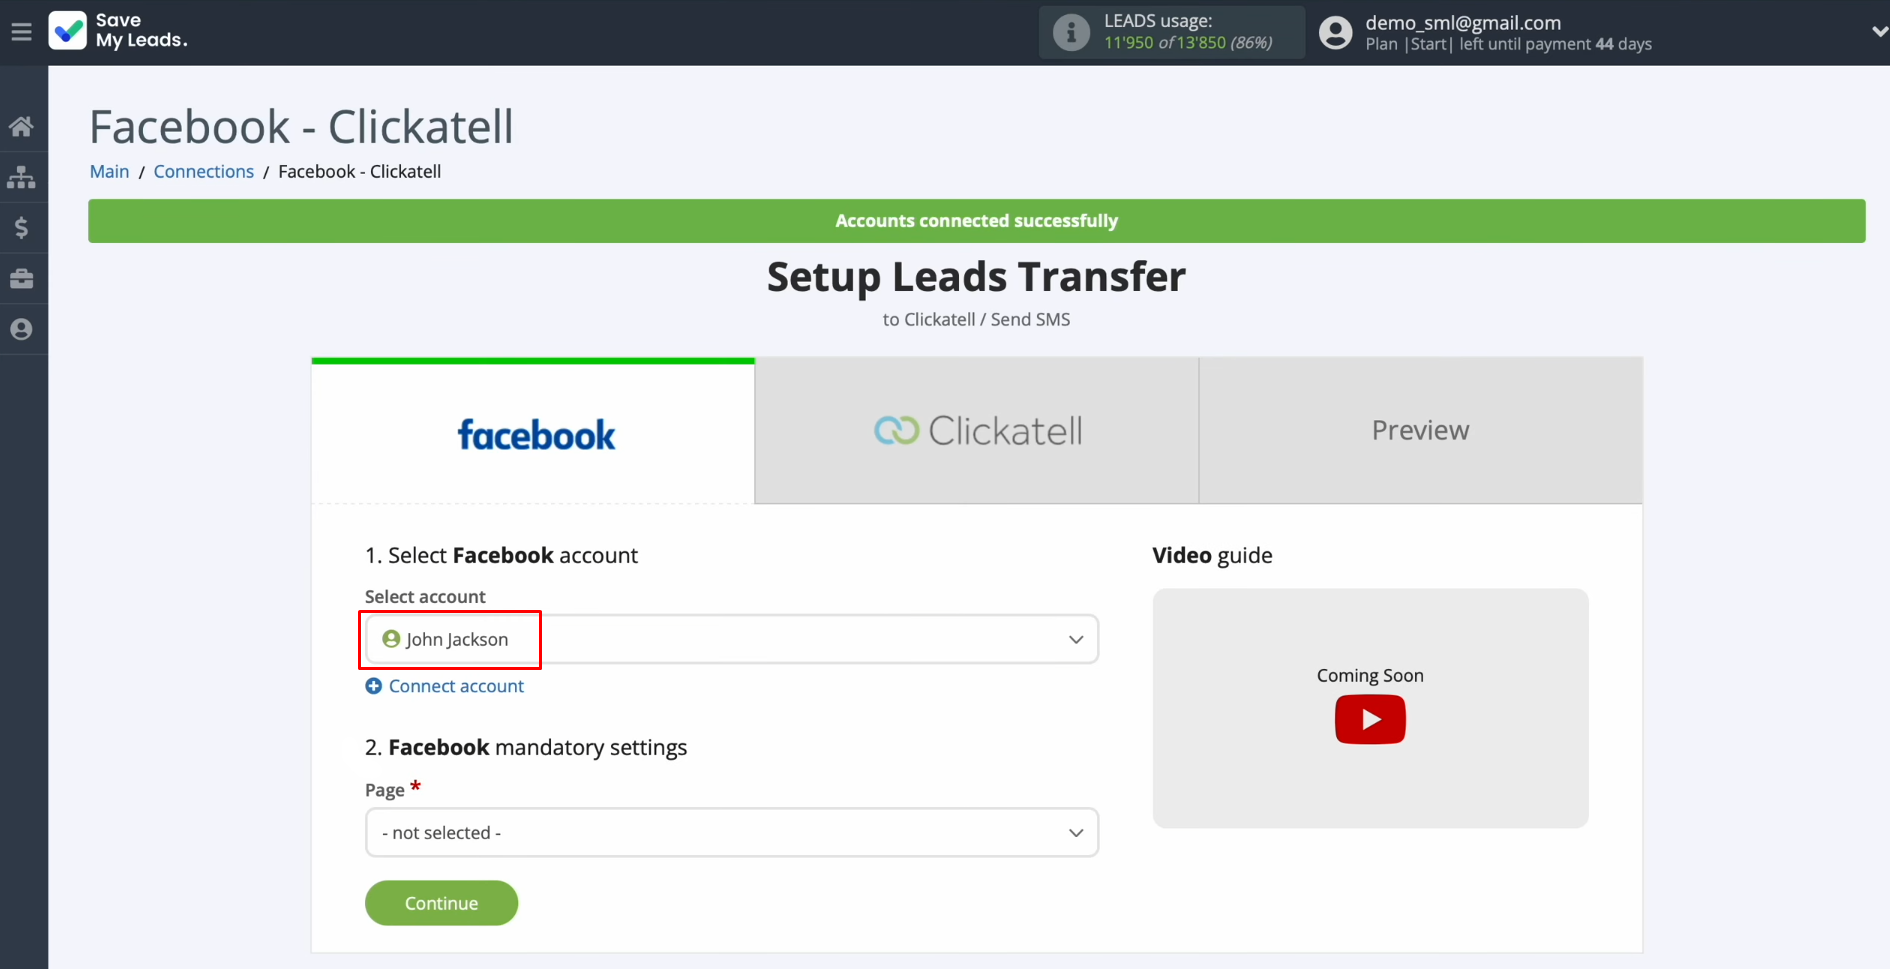
When the connected account appears in the list, select it.
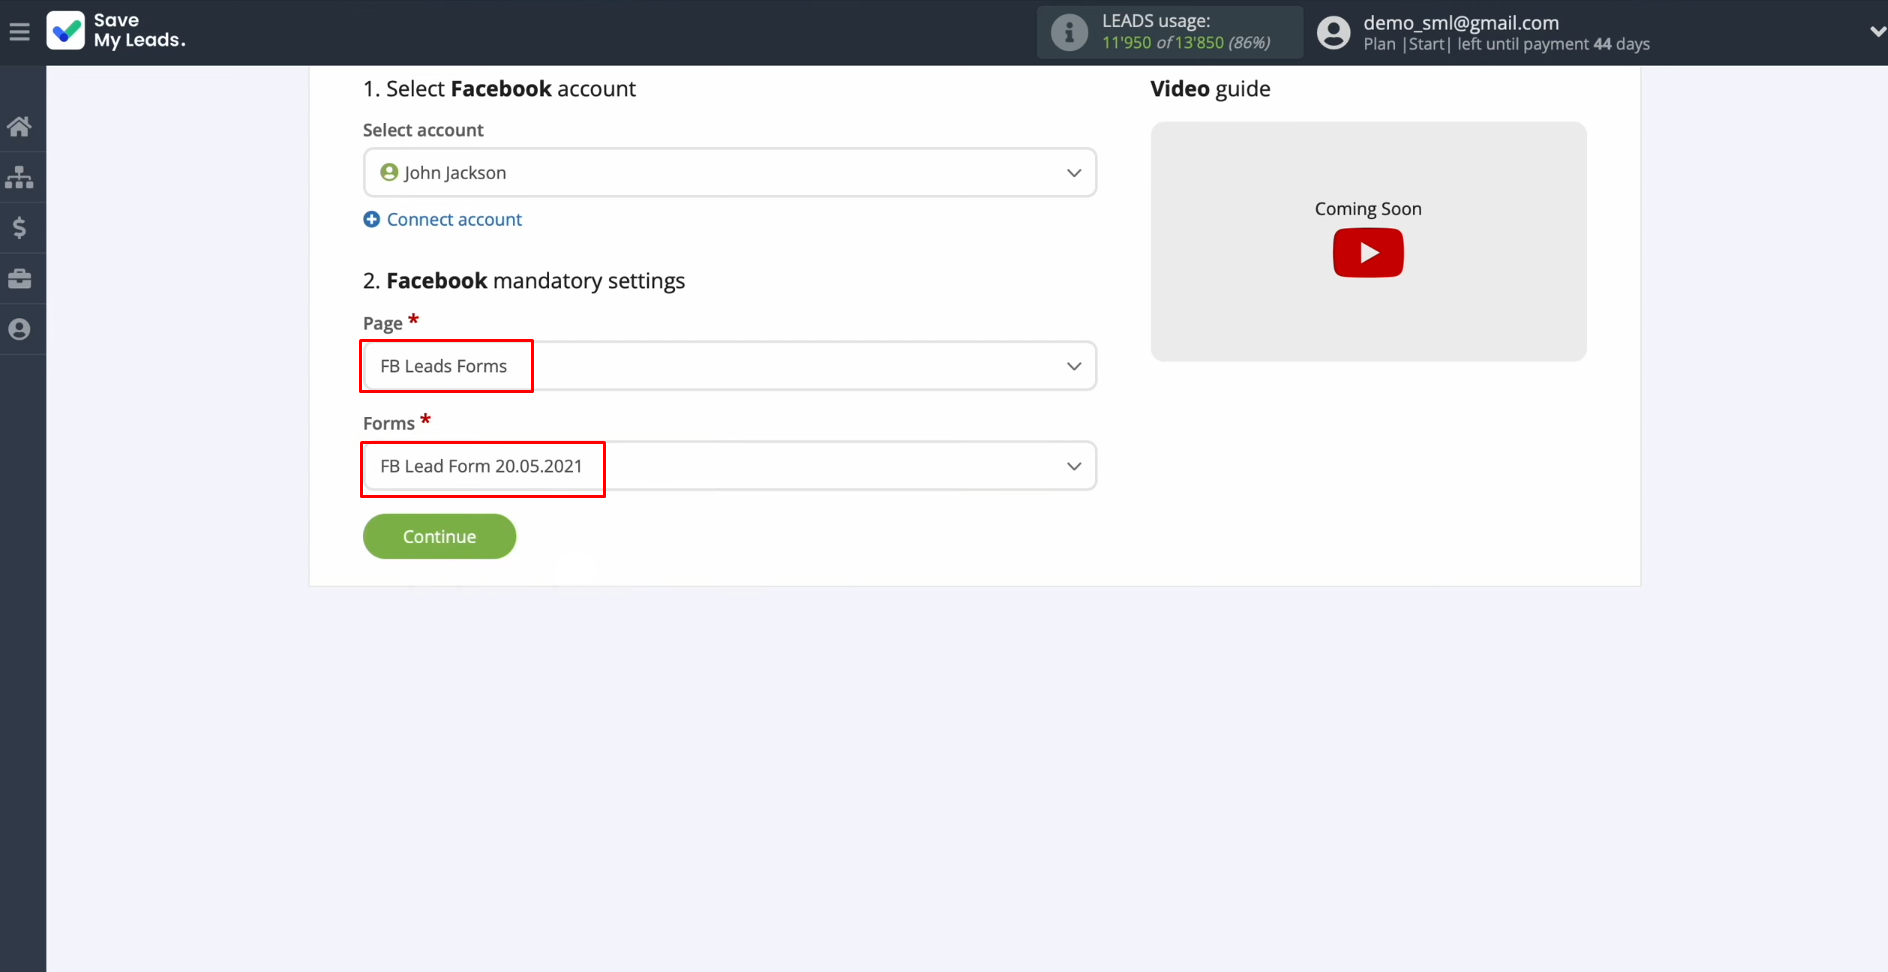
Select the
advertising page and form where your new Facebook leads will come from. Click “Continue”.
Setting up the Data Receiver – Clickatell
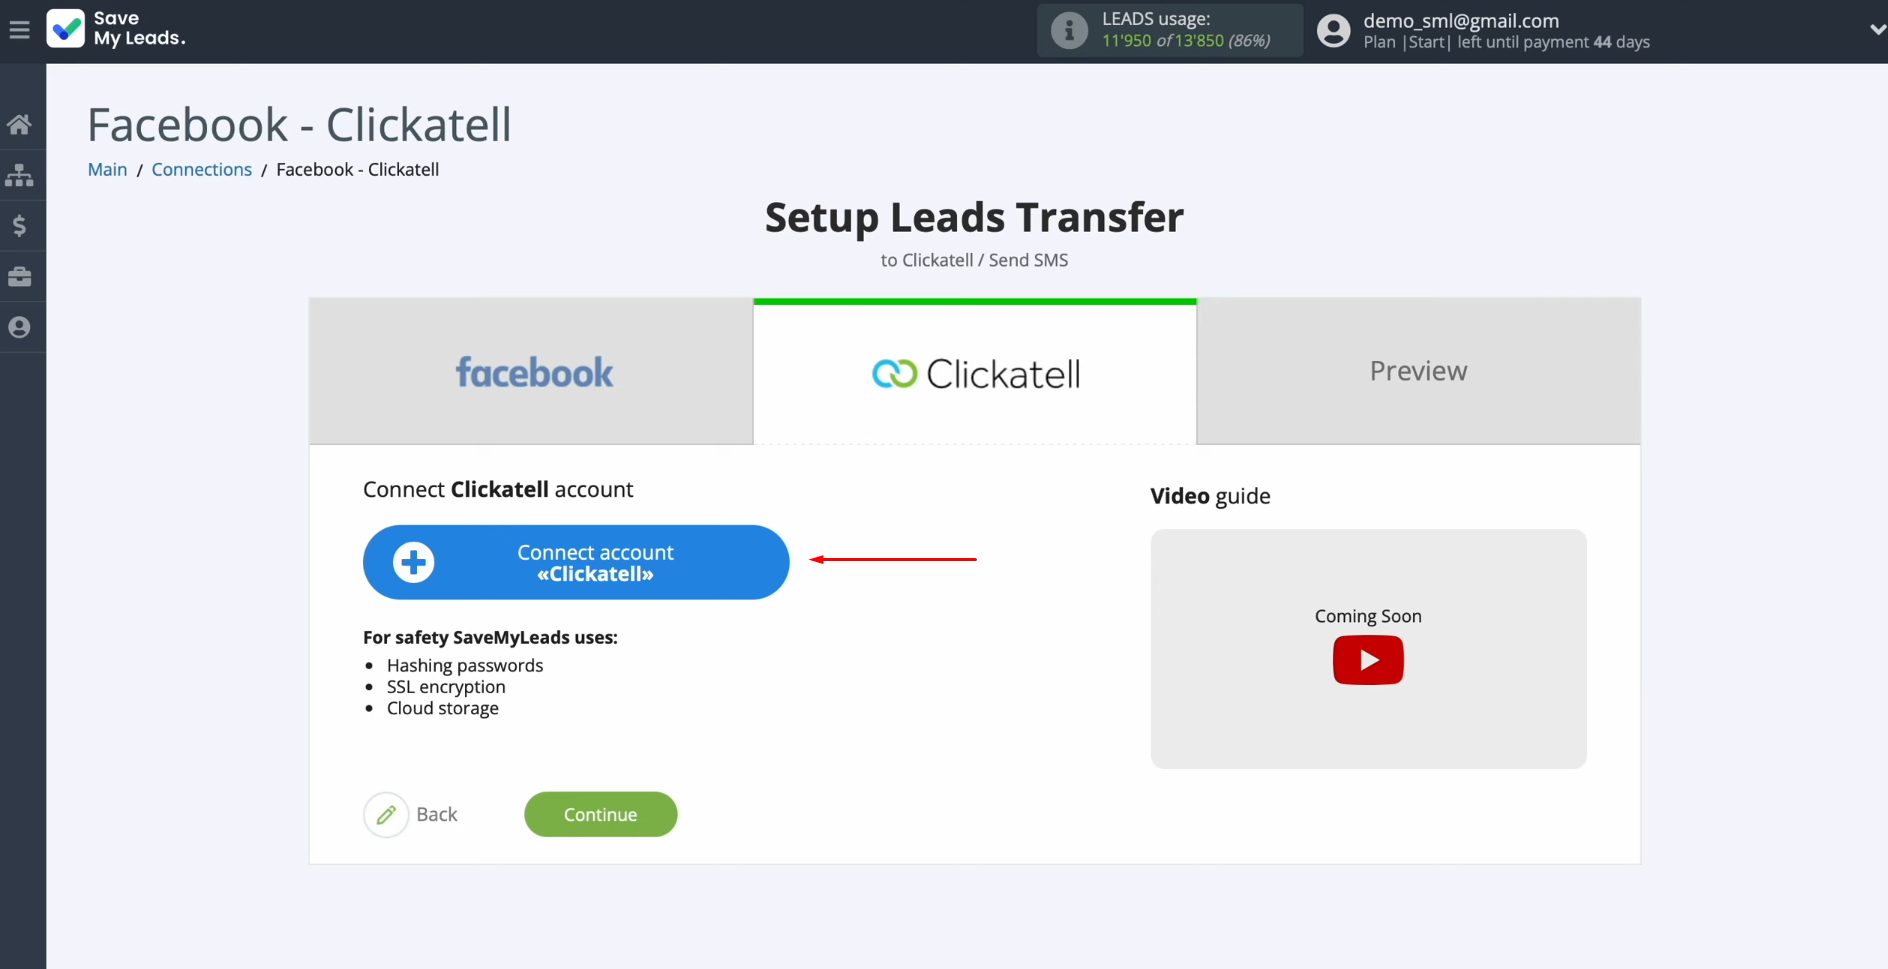
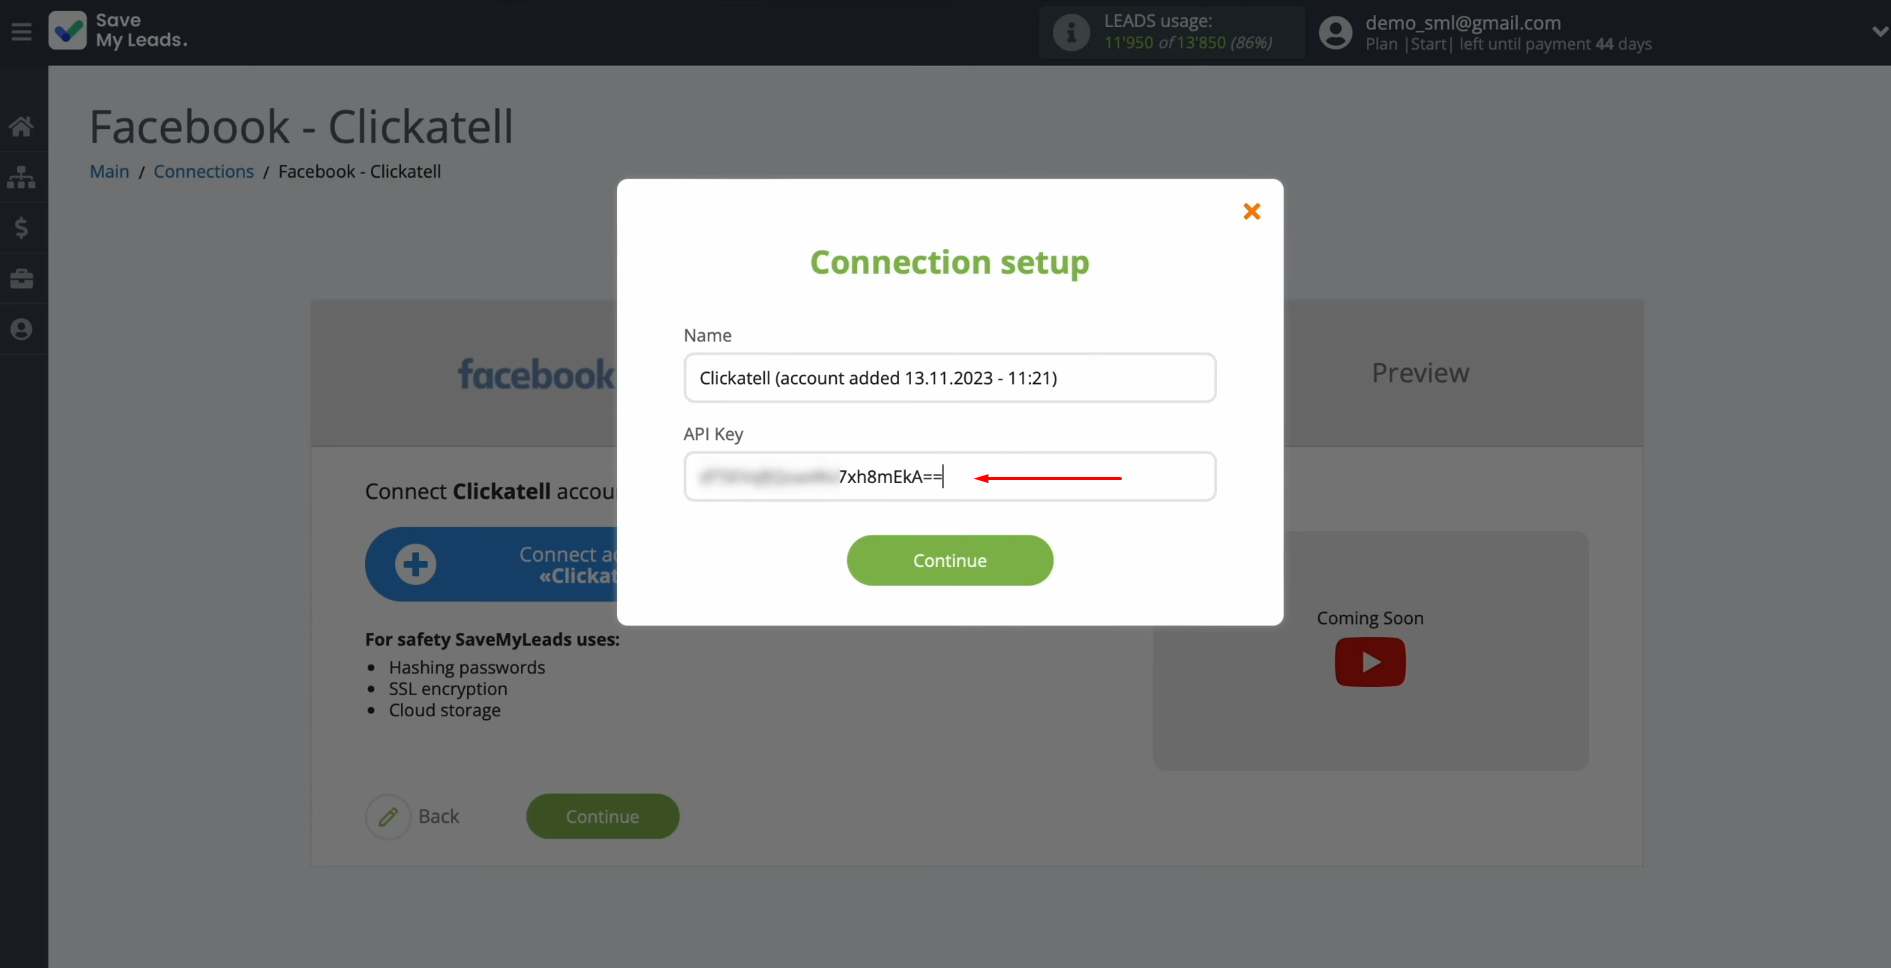
To set up Facebook integration with Clickatell, connect your Clickatell account to SaveMyLeads. Click on the blue button.
Specify the API key.
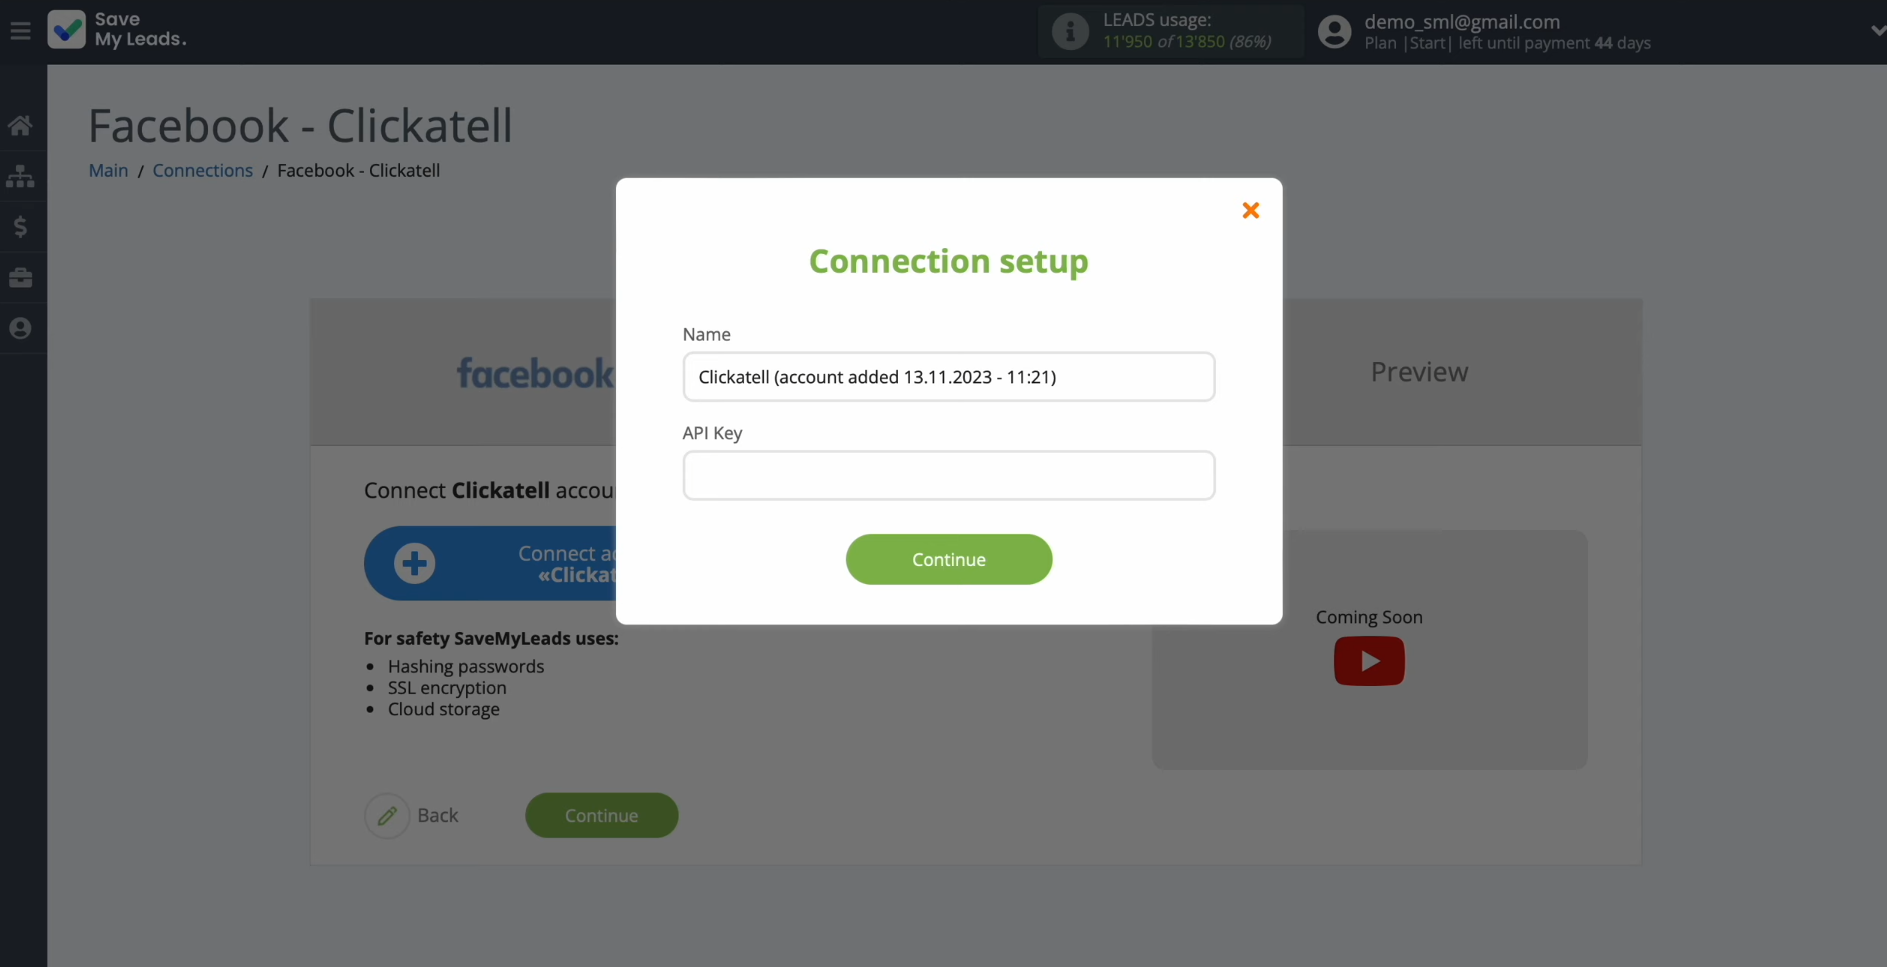
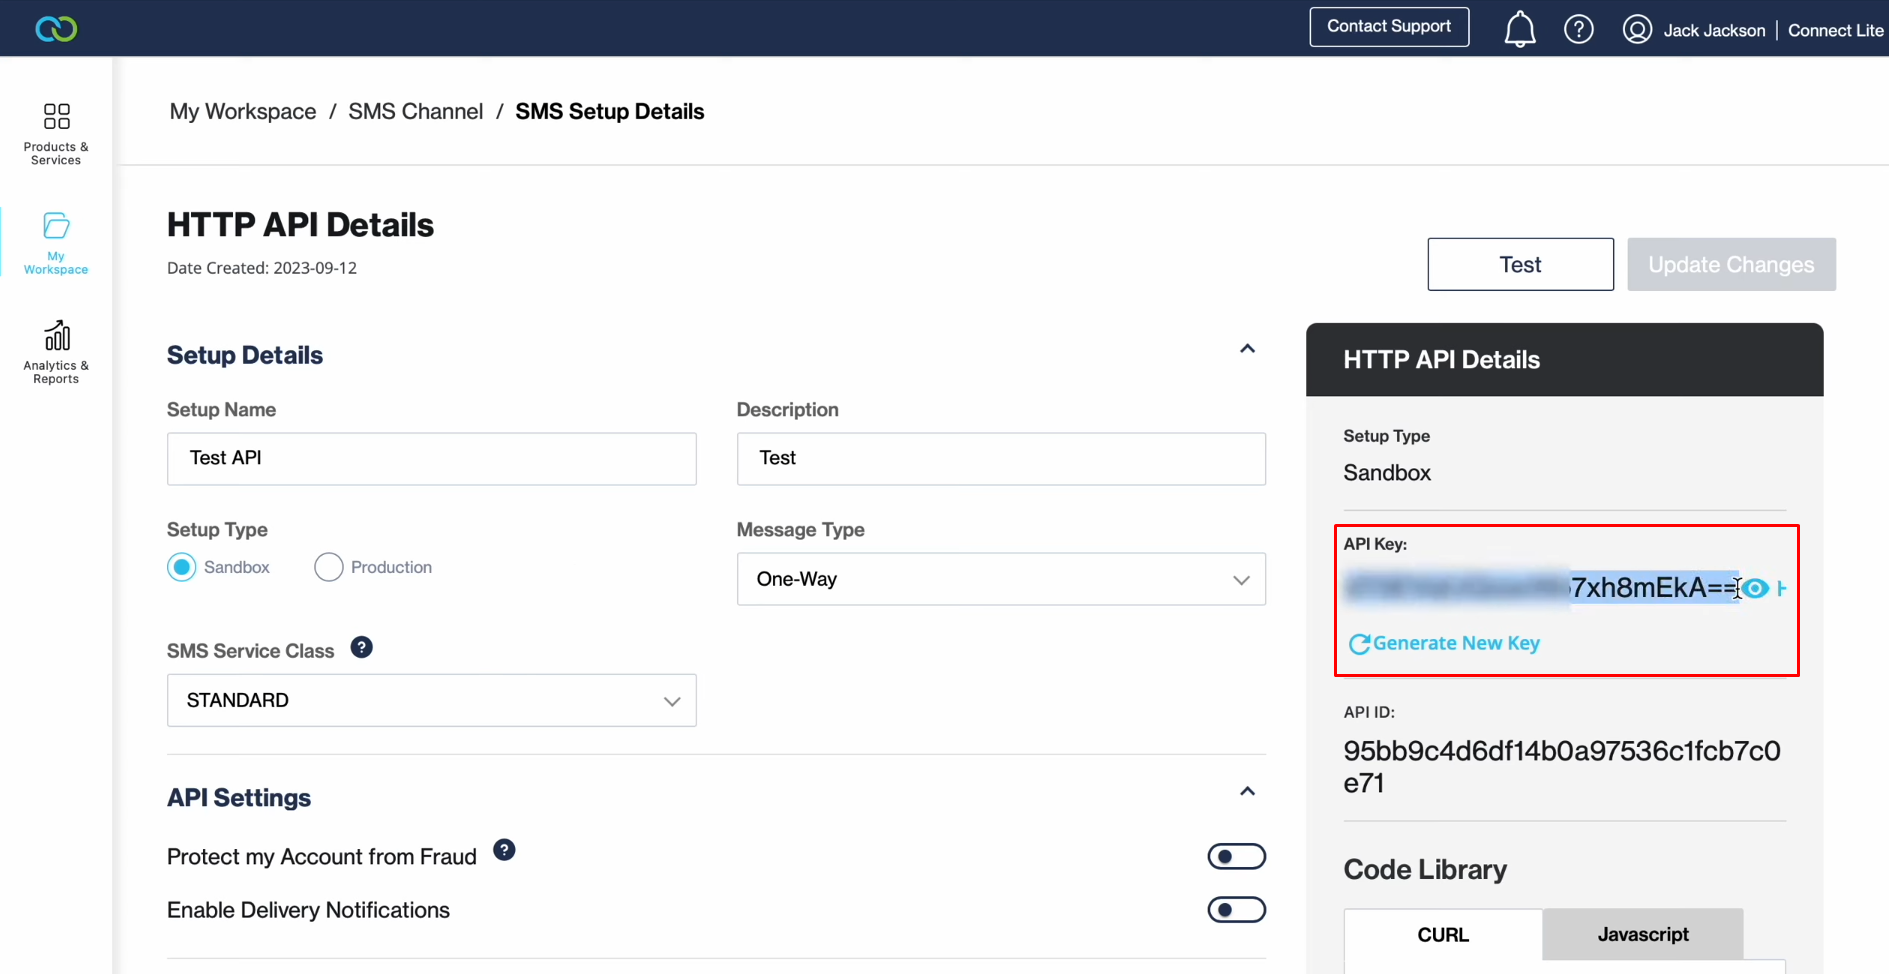
To get it, go to your Clickatell personal account. Select the "My Workspace" section.
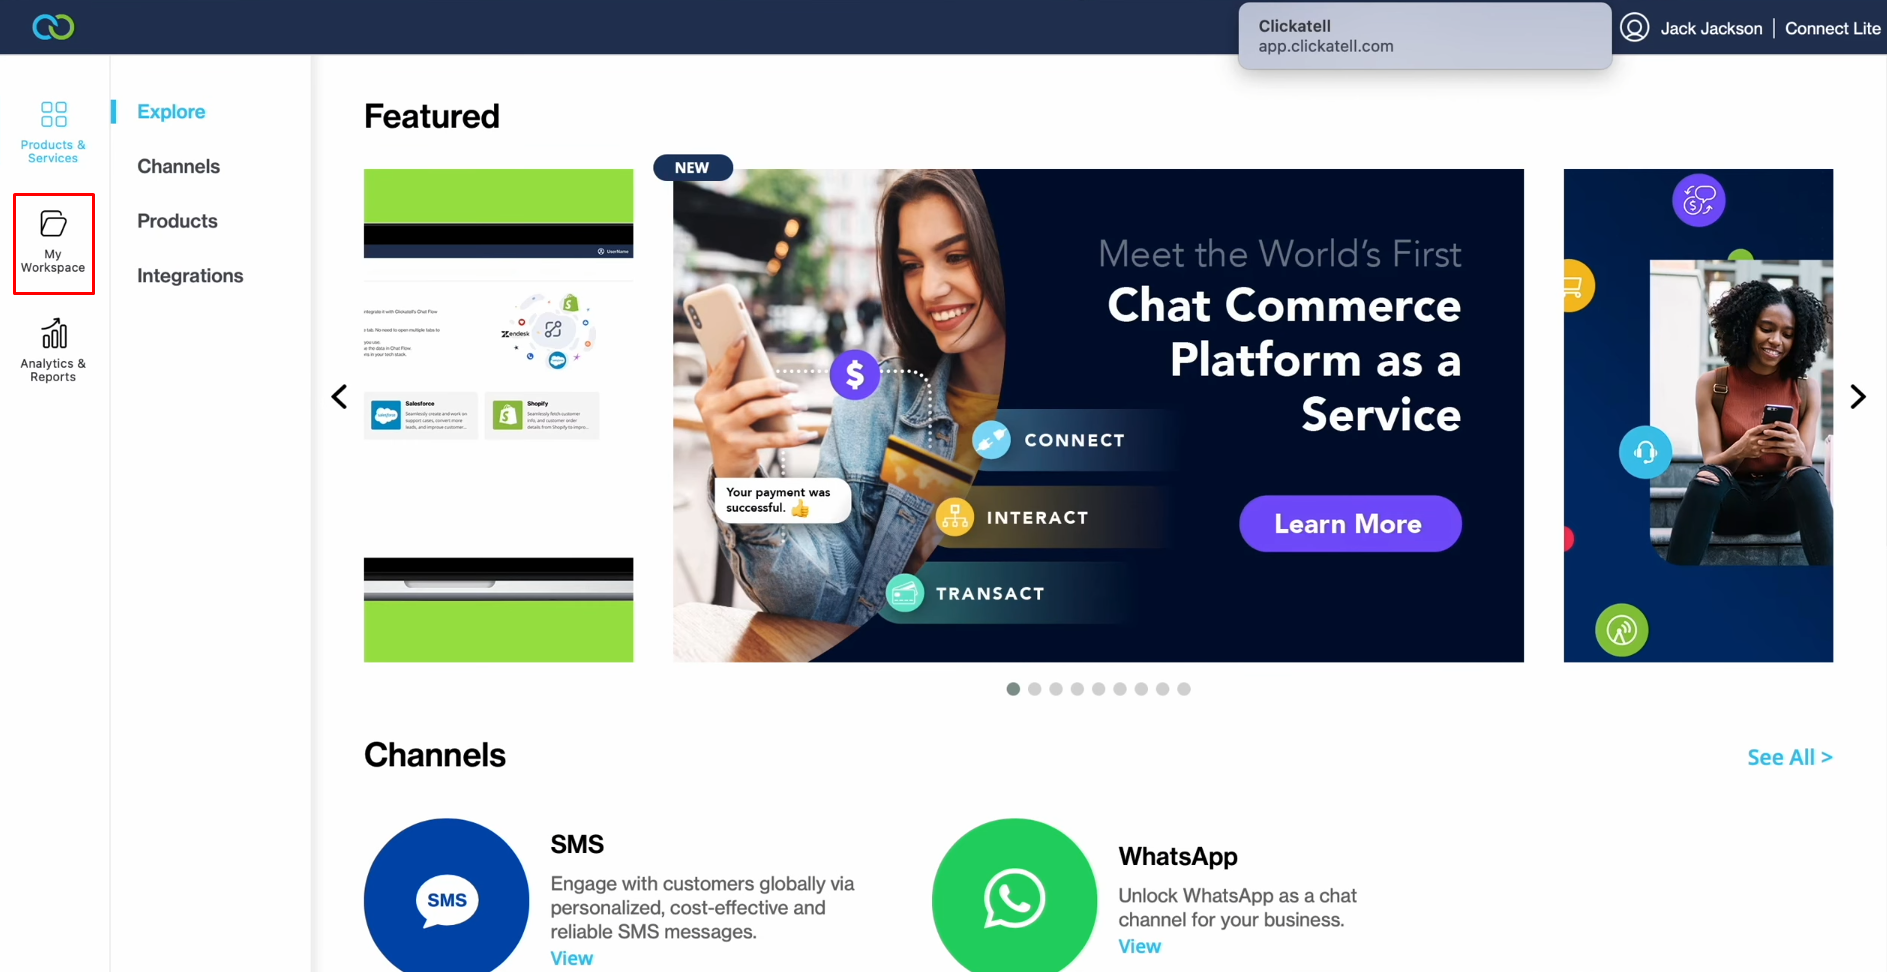
In the "Channels" section, select SMS.
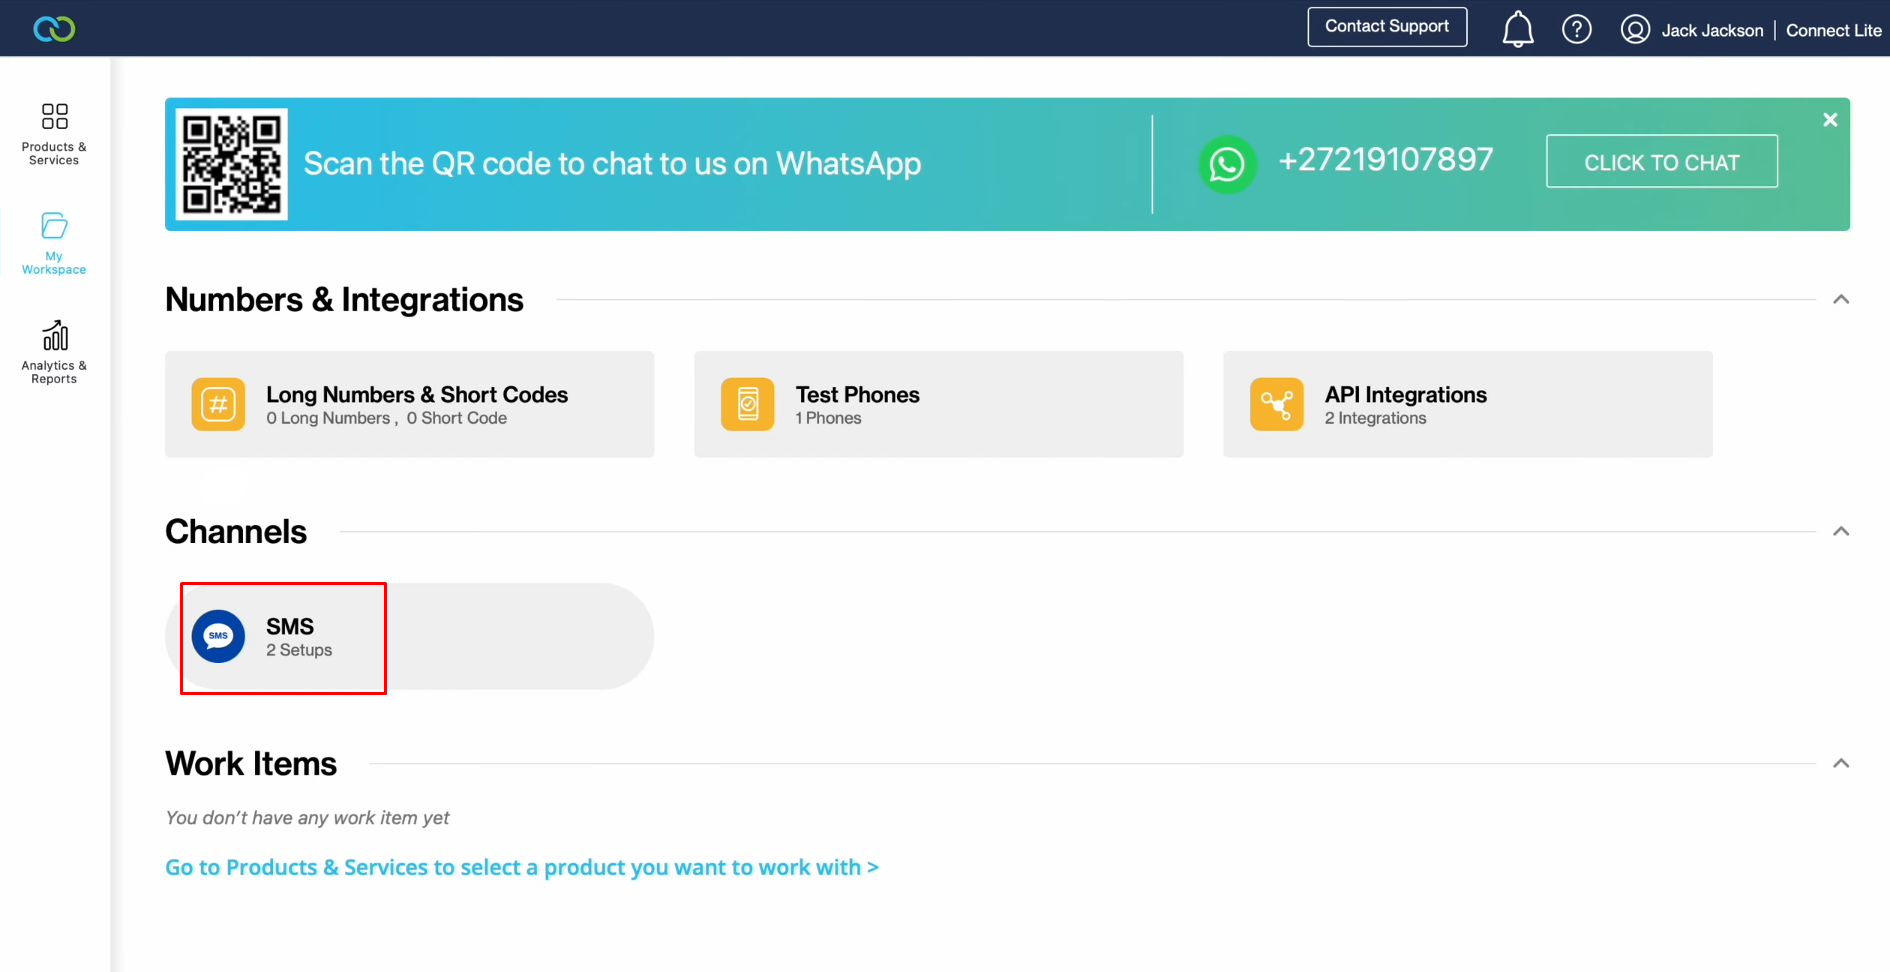
Select "My SMS setups", and click "Test API".
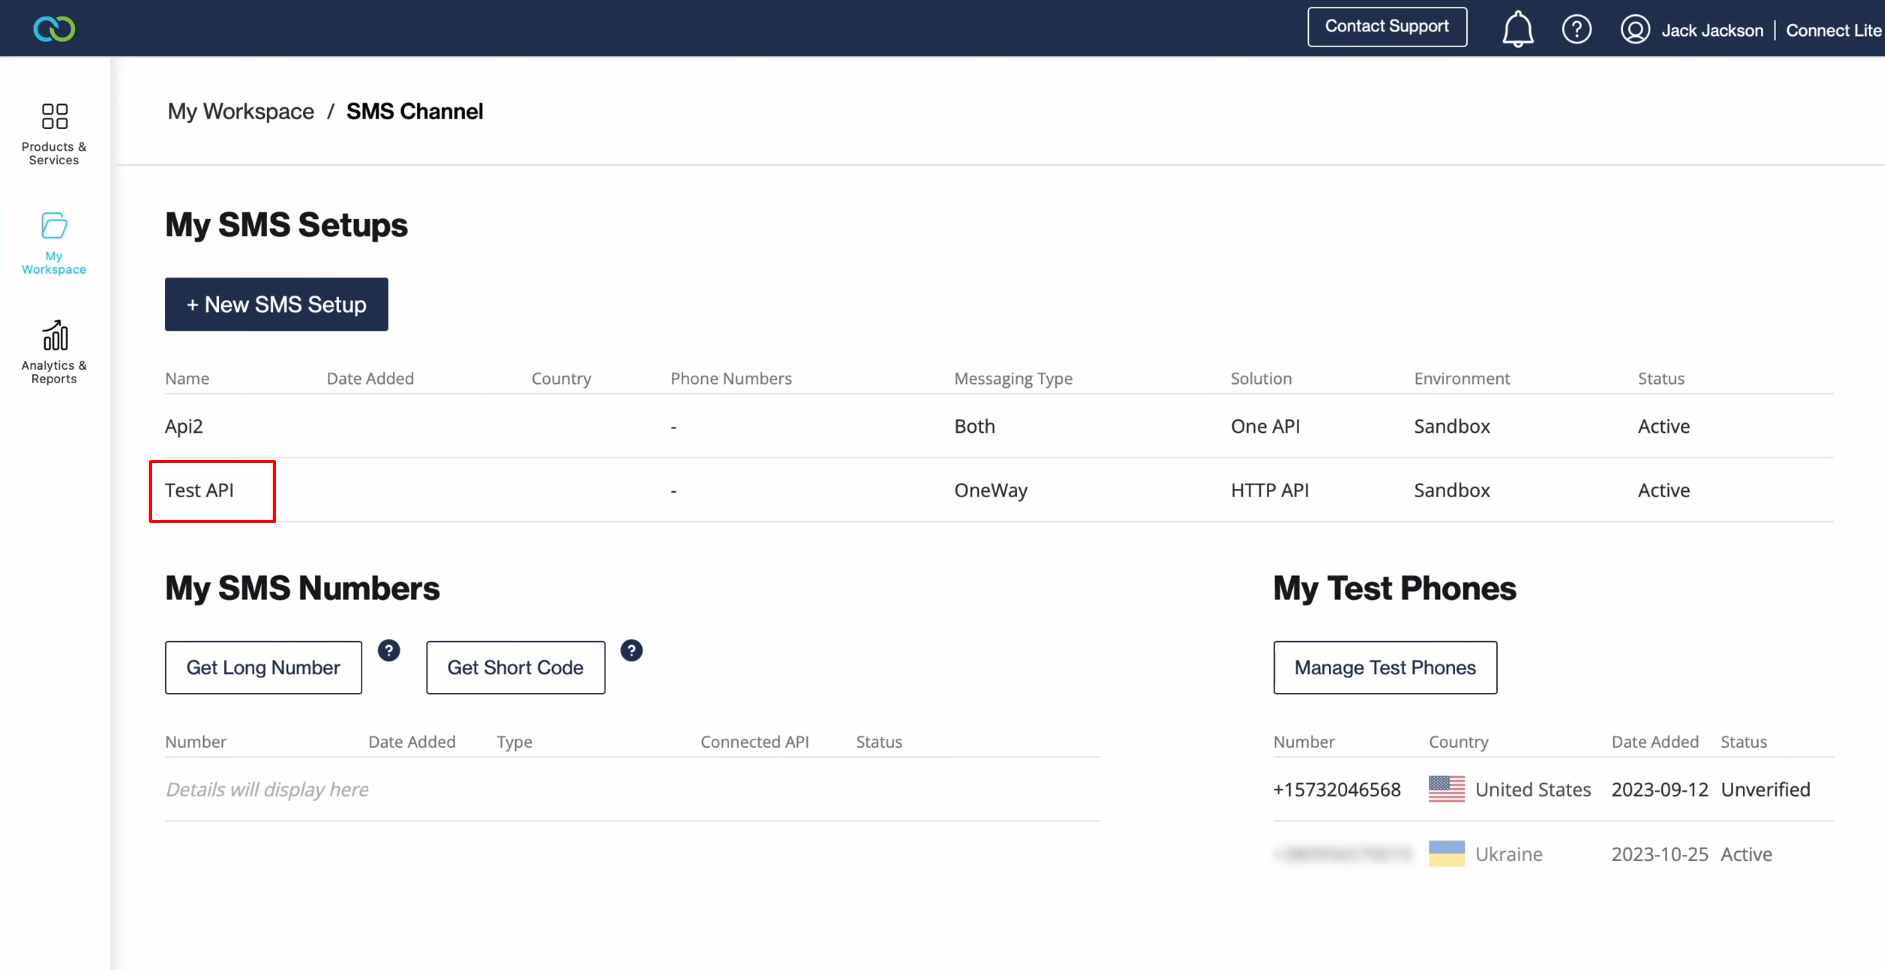
Click “View”, and copy the API
key.
Paste it into
the appropriate field in SaveMyLeads. When you fill out the field, click "Continue".
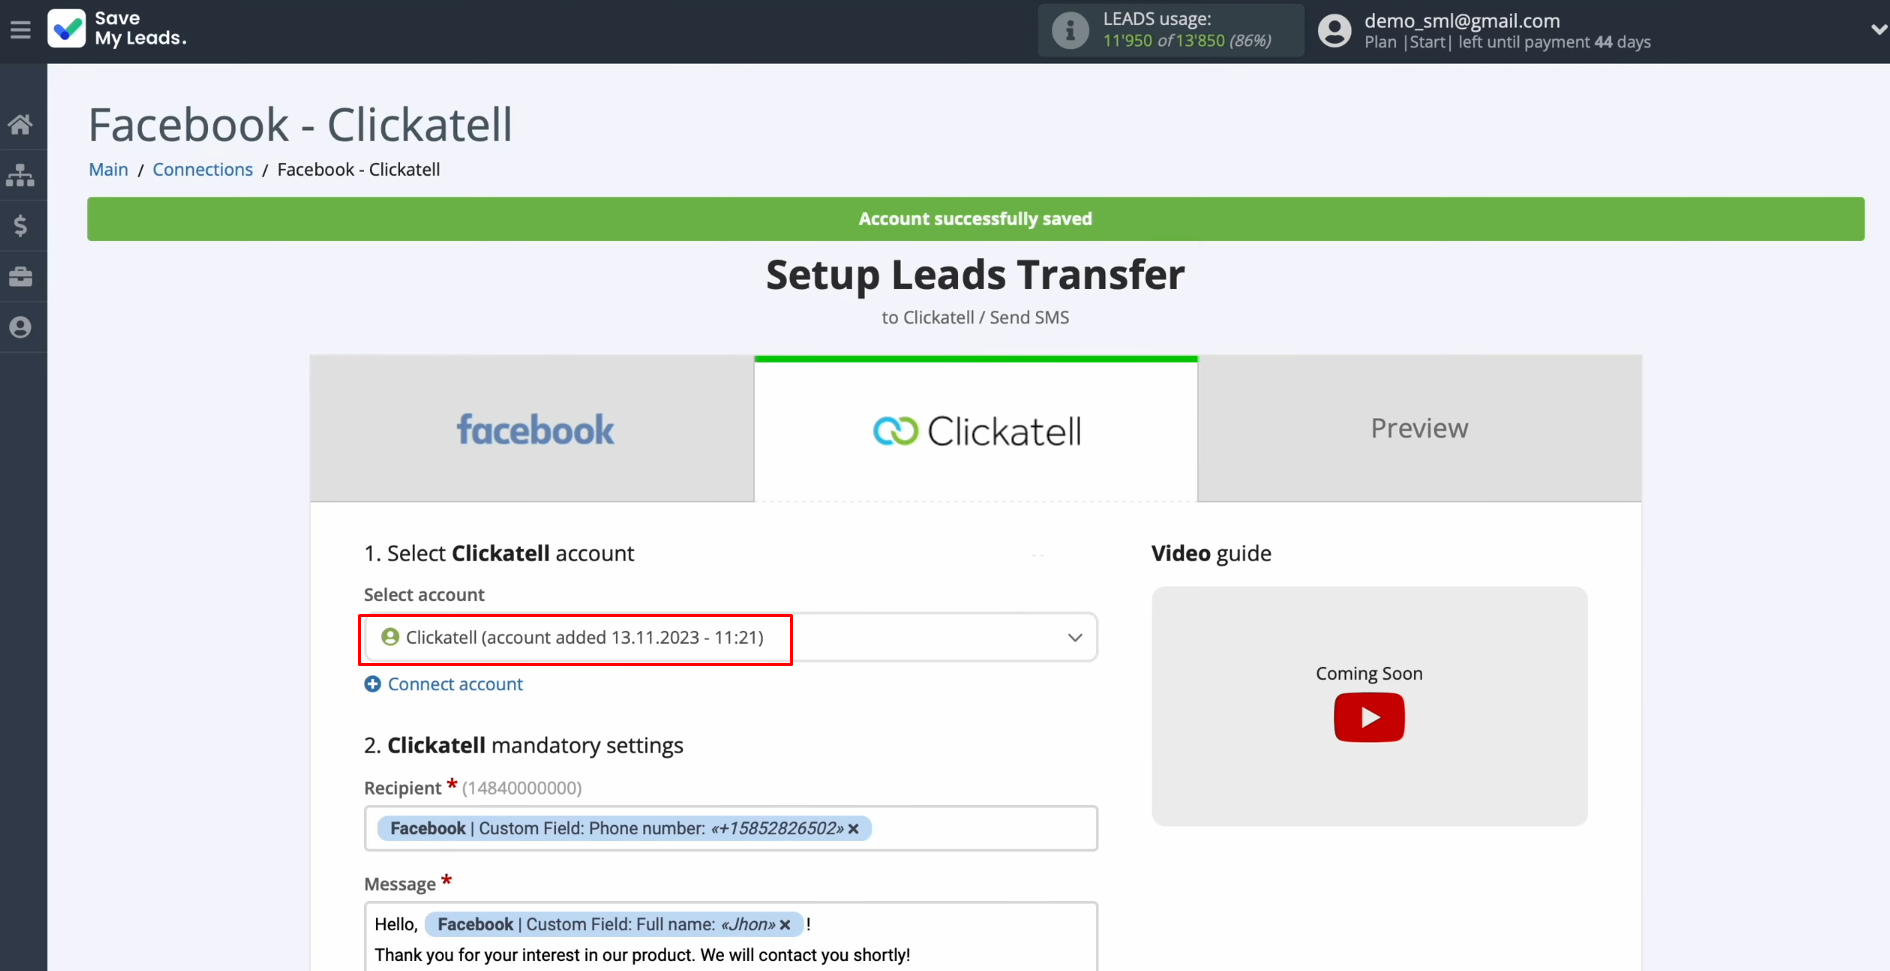
When the connected
account appears in the list, select it.
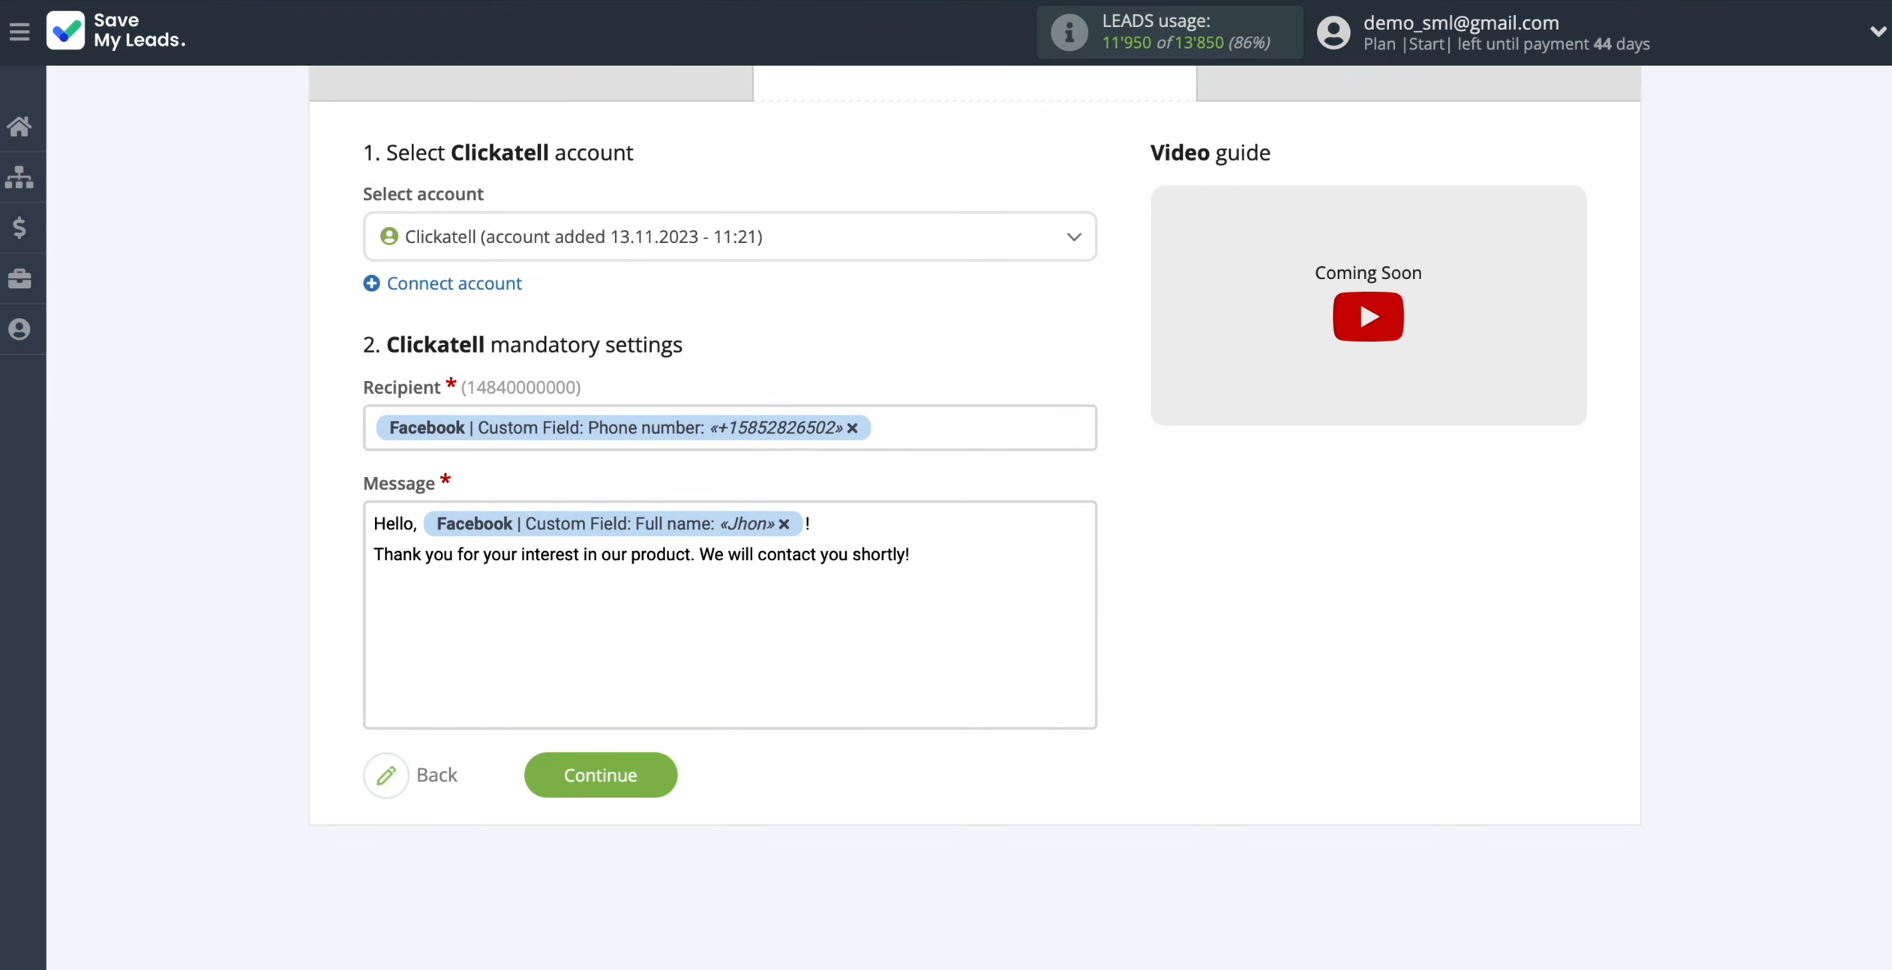
You see Clickatell fields for
sending SMS messages.
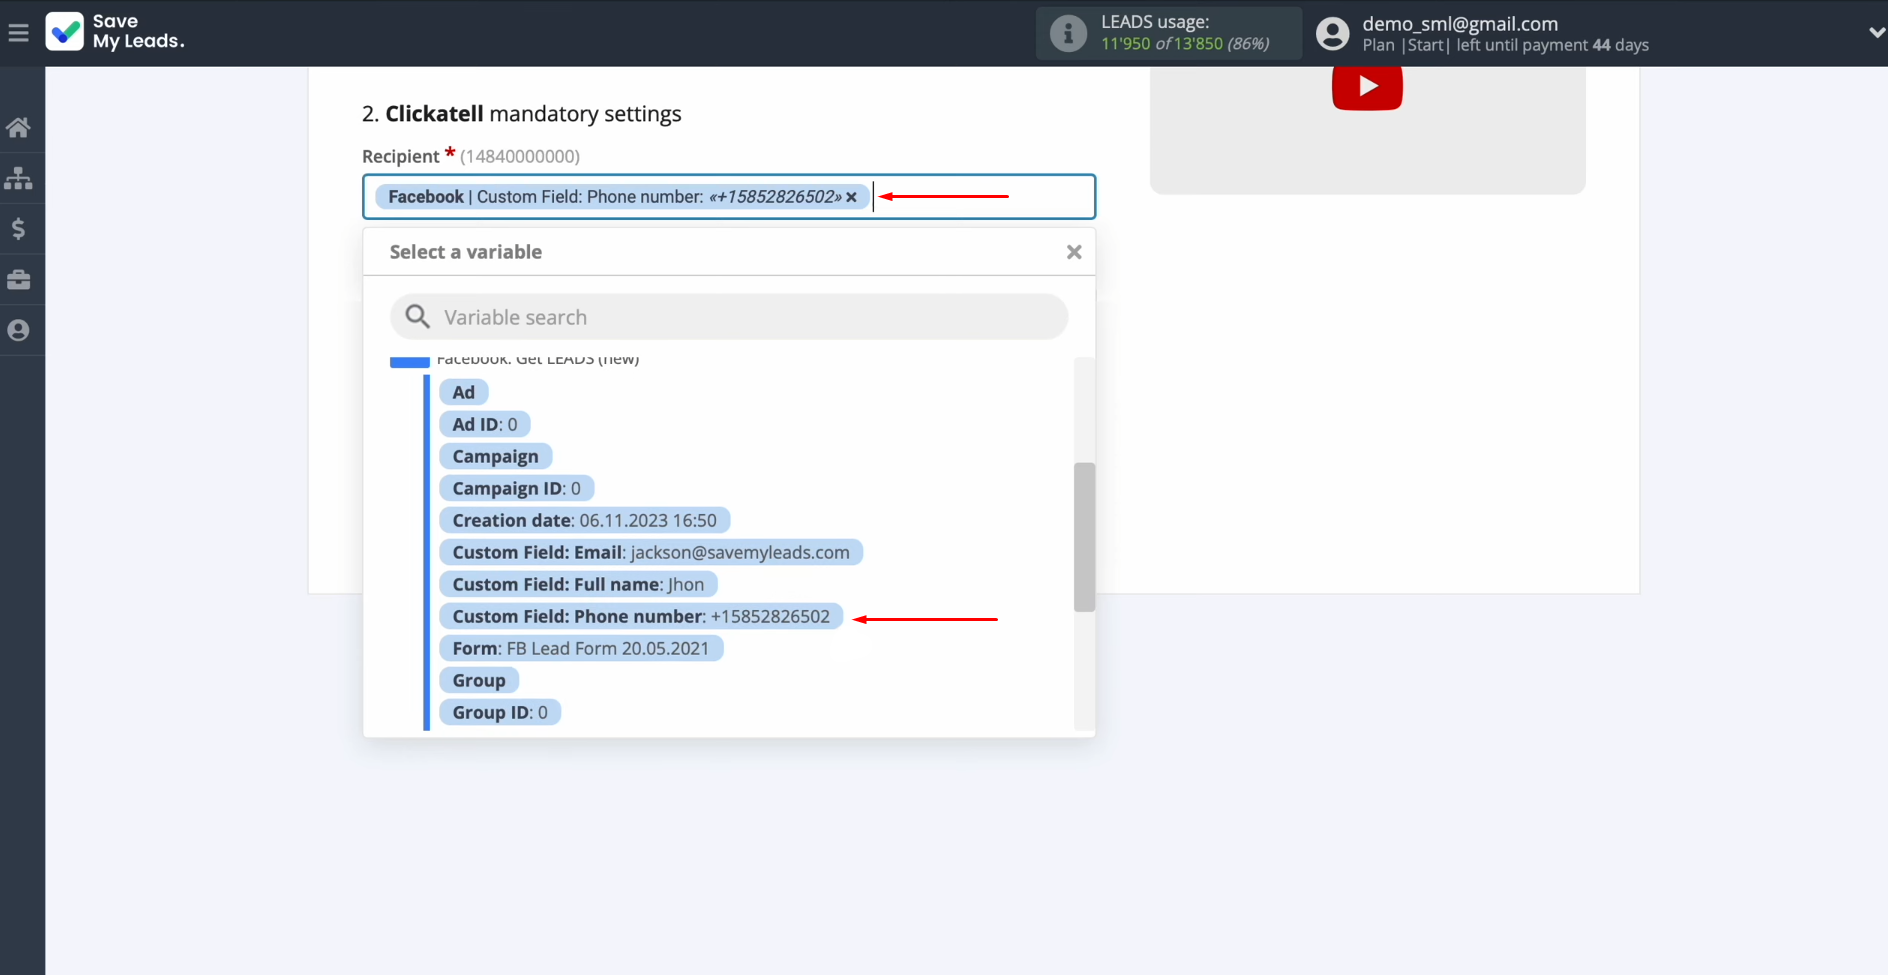
In the
recipient field, assign a variable from Facebook that contains
the phone number. Click in the field and select a
variable from the drop-down list.
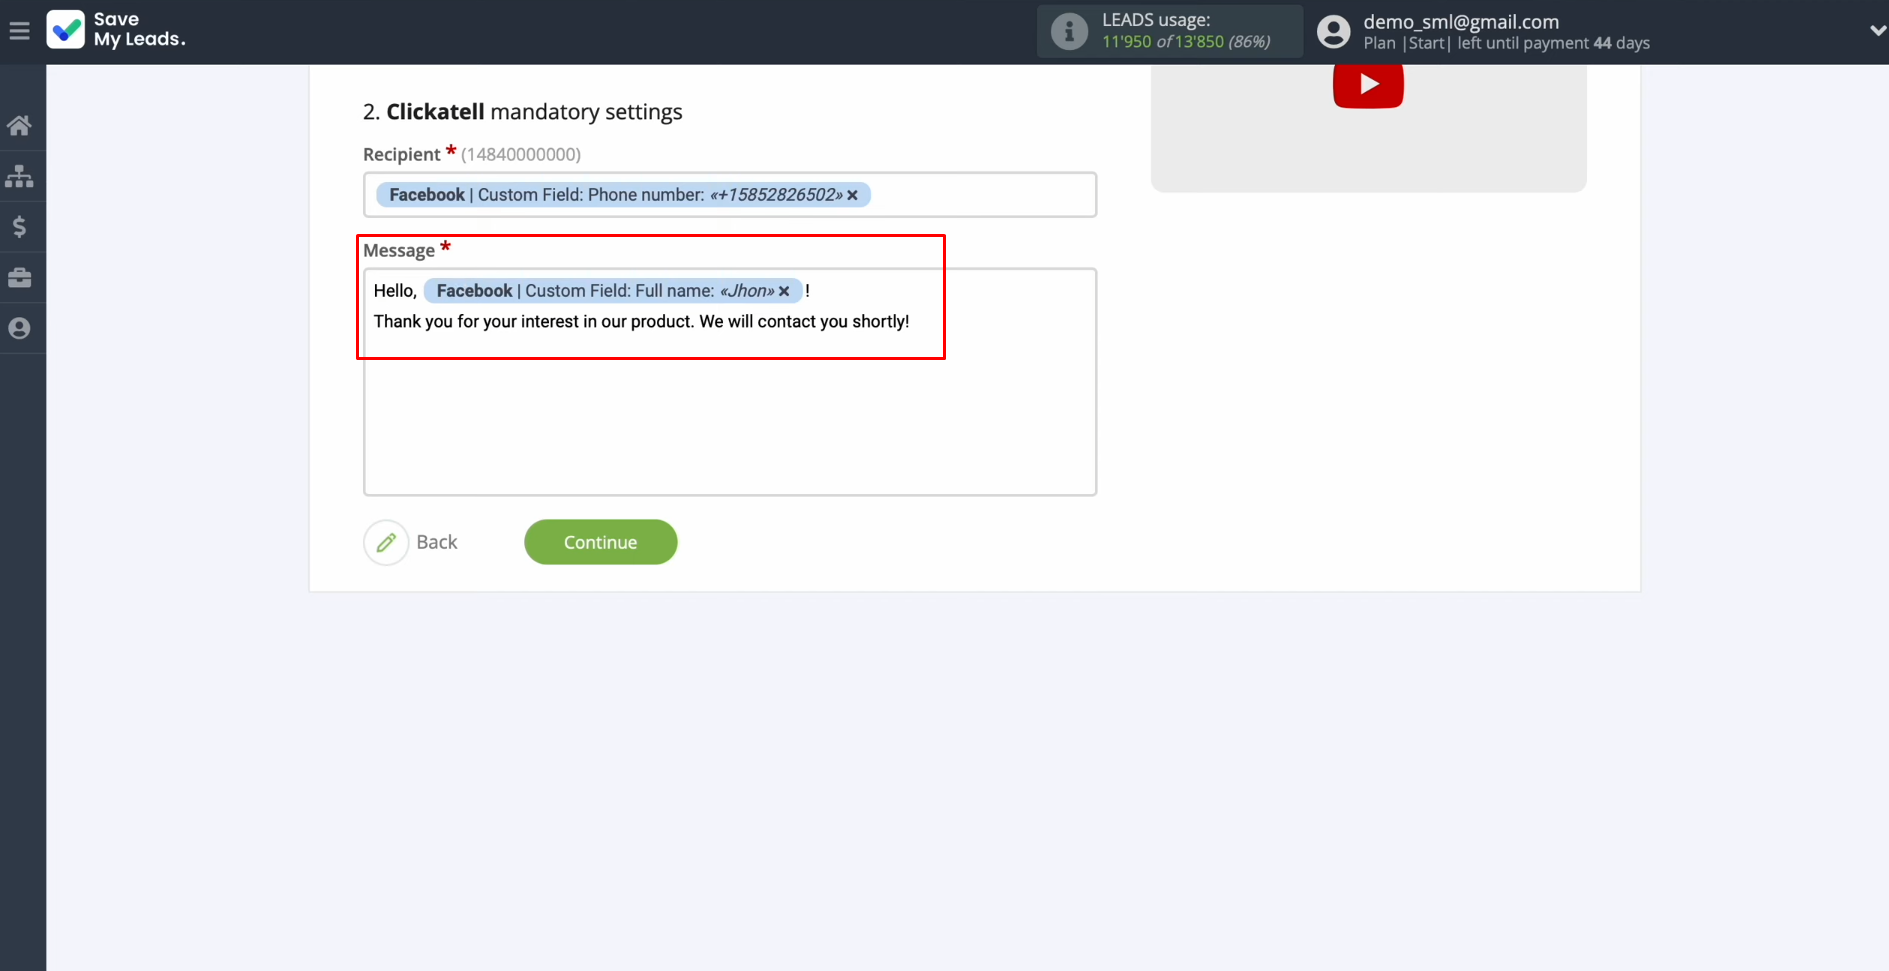
In the message field, enter the
text that will be sent to each lead from Facebook. Use not only variables from the
drop-down list but also enter data manually. When you have filled out all the fields, click "Continue".
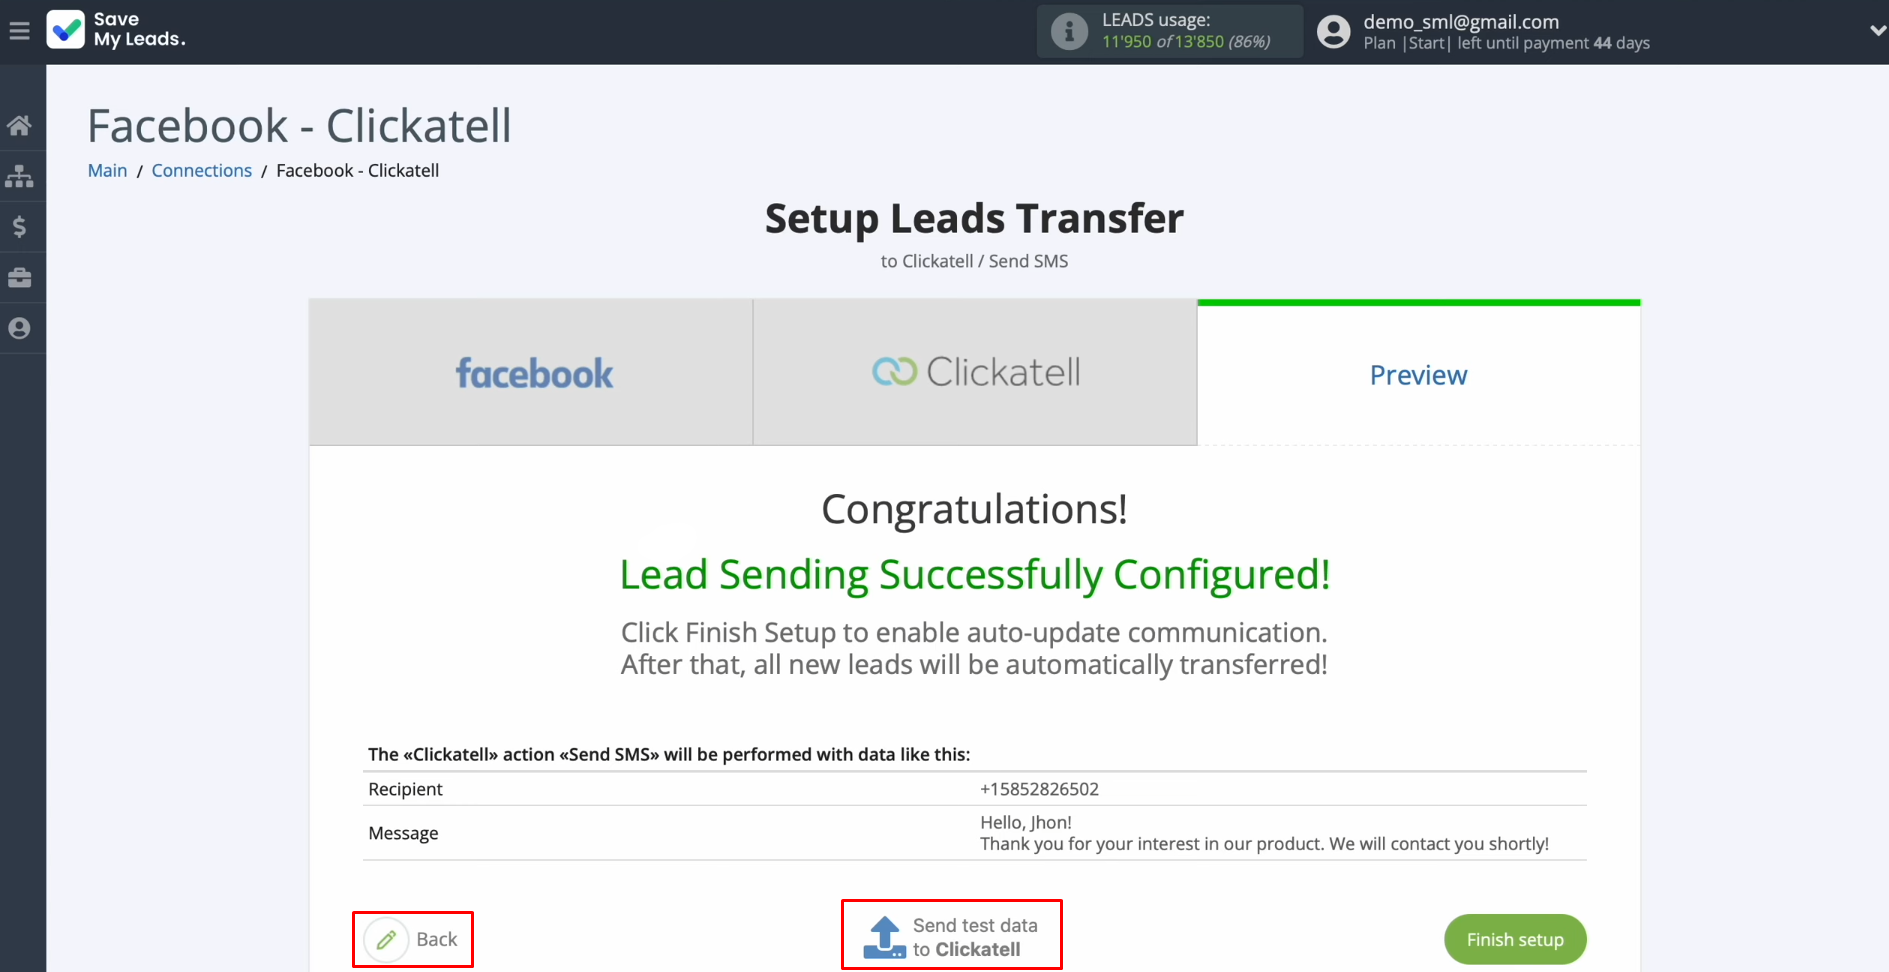
You see an
example of the data that will be sent to each lead from Facebook via SMS
through the Clickatell service. If you want to correct something, click
“Back”, and you will go back a step. To see the result,
click "Send test data to Clickatell".
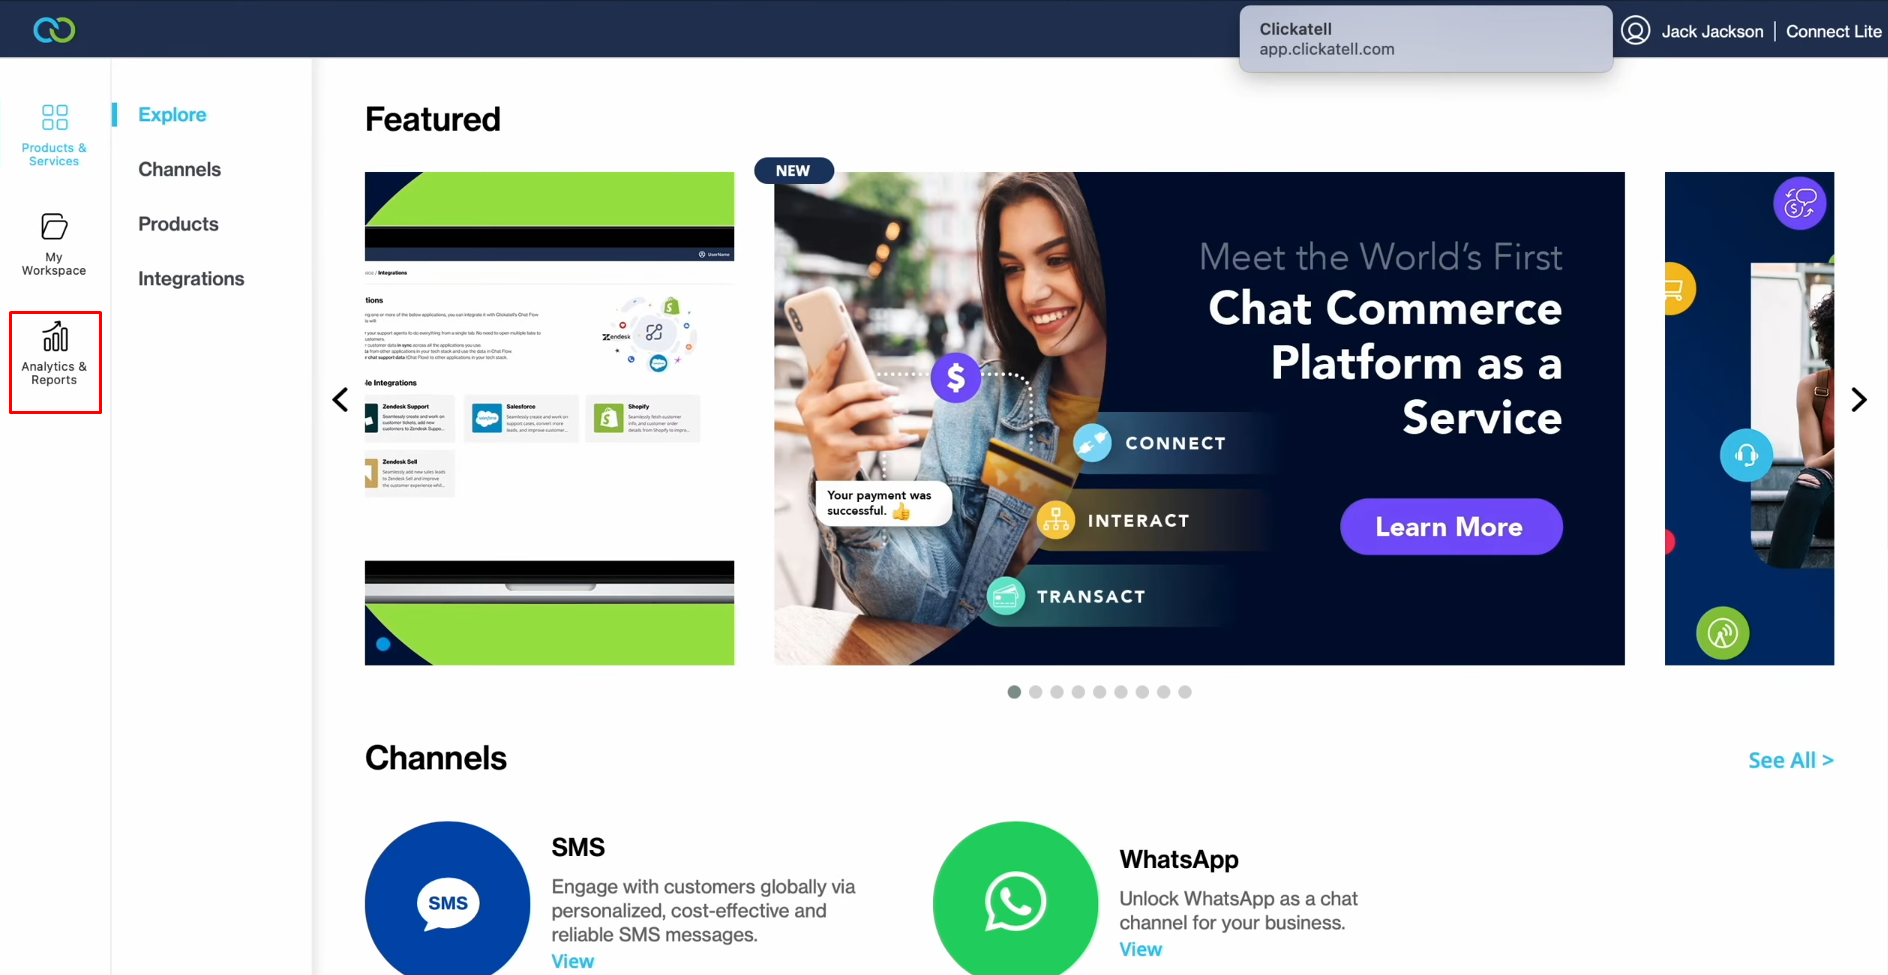
After successful sending, go
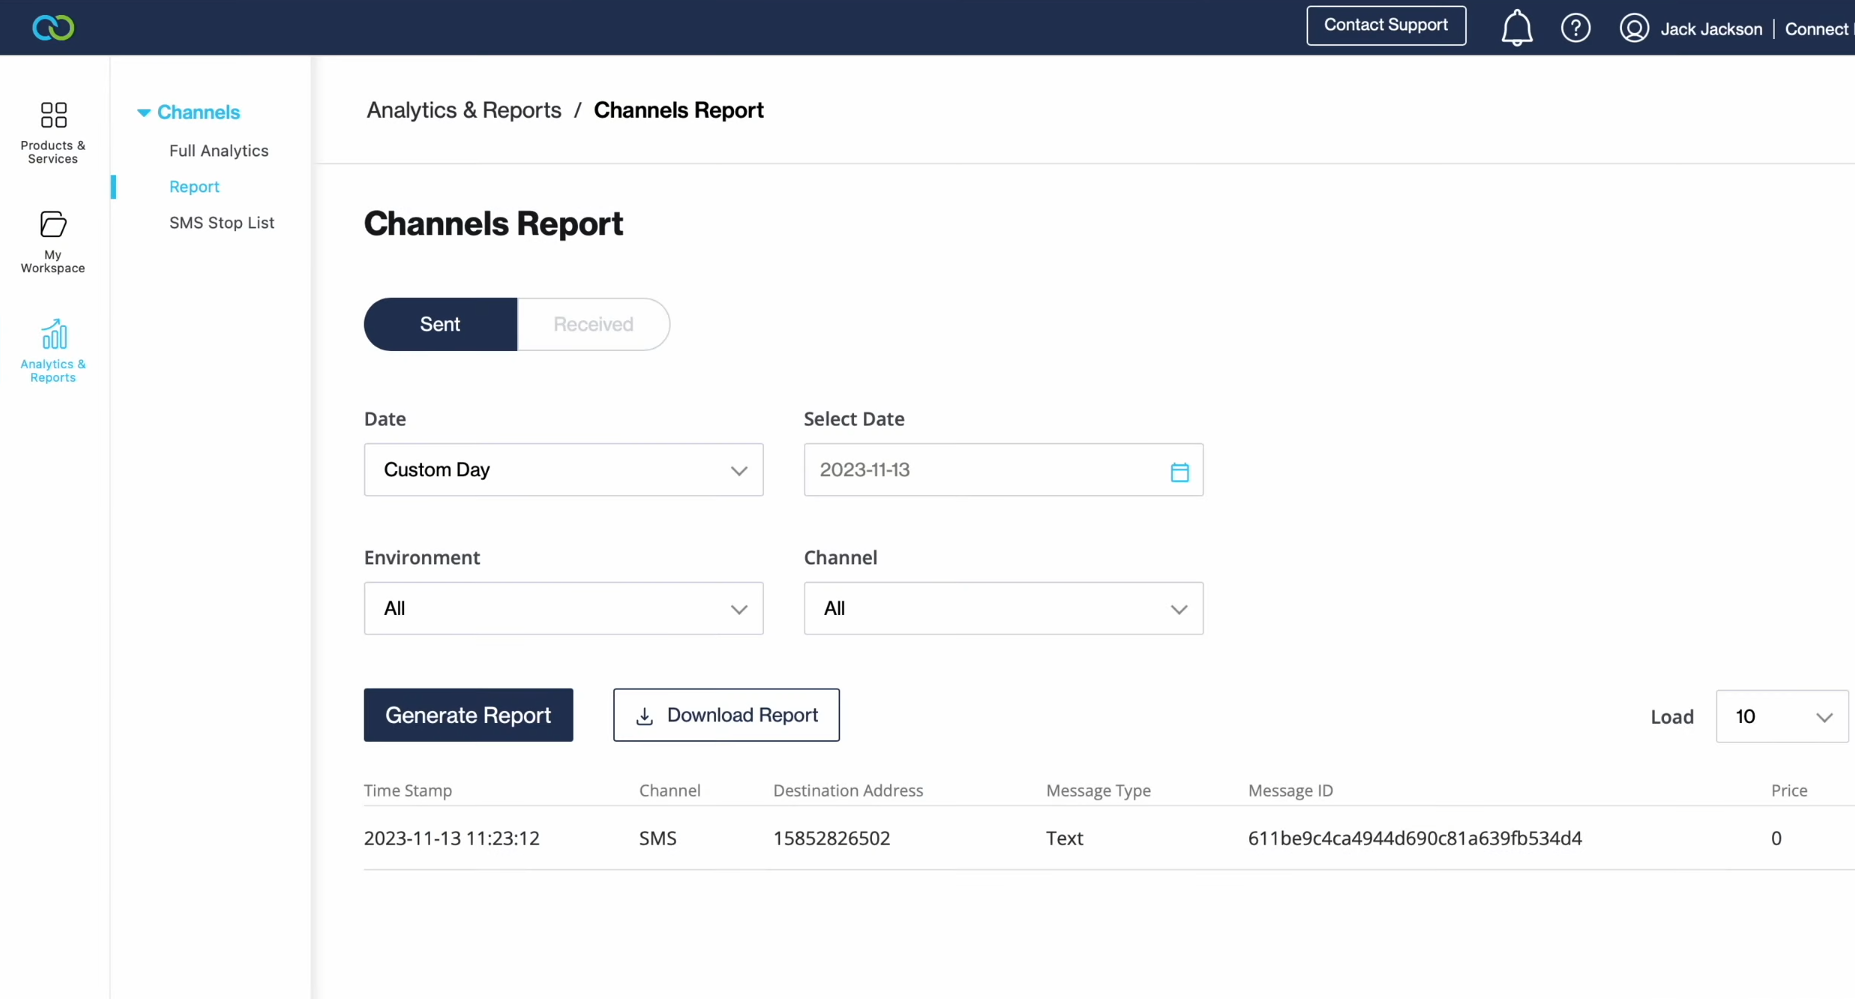
to the "Analytics & Reports" section in Clickatell to check the result.
Go to the "Report" section and select a date.
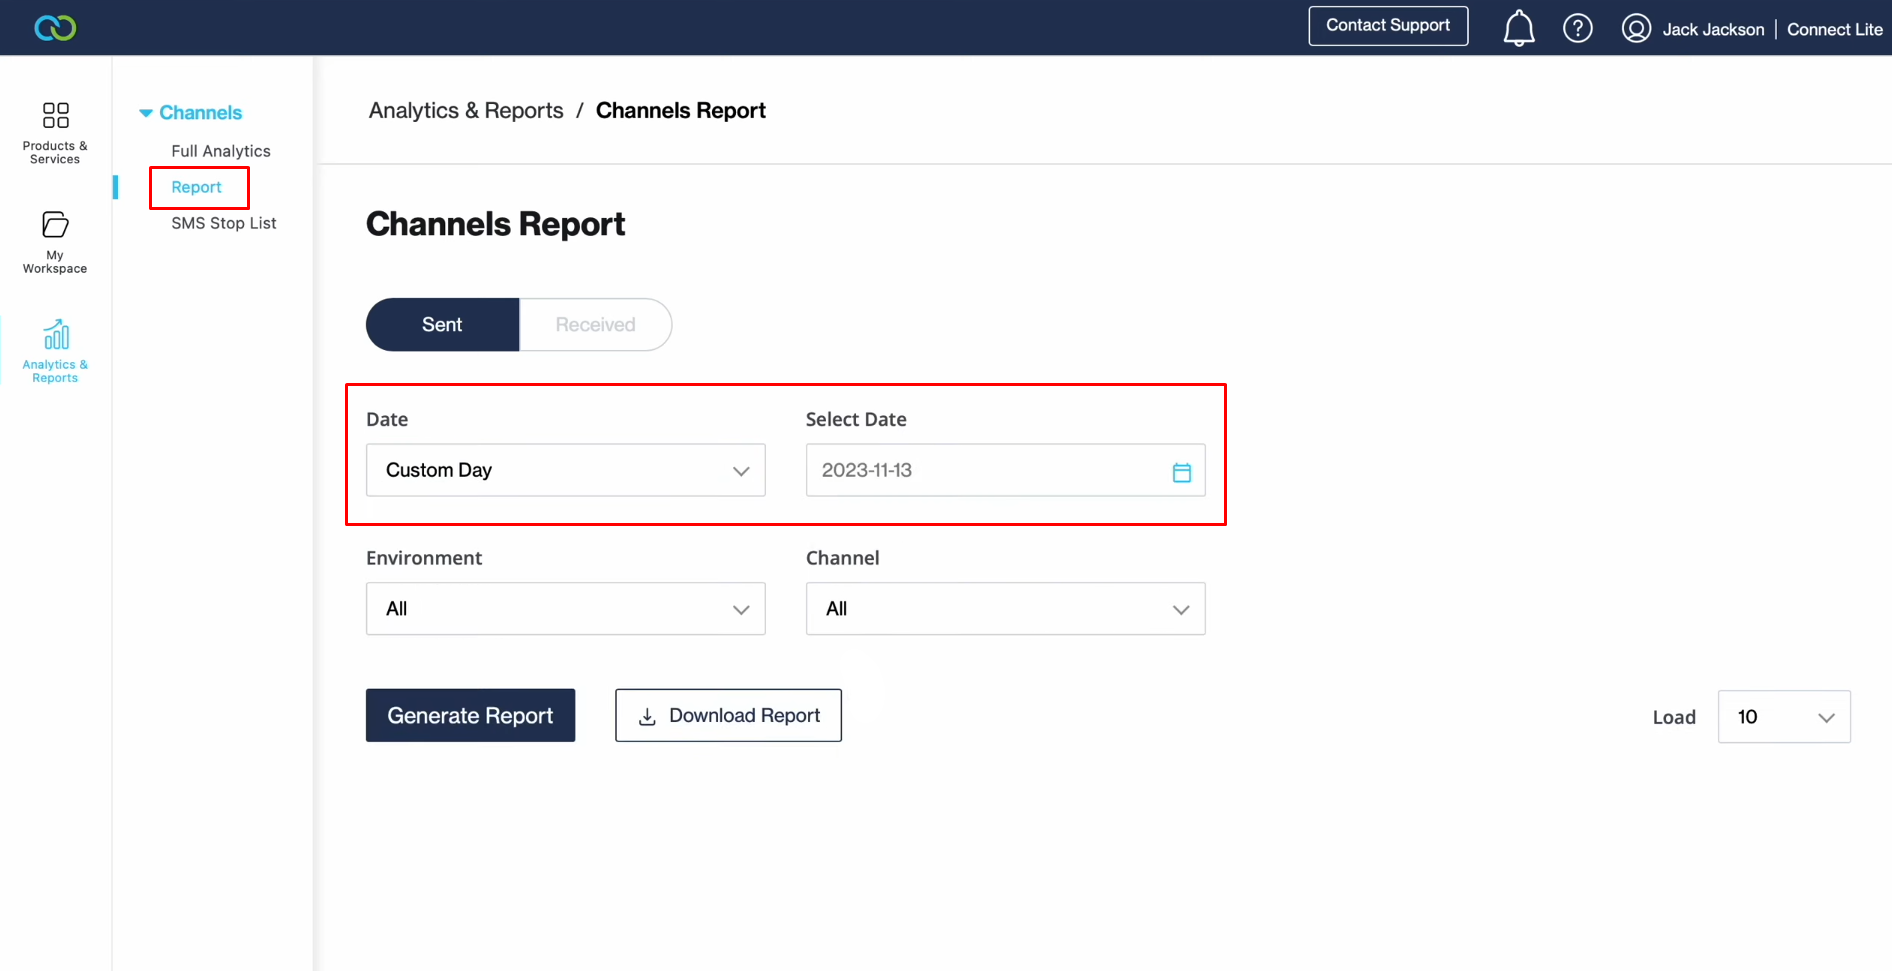
Click “Generate report”.
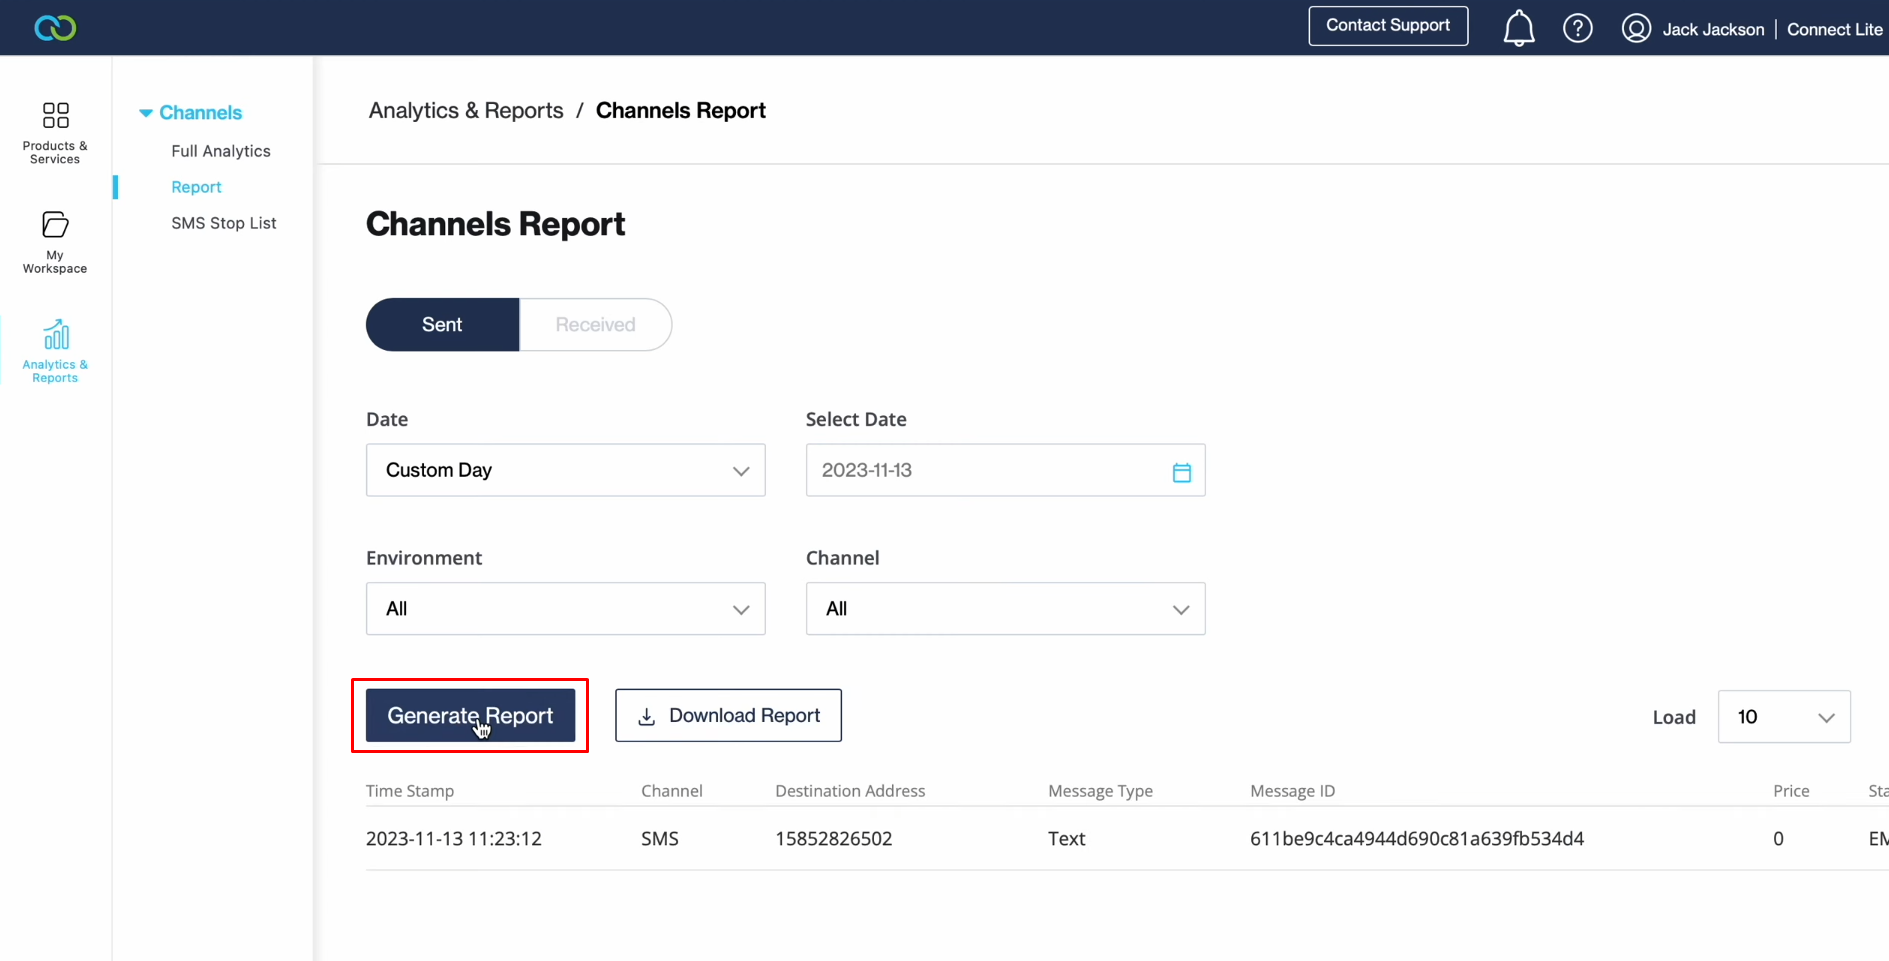
If everything is OK, return to SaveMyLeads and finish setting up.
Setting up Auto-update
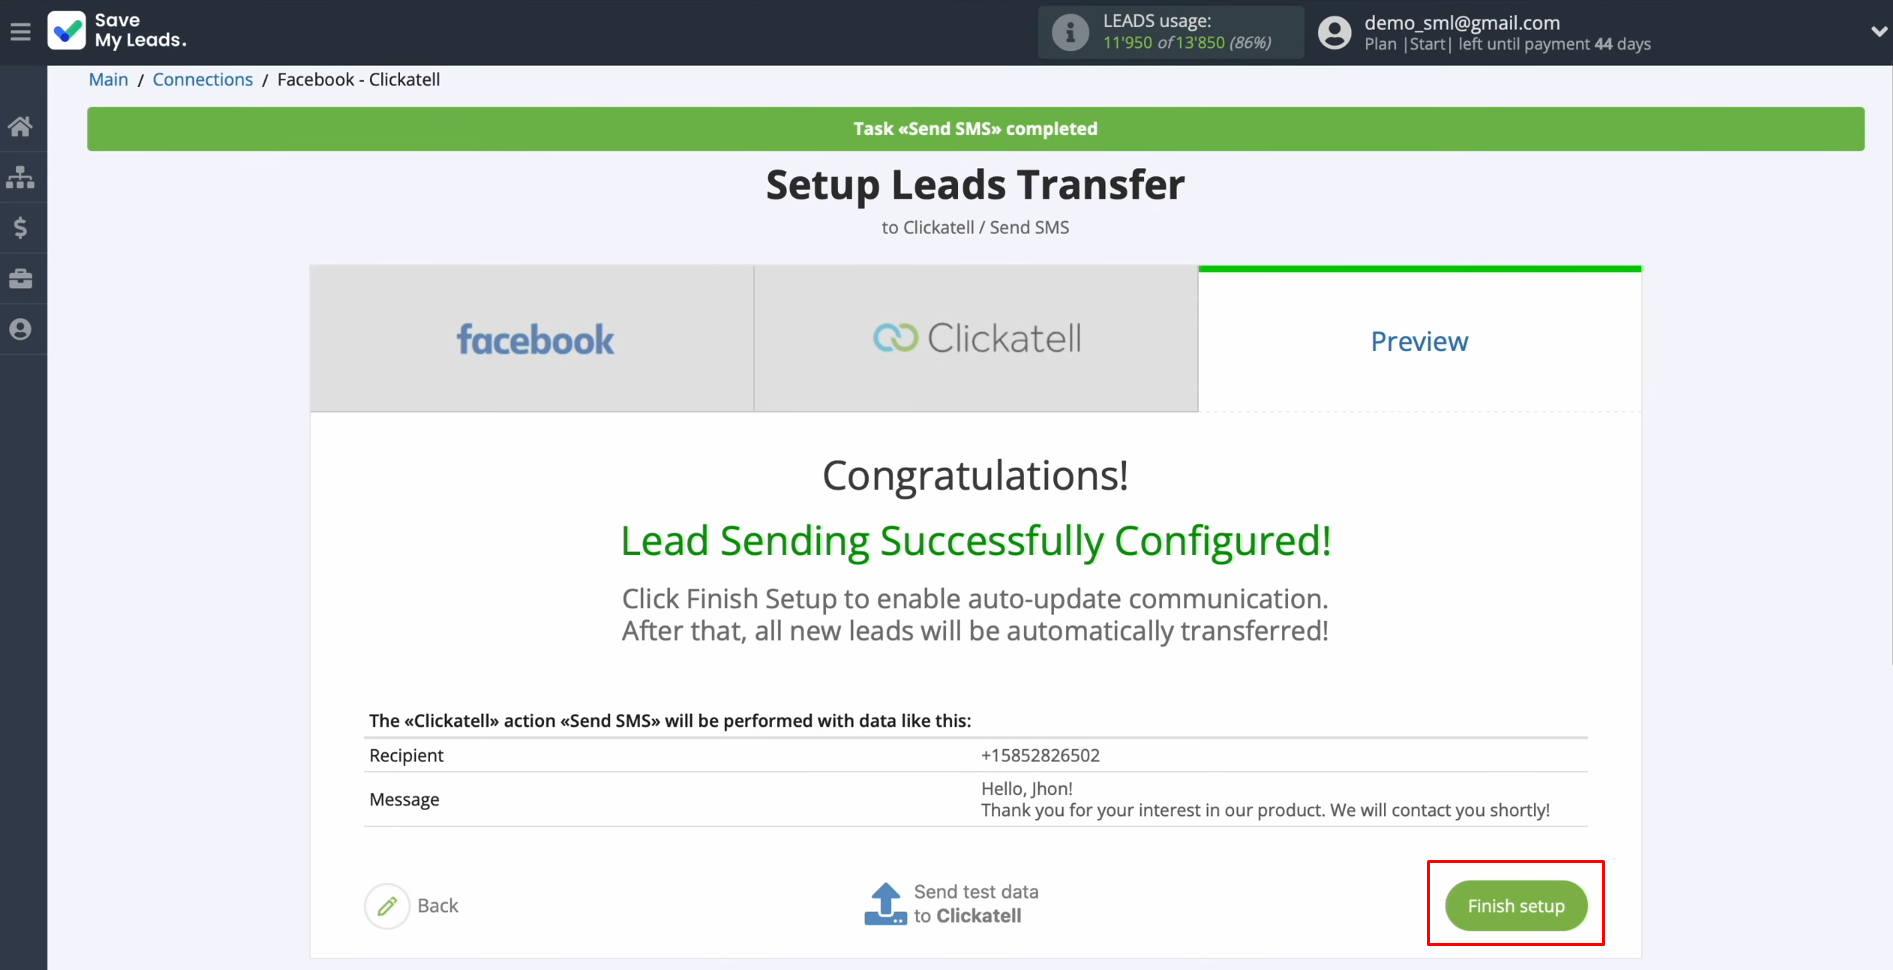
In order for each new lead from Facebook to instantly receive an SMS message via the Clickatell, you have to enable auto-update. To achieve this, click “Finish setup”.
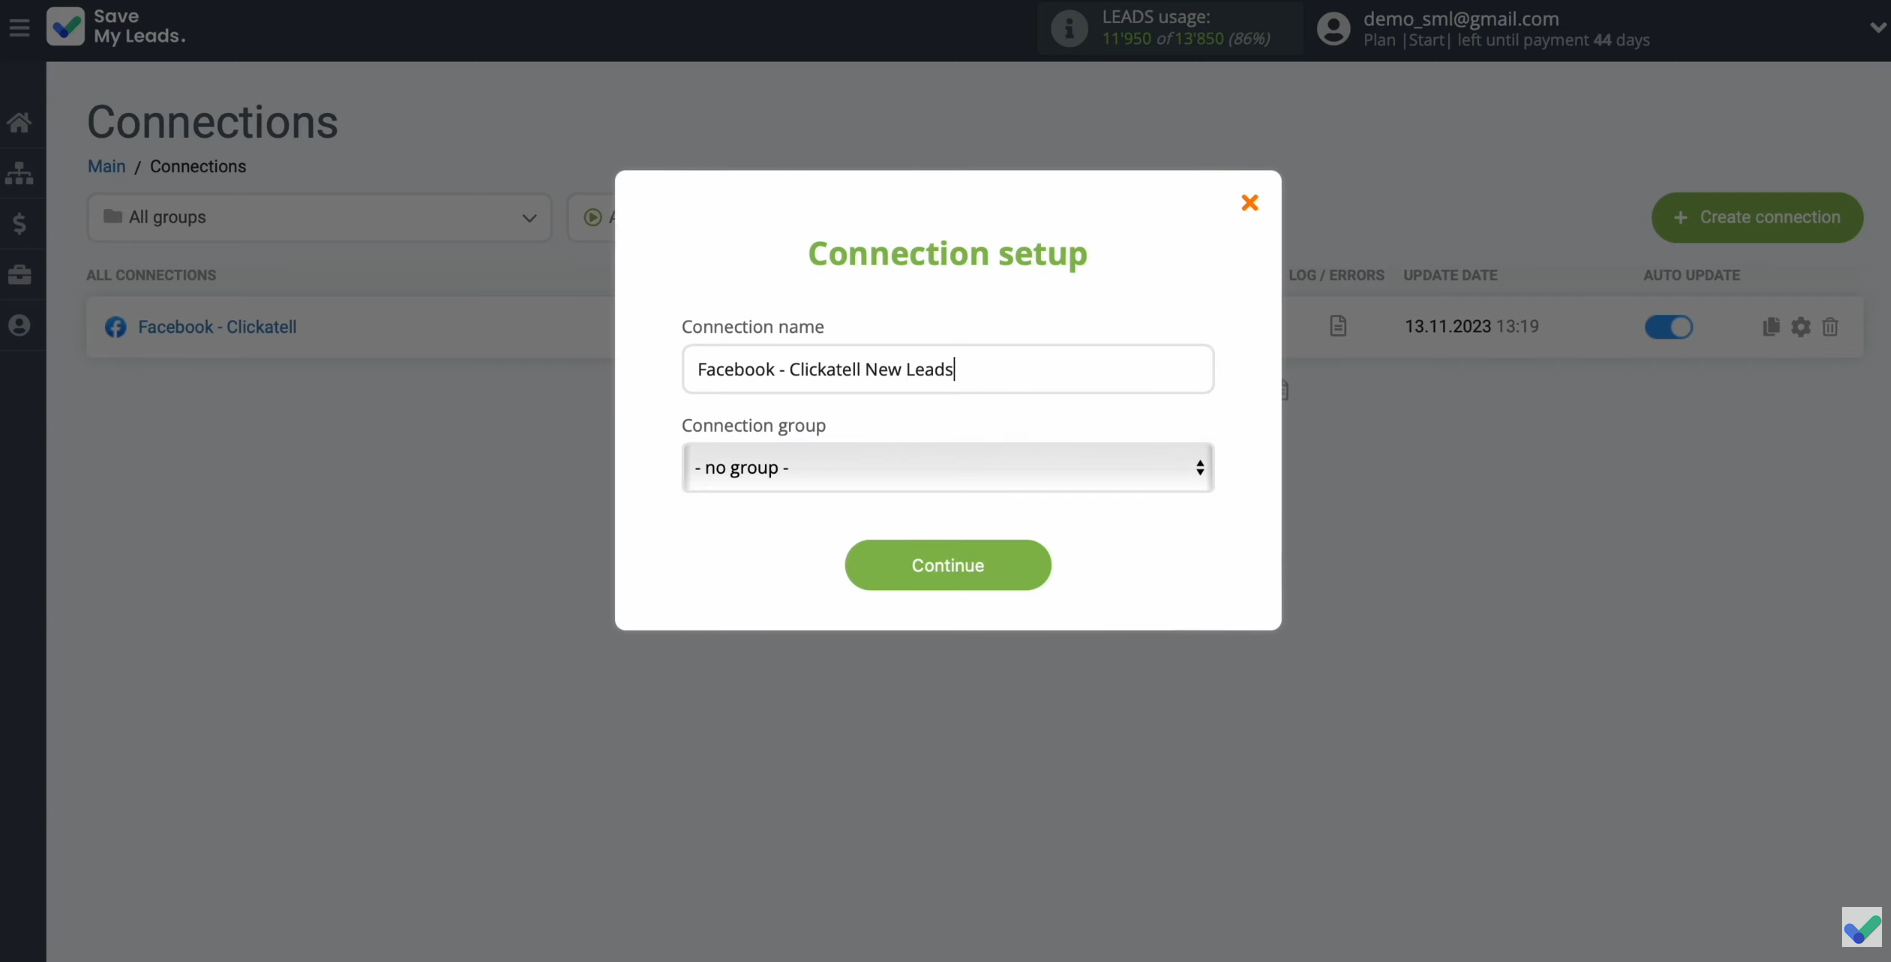
If you want to change the connection name, you can do this in its
settings. For this, click on the gear icon.
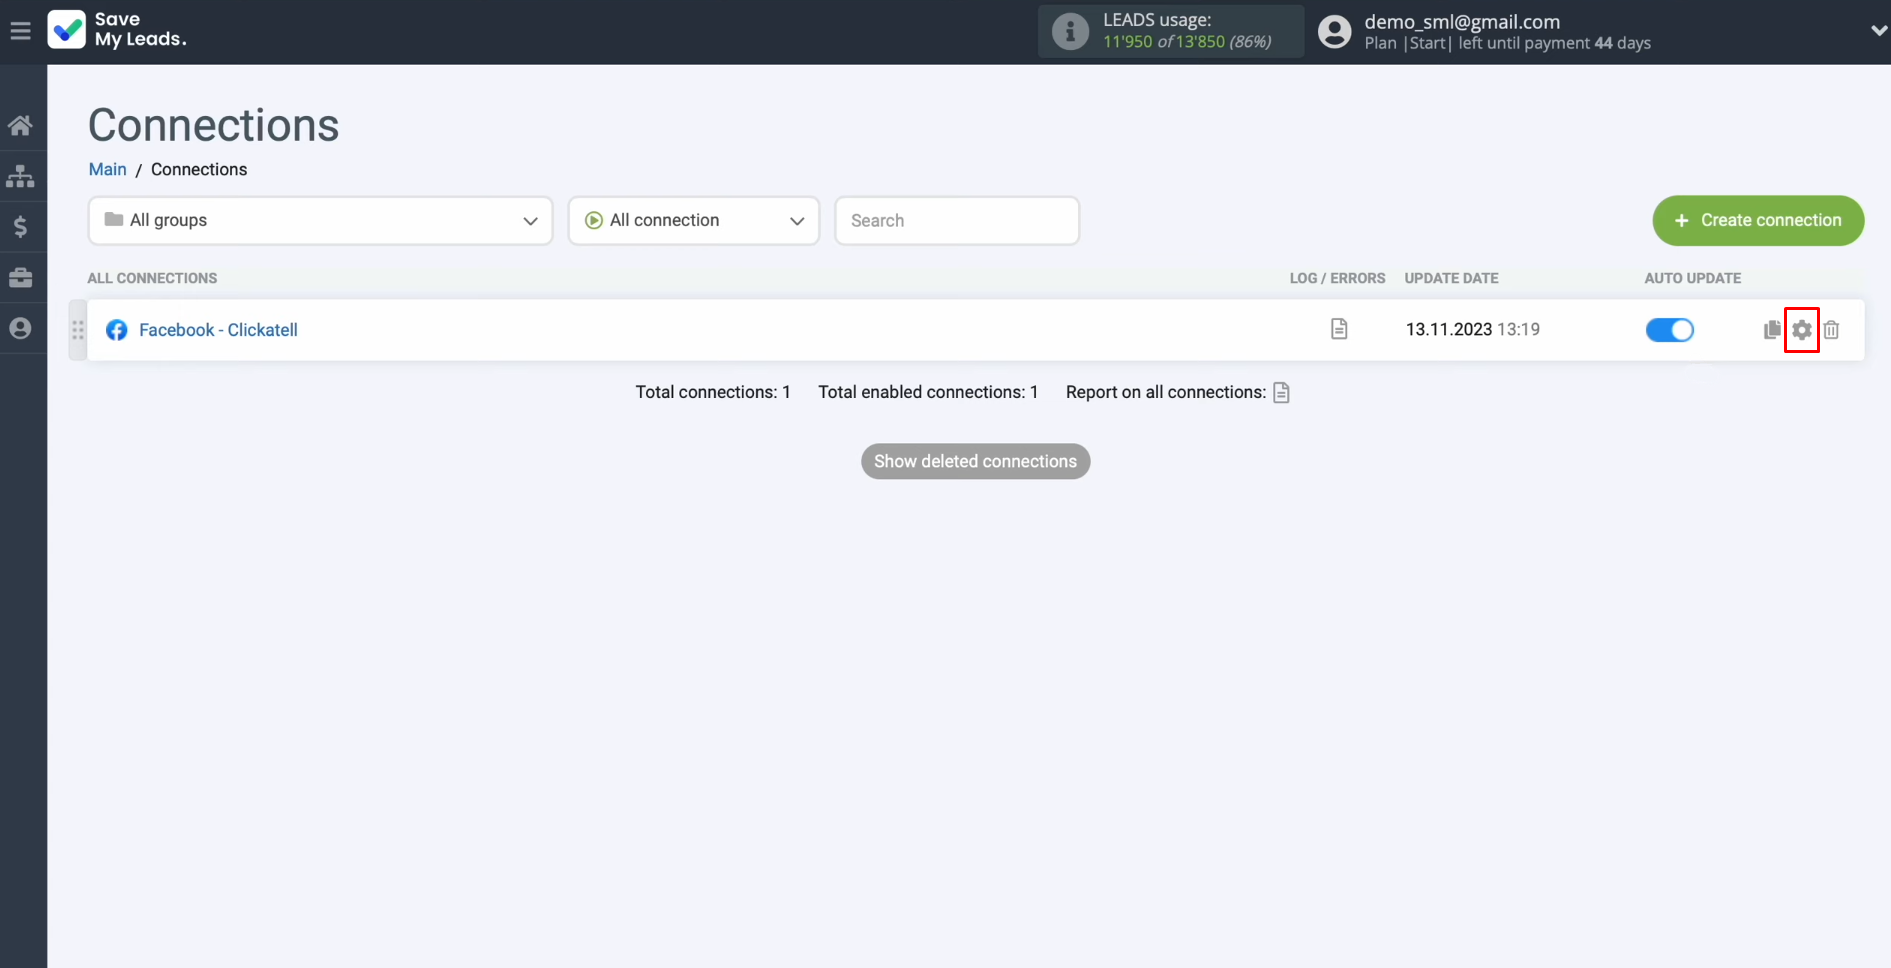
Change the connection name and add your
connection to the group. After that, click “Continue”.
That's
all. Clickatell Facebook integration was completed.
Result of Facebook Lead Ads and Clickatell Integration
If you had followed all the steps in our instructions one by one, you should have succeeded. You've probably already seen that every form a lead submits from Facebook turns into a new contact in your Clickatell database, who immediately receives an SMS message. Such automation will definitely increase the speed of interaction with potential clients and significantly simplify the work of you and your colleagues.
- Automate the work with leads from the Facebook advertising account
- Empower with integrations and instant transfer of leads
- Don't spend money on developers or integrators
- Save time by automating routine tasks
One of the significant advantages of the SaveMyLeads service that you used to set up data transfer and send messages is that you do not need special programming skills to do it. The developers of this online connector have already taken care of everything. Thanks to the intuitive interface, system communication can be configured in just a few minutes, even by a completely inexperienced user. Finally, we wish you to collect as many leads as possible through Facebook Lead Ads, and SaveMyLeads, which tracks them around the clock, will help you speed up your work with them.
Would you like your employees to receive real-time data on new Facebook leads, and automatically send a welcome email or SMS to users who have responded to your social media ad? All this and more can be implemented using the SaveMyLeads system. Connect the necessary services to your Facebook advertising account and automate data transfer and routine work. Let your employees focus on what really matters, rather than wasting time manually transferring data or sending out template emails.

