Amazon DynamoDB is a serverless NoSQL database that is highly stable, low latency, and highly scalable. In this guide, we'll show you how to set up the Facebook Lead Ads and DynamoDB integration. Using such a connection, you can ensure that new rows are automatically added to the database based on information from completed Facebook lead forms.
Amazon DynamoDB is part of the Amazon Web Services platform. The database integrates with AWS products, uses encryption, auto-backups, and provides high throughput and low latency. You can efficiently store data in Amazon DynamoDB and use it for a variety of workflows. We'll look at a situation where new leads from Facebook are stored in a DynamoDB database table. All information from completed lead forms is accumulated in one place in a convenient format. It is also worth paying attention to automated services such as Amzwatcher, which will help in the analysis of Amazon affiliate links.
In our example, each new social media hit needs to be transferred to an Amazon DynamoDB table. We propose to fully automate this process. Set up Facebook and Amazon DynamoDB integration and get rid of the following chores:
- checking the FB advertising account for new leads;
- uploading data on completed lead forms;
- adding new records to the database.
You don't need to spend time monitoring your Facebook ad account and use SQL or DynamoDB API to add a lead to the database. Everything will happen automatically.
How to setup Facebook and Amazon DynamoDB integration
To set up the Facebook Lead Ads and Amazon DynamoDB integration, we will use the SaveMyLeads service. This tool allows you to automate the transfer of leads from the FB advertising account to various applications and systems without special skills and knowledge. In our case, the host system will be the Amazon DynamoDB database service.
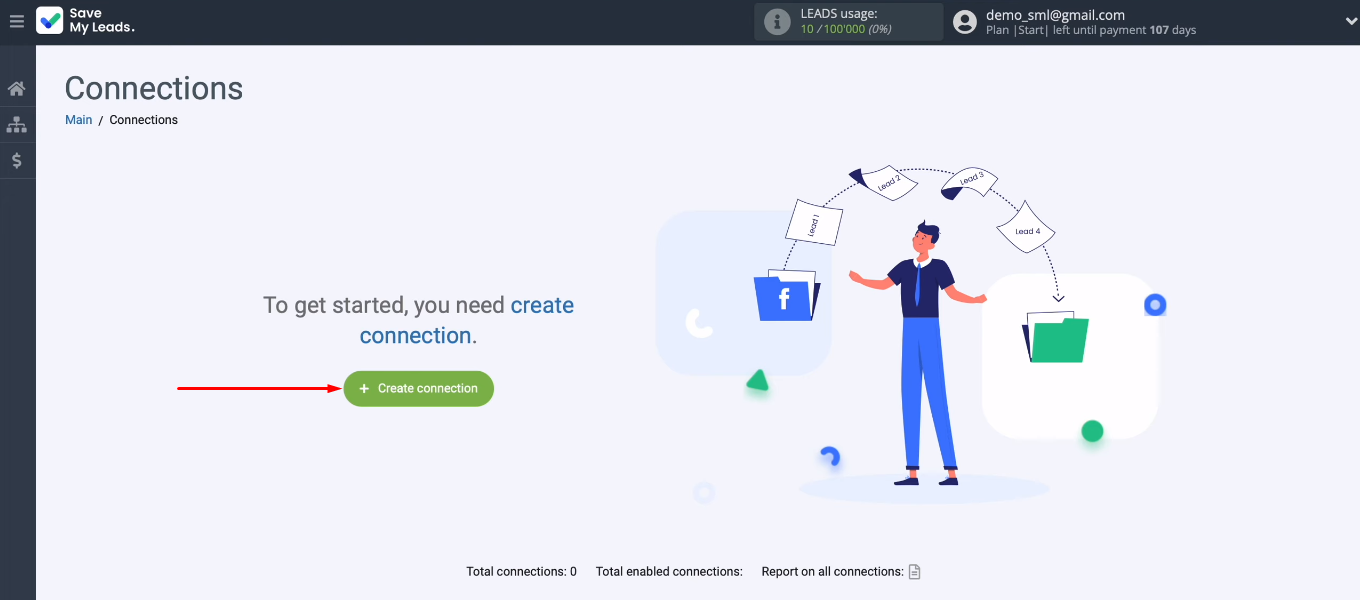
Integration is created through a web interface. We will set up a data source (Facebook Lead Ads) and a sink (DynamoDB) in sequence. But first you need to register on our website and go to your personal account. In the main window, click the “Create connection” button.
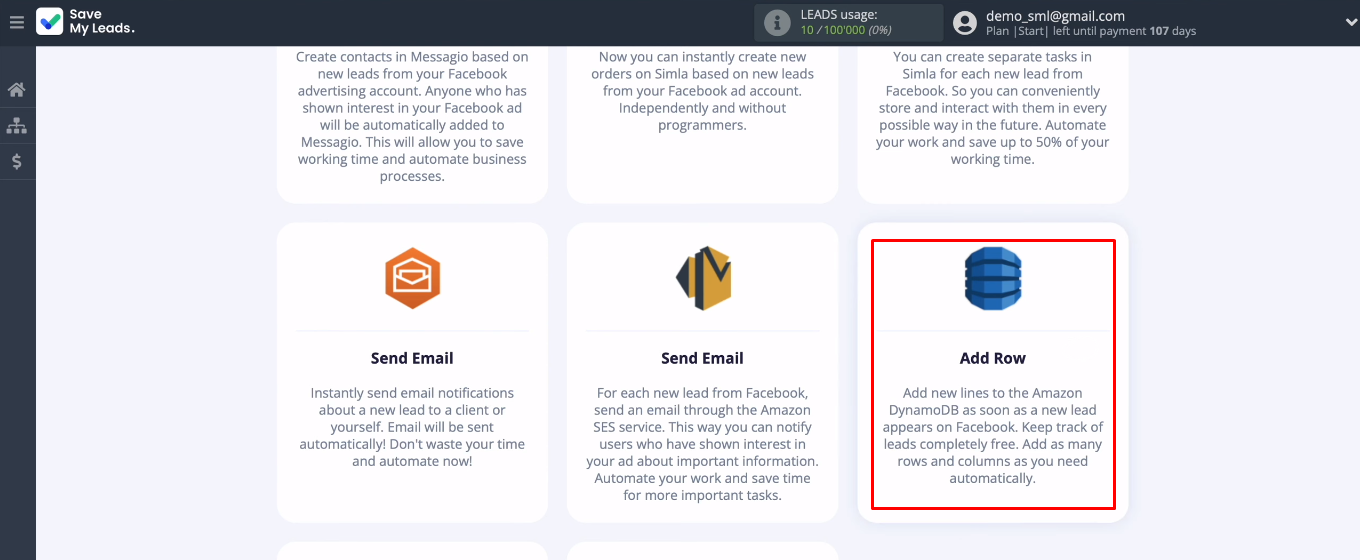
The SaveMyLeads service offers a large number of ready-made templates for combining Facebook with various applications. Select "Amazon DynamoDB (Add Row)".
Connect Facebook Lead Ads
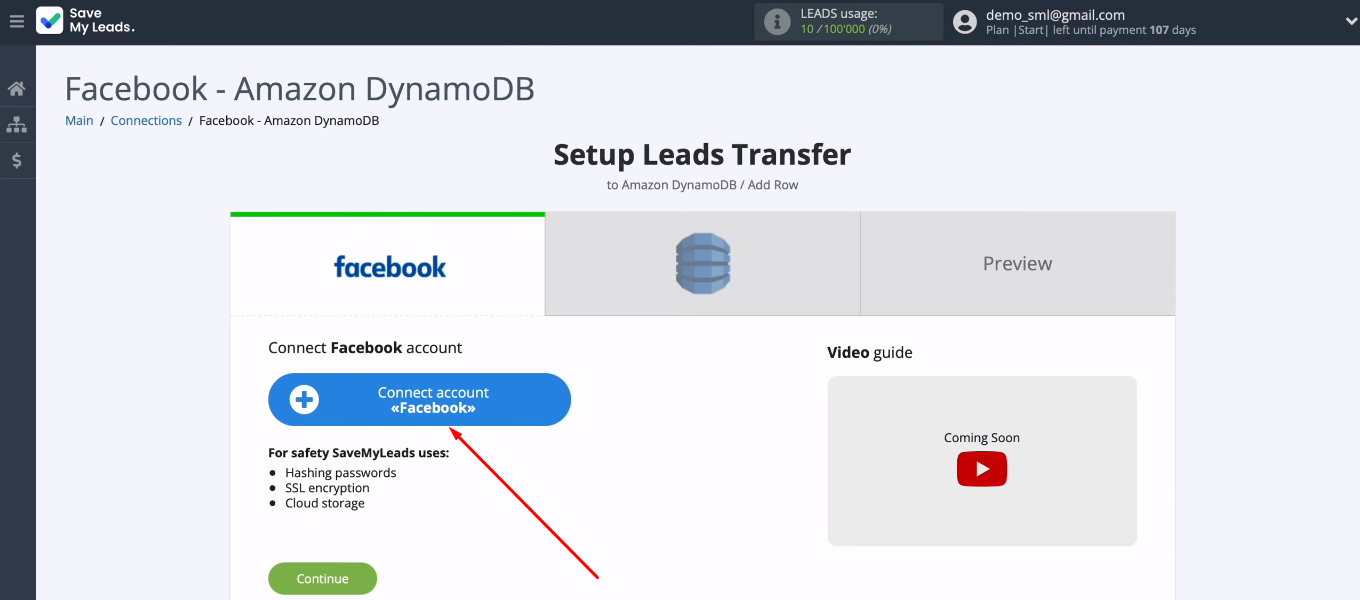
Click "Connect account Facebook".
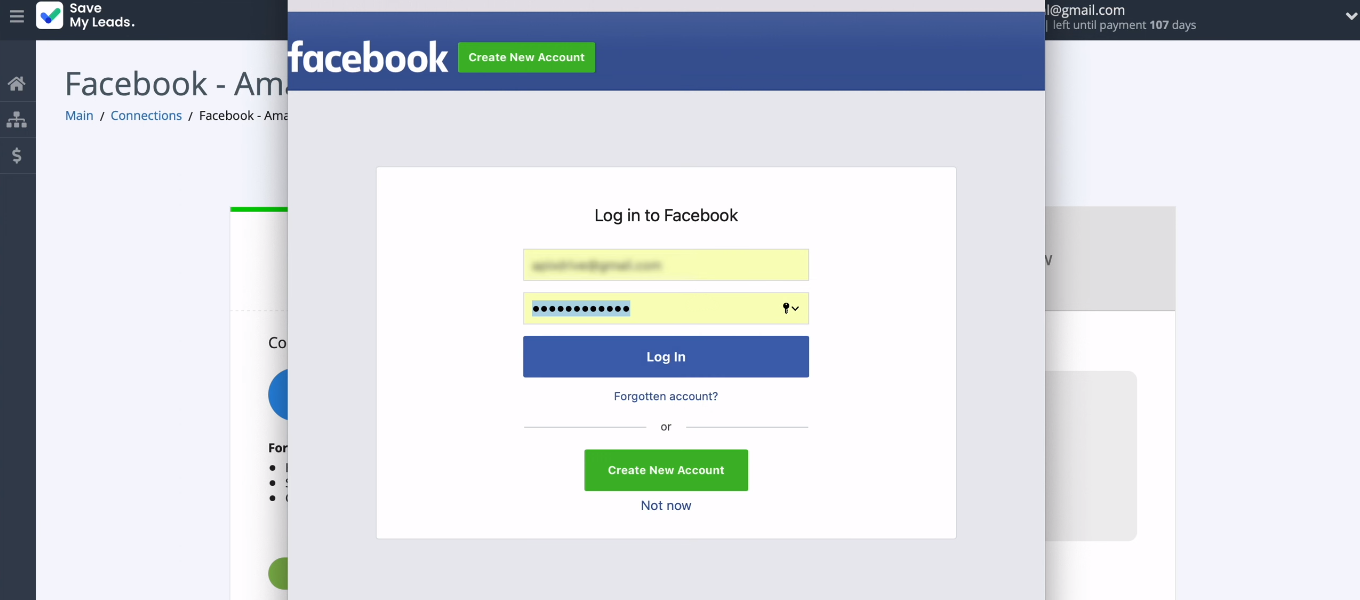
Log into your FB account.
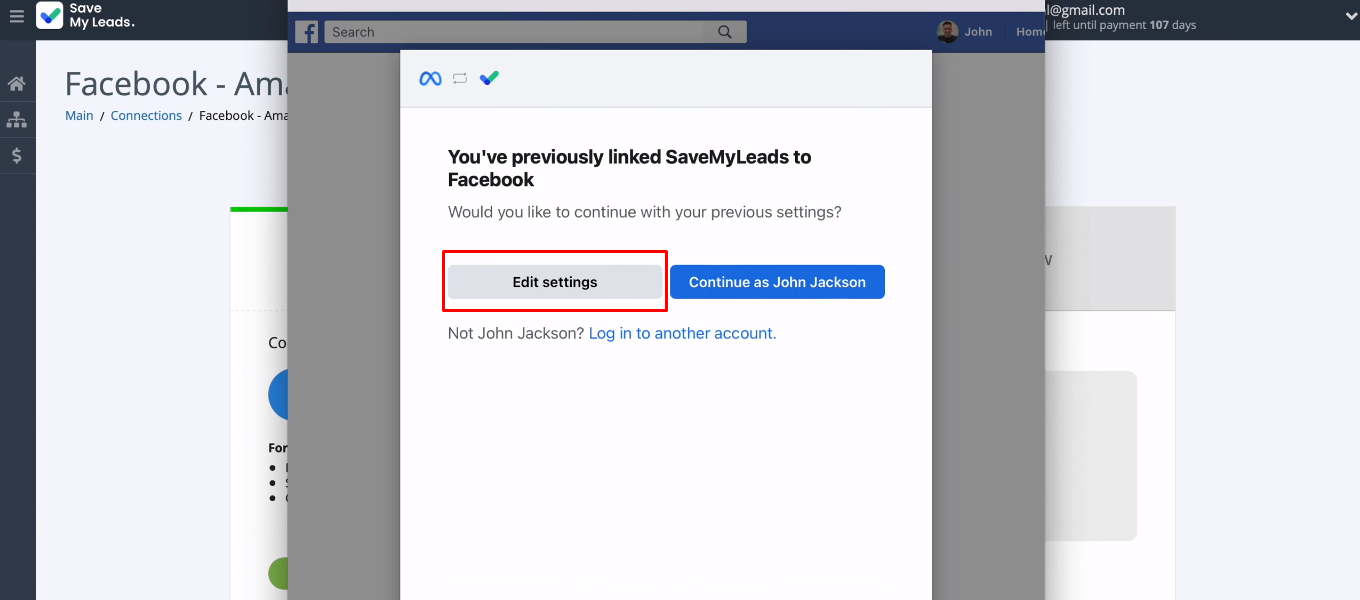
Click "Edit settings".
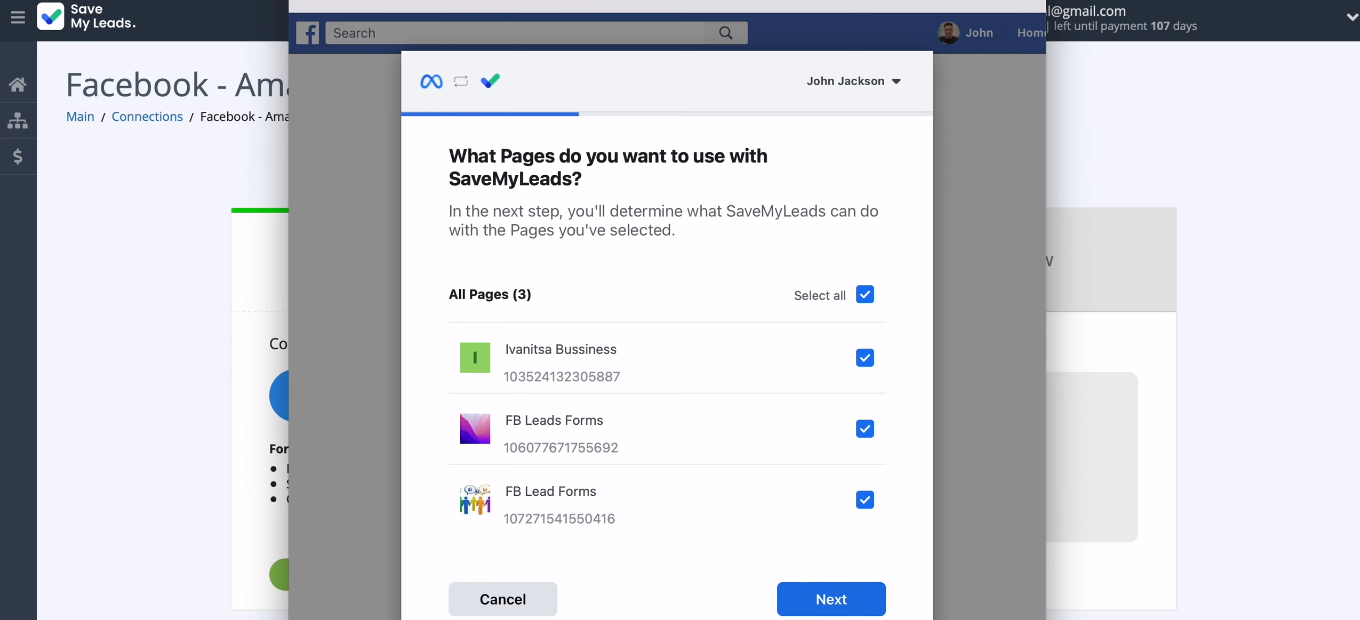
Select the advertising pages you want to work with in the SaveMyLeads system.
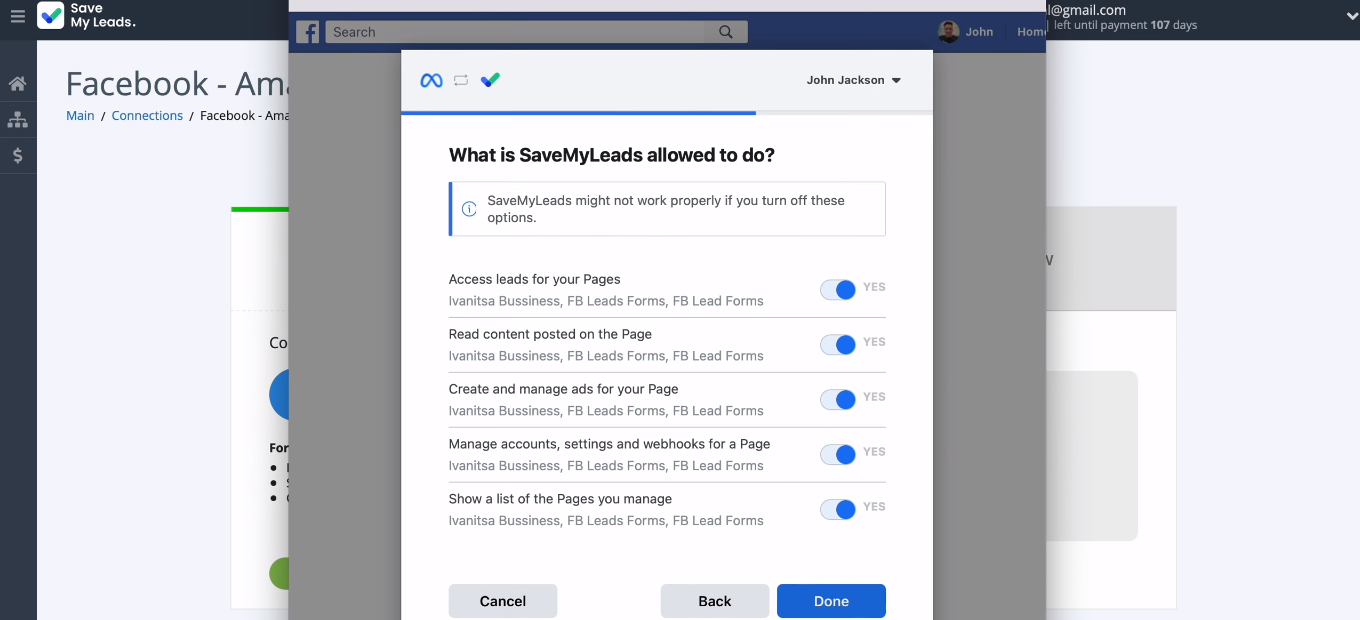
Check all access checkboxes, they must be enabled.
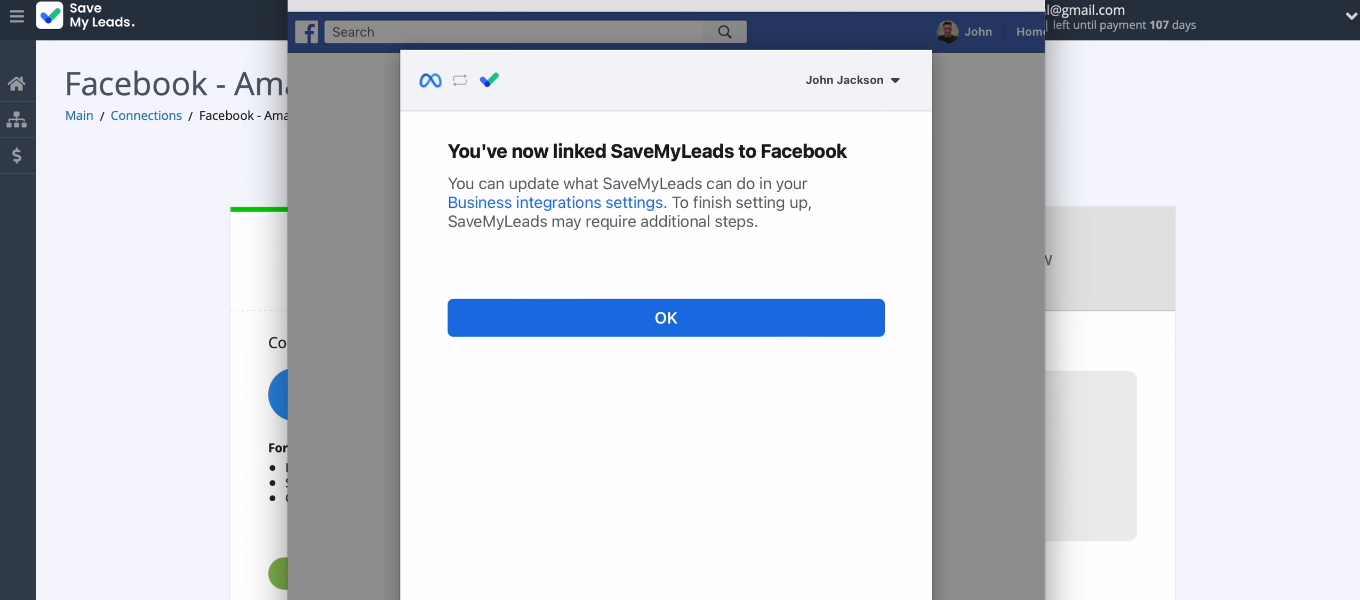
Click "OK" — your Facebook account has been added to the SML system.
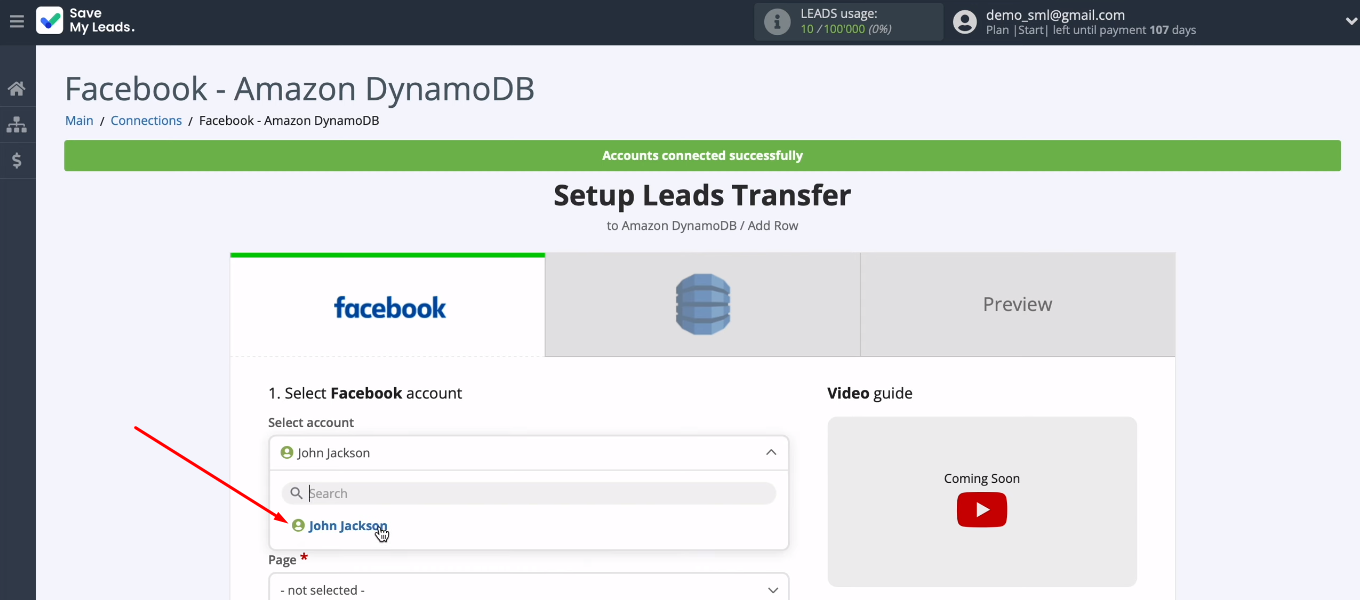
Select a connected Facebook account.
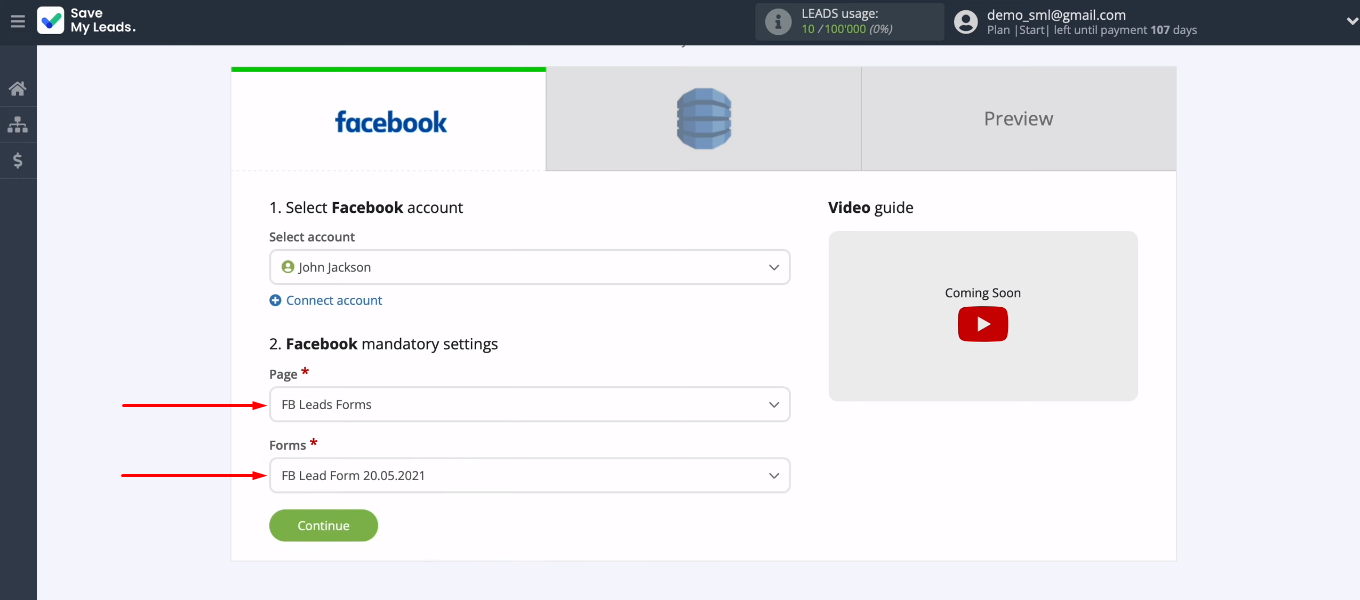
Choose ad page and lead form. If you want to upload leads on multiple lead forms, create a separate connection for each of them. When you have decided on all the data source parameters, click “Continue”.
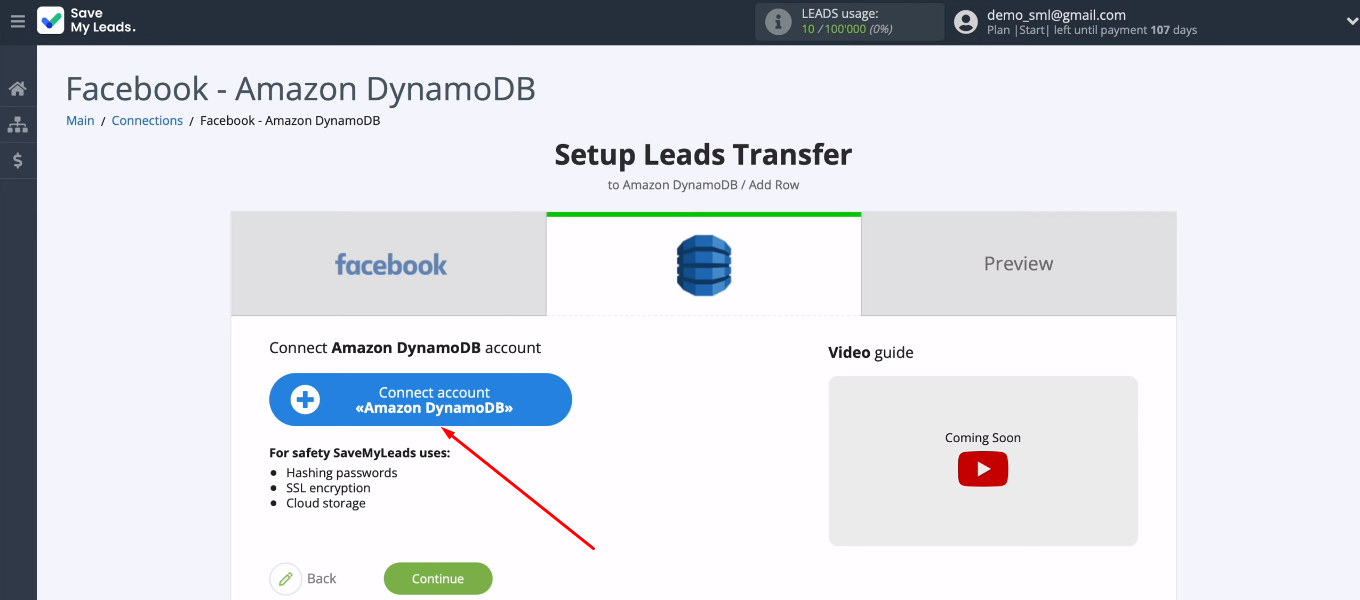
Connect Amazon DynamoDB
Click “Connect account Amazon DynamoDB”.
We need to fill in a few fields. First, let's define the value in the "Region" field.
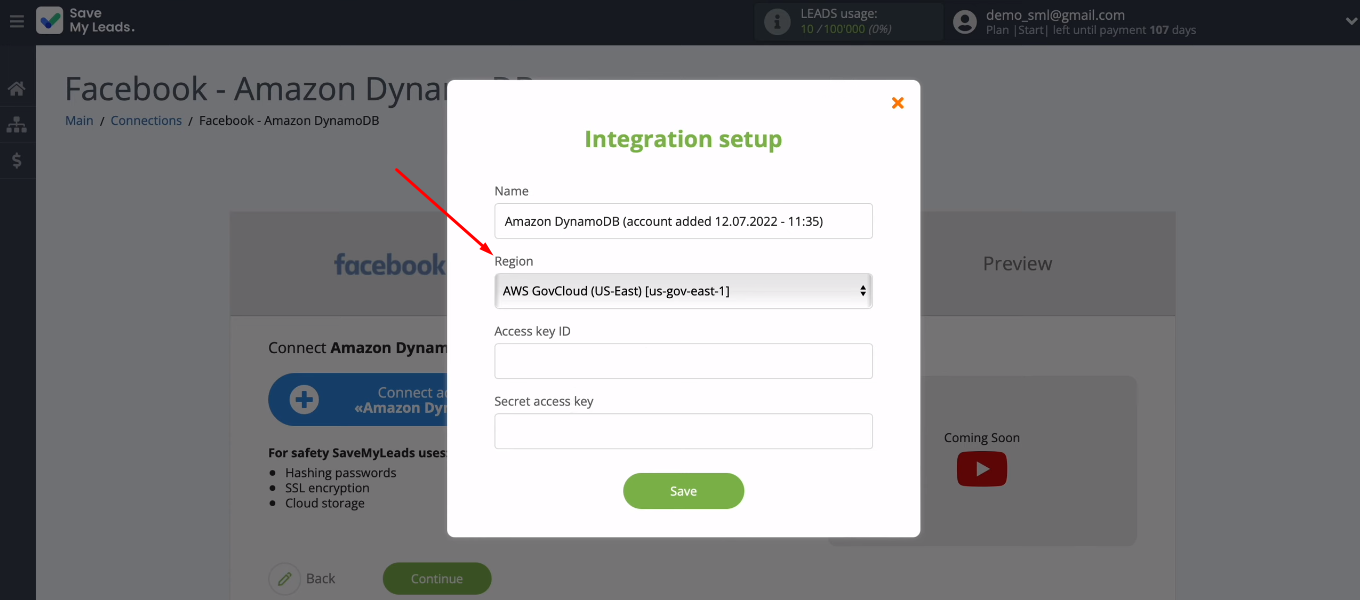
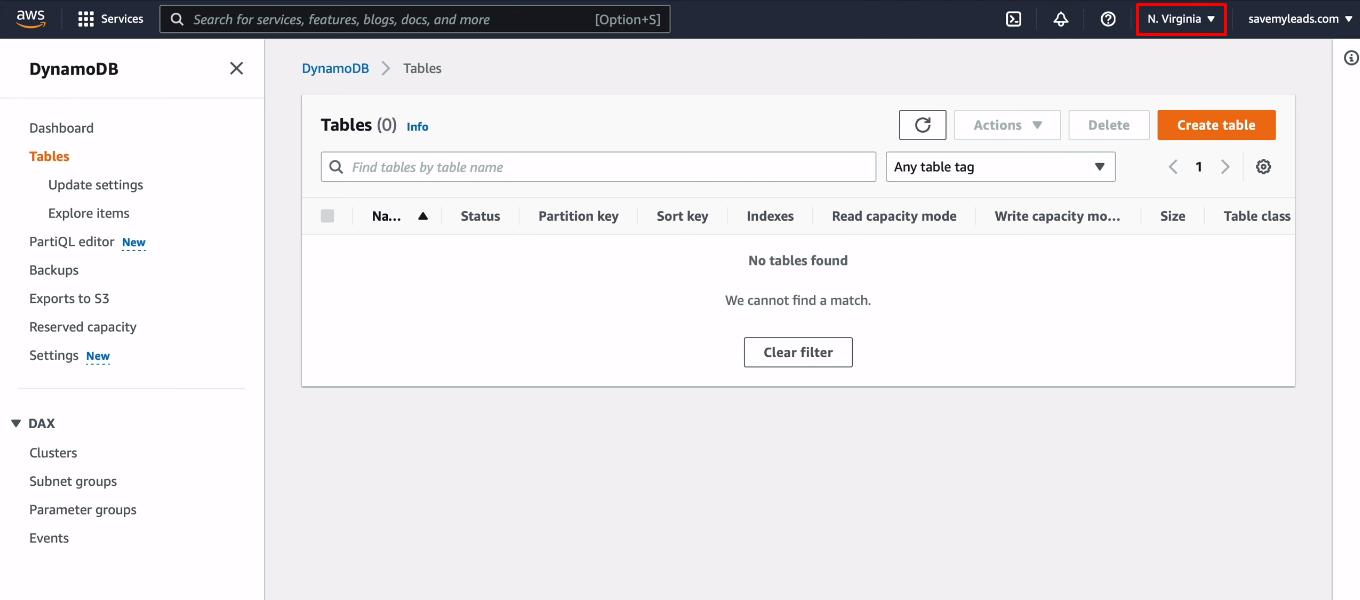
Log in to your personal Amazon account. The current region can be viewed in the upper right corner. In our case, this is “N.Virginia”.
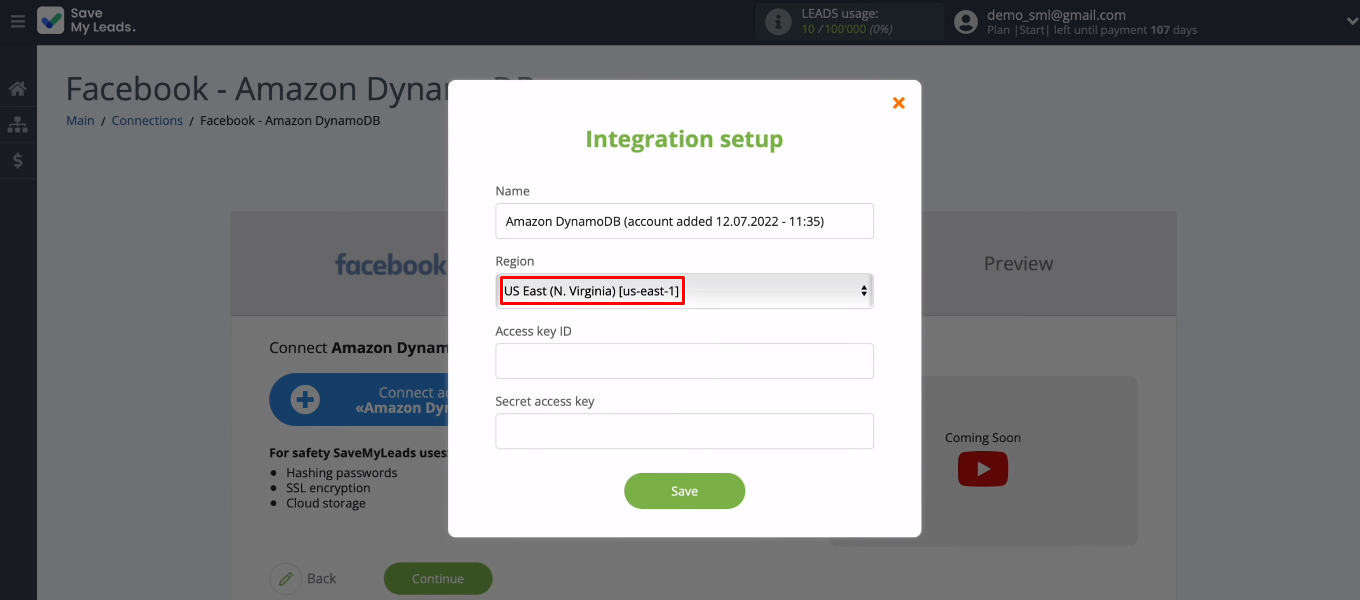
Go back to SaveMyLeads and set the "Region" field to the value from your personal Amazon account.
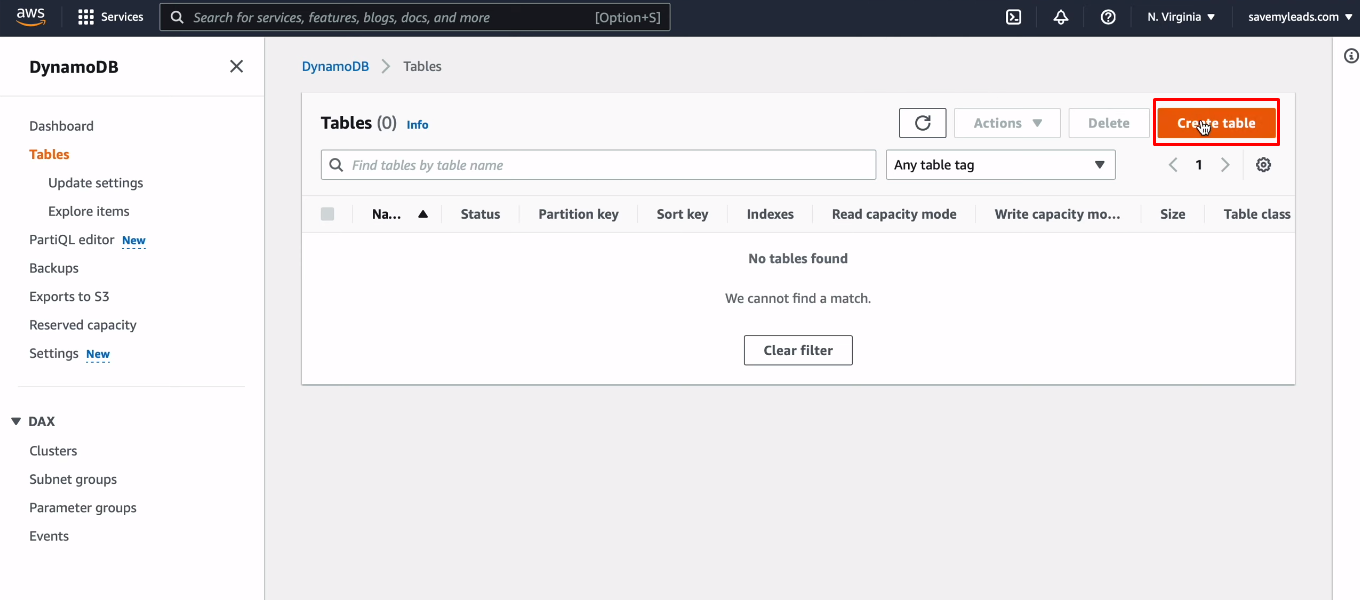
Go to Amazon DynamoDB. We need to create a table that will store leads from Facebook. Click "Create table".
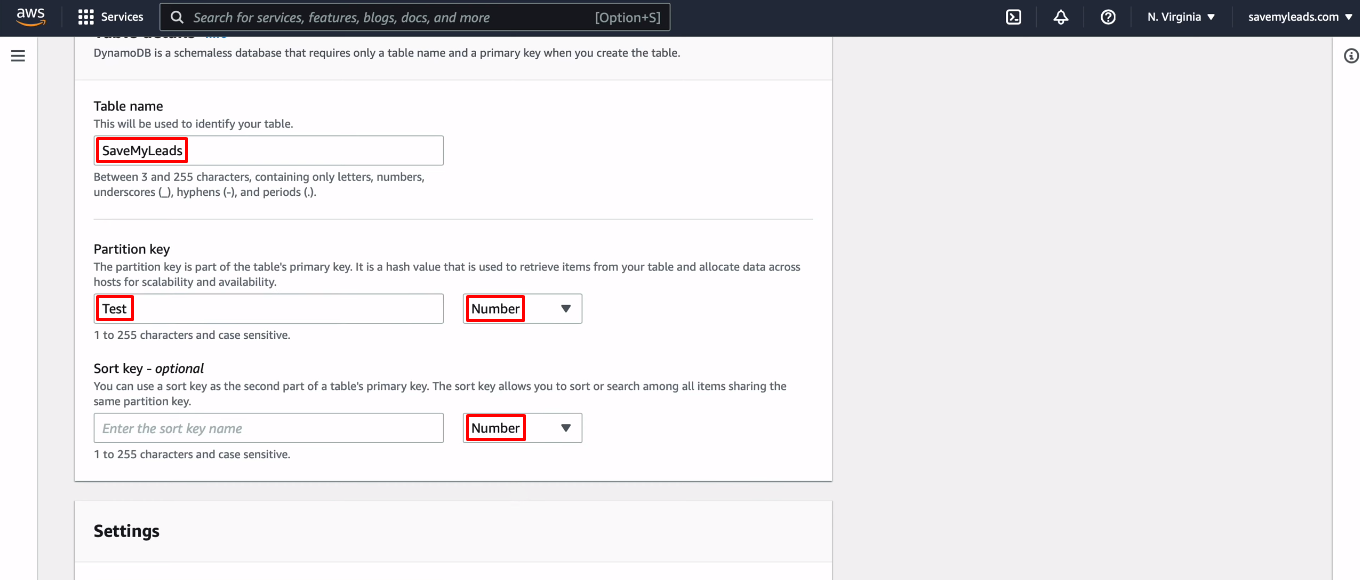
In the next window, specify the name of the table, as well as the name and type of the Partition key. Optionally, you can also set the Sort key.
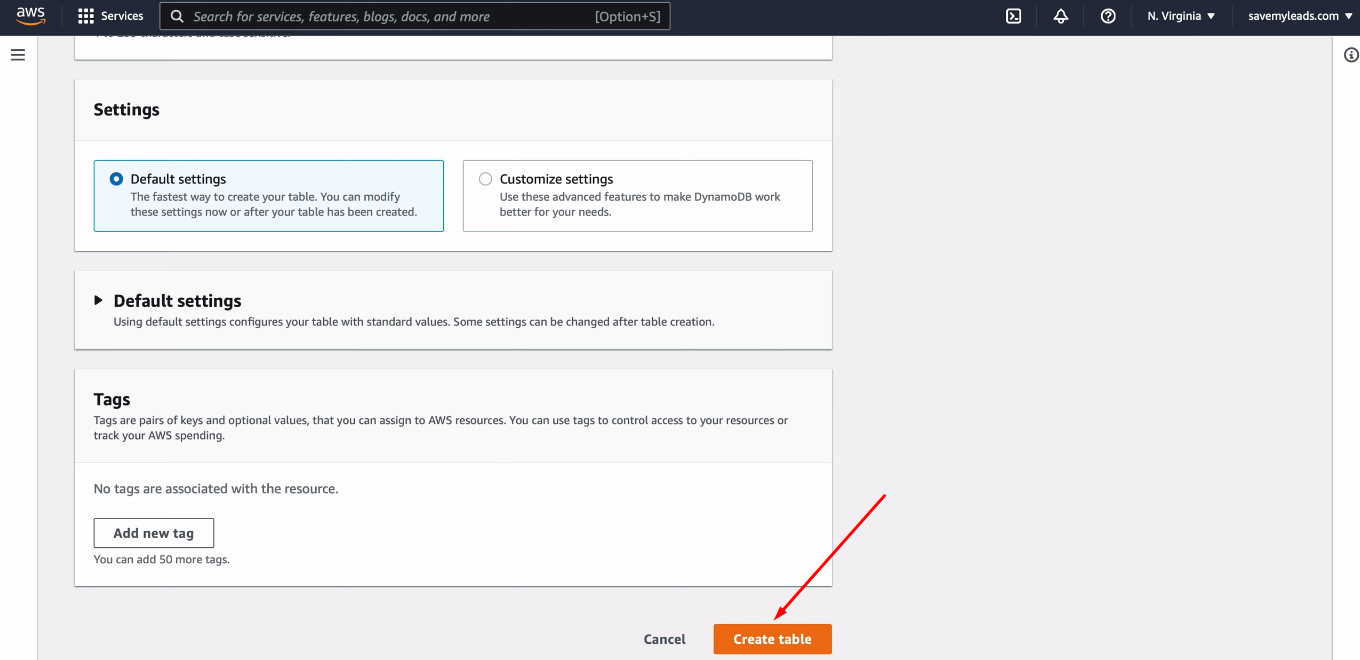
Scroll down the screen and click "Create table".
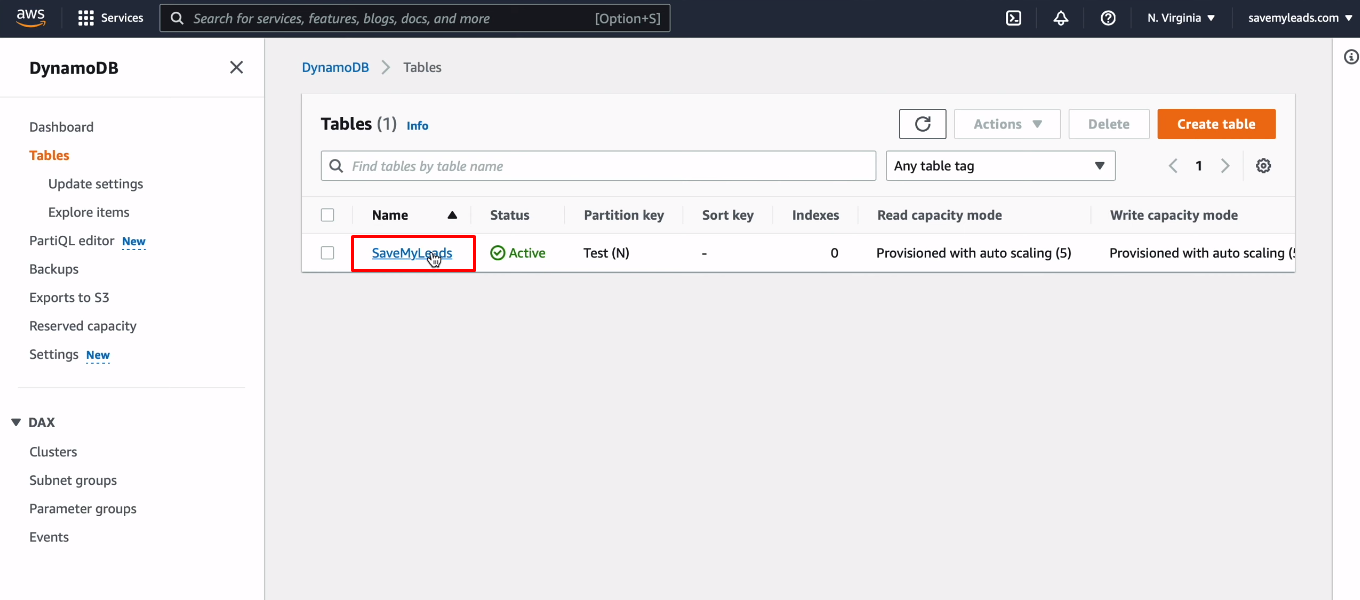
When the status of the created table becomes “Active”, go to it.
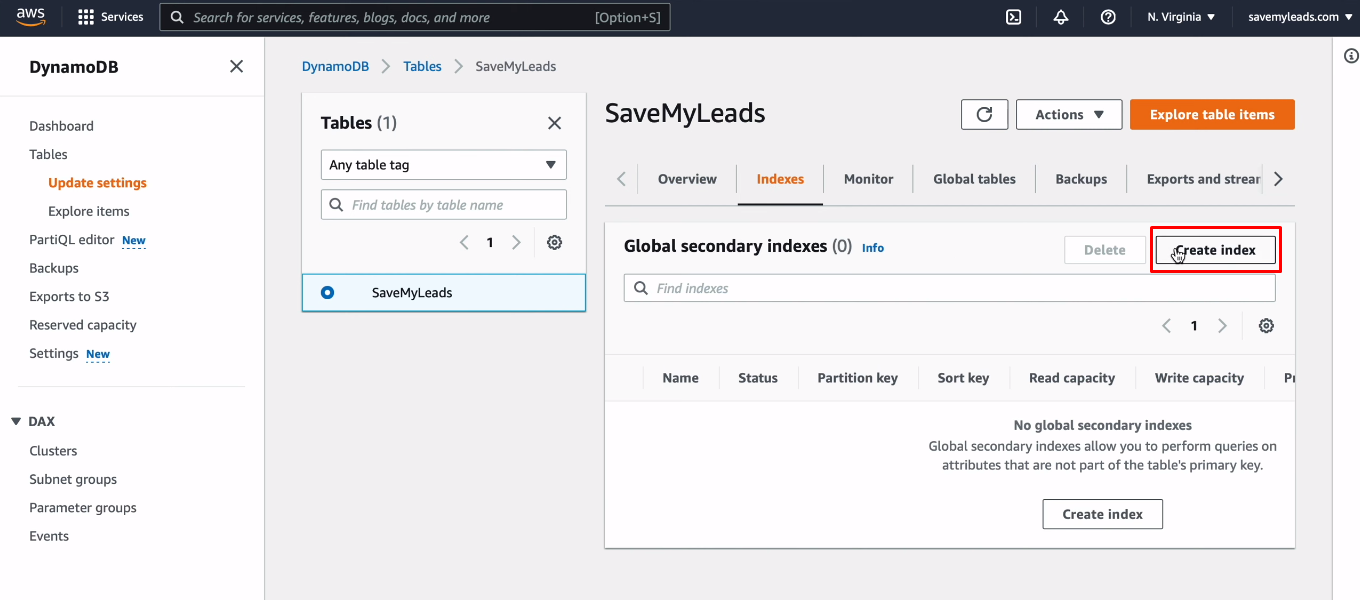
Go to the "Index" tab. Click "Create index".
Define a Partition key and optionally a Sort key.
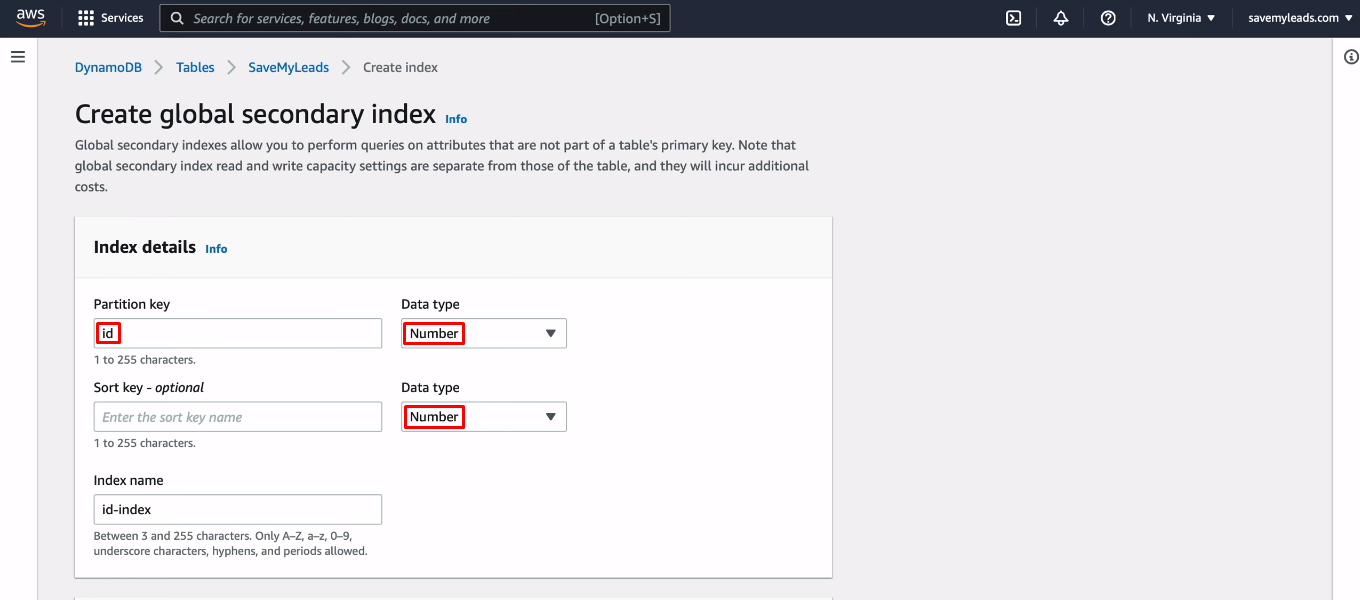
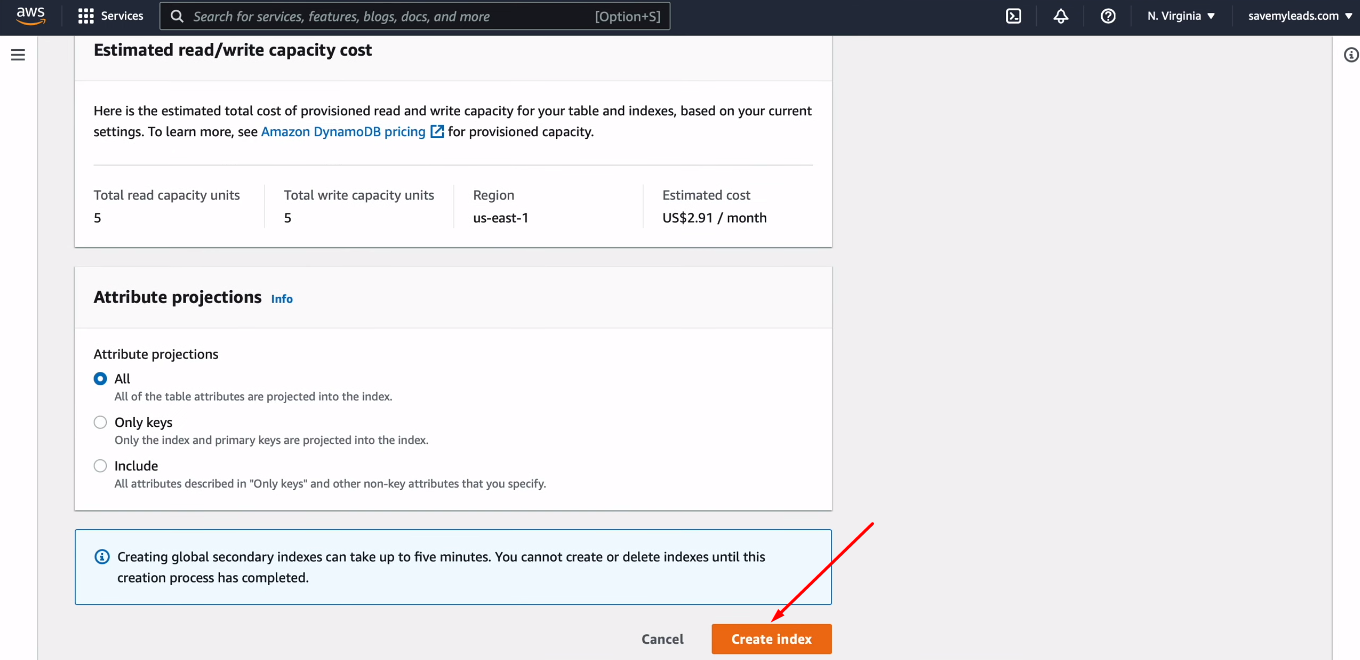
Scroll down the screen and click "Create index".
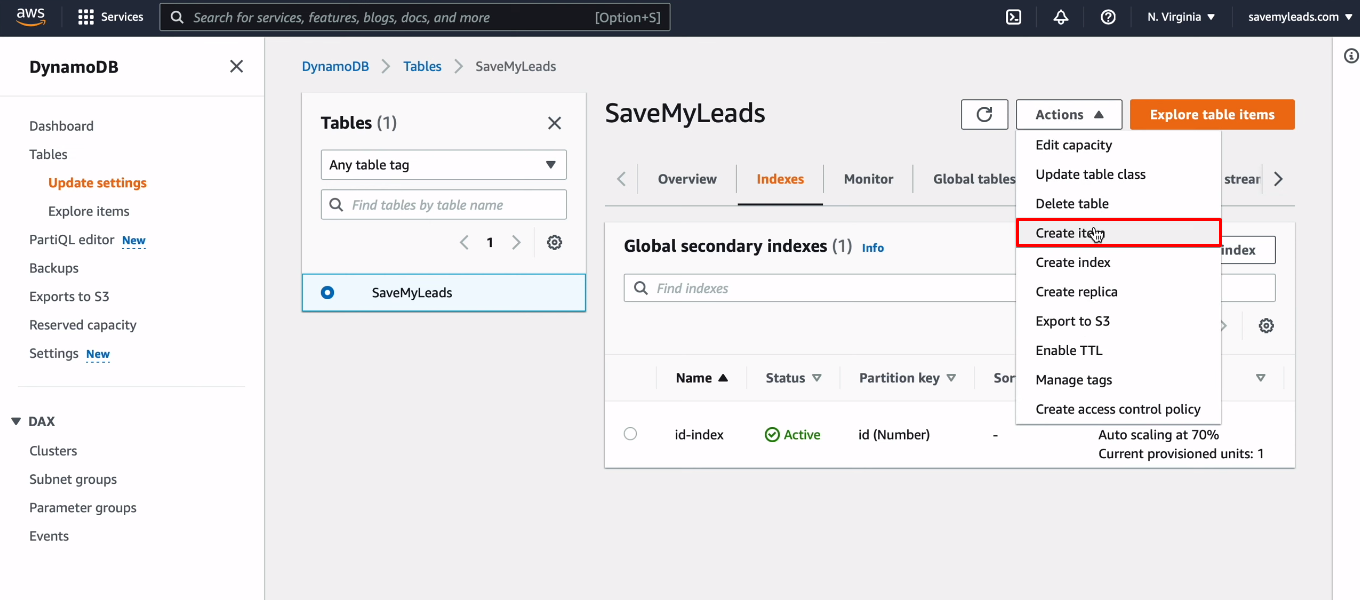
Now expand the "Actions" list and click "Create item".
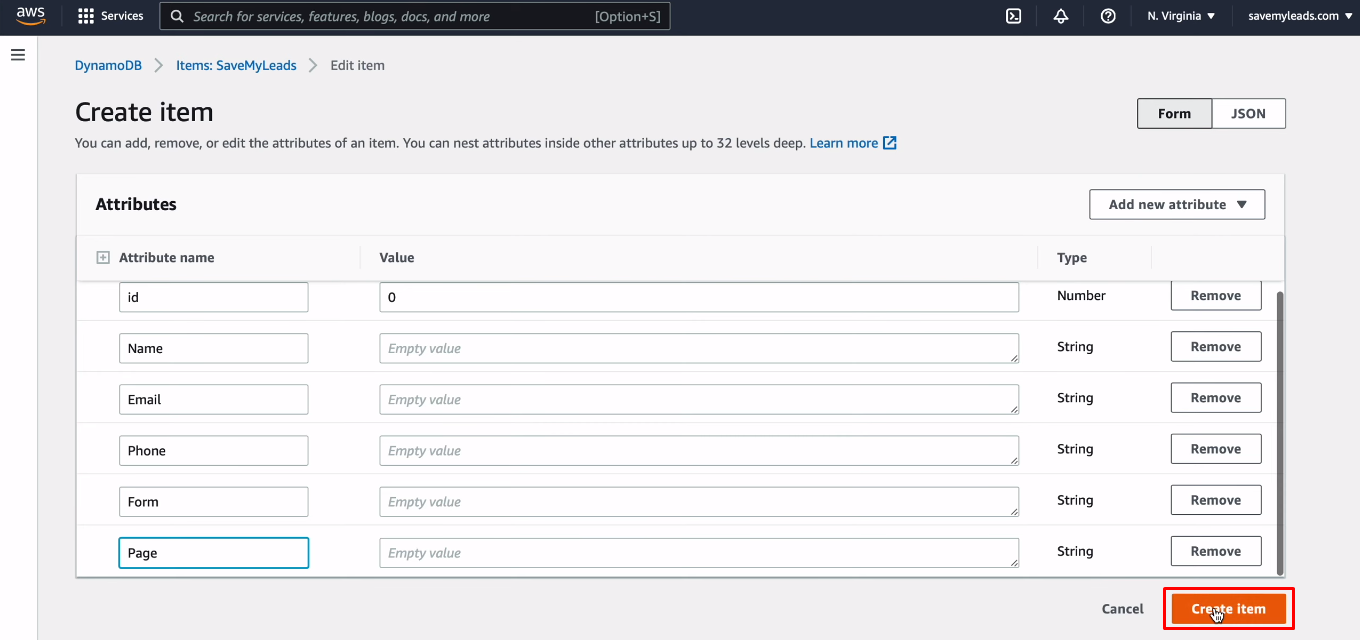
Create the table attributes that will be used to store the data. Click “Add new attribute”, select type and name.
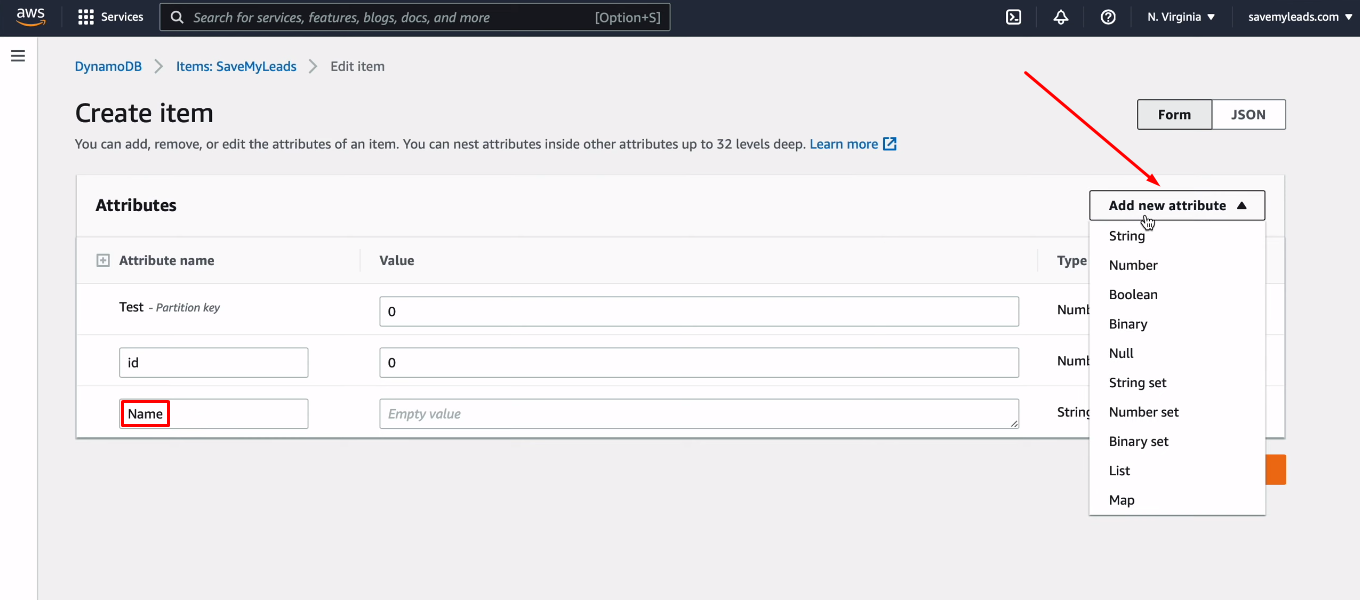
When all required attributes are created, click “Create item”.
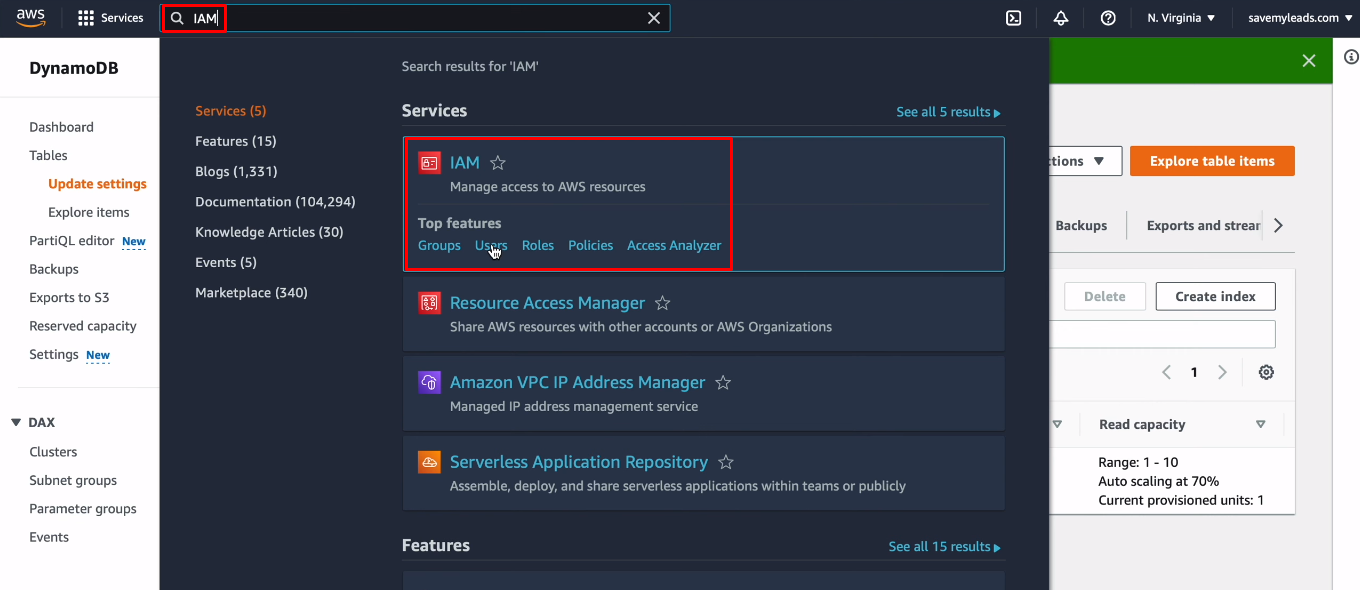
Now we need to create a group and a user to connect Amazon DynamoDB to the SaveMyLeads service. Find the IAM system through the search bar and go to it.
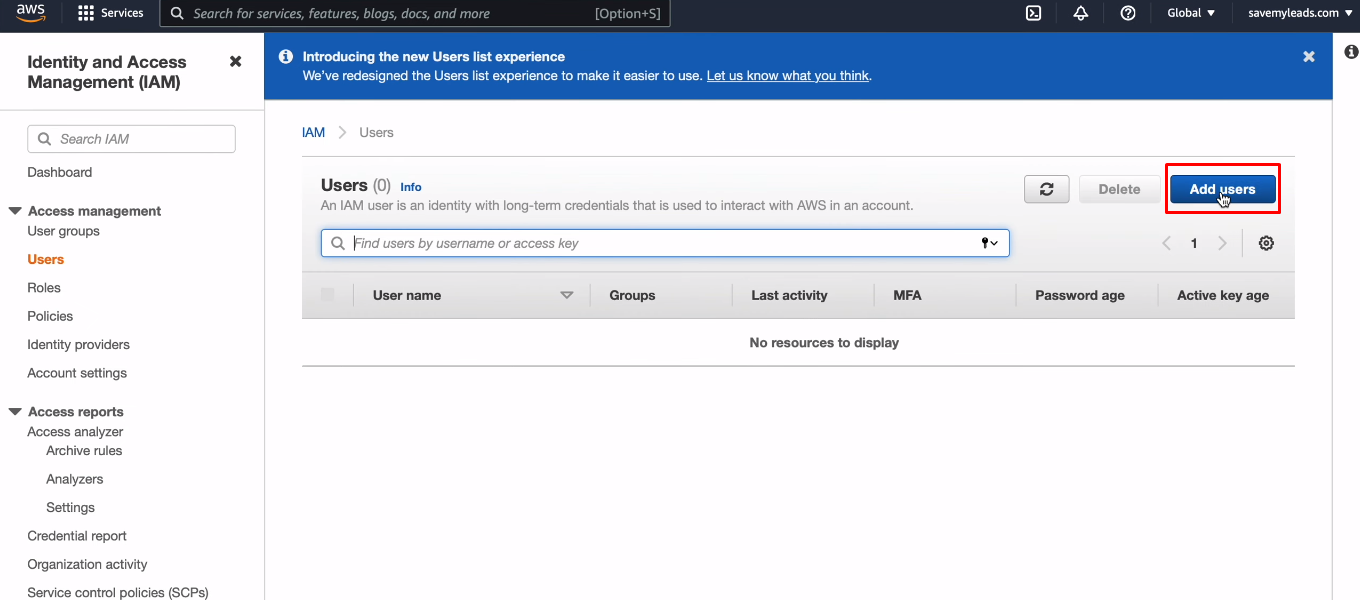
In the "Users" section, click "Add users".
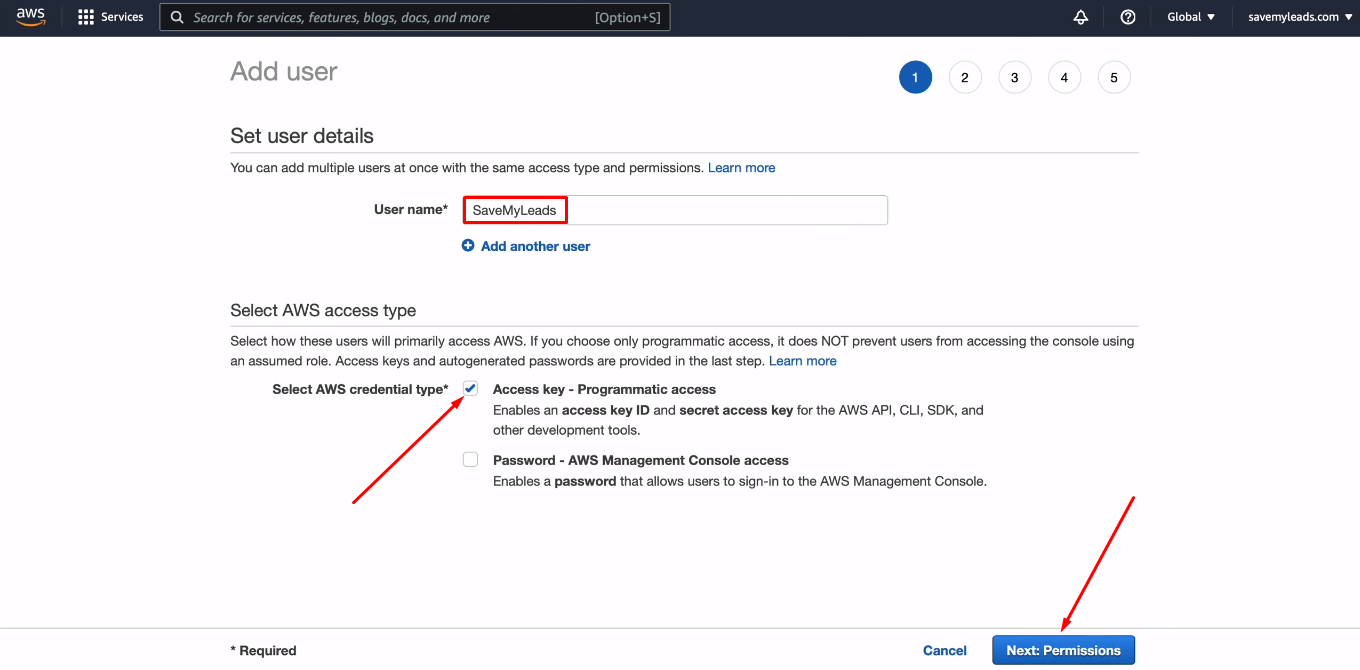
Specify the user name, check the box “Access key - Programmatic access” and click “Next: Permissions”.
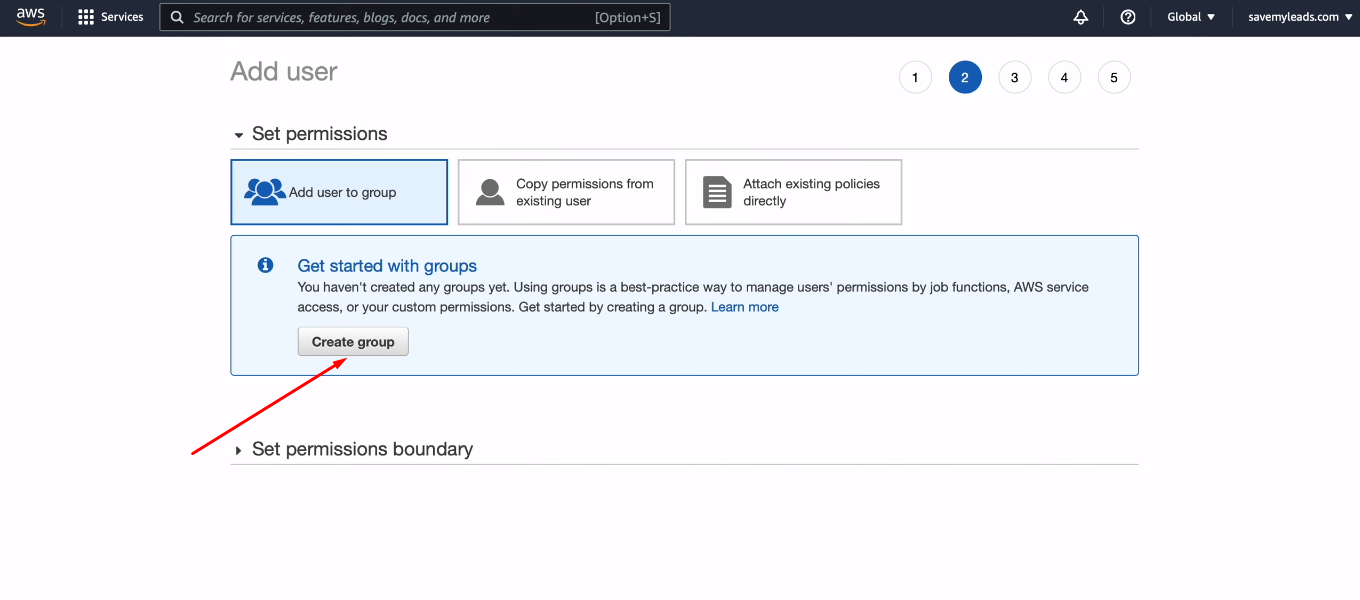
In the next window, click "Create group".
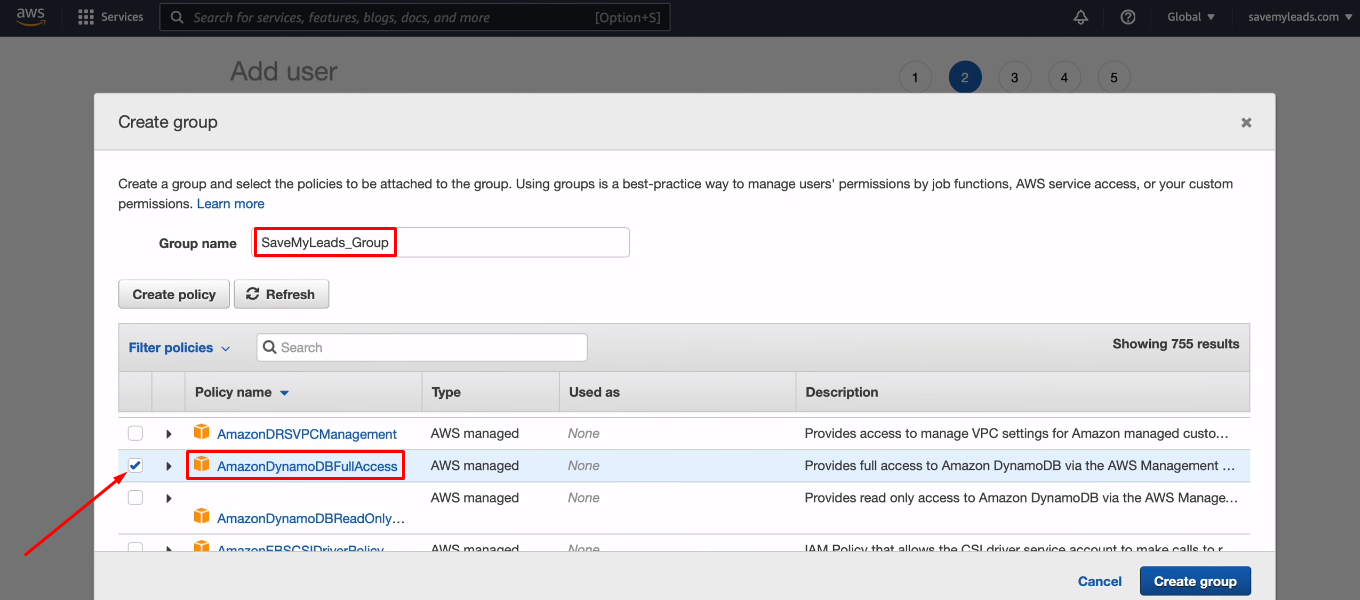
Specify a group name. In the list of policies, find the item “AmazonDynamoDBFullAccess” and check it. Click "Create group".
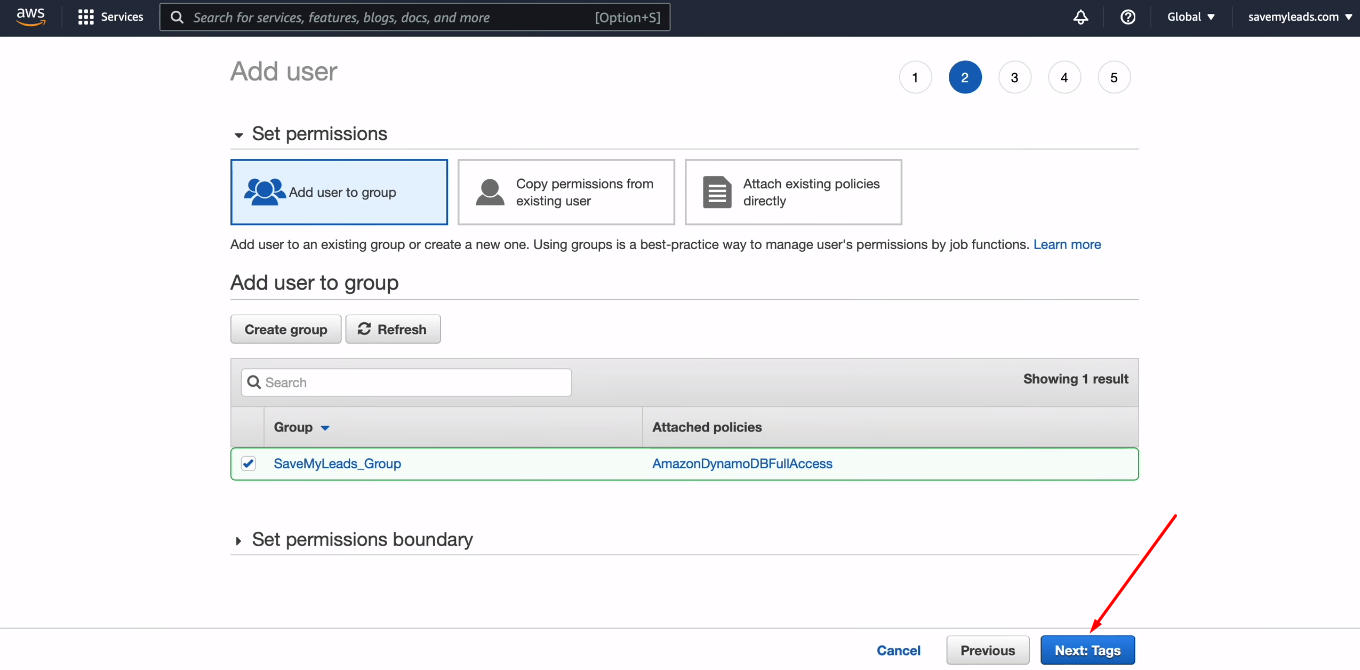
Click "Next: Tags".
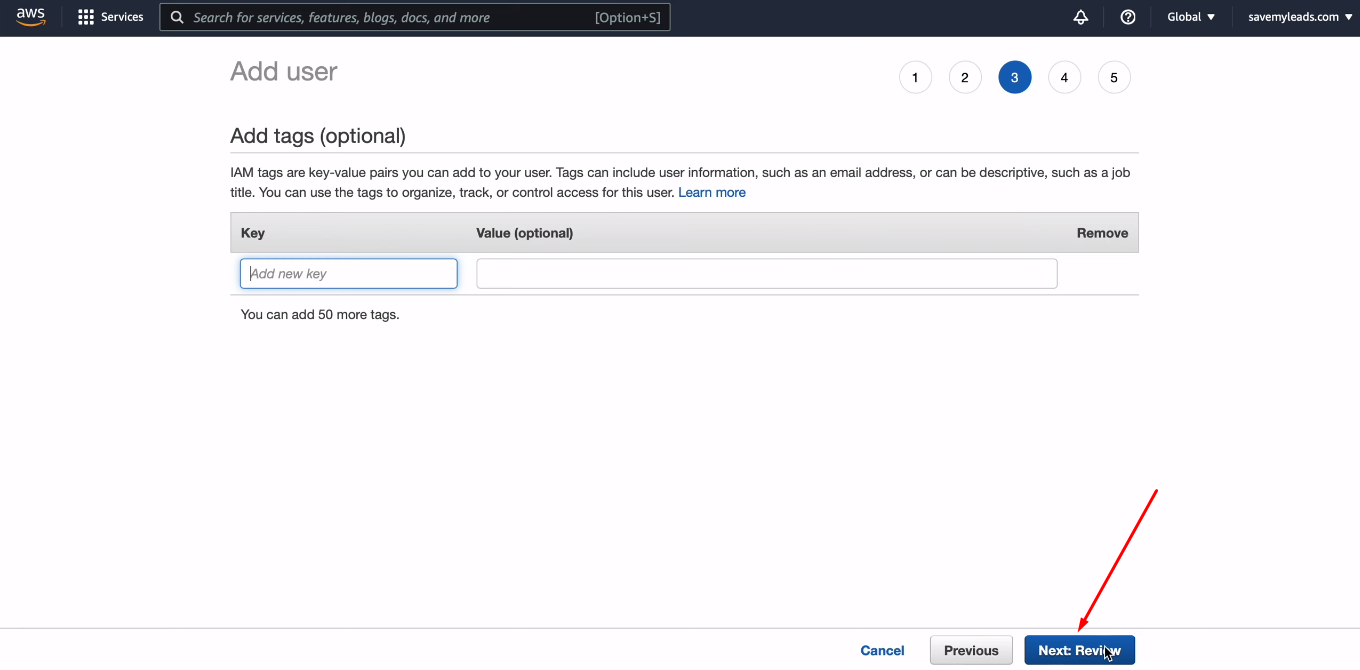
Click "Next: Review".
Click “Create user”.
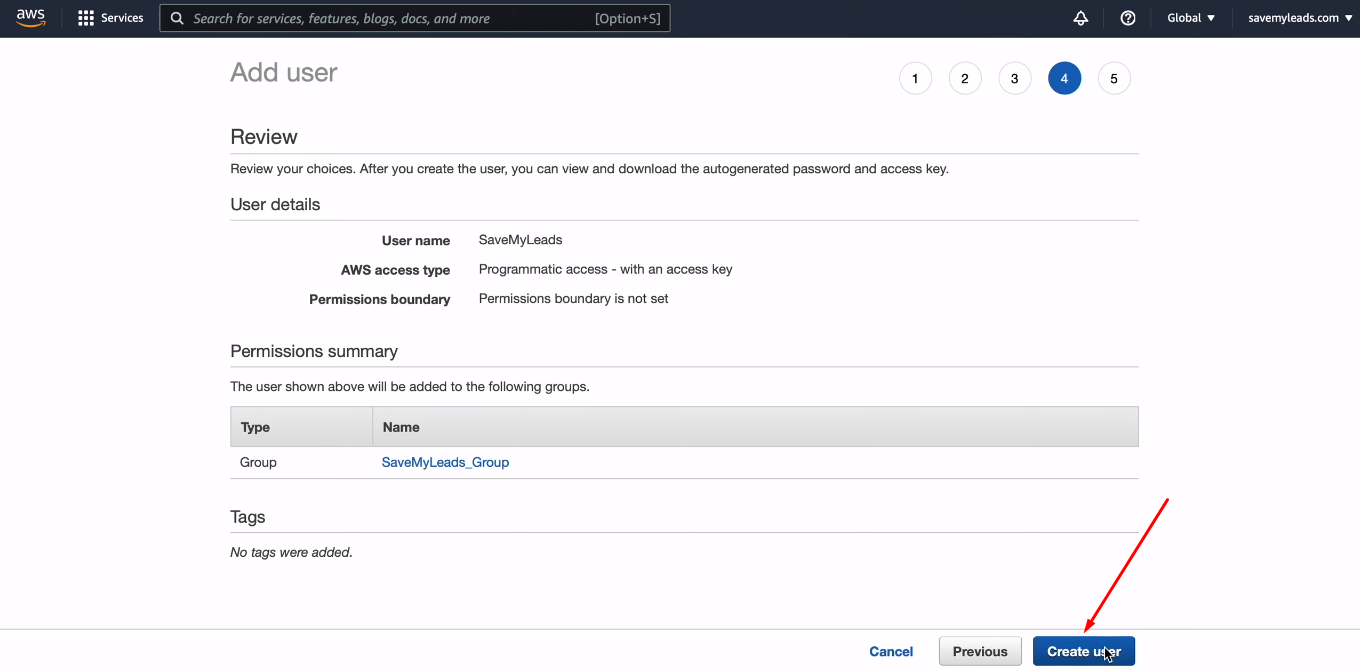
The next window contains two keys that need to be transferred to the SaveMyLeads system.
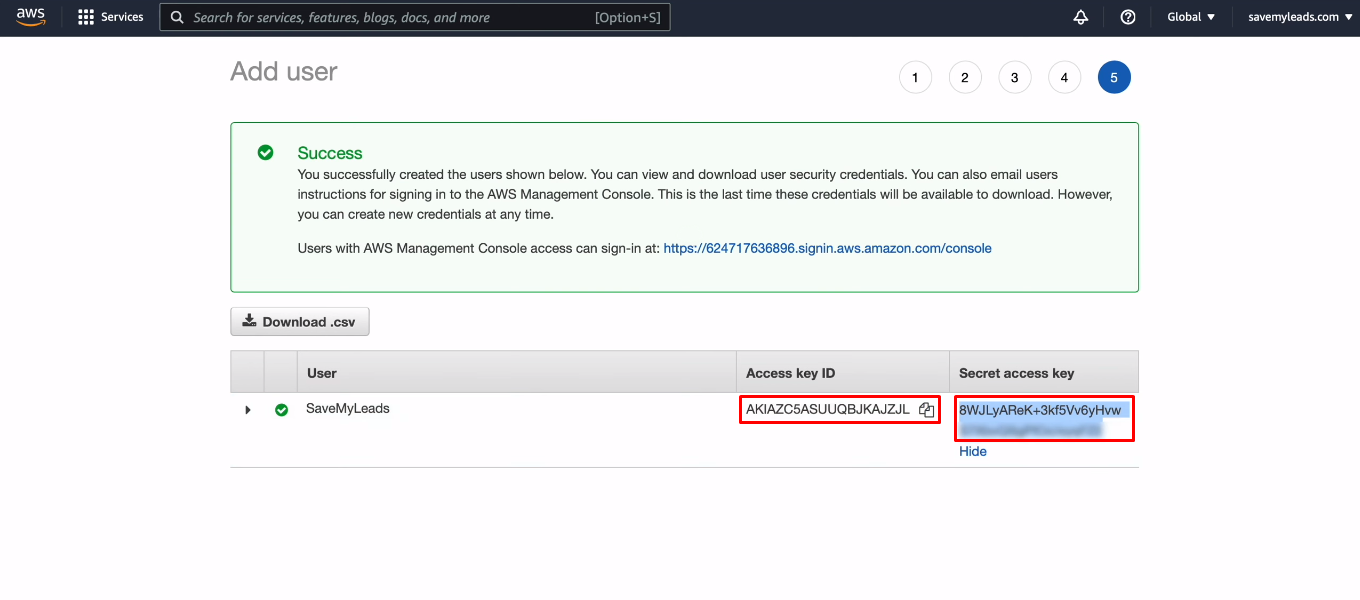
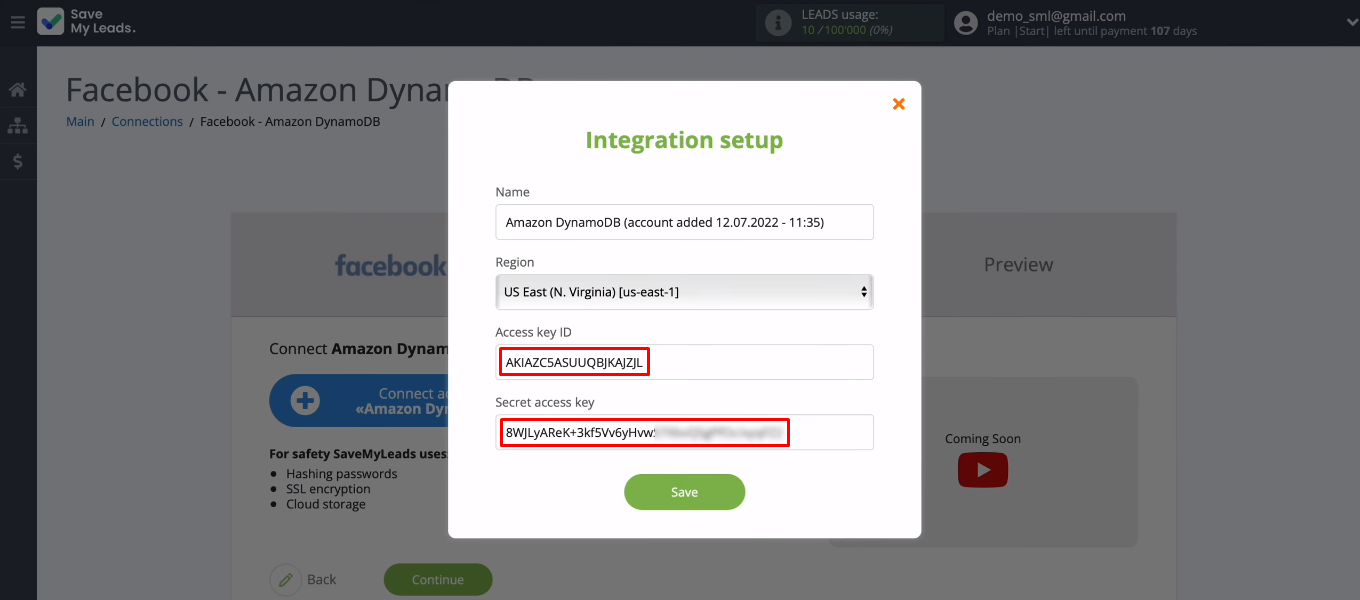
Complete all required fields to connect Amazon DynamoDB to the SaveMyLeads service. Click "Save".
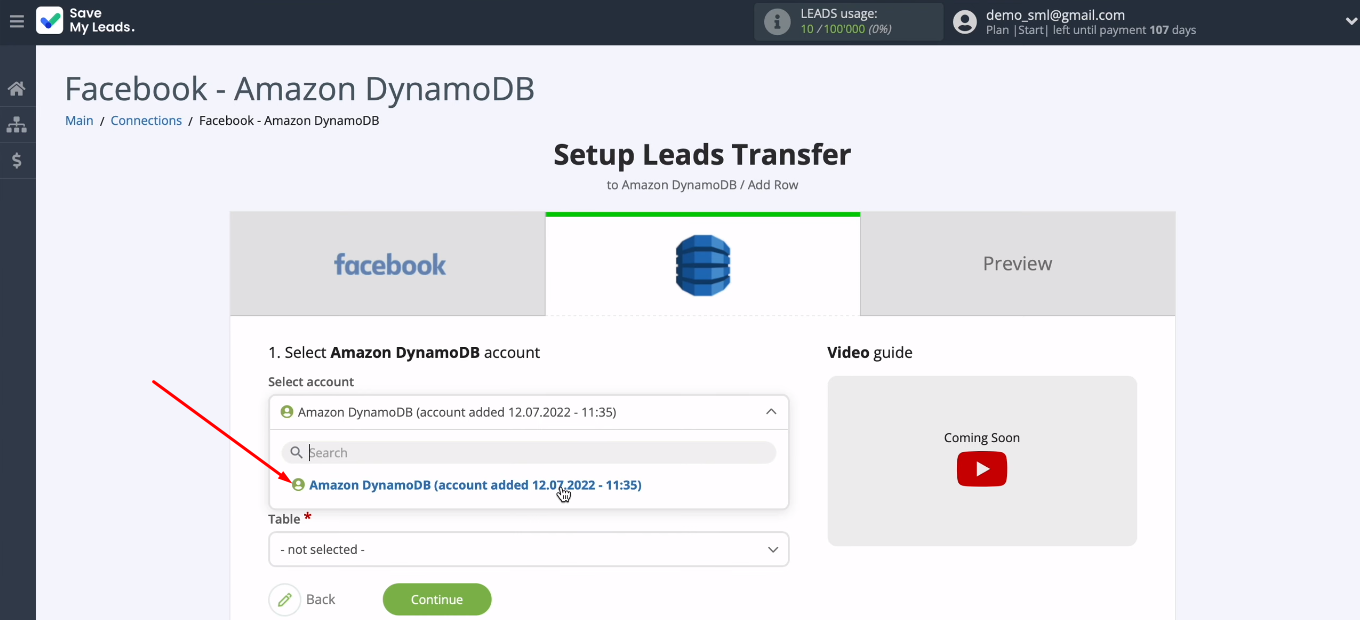
The Amazon DynamoDB account is listed as available. Select it.
Select the DynamoDB table where new Facebook leads will be added.
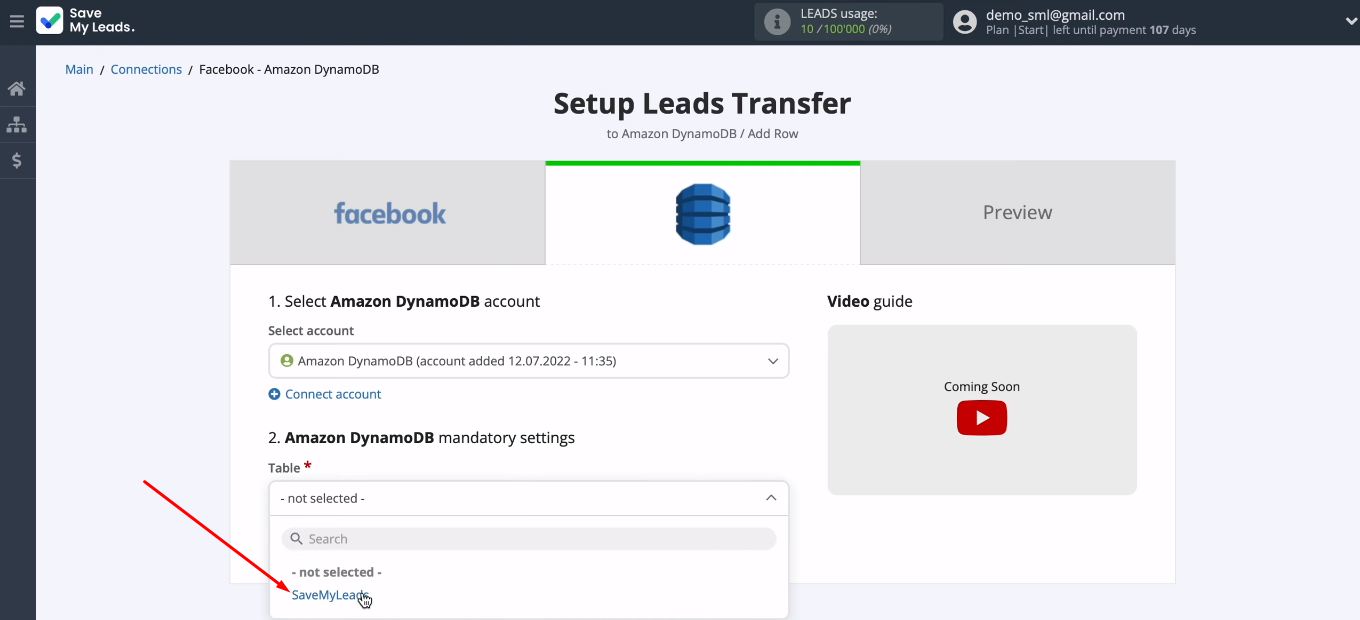
The SaveMyLeads service offers its own way of filling in Amazon DynamoDB fields. To assign a variable yourself, click in the field and select a value from the list.
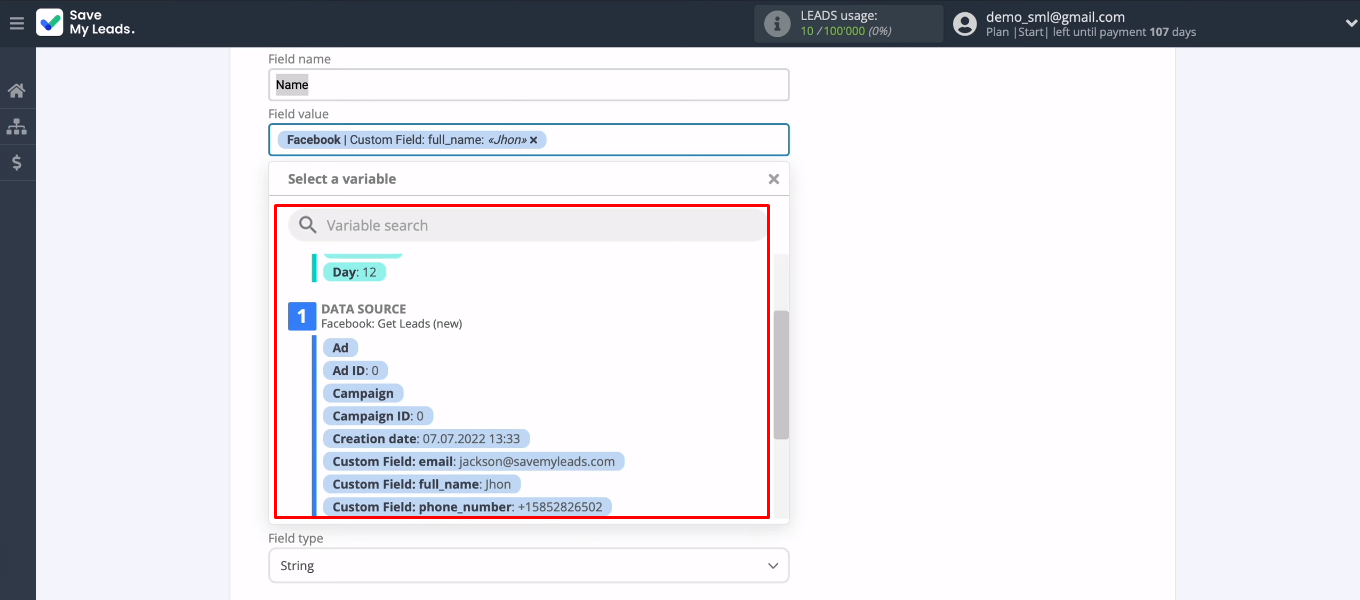
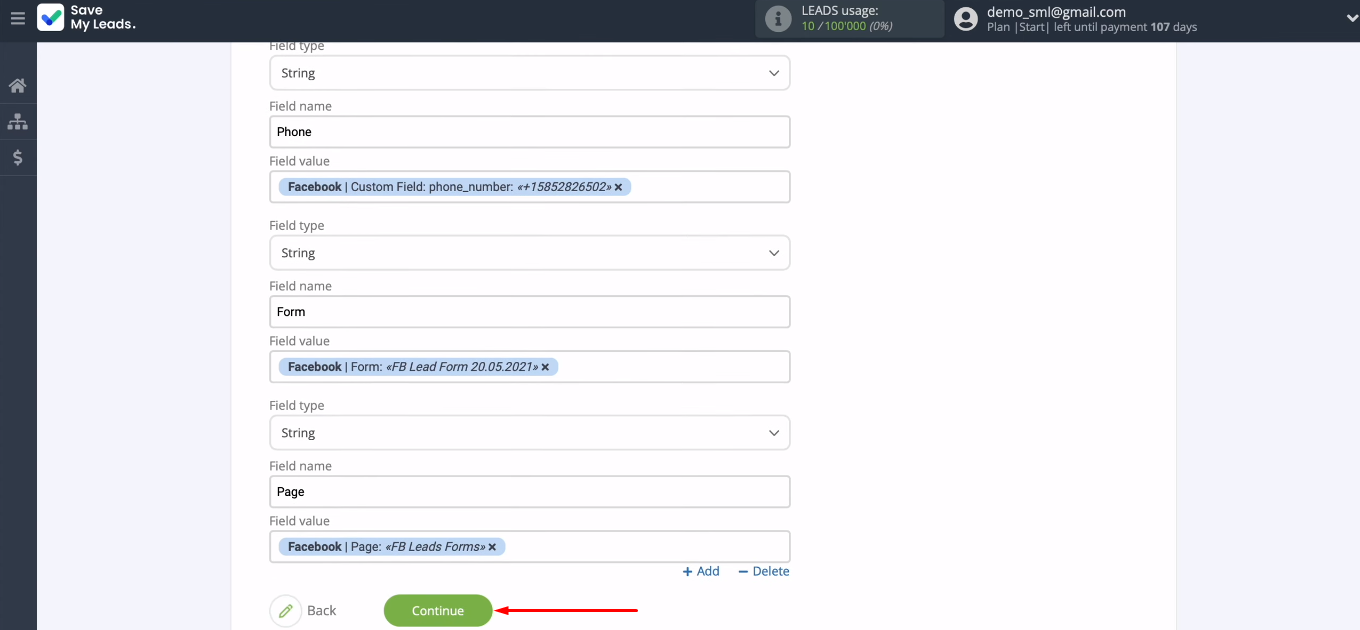
Also check the field types and names. When all required Amazon DynamoDB fields are configured, click "Continue".
The next step is to validate the test dataset. If everything suits you, click “Send test data to Amazon DynamoDB”.
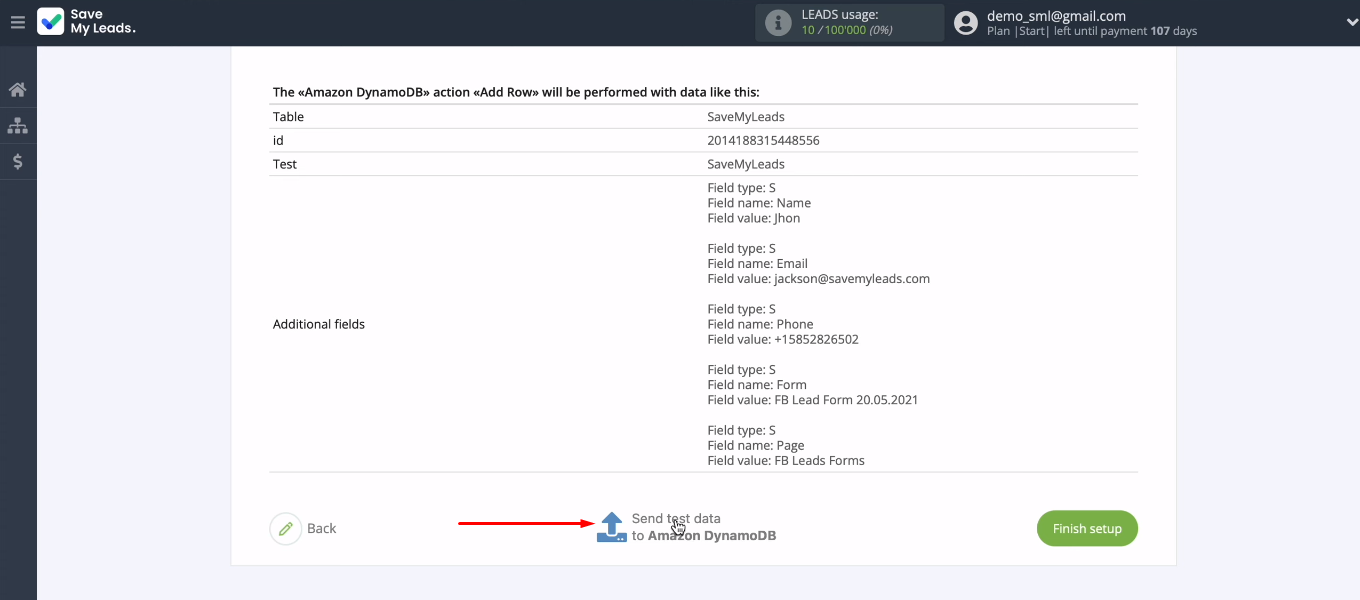
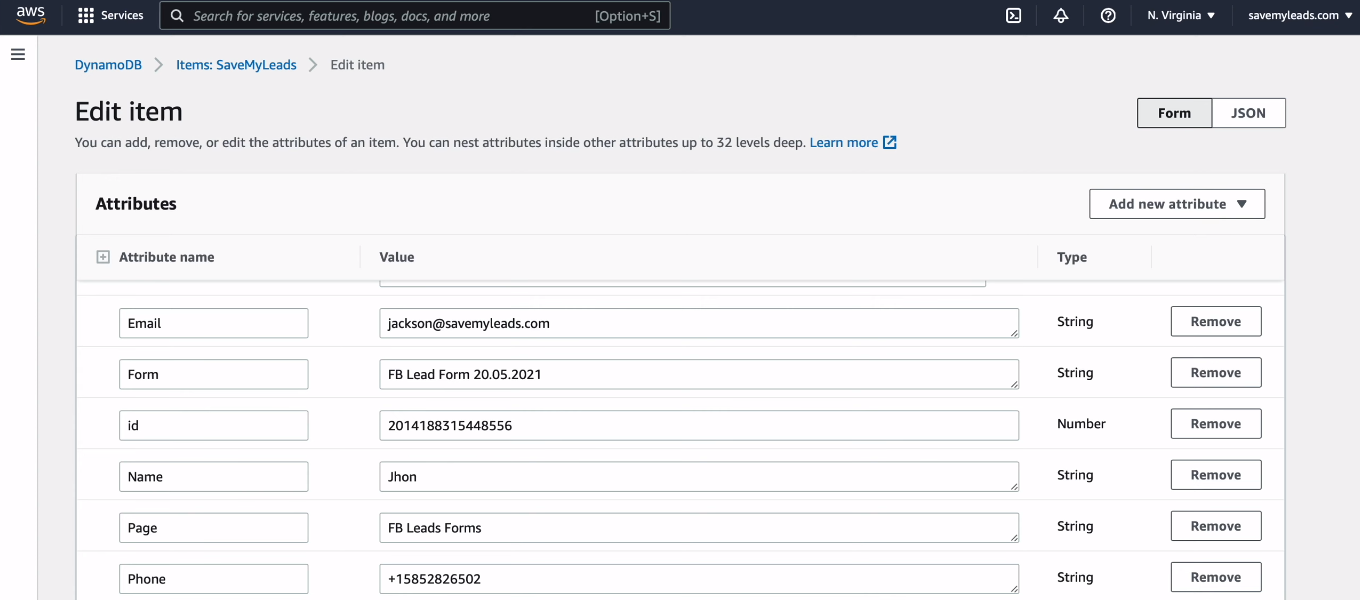
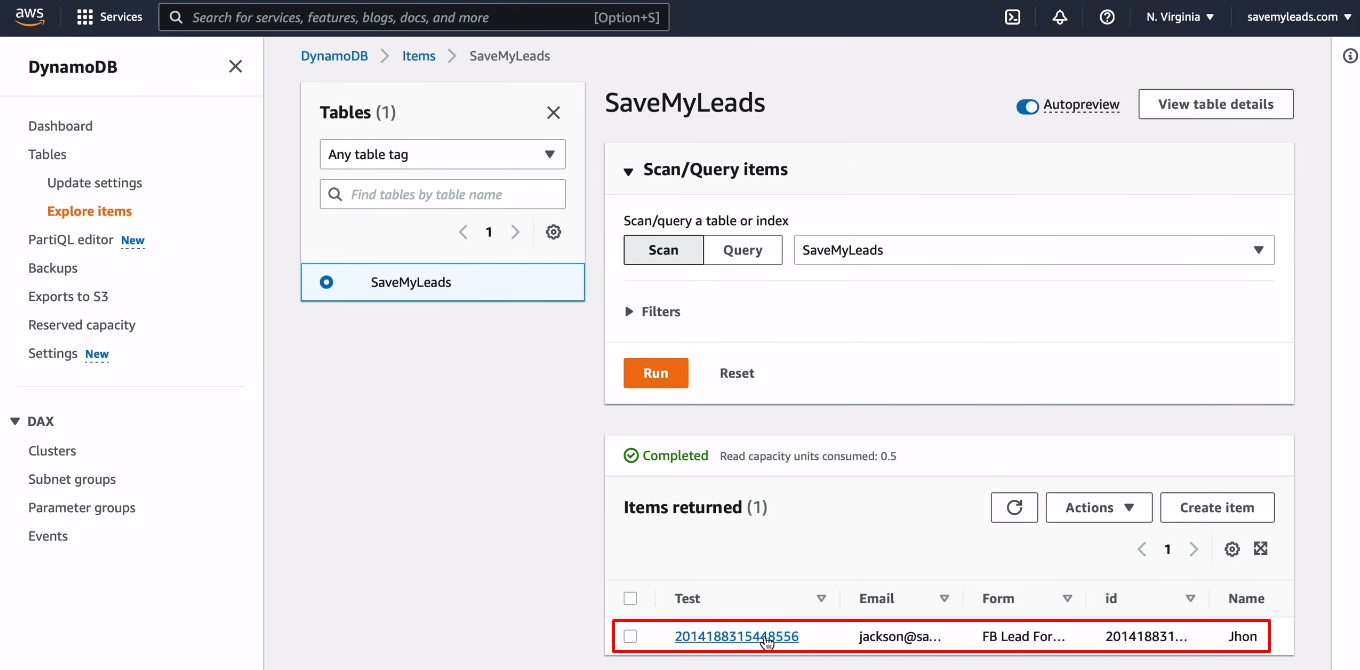
Now go to Amazon DynamoDB and check if the new item is in the table.
Enable automatic data update
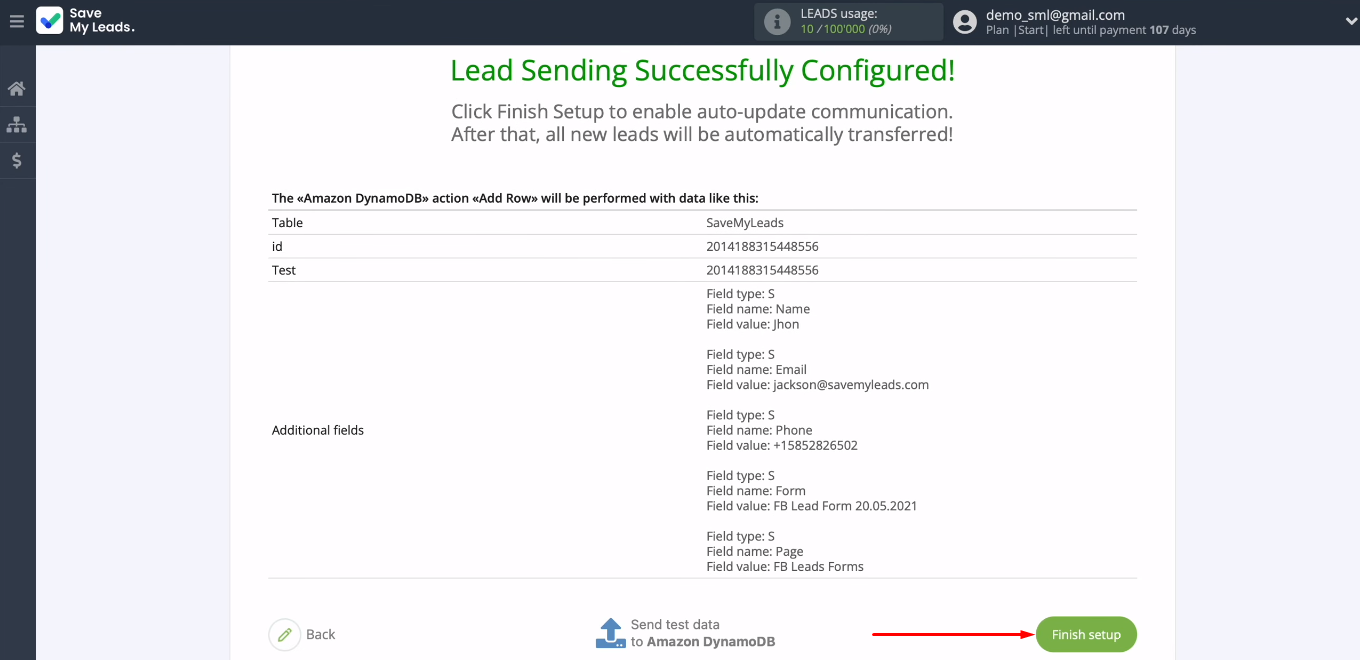
Return to the SaveMyLeads system and click “Finish setup”. This way you will activate the integration and the SML service will start tracking and transmitting new leads to Facebook.
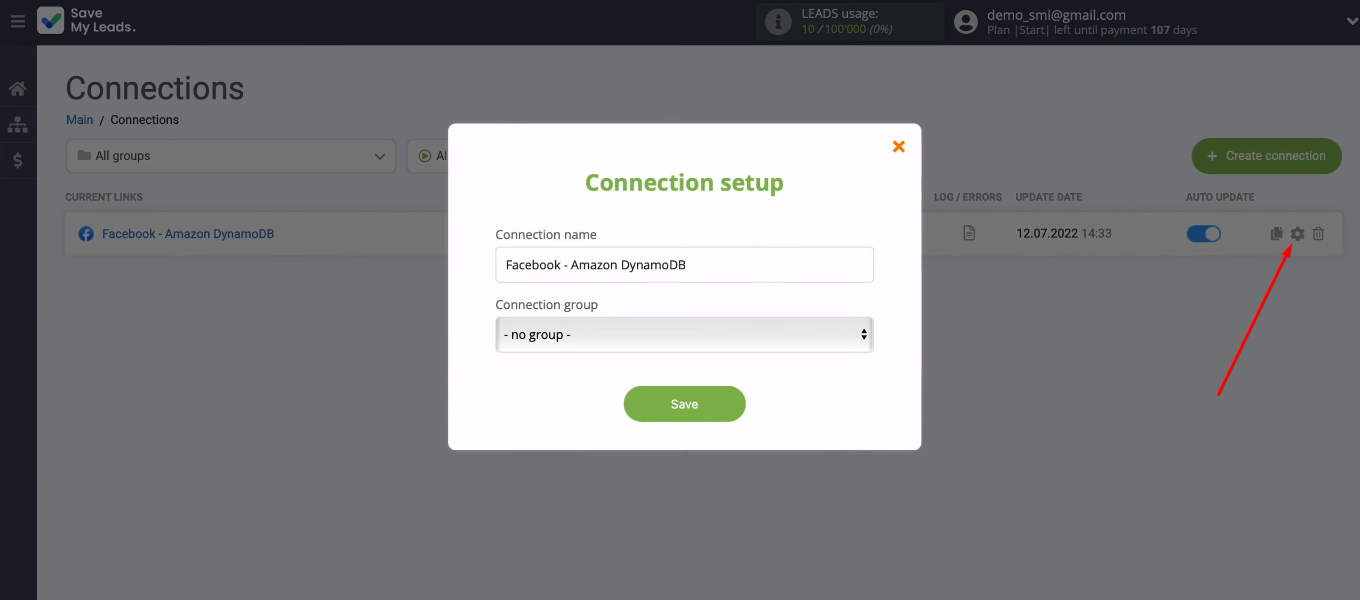
You can change the connection name through the settings menu (“gear”). You also have the option to add an integration to a specific group.
Result of Facebook and Amazon DynamoDB integration
We set up Facebook and Amazon DynamoDB integration using the SaveMyLeads online connector. Now every new lead from the social network will be automatically added to the DynamoDB database table. Using the SML connector, you can set up automated transfer of data from Facebook to various applications. Send leads to mailing list services, CRM systems, instant messengers, Google services, etc. Automate data transfer. The less time you spend on routine work, the more effectively you will be able to solve really important tasks.
